foreword
I’m the kind of person who likes little gadgets when I’m idle. The mouse arrows that come with the computer system at the beginning look the same every day... I just want to make a little trick, and I made a desktop pendant. Every day change to a different one
- List item
Preparation
-
Relevant documents
Disclaimer: The material of the picture comes from the Internet, and it is deleted due to intrusion. -
Development tools
Python version: 3.6.4 -
Related modules:
PyQt5 module
and some modules that come with Python. -
Environment setup Install
Python and add it to the environment variable, and pip installs the required related modules. -
Principle introduction
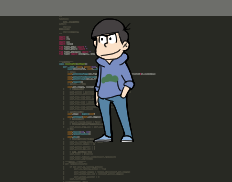
Since you want to write a desktop pet, first of all, of course, you need to find the picture material of the pet. Here we use the pet picture material from the shimiji mobile APP, such as Pikachu:
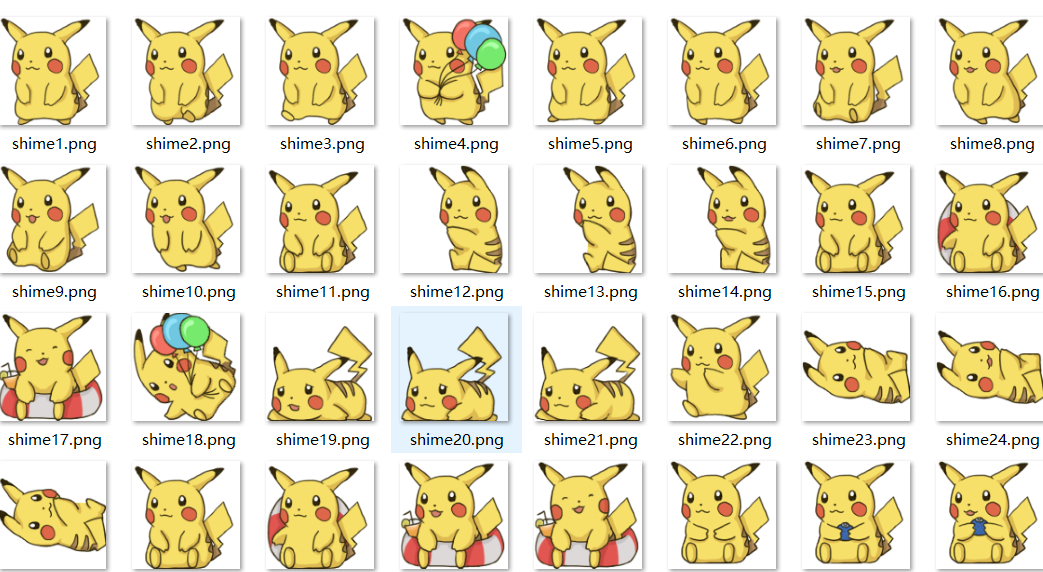
I downloaded about 60 kinds of pet pictures for you to choose
If you need source code and materials, you can click directly
are packaged together in the associated files
Next, we can start designing our desktop pets. In view of the fact that the desktop widgets written in python on the Internet are basically based on tkinter, in order to highlight the difference of the official account, here we use PyQt5 to realize our desktop pet.
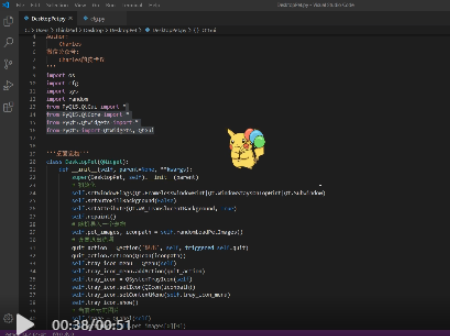
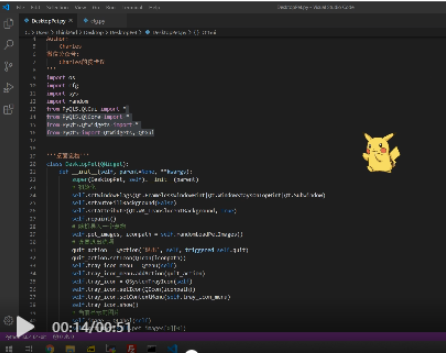
Implementation code
1. Initialize a window component:
class DesktopPet(QWidget):
    def __init__(self, parent=None, **kwargs):
        super(DesktopPet, self).__init__(parent)
        self.show()
Effect
2. Set the properties of the window:
# 初始化
self.setWindowFlags(Qt.FramelessWindowHint|Qt.WindowStaysOnTopHint|Qt.SubWindow)
self.setAutoFillBackground(False)
self.setAttribute(Qt.WA_TranslucentBackground, True)
self.repaint()
Randomly import a picture to see the effect
self.pet_images, iconpath = self.randomLoadPetImages()
currently displayed image
self.image = QLabel(self)
self.setImage(self.pet_images[0][0])
Function code to randomly import all pictures of a pet
def randomLoadPetImages(self):
    pet_name = 获取源码+wx:xiaoyuanllsll
    random.choice(list(cfg.PET_ACTIONS_MAP.keys()))
    actions = cfg.PET_ACTIONS_MAP[pet_name]
    pet_images = []
    for action in actions:
        pet_images.append([self.loadImage(os.path.join(cfg.ROOT_DIR, pet_name, 'shime'+item+'.png')) for item in action])
    iconpath = os.path.join(cfg.ROOT_DIR, pet_name, 'shime1.png')
    return pet_images, iconpath
3. Pets randomly appear on the desktop
Randomly to a certain position on a screen
def randomPosition(self):
    screen_geo = QDesktopWidget().screenGeometry()
    pet_geo = self.geometry()
    width = (screen_geo.width() - pet_geo.width()) * random.random()
    height = (screen_geo.height() - pet_geo.height()) * random.random()
    self.move(width, height)
Effect
The settings are almost the same, but sometimes if you don’t want to use it, you should think about how to exit
In order to consider the aesthetics, add a tray icon to him
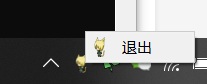
4. Realize the exit function of the program:
Set exit options
quit_action = QAction('退出', self, triggered=self.quit)
获取源码+wx:xiaoyuanllsll
quit_action.setIcon(QIcon(iconpath))
self.tray_icon_menu = QMenu(self)
self.tray_icon_menu.addAction(quit_action)
self.tray_icon = QSystemTrayIcon(self)
self.tray_icon.setIcon(QIcon(iconpath))
self.tray_icon.setContextMenu(self.tray_icon_menu)
self.tray_icon.show()
Effect
Then it's almost like this, but it has to continue to improve
5. Realize mouse dragging
When the left mouse button is pressed, the pet will be bound to the mouse position
def mousePressEvent(self, event):
    if event.button() == Qt.LeftButton:
        self.is_follow_mouse = True
        self.mouse_drag_pos = event.globalPos() - self.pos()
        event.accept()
        self.setCursor(QCursor(Qt.OpenHandCursor))
When the mouse moves, the pet also moves
def mouseMoveEvent(self, event):
    if Qt.LeftButton and self.is_follow_mouse:
        self.move(event.globalPos() - self.mouse_drag_pos)
        event.accept()
When the mouse is released, unbind
def mouseReleaseEvent(self, event):
    self.is_follow_mouse = False
    self.setCursor(QCursor(Qt.ArrowCursor))
Effect

Haha, it's getting more and more decent~ Finally, as a lively pet, you can't be so rigid and not moving at all, can you? Anyway, you have to learn to make facial expressions to make the master happy, right?
6. Set a timer:
# 每隔一段时间做个动作
self.timer = QTimer()
self.timer.timeout.connect(self.randomAct)
self.timer.start(500)
The timer switches the picture of the selected pet every once in a while to achieve the animation effect of the pet's facial expressions (the basic content of the video is composed of frames of pictures, so I don't need me to popularize it T_T).
Of course, here we must classify the actions of the pictures (pictures performing the same action belong to the same category) to ensure the coherence of the pet's facial expressions.
Specifically, the code is implemented as follows:
Randomly do an action
def randomAct(self):
    if not self.is_running_action:
        self.is_running_action = True
        self.action_images = random.choice(self.pet_images)
        self.action_max_len = len(self.action_images)
        self.action_pointer = 0
    self.runFrame()
complete each frame of the motion
def runFrame(self):
    if self.action_pointer == self.action_max_len:
        self.is_running_action = False
        self.action_pointer = 0
        self.action_max_len = 0
    self.setImage(self.action_images[self.action_pointer])
    self.action_pointer += 1
ok, you're done~ See the relevant files for the complete source code. See the effect display section for the final effect.
Final effect display
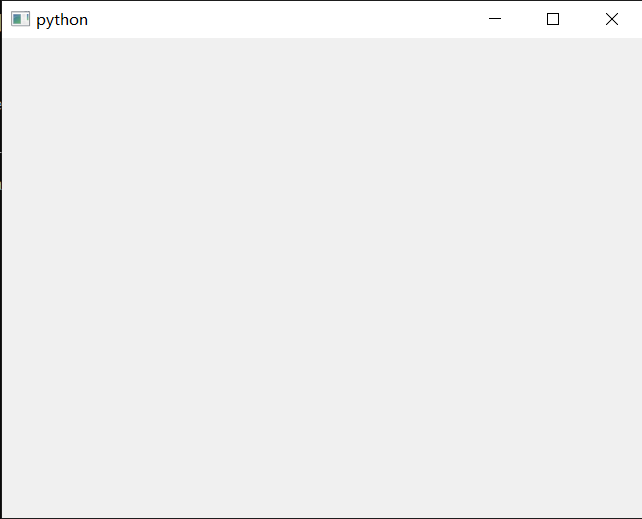
Run the following command in the cmd window:
python DesktopPet.py
It was originally a dynamic picture, but I can’t show it for some reason, so I can only take a screenshot for everyone to see! !
Well, today's sharing is over here
If you get the source code, you can click on the business card at the end of the article
If you don't understand anything, you can contact me directly.
It's time to get off work, let's go first~