Table of contents
1.3 What can be done after learning Linux
2.1 Mainstream operating systems
2.2 History of Linux Development
3.1 Installation method introduction
3.5 Install SSH connection tool
4.1 First experience with Linux commands
4.2 File directory operation commands
4.4 Packaging and compression commands
Introduction to Linux
Linux installation
Linux common commands
If you gain something, please give it a thumbs up~~~
1 Introduction
1.1 What is Linux
Linux is an operating system that is free to use and spread freely. When it comes to operating systems, everyone is more familiar with Windows and MacOS operating systems. The Linux we are learning today is also an operating system.
1.2 Why learn Linux
So why do we learn Linux, mainly for two reasons.
1). Employment requirements of enterprises
The job requirements of java development engineers searched on many well-known recruitment websites mention the experience of Linux operating system in many job requirements.
Why, as a javaEE development engineer, does the company require us to know the relevant knowledge of the Linux operating system?
This is because the Linux operating system provides many stable release versions, which are widely used in our various server operating systems, and we will develop them in the future In order to finally go online and run the project, the project needs to be deployed on a Linux server.
2). Personal development needs
As javaEE development engineers, we will involve a lot of database, middleware and other technologies when developing in enterprises in the future, such as MySQL, Redis, MQ and other technologies, and most of these application software need to be installed and used in the Linux system. As developers, we need to connect to the Linux operating system through remote tools, and then operate these software. And some small companies may need us to install these software on the server ourselves.
Therefore, no matter from the level of enterprise employment needs or personal development needs, as server-side development engineers, the basic use of Linux is an indispensable skill for us.
1.3 What can be done after learning Linux
After learning the Linux operating system course, we can do the following things:

1). Environment construction and system installation: Generally, we will not install the Linux system directly on the local computer, but on a dedicated server of the company
Remote connection: If we want to use the server, we usually connect to the Linux system through a remote connection tool for operation.
2). Common commands
After connecting to the server, we can operate the Linux server through the relevant instructions we have learned. In the Linux server, we can perform the following operations: A.
Basic operations of files and directories (view, delete, create, etc.)
B. Files and folders Copying, moving, and renaming
C. Packing, compressing, and decompressing operations of
files D. Editing of text
3). Install software
After learning to operate the basic common instructions, we can install the commonly used software we develop in the Linux server, such as: JDK, Tomcat, MySQL installation and configuration.
4). Project deployment After the basic software and environment are installed and configured, we can deploy the project we developed to the server for running and testing.
For us to learn the Linux operating system, Linux commands are the foundation and the key content of learning the Linux system. Although there are many Linux commands, there are not many commonly used commands. When you are learning, you mainly master these commonly used commands. That's it. For other commands, when we use them in the future, we only need to know how to query them. For the learning of common Linux commands, the best way to learn is: typing more

2.Introduction to Linux
2.1 Mainstream operating systems
The mainstream operating systems in different fields are mainly divided into the following categories: desktop operating systems, server operating systems, mobile device operating systems, and embedded operating systems. Next, what are the representative operating systems in these fields?
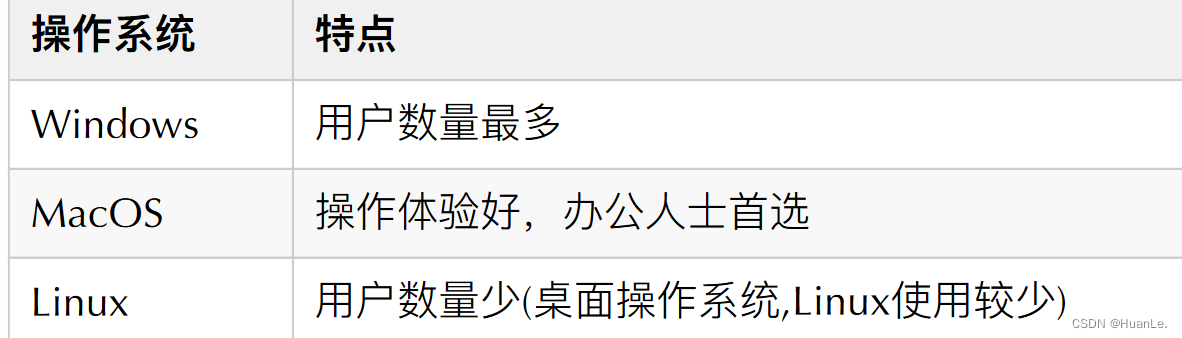
1). Desktop operating system
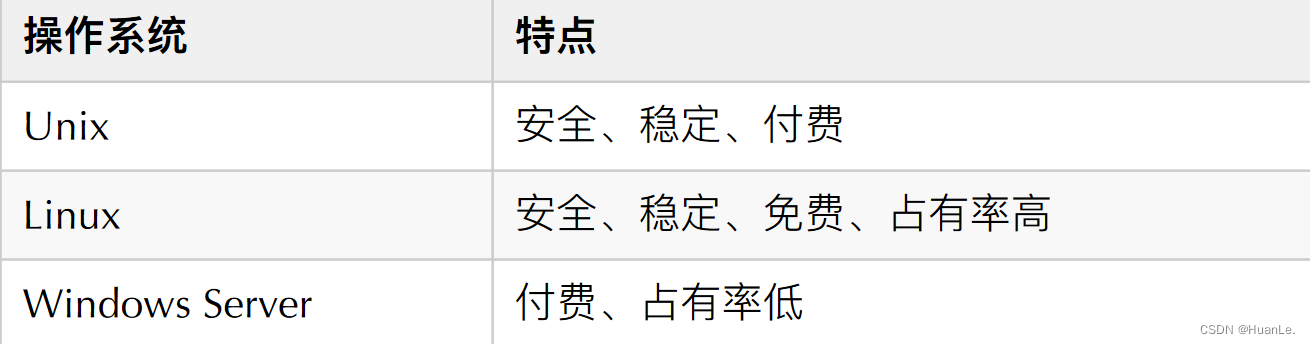
2). Server operating system
The operating system on which the application software is deployed:
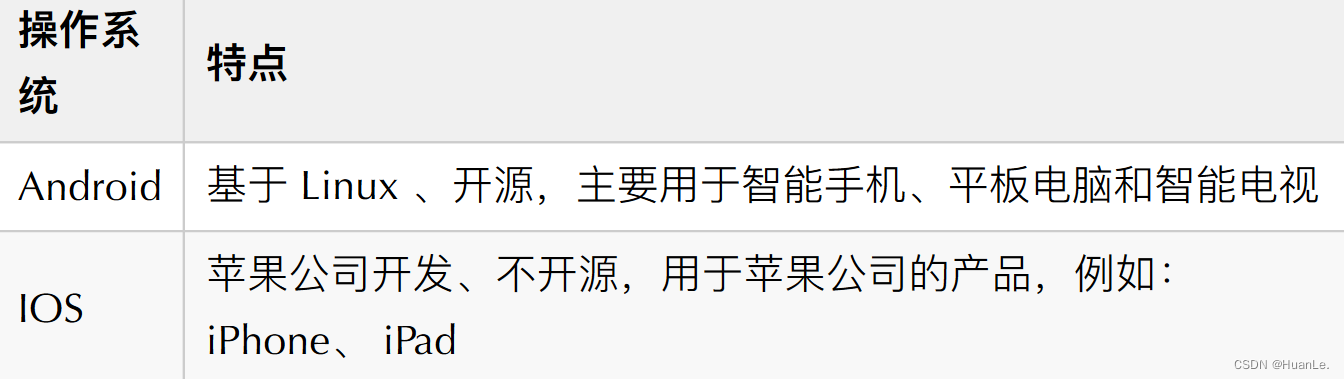
3). Mobile device operating system
4). Embedded operating system

2.2 History of Linux Development

Time: 1991
Place: University of Helmeki, Finland
Character: Linus Torvalds (21 years old)
Language: C language, assembly language
Logo: Penguin
Features: free, open source (open source code), multi-user ( Allow multiple users to operate the same
Linux system at the same time), multitasking (allow multiple tasks to execute at the same time)
2.3 Linux system version
There are two versions of the Linux system, namely: kernel version and release version.
1). The kernel version
is developed and maintained by Linus Torvalds and his team. It
is free and open source
and is responsible for controlling the hardware.
2). The release version
is extended based on the Linux kernel version.
It is developed and maintained by various Linux vendors.
There are paid versions and free versions
We use the Linux operating system, actually choose the distribution version of Linux. In the Linux system, there are various distribution versions, as follows:
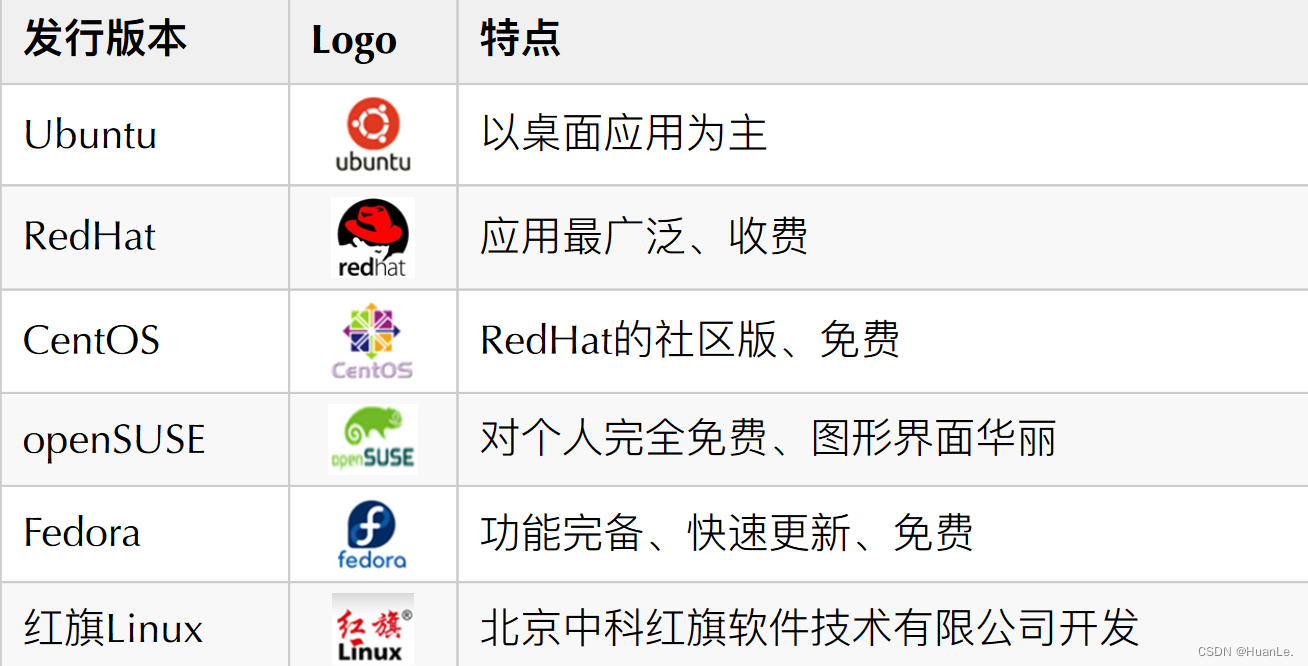 In addition to the distributions listed above, there are many Linux distributions, and we will not list them here.
3. Linux installation
3.1 Installation method introduction
The installation methods of the Linux system mainly include the following two types:
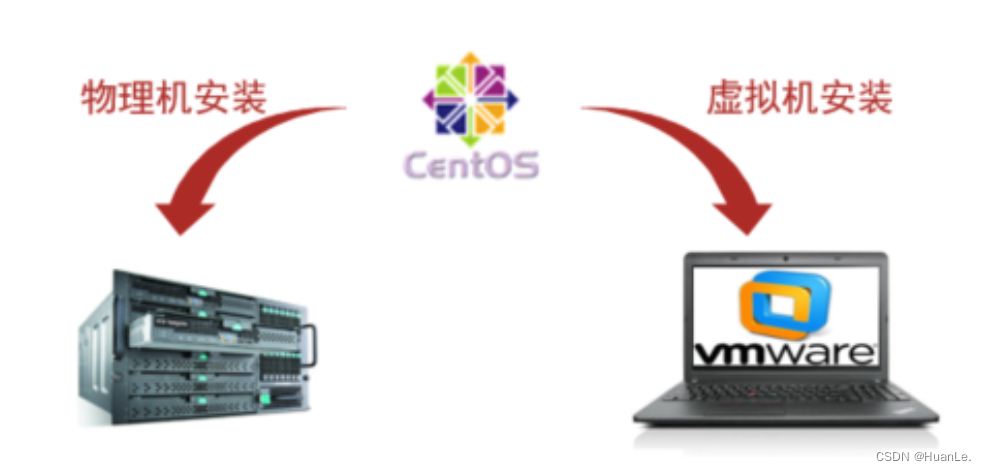

Virtual Machine (Virtual Machine) refers to a complete computer system simulated by software with complete hardware system functions and running in a completely isolated environment. Commonly used virtual machine software:
VMWare VirtualBox VMLite WorkStation Qemu HopeddotVOS Then we can install the Linux operating system in the virtual machine in the course. The virtual machine software we choose in class is VMware.
3.2 Install VMware
The VMware installer is provided in our course materials. Just double-click to run the VMware installer, and follow the prompts to complete the installation.
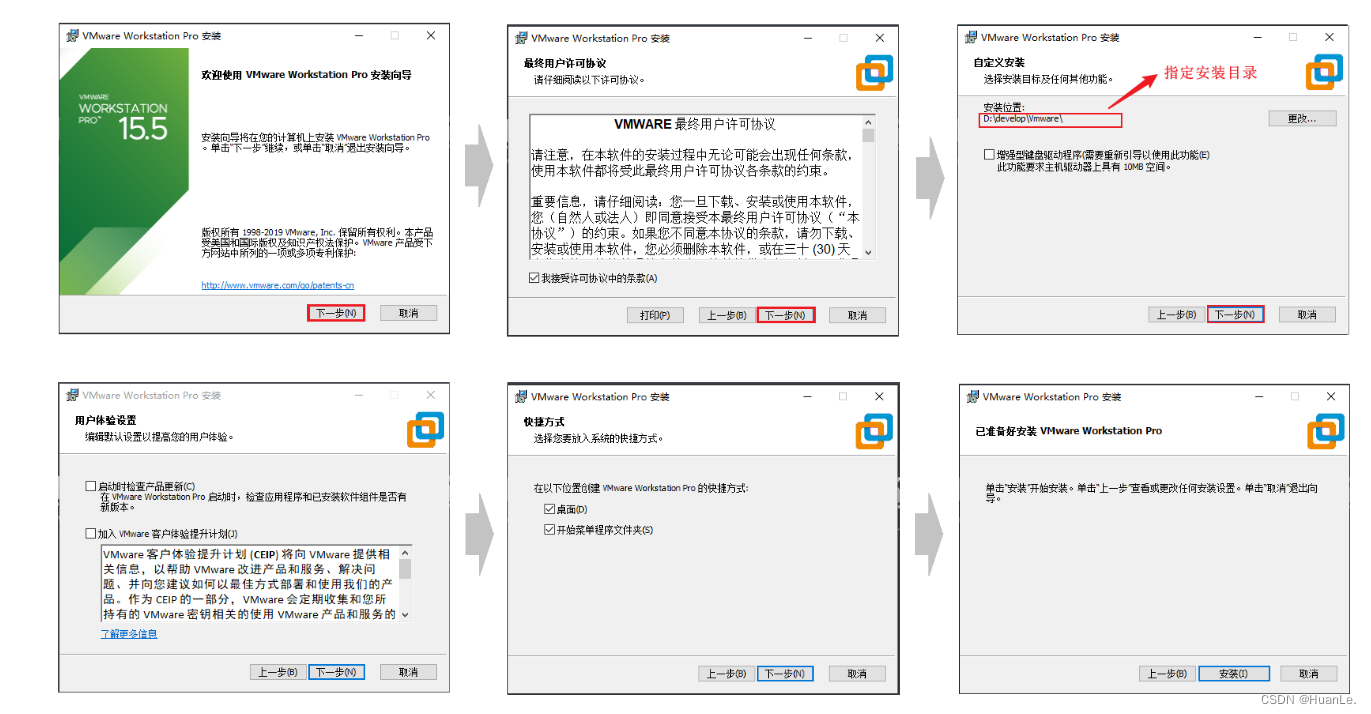
The above is every step of the VMware installation, basically just click "Next" to continue the installation.
3.3 Install Linux
After the VMware virtual machine is installed, we can open VMware and install the Linux operating system on it. The specific steps are as follows:
1). Select to create a new virtual machine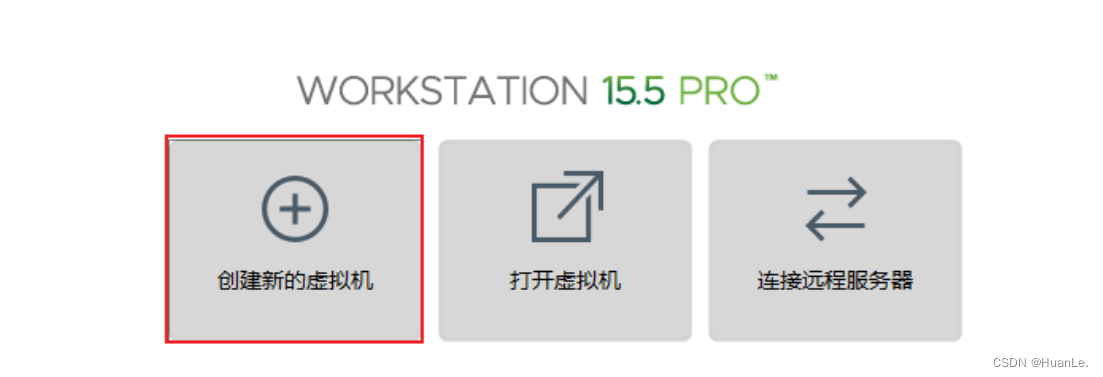
2). Select "Typical" configuration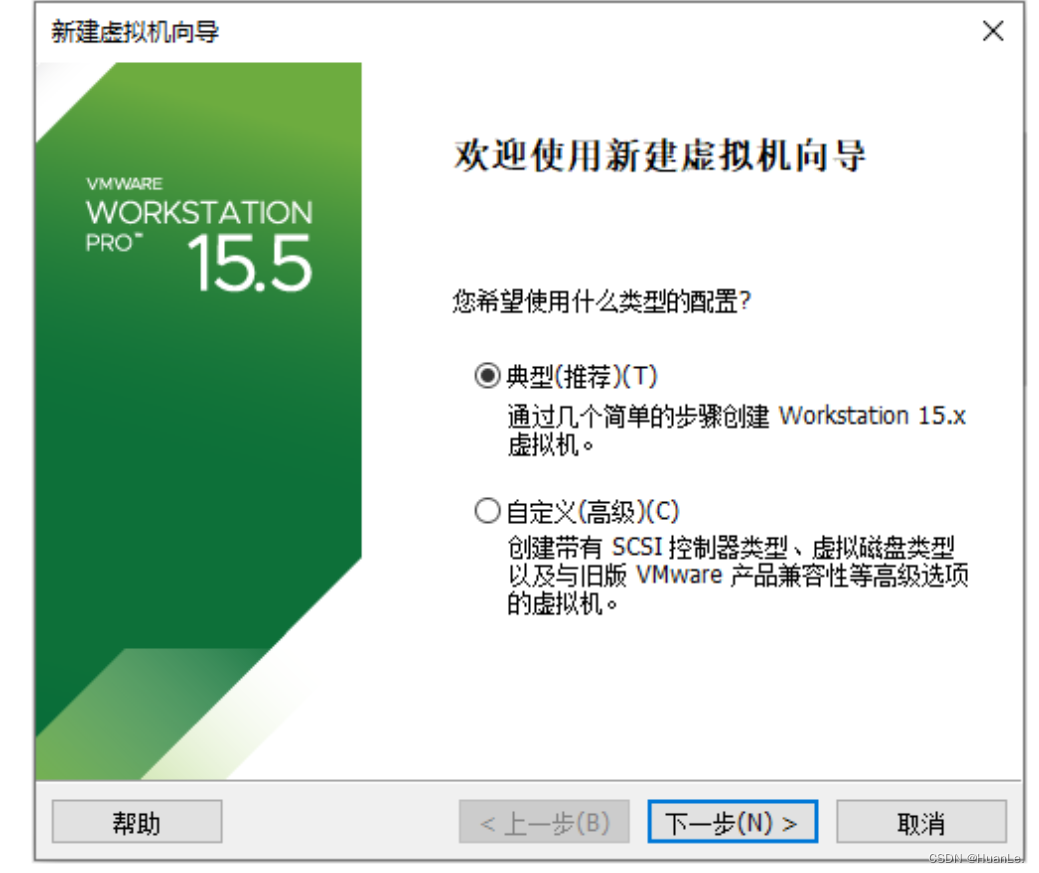
3). Select "Install the operating system(S) later"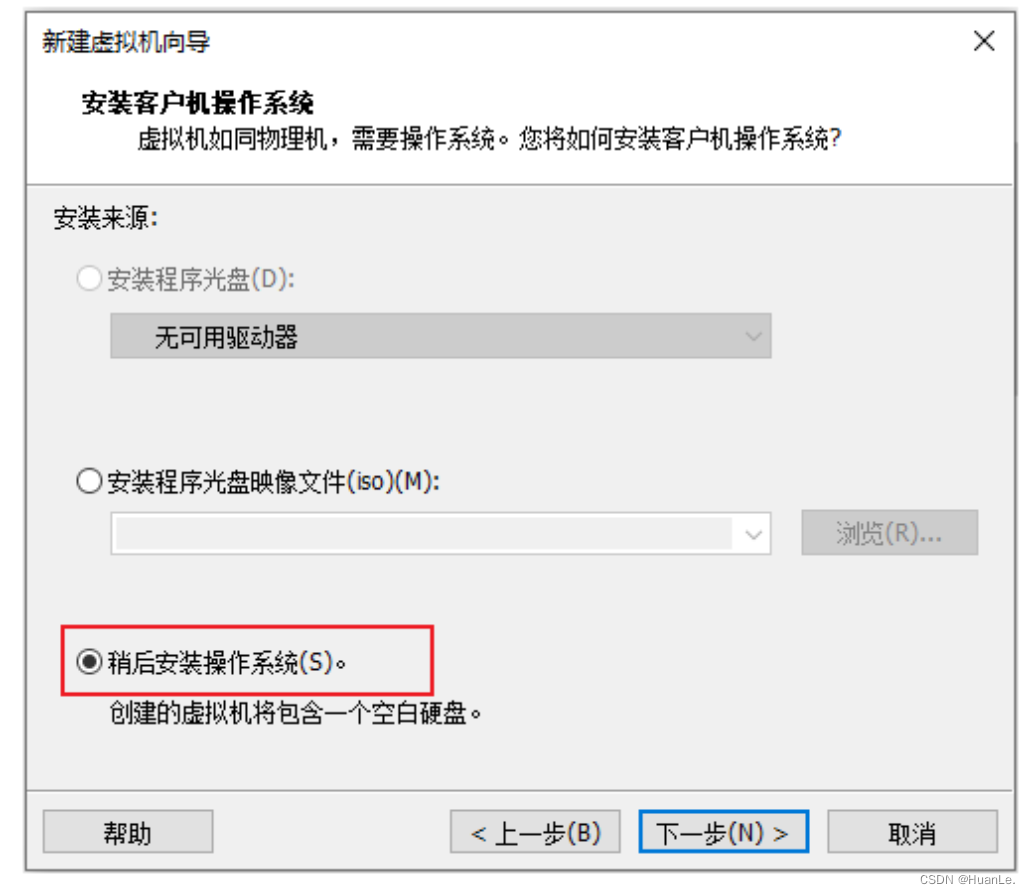
4). Select "Linux" operating system, "CentOS7 64-bit" version
5). Set the virtual machine name and system file storage path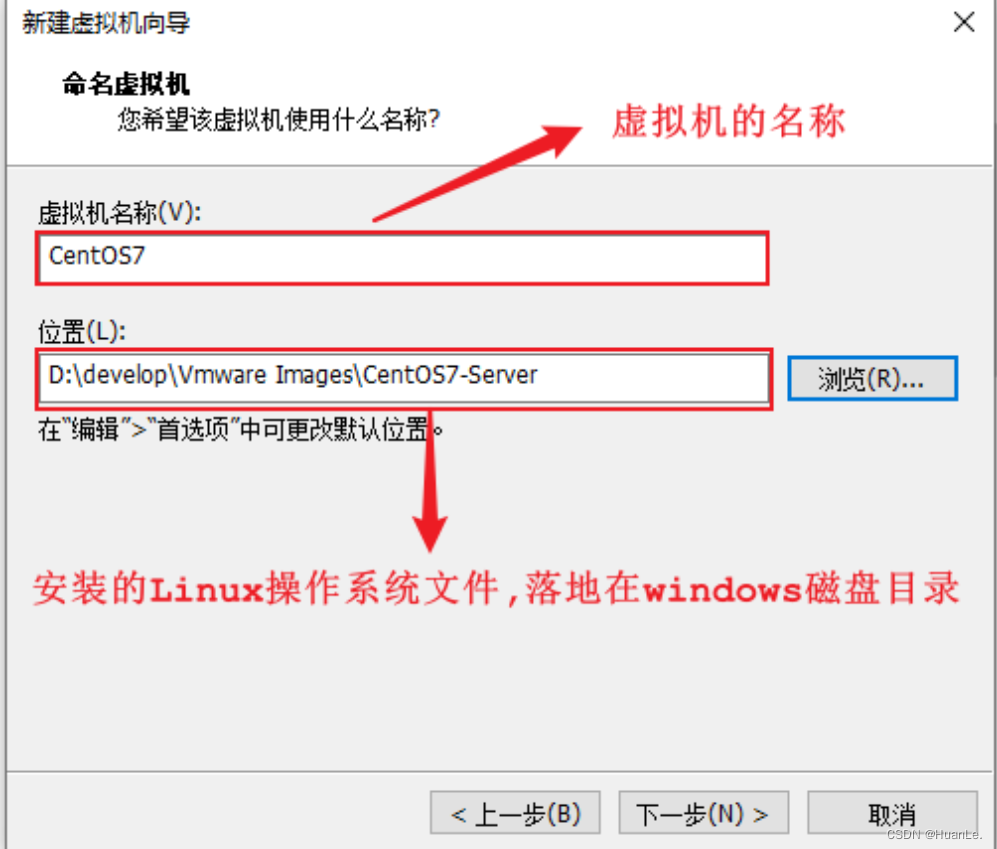
6). Set disk capacity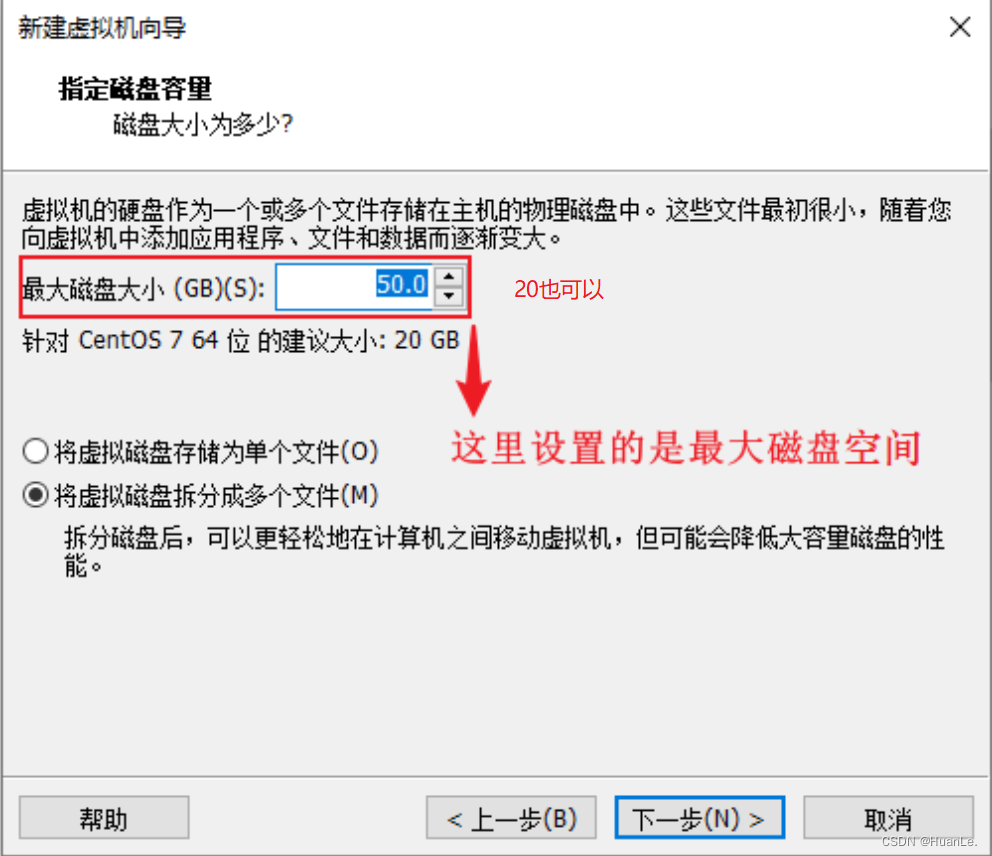
7). Custom hardware information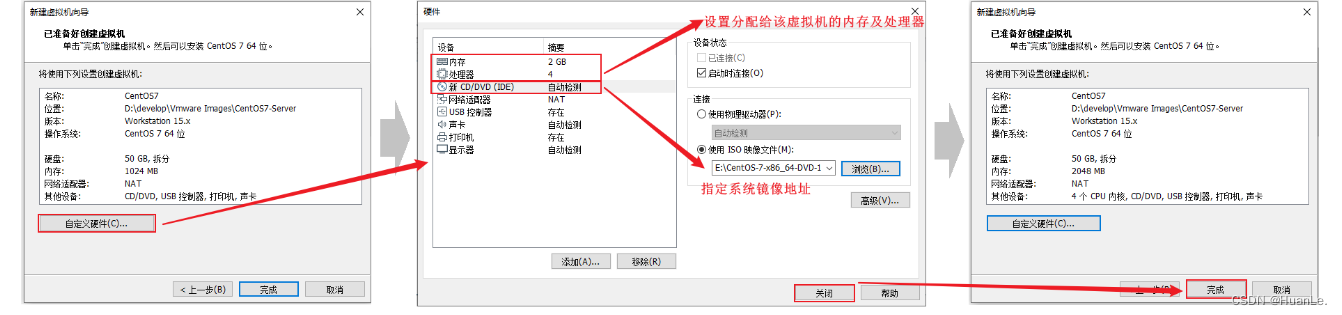
8). Start the new virtual machine created above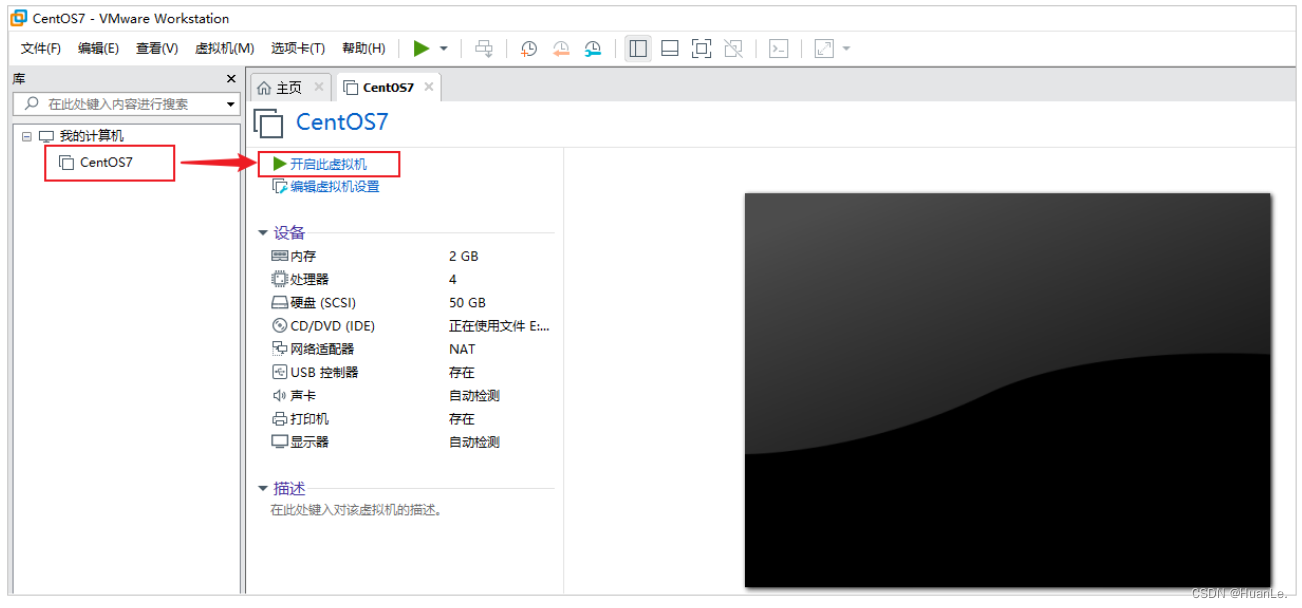
9). Select "Install CentOS7"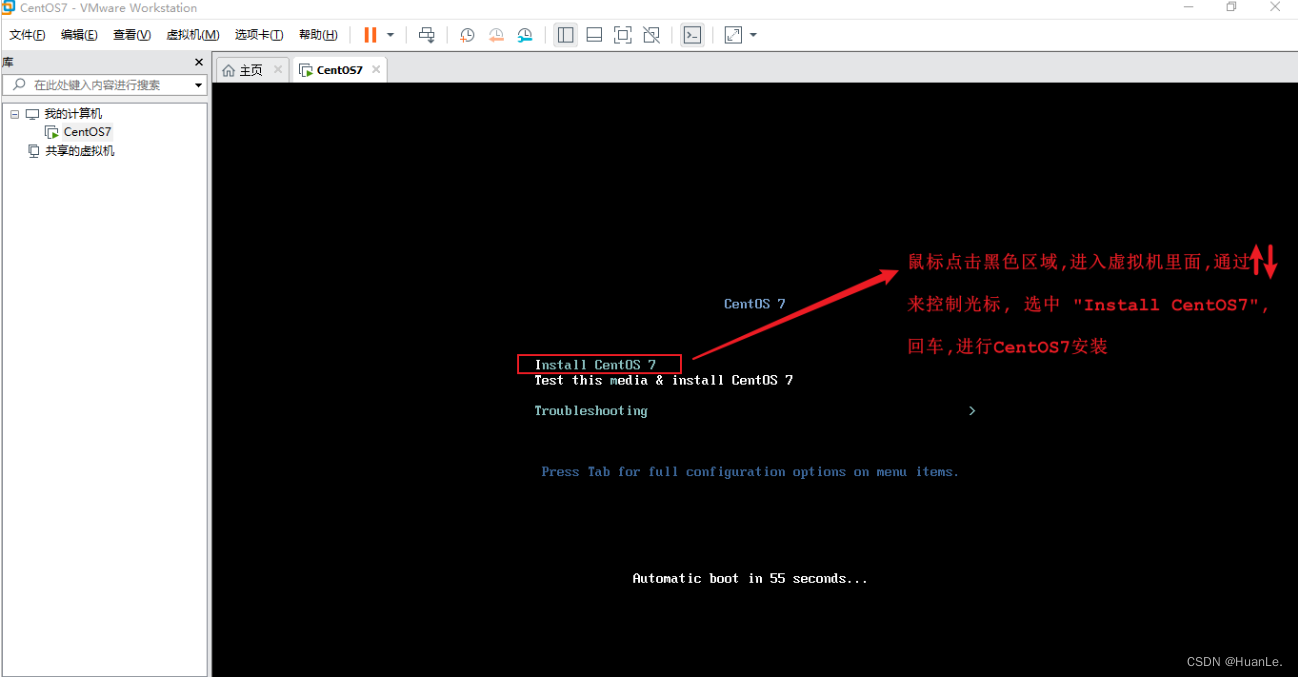
After entering the Linux system, we found that the cursor cannot be moved to the windows operating system. At this time, we can use the shortcut key "Ctrl+Alt" to switch the cursor to the windows system.
10). Select the language as "Simplified Chinese"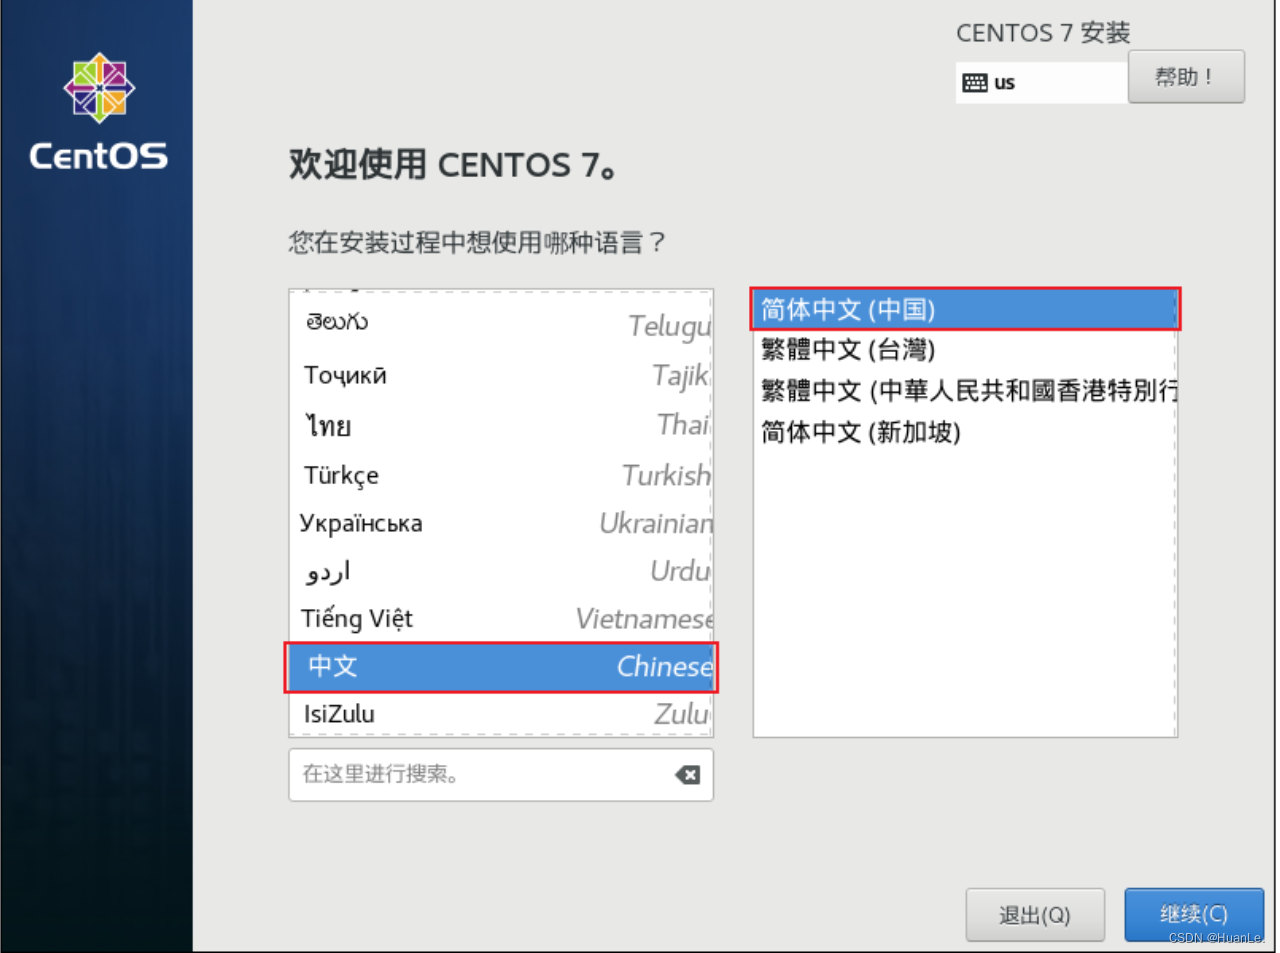
11). Select "Automatically configure partitions"
12). Select "Infrastructure Server"
Minimal installation: It occupies the least space when installing Linux, and many functions are ignored
Recommended installation: Infrastructure Server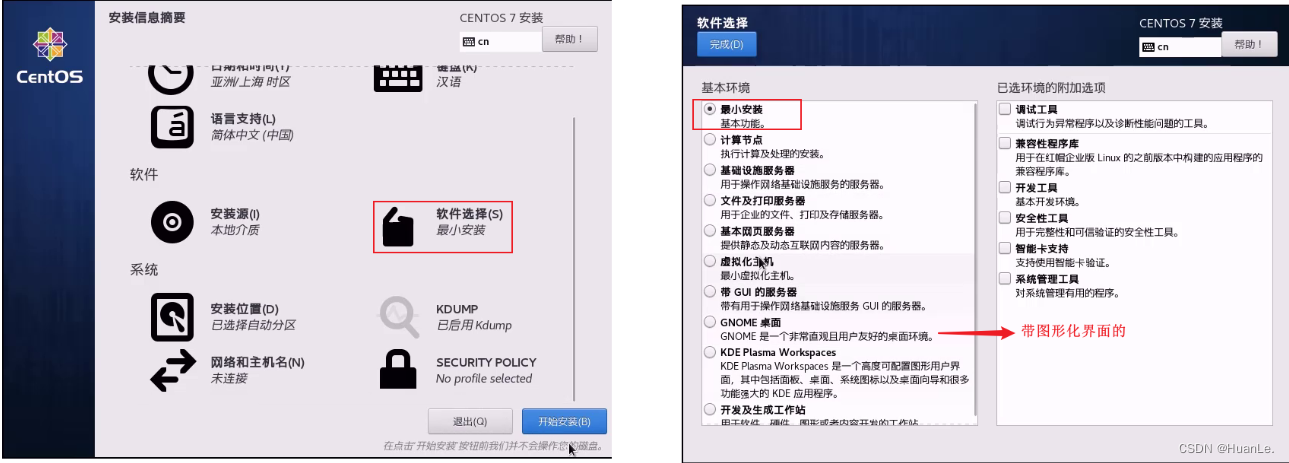
13). Set "root" user password
After the installation is complete, click the blue "Restart" button in the window to restart the Linux system.
14). Login system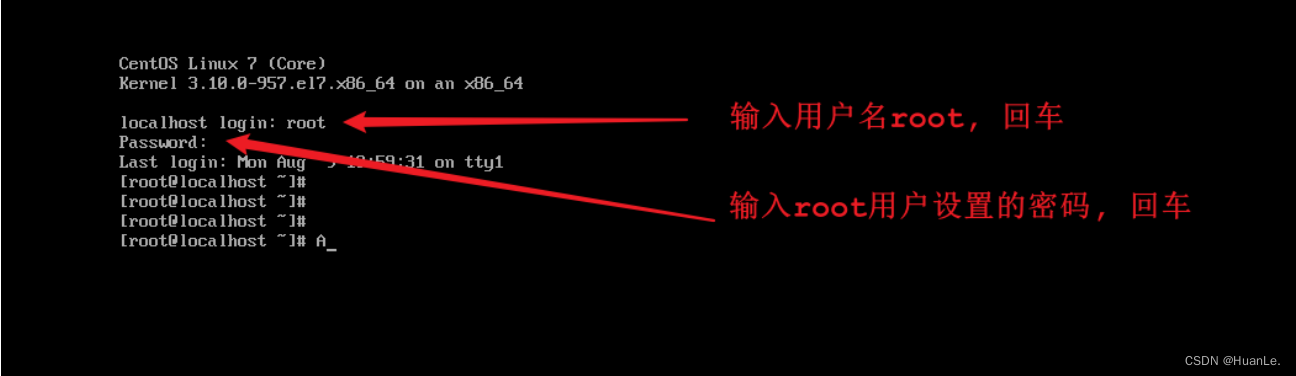
Note: In the Linux system, the password information is entered on the command line. In order to ensure security, the password is not displayed (it seems that it has not been entered, but it has actually been entered);
3.4 Network card settings
After the server is restarted, we can use the linux command ip addr to query the IP address of the Linux system. The specific information is as follows: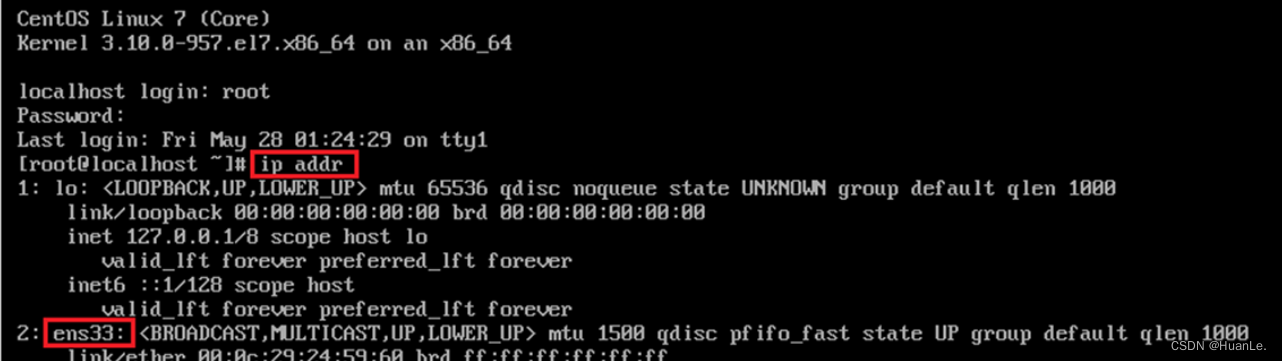
From the figure, we can see that the IP address of the Linux system has not been obtained. Why? This is caused by the failure to initialize the IP address because the network card is not loaded when the server is started. Then we need to modify the network initialization configuration and set the network card to initialize when the system starts. The specific operation steps are as follows:
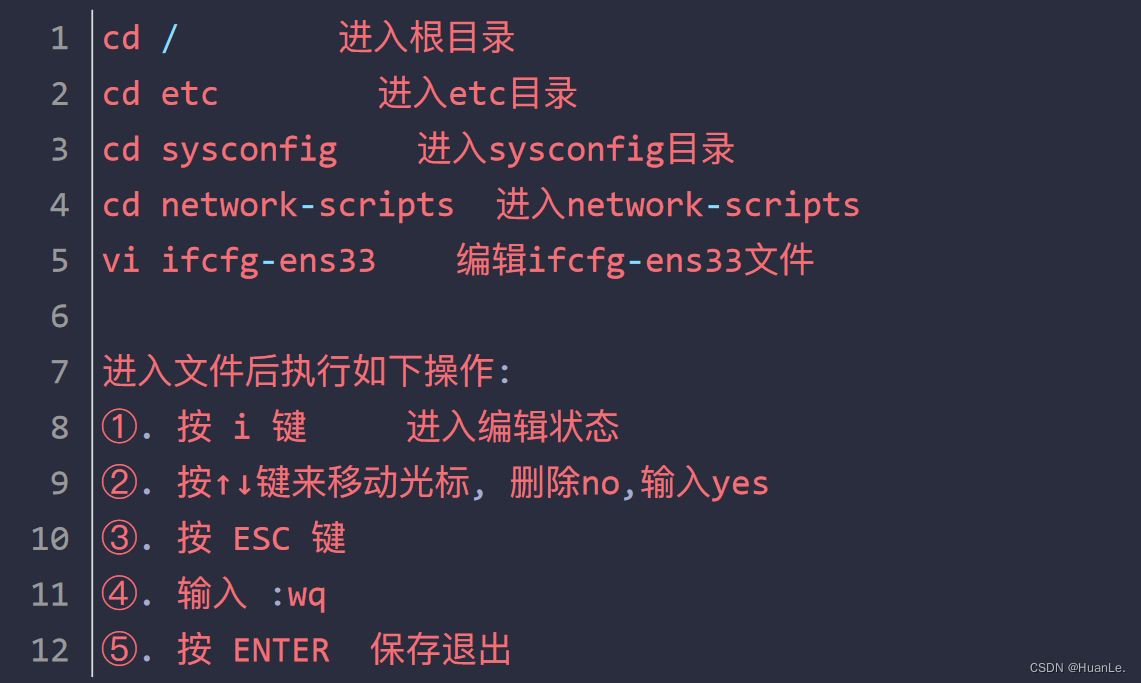
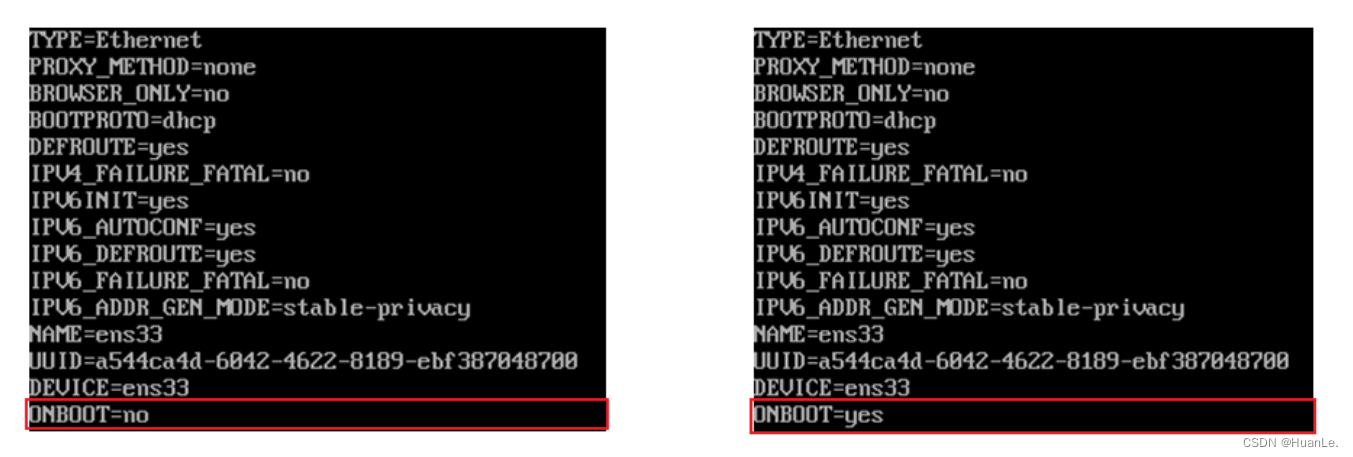
Remarks: In the above operations, the relevant commands in Linux are used. You don’t need to delve into it at present, and I will explain it in detail later. At present, you only need to change the value of the configuration item ONBOOT in this file from no to yes That's it.
2). Restart the virtual machine

After restarting, enter the user name and password of root again, and after logging in to the Linux system, you can check the IP address by command ip addr.

Note: If the ip address is not displayed after opening, you need to restart the network card settings: service network restart
3.5 Install SSH connection tool
3.5.1 Introduction to SSH Connection Tool
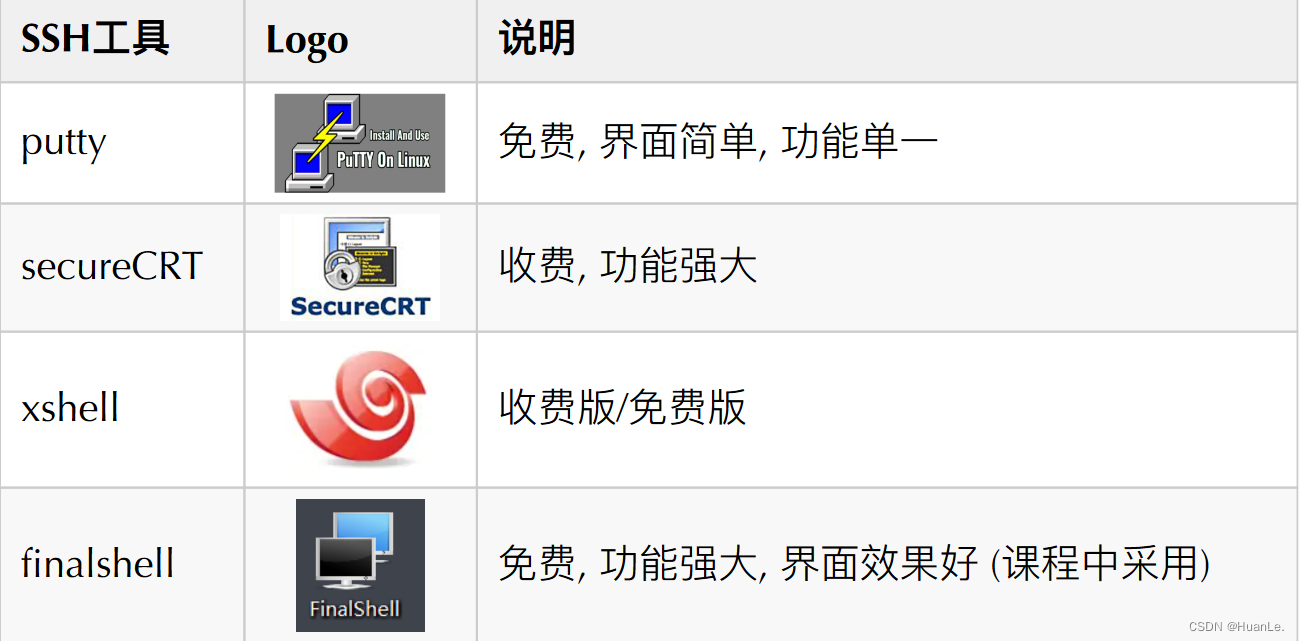
Linux has been installed and configured, and then we are going to learn the basic operating instructions of Linux. Before learning, we still need to do one more thing, because when our enterprise develops, Linux servers are generally deployed in remote computer rooms, we need to operate the server, and we will not go to the remote computer room to operate every time , but connect directly through the SSH connection tool.

SSH (Secure Shell), a security protocol based on the application layer. Commonly used SSH connection tools:
3.5.2 FinalShell installation
Download FinalShell
and double-click the .exe file, and then perform normal installation.

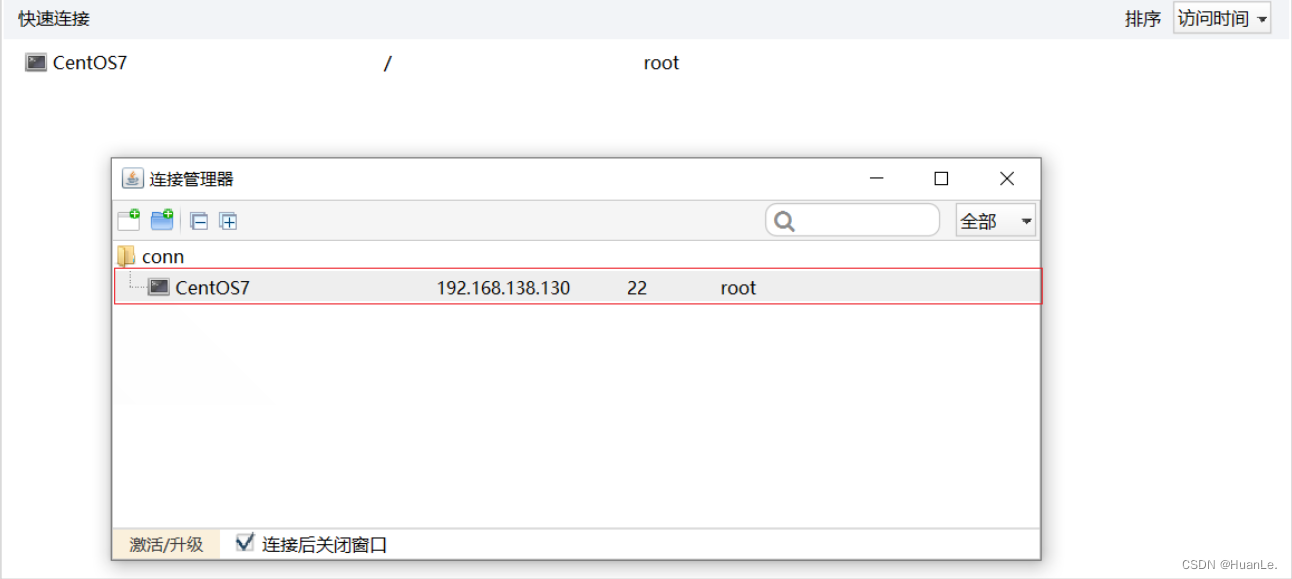
3.5.3 Connect to Linux
1). Open finalShell

2). Establish a connection

3.6 Linux directory structure
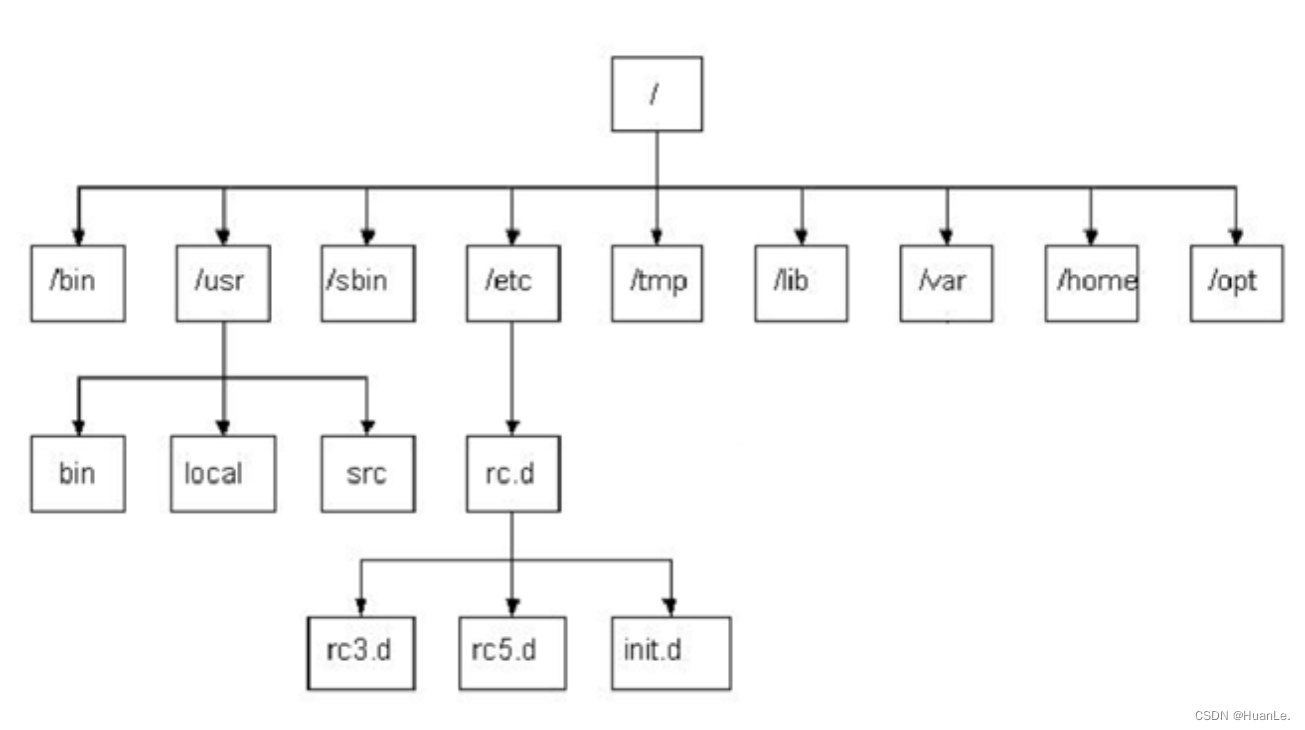
After logging in to the Linux system, we need to familiarize ourselves with the directory structure of Linux. In the Linux system, there is also the concept of a directory, but there are many differences between the directory structure of Linux and the directory structure of Windows. Under the Windows directory, there are drive letters one by one (C drive, D drive, E drive), and the directory belongs to a certain drive letter. The directories in the Linux system have the following characteristics: A. / is the vertex of all directories B. The directory structure is like an upside-down tree Comparison of the
directory structure between Linux and Windows:

The directory structure of Linux is as follows:
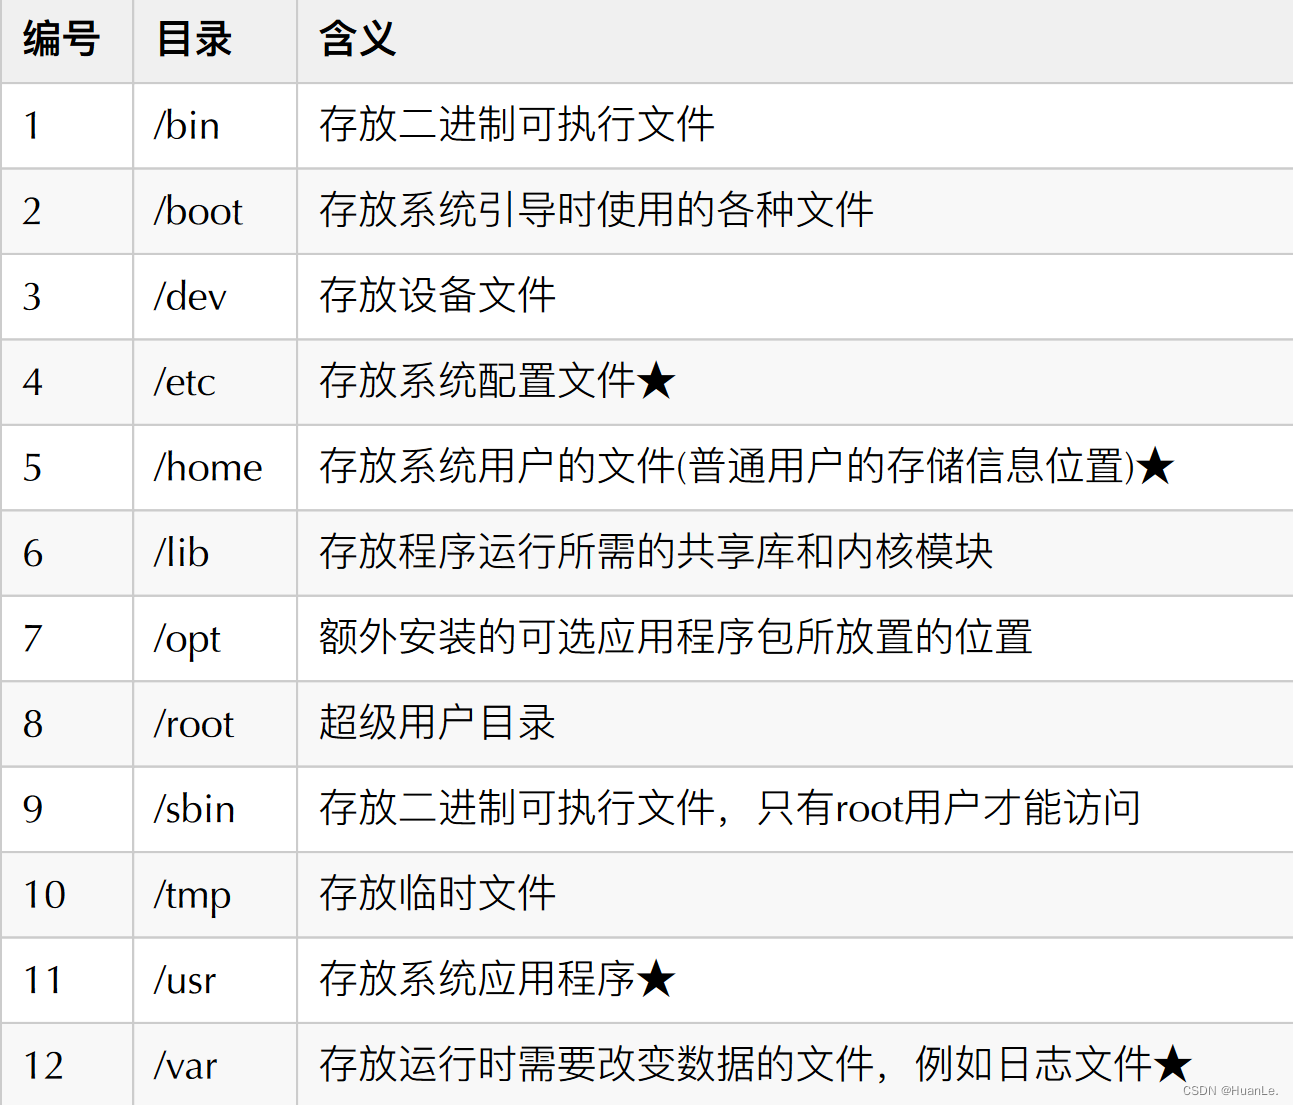
The function and meaning of each directory under the root directory/:
4. Linux common commands
4.1 First experience with Linux commands
4.1.1 Demonstration of common commands
In this part, we mainly introduce several commonly used commands, so that you can quickly feel
the operation mode of the following Linux commands. It mainly includes the following instructions:
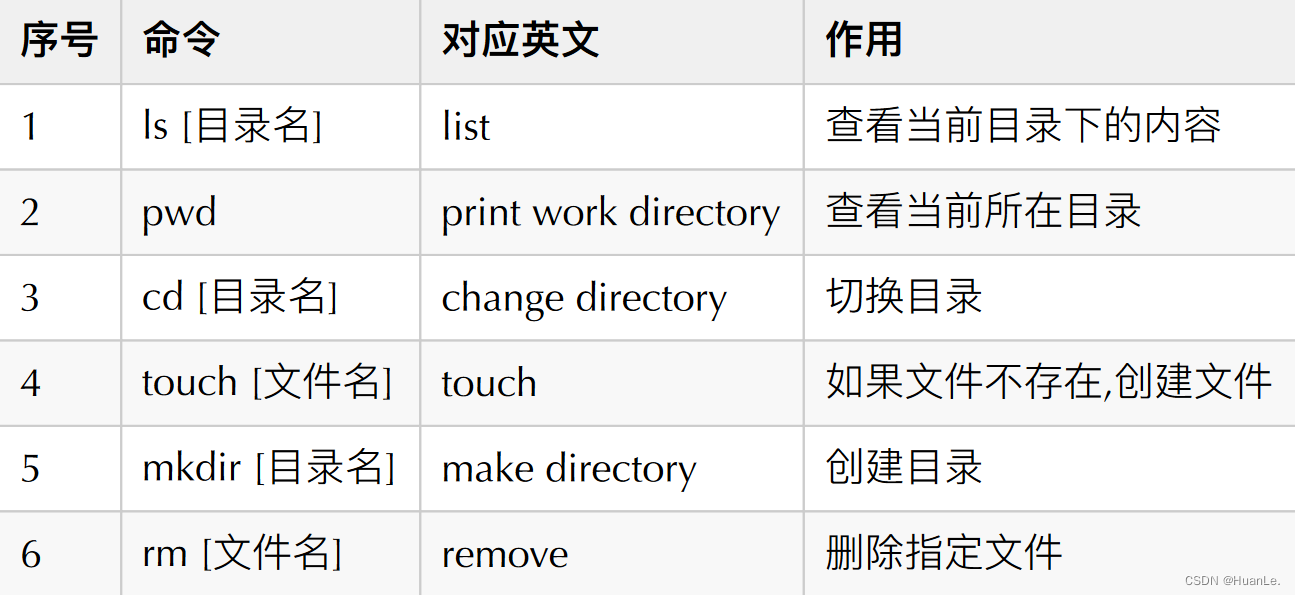
Next, let's quickly demonstrate these commonly used commands.
1). ls

Command Interpretation: ls View the contents of the current directory (files and directories) ls / View the contents of the specified directory (/)
2). pwd

Command interpretation: pwd View the current directory
3). cd

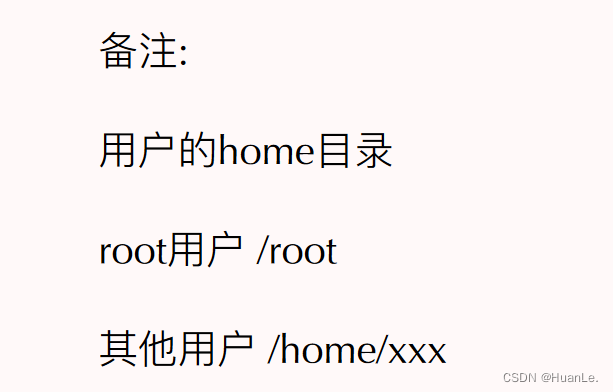
Command Interpretation: cd / switch to the root directory cd /root switch to the /root directory cd .. switch to the upper level directory cd ./aa switch to the aa directory under the current directory 4).
touch

Command Interpretation: touch 1.txt Create file 1.txt in the current directory
touch 2.txt 3.txt 4.txt Create files 2.txt, 3.txt, 3.txt at one time The essence is to build a an empty file;
5). mkdir

Command interpretation: mkdir 01 Create folder 01
6).rm

Command Interpretation: rm 4.txt Delete file (When deleting a file, you need to confirm, enter y, it means confirm)
Note:

When executing a Linux command, if the prompt information is displayed as garbled characters, as shown in the figure above. This is caused by an encoding problem, you only need to modify the Linux encoding, the command is as follows:
echo 'LANG="en_US.UTF-8"' >> /etc/profile source /etc/profile
4.1.2 Linux command usage skills When we use Linux system commands, we can use the following techniques:
1). Tab key auto-completion
2). Press Tab key twice in a row to give operation tips
3). Use the up and down arrows to quickly call out the commands you have used
4). Use the clear command or the shortcut key Ctrl+l to clear the screen
5). Use ctrl+c to terminate the occupation of the current terminal by the current process
Operation example:
A. When executing the command, for the file/directory to be operated, press Tab to automatically complete:

B. If there are multiple files starting with "1." above, you can press the Tab key twice to give an operation prompt:

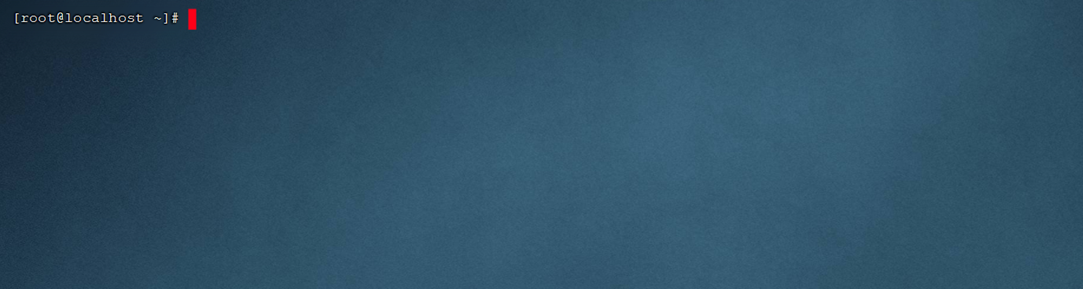
C. Use the clear command or the shortcut key Ctrl+l to clear the screen:
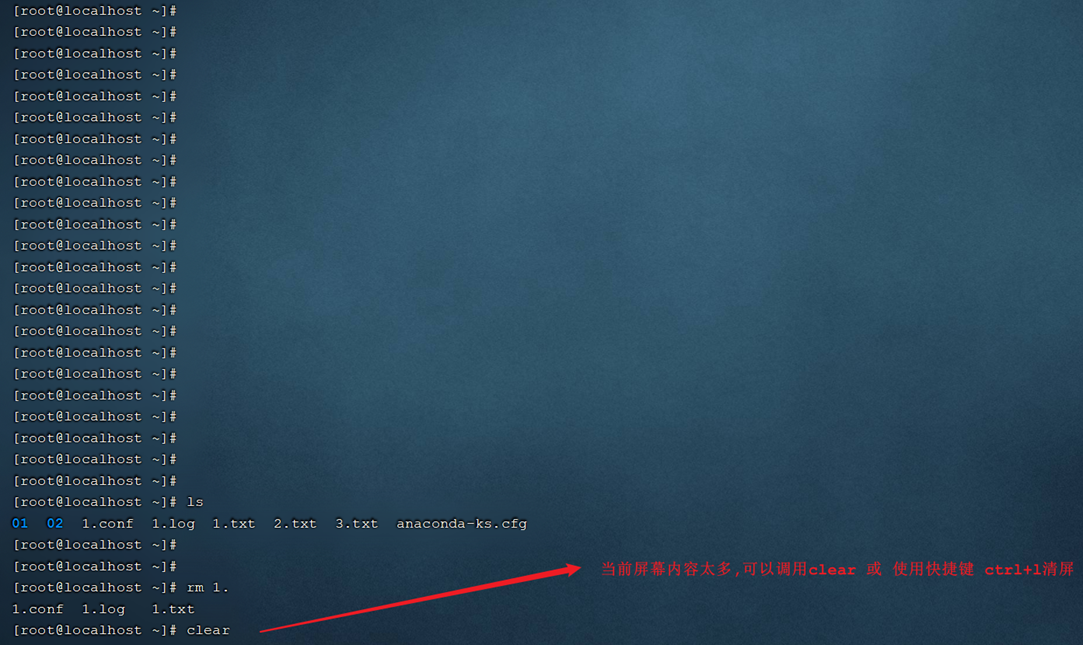
After clearing the screen, the interface becomes clean:
4.1.3 Linux command format 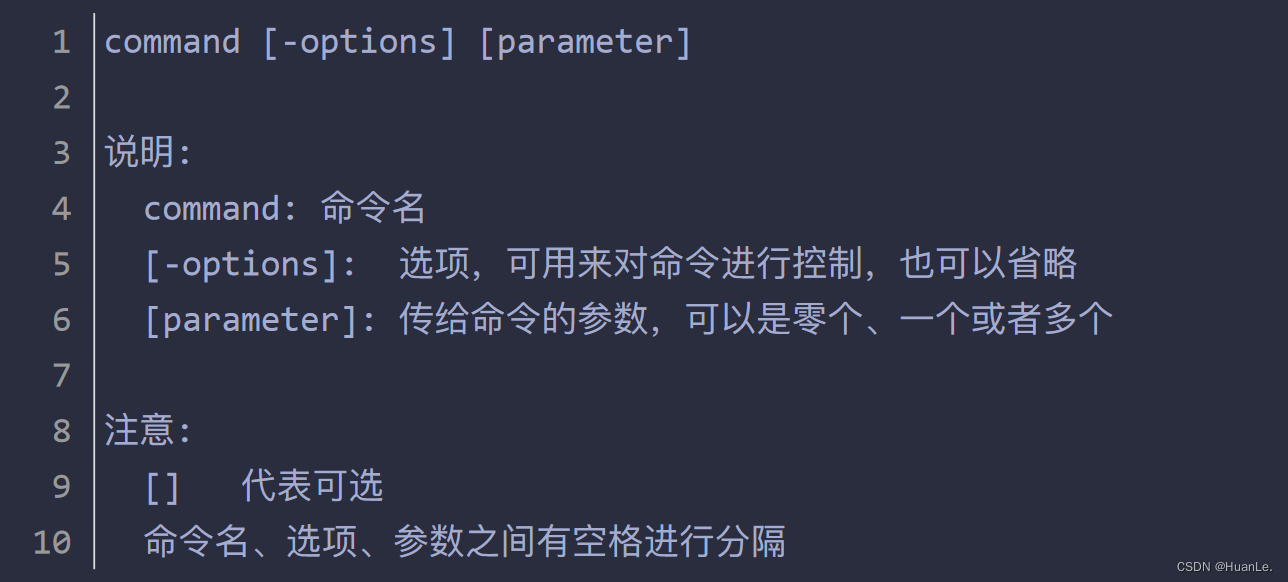
Operation example:

4.2 File directory operation commands
4.2.1 ls 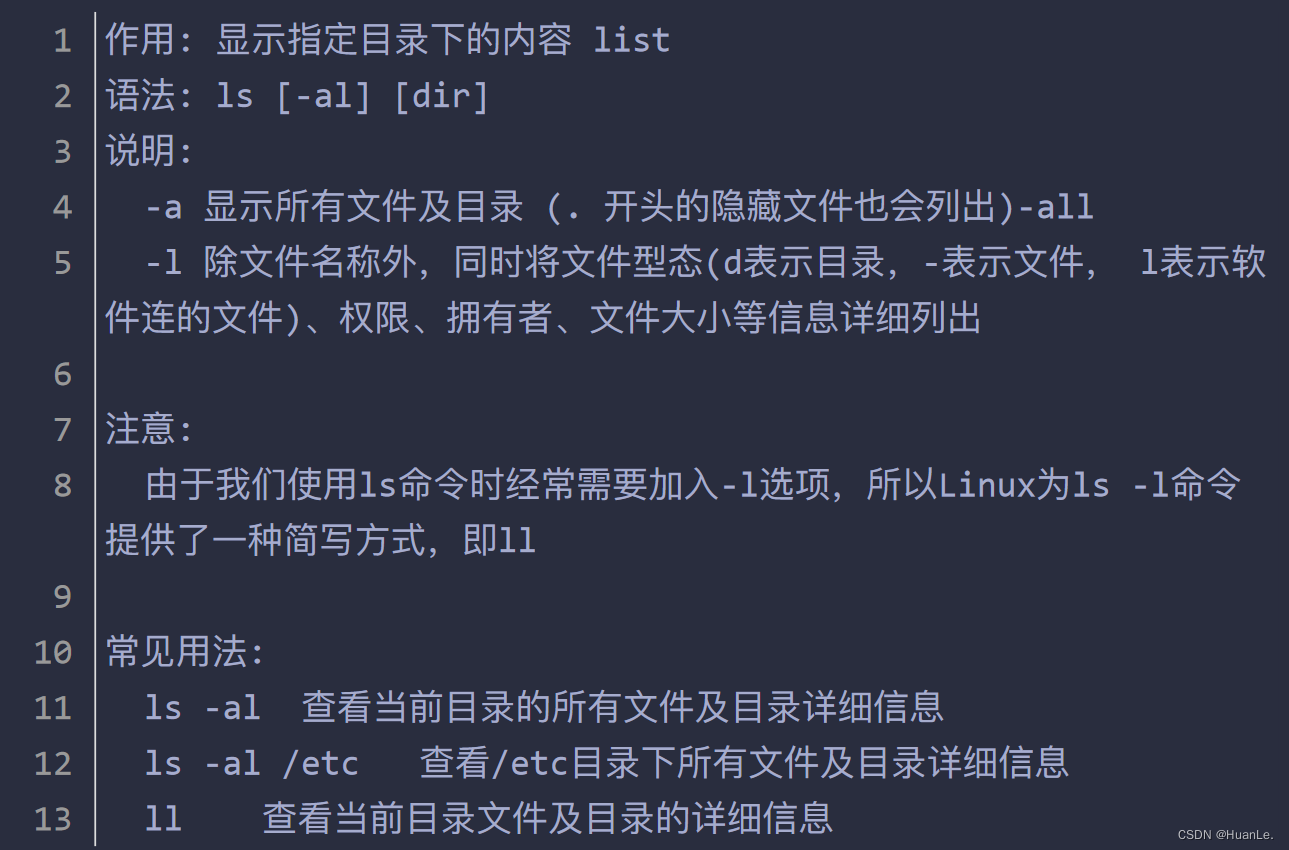
Note: Whether it is window or linux, if the directory starts with ., it will be hidden by default.
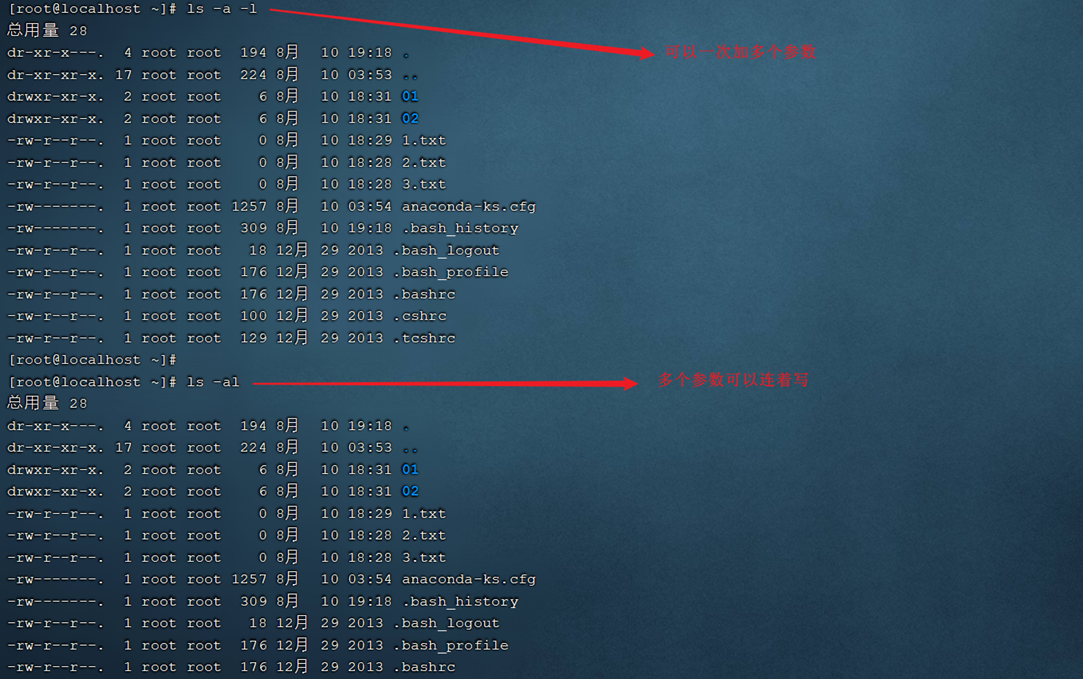
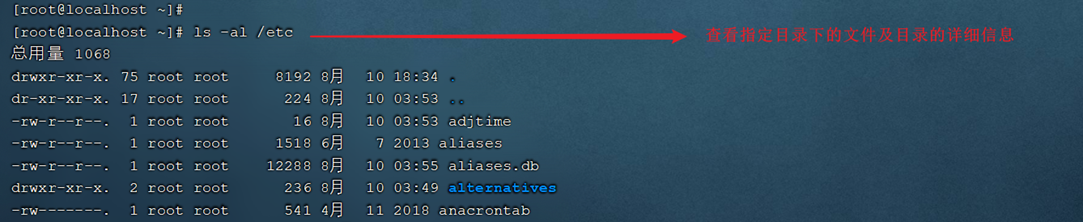
Operation example:


4.2.2 cd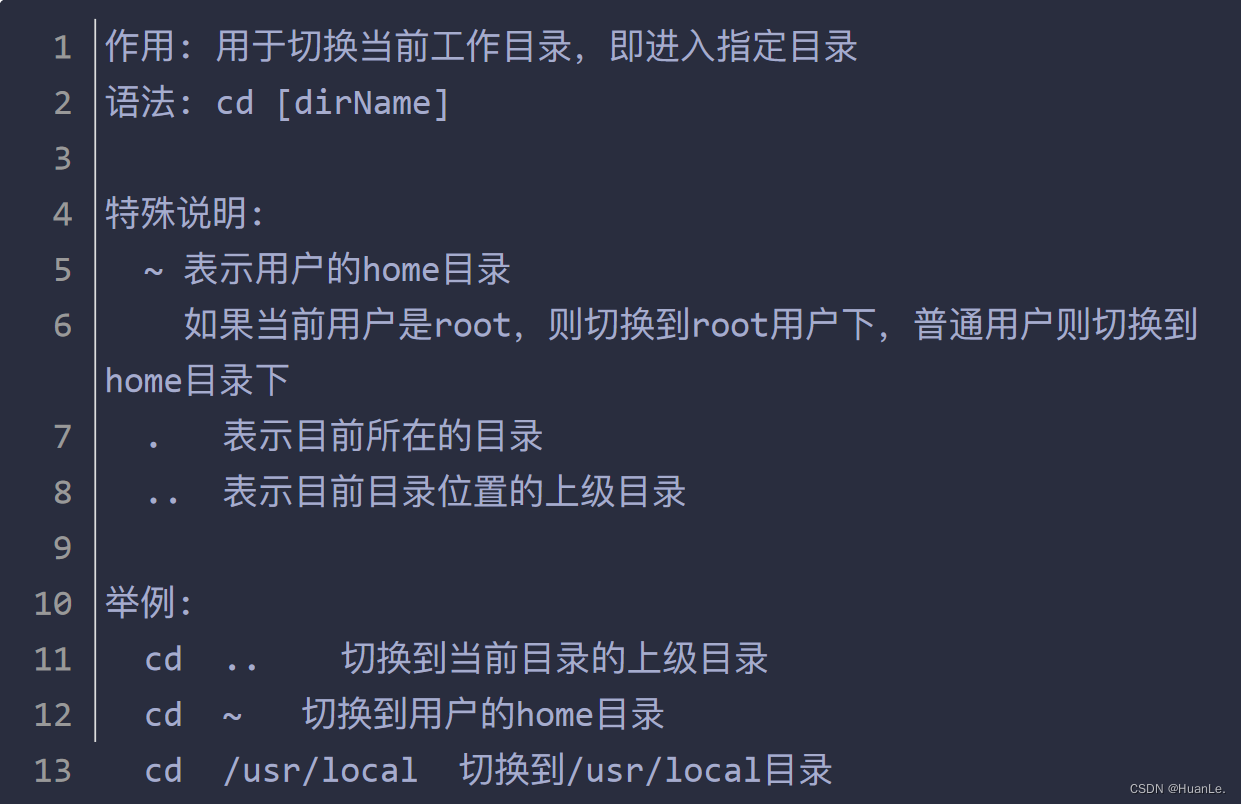
Operation example:
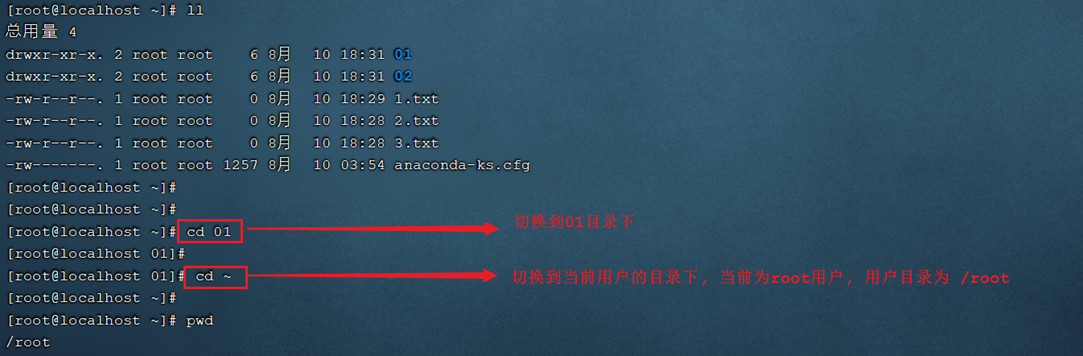

cd .. Switch to the upper-level directory of the current directory location; you can switch to the upper-level directory of the upper-level directory through cd ../..
4.2.3 cat 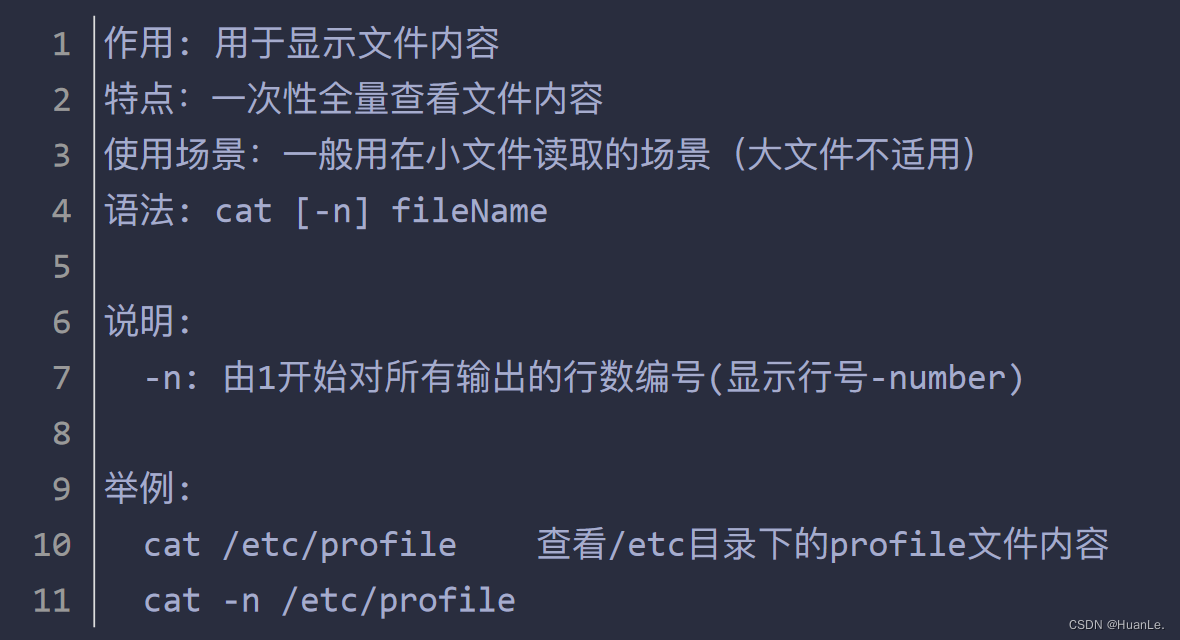
operation demonstration:

The cat command will check all the content of the file at once. If the file has a lot of content, it is not very convenient to check at this time. At this time, we can use a new command more.
Note: If the content is relatively small, it is more convenient to use the cat command. However, if the content is large (hundreds or thousands of lines), it is not recommended to use cat (the data read by cat is read in full)
4.2.4 more 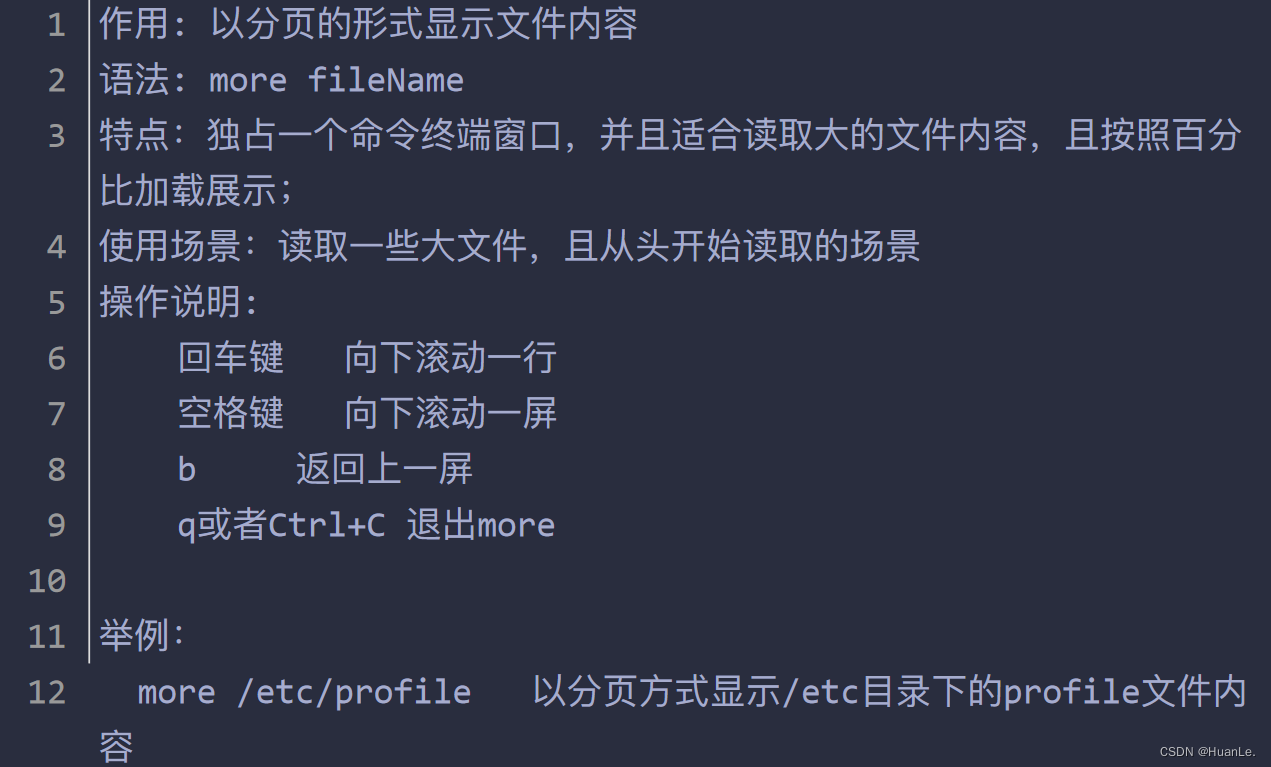
operation example:
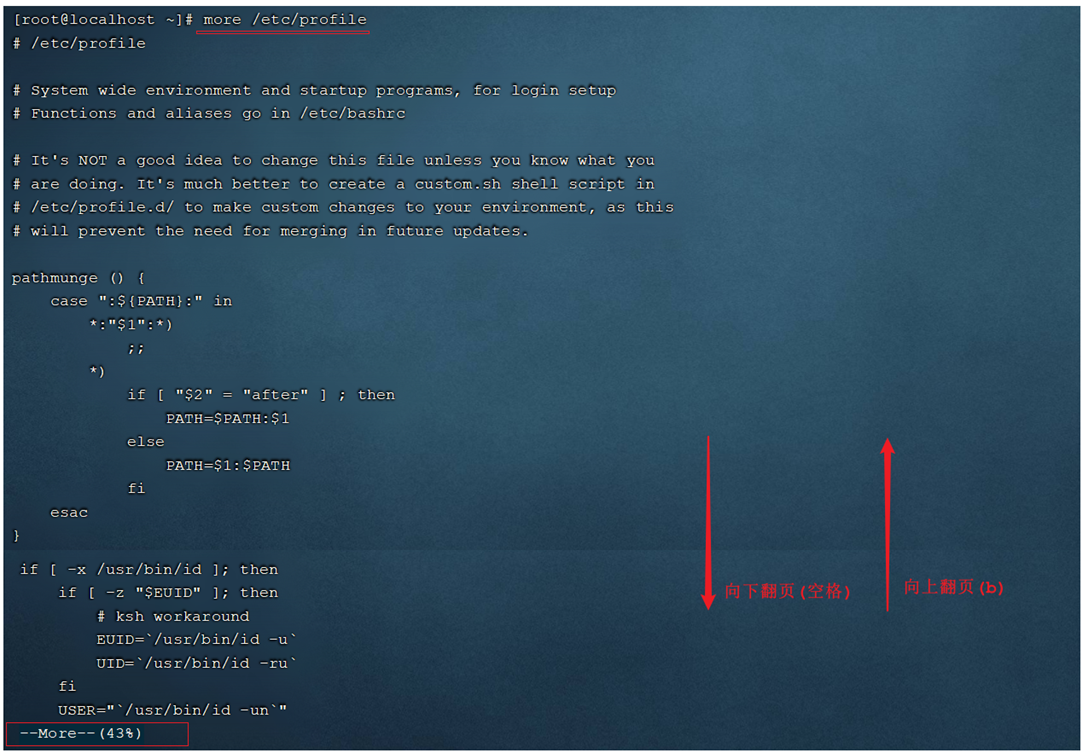
When we are looking at some relatively large files, we may need to frequently query
the data information at the end of the file. At this time, if the file is very large, we have to turn down the page until the
last page to see the latest added Data, this method is more cumbersome, at this time, we can
use the tail command.
Thinking question:
If a certain text is relatively large and the content of the query is relatively high, use more to compare the format
, but if the content to be queried is at the end of the file, it is more appropriate to use tail
; if the query is for a small file, use cat to compare Suitable for
4.2.5 tail
Operation example: A defaults to query the 10 lines at the end of the file

B. You can query the data with the specified number of rows at the end by specifying parameters

C. Dynamically read the data at the end of the file

Execute the command tail -f 1.txt in window 1 to dynamically view the data at the end of the file. Then
right-click on the top label and select "Copy Label" to open a new window 2. At this time, execute the command echo 1 >> 1.txt in the newly opened
window 2, append content to the end of the 1.txt file, and then we You
can see the latest data at the end of the file in window 1.
If we don't want to view the data at the end of the file, we can directly use the shortcut key Ctrl+C
to end the current process.
Description: echo content >> file name: write the specified content at the end of the specified file;
echo content > file name: overwrite the old content in the text with the specified content;
4.2.6 mkdir 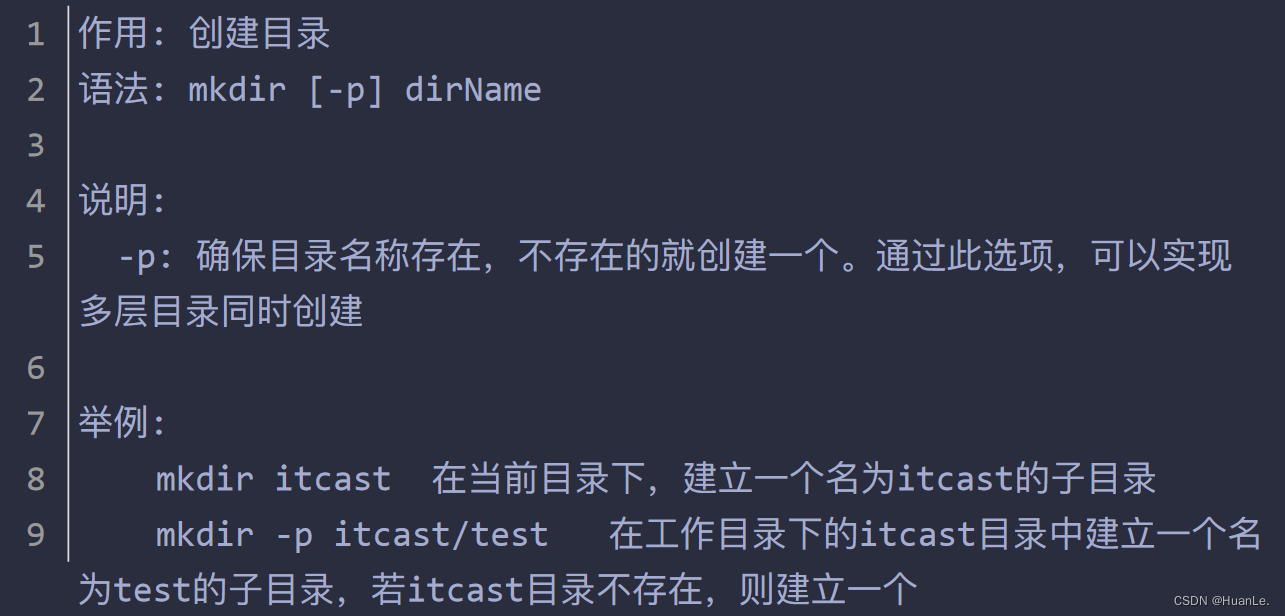
operation demo: 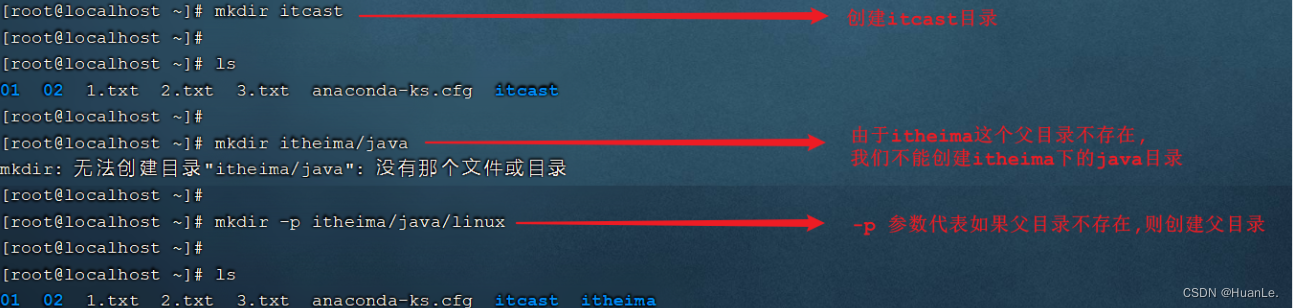
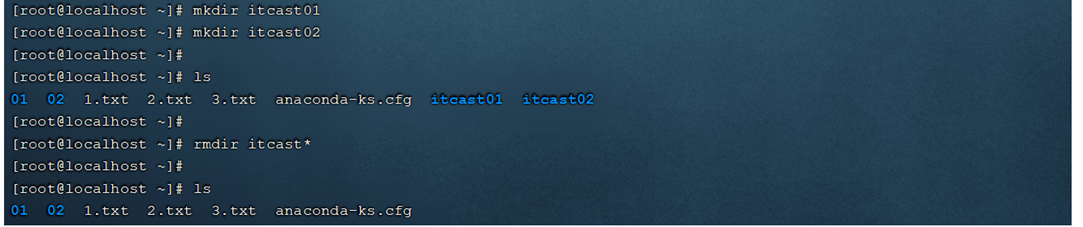
4.2.7 rmdir
Operation demo:
A. Delete the empty directory

B. Delete non-empty directories

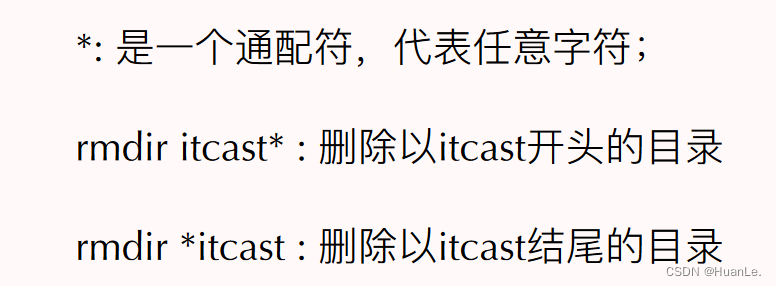
C. Use the * wildcard to delete directories
4.2.8 
Example of rm operation:

Note: For commands like rm -rf xxx, you must be cautious when executing them, and delete them after confirming that they are correct to avoid accidental deletion.
4.3 Copy move command
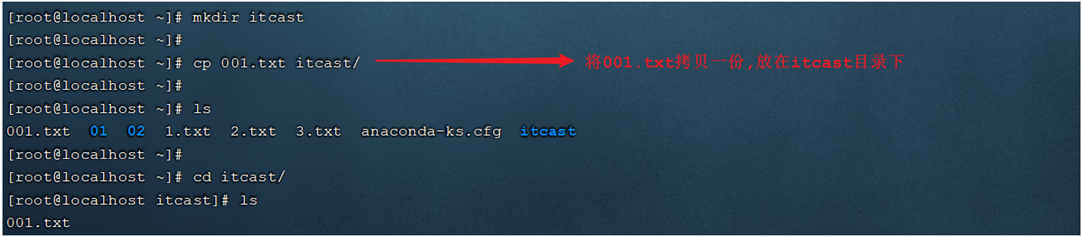
4.3.1 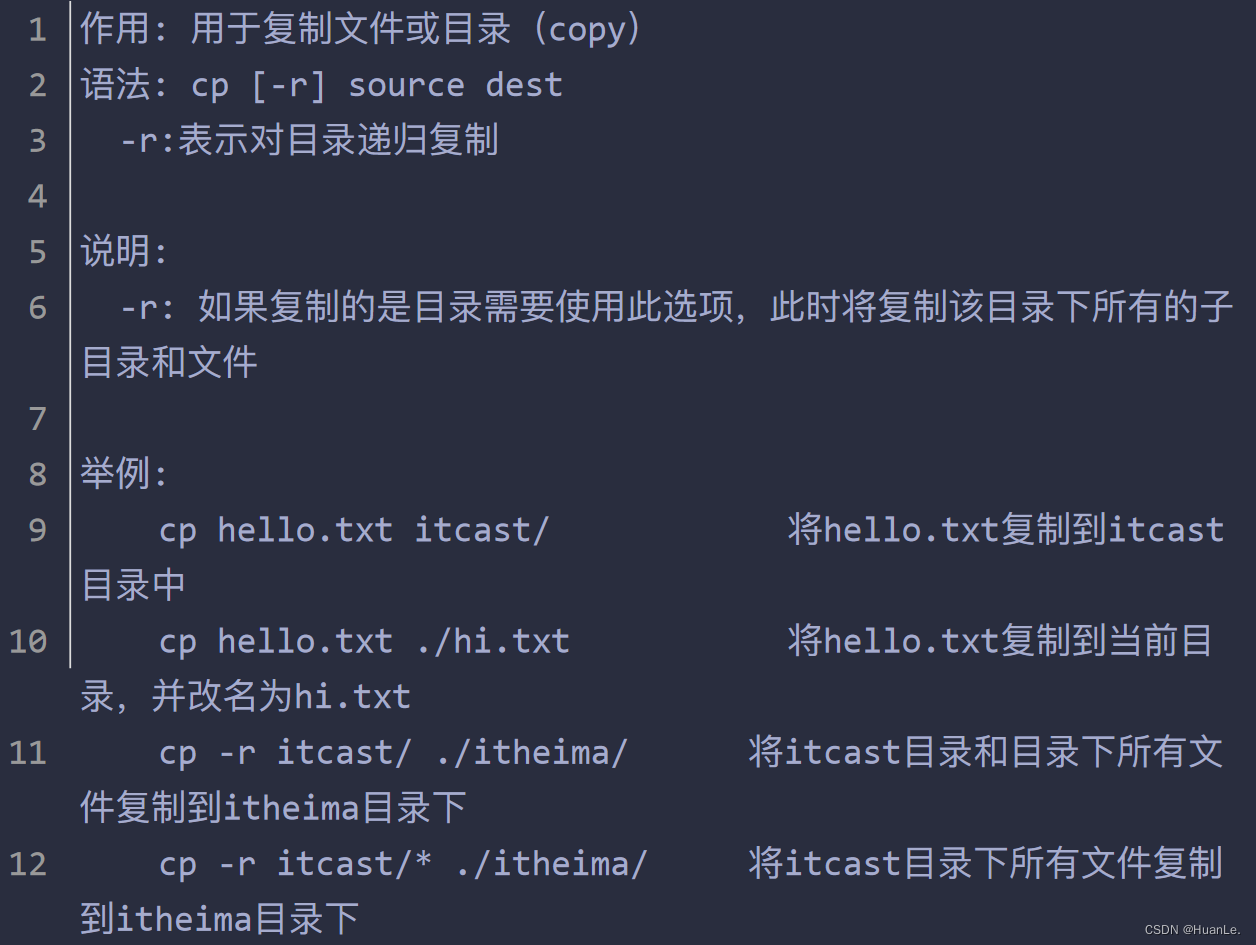
Notes for cp: There is no suffix in the file under linux, we usually add a suffix for readability; **Operation example:


If the copied content is a directory, you need to add the parameter -r.
Classic scenario: When we make some configuration changes, we are afraid of making mistakes in the original file, so we usually
use the cp command to make a backup first. If something goes wrong, we can roll it back ;
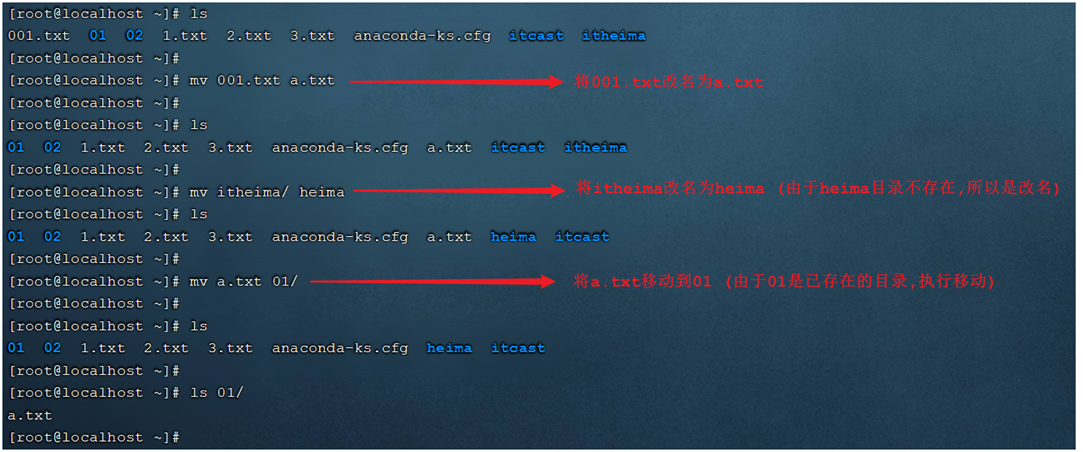
4.3.2 mv
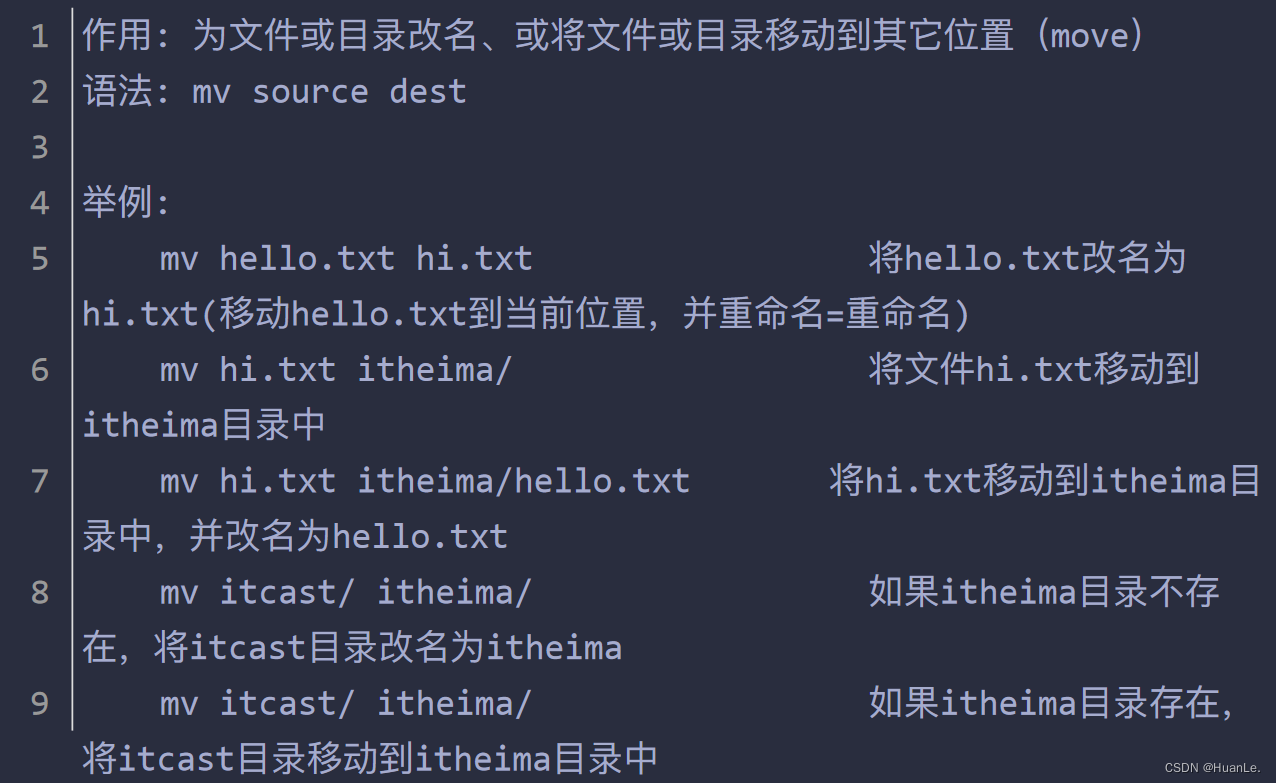
Operation example:
The mv command can both rename and move. Specifically, whether to rename or move, the system will judge according to the parameters we input (if the second parameter dest is an existing directory, the move operation will be performed, and in other cases, it will be renamed)
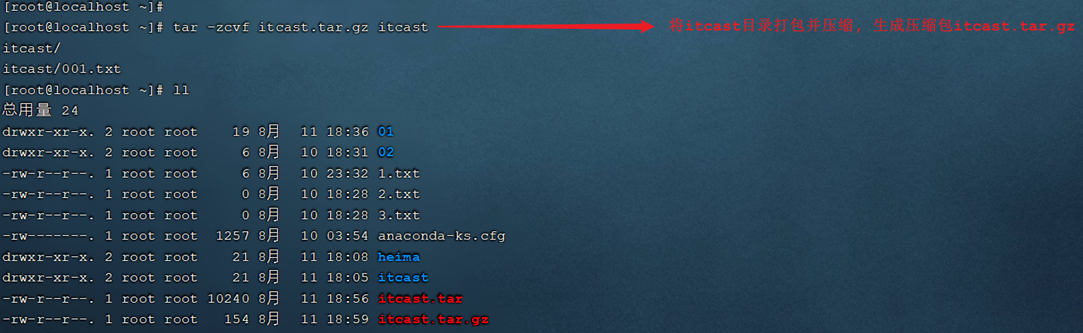
4.4 Packaging and compression commands

Operation example: A. Packing

B. Pack and compress
C. Unpack
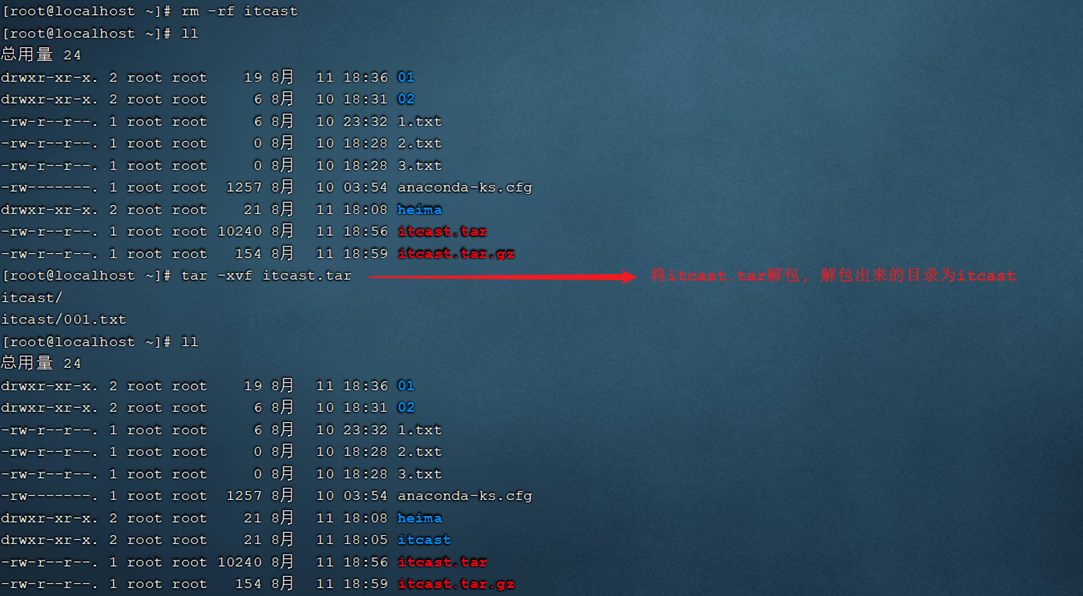
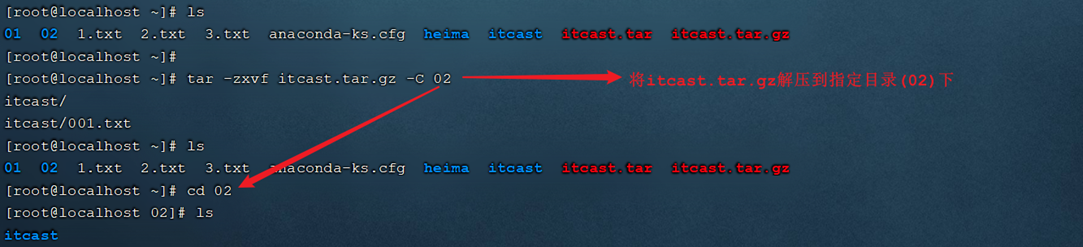
D. Unzip

Unzip to the specified directory, you need to add the parameter -C
4.5 Text Editing Commands
Text editing commands mainly include two: vi and vim. The usage of the two commands is similar. Our course mainly explains the use of vim.
4.5.1 Introduction to vi&vim
Function: The vi command is a text editing tool provided by the Linux system, which can edit the file content, similar to the notepad in Windows Syntax:
vi fileName
Description: 1). vim is a developed from vi A more powerful text editing tool, which can color the text content when editing files, which is convenient for us to edit and process files, so vim is more commonly used in actual work. 2). To use the vim command, we need to complete the installation ourselves. You can use the following command to complete the installation: yum install vim
4.5.2 vim installation
command: yum install vim
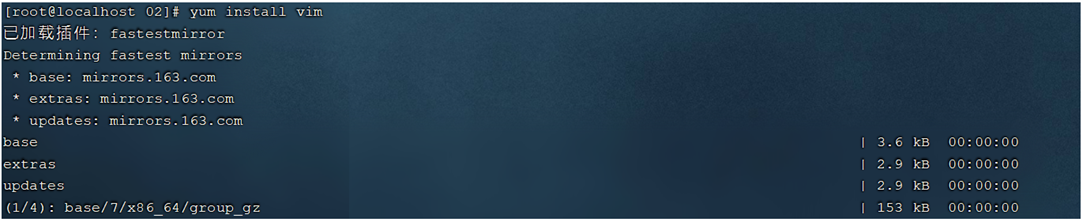
During the installation process, there will be a confirmation prompt, enter y at this time, and then return to continue the installation:


4.5.3 The use of vim
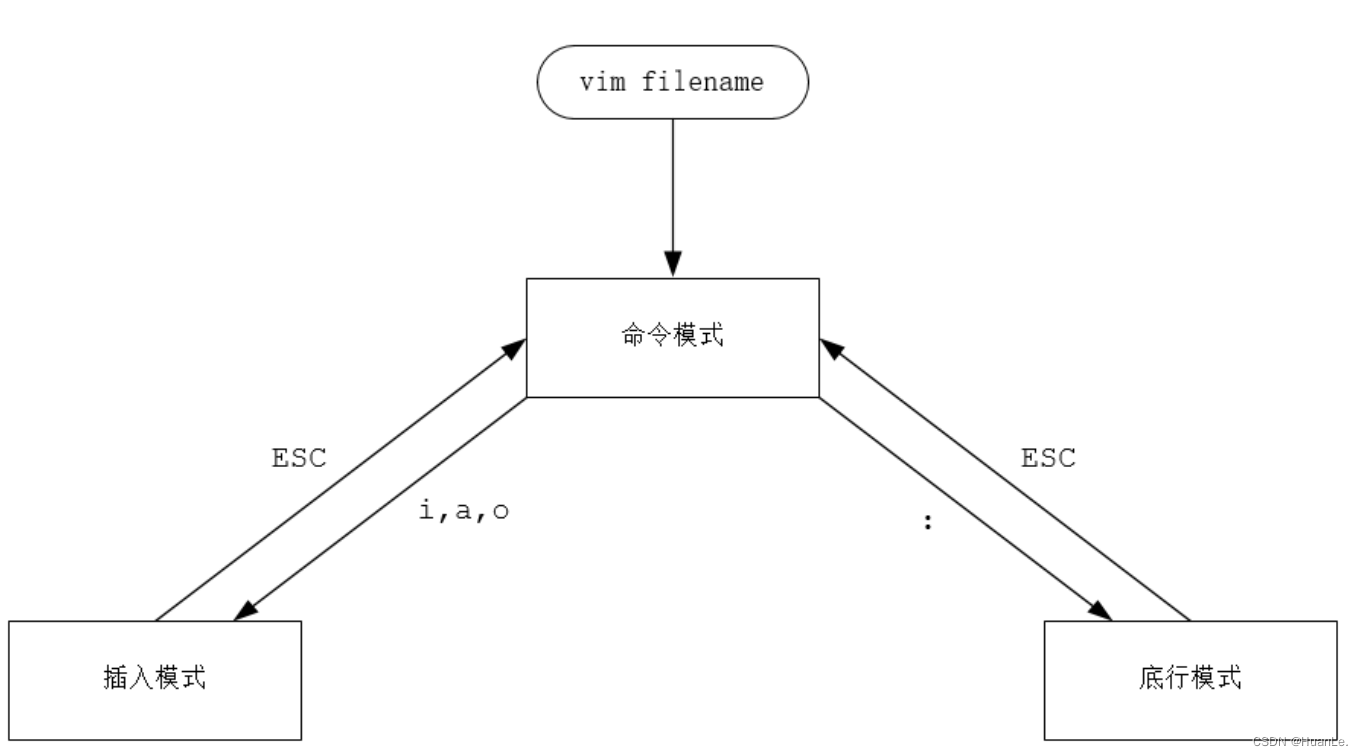
: Edit the content of the file, vim is actually a text editor Syntax: vimfileName Description: 1). When using the vim command to edit a file, if the specified file exists, it will be opened directly. Creates a new file if the specified file does not exist. 2). Vim is divided into three modes for text editing, namely Command mode, Insert mode and Last line mode. These three modes can be switched among each other. When we use vim, we must pay attention to which mode we are currently in.
Three modes:
command mode (default)
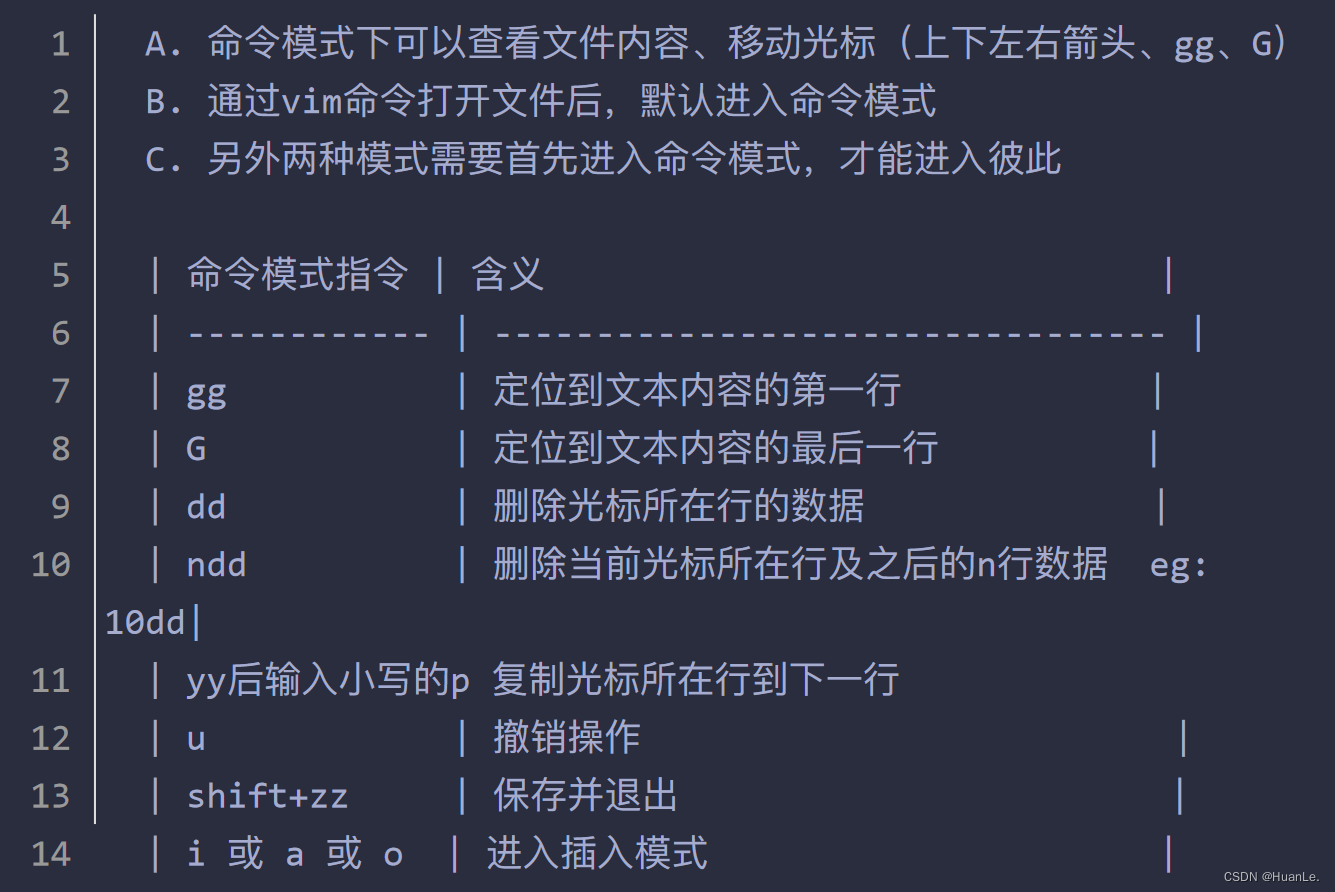
Insert mode A. You can edit the file content in insert mode B. Press any one of [i, a, o] in command mode to enter insert mode. After entering the insert mode, the word [insert] will appear below C. Press the ESC key in the insert mode to return to the
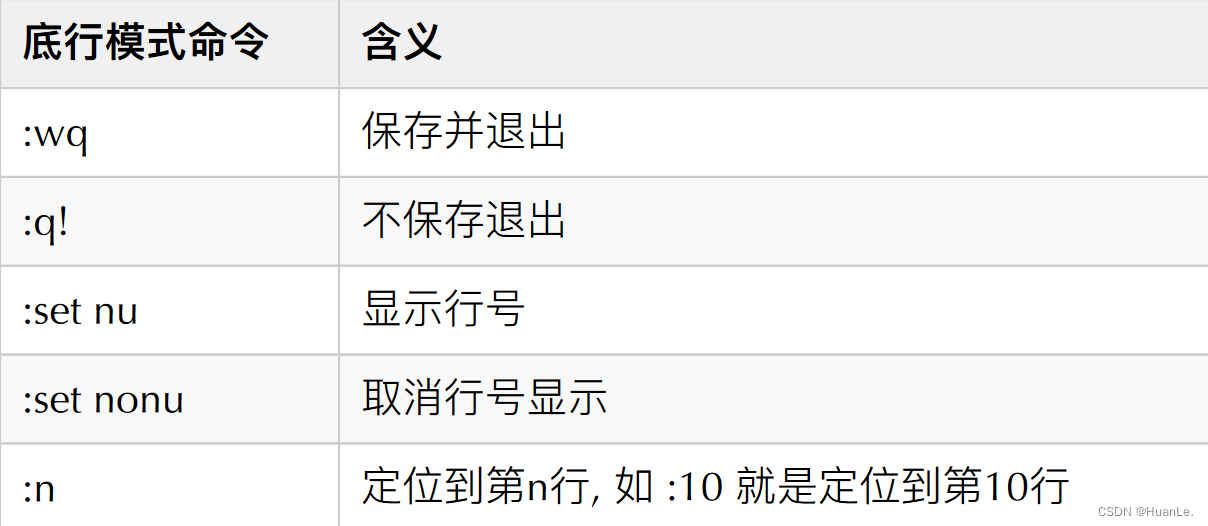
bottom line mode of the command mode A. In the bottom line mode, you can use commands to search for the file content, display the line number, and exit Wait for the operation B. Press any one of [:,/] in the command mode to enter the bottom row mode C. After entering the bottom row mode by /, you can search the file content D. After entering the bottom row mode by: , you can enter wq (save and exit), q! (quit without saving), set nu (display line number)
Operation example:

4.6 Find command
4.6.1 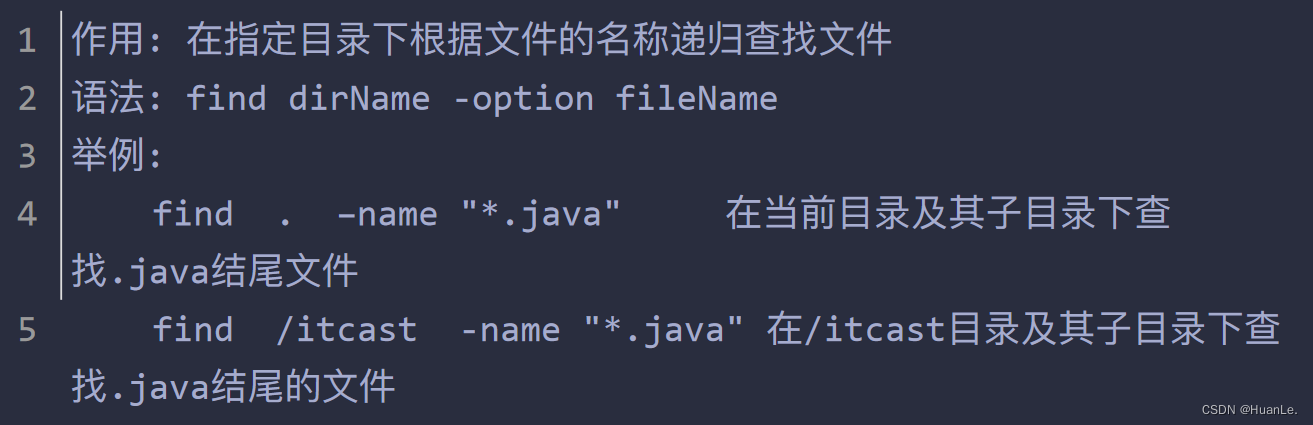
Example of find operation:

4.6.2 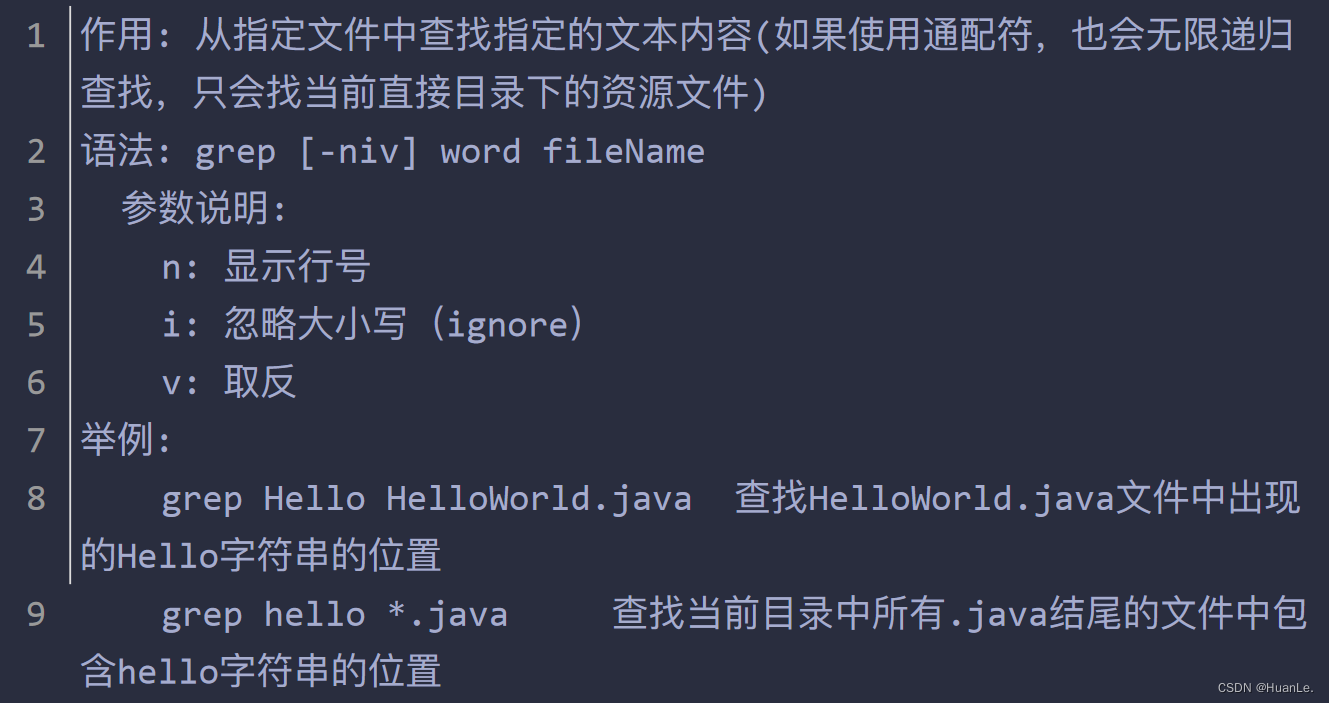
Example of grep operation:
