1. Basic diffuse reflection
First, create a new Shader and create the corresponding shader synchronously. Replace the original material of the model with the new material.
Next, start writing the basic diffuse reflection Shader
Declare the texture and diffuse color attributes, and declare the corresponding variables in CG
Properties
{


	_MainTex ("Texture", 2D) = "white" {

    }
	_Diffuse("Diffuse Color",COLOR) = (1,1,1,1)
}
Introduce two Shader libraries "UnityCG" and "Lighting"
#include "UnityCG.cginc"
#include "Lighting.cginc"
Define the output structure
struct v2f
{


	float4 vertex : SV_POSITION;
	float2 uv : TEXCOORD0;
	fixed3 worldNormal:TEXCOORD1;
	fixed3 worldPos:TEXCOORD2;
};
Calculate the normal coordinates and vertex coordinates in the world space in the vertex shader
v2f vert(appdata_base v)
{


	v2f o;
	o.vertex = UnityObjectToClipPos(v.vertex);
	o.uv = TRANSFORM_TEX(v.texcoord, _MainTex);
	o.worldNormal = UnityObjectToWorldNormal(v.normal);
	o.worldPos = mul(unity_ObjectToWorld, v.vertex);
	return o;
}
Calculate diffuse reflection in the fragment shader
fixed4 frag(v2f i) : SV_Target
{


	// 环境光
	const fixed3 ambient = UNITY_LIGHTMODEL_AMBIENT.xyz;
	// 纹理采样
	const fixed4 albedo = tex2D(_MainTex, i.uv);
	// 漫反射
	const fixed3 worldLightDir = UnityWorldSpaceLightDir(i.worldPos);
	const float difLight = dot(i.worldNormal, worldLightDir) * 0.5 + 0.5;
	const fixed3 diffuse = _LightColor0.rgb * albedo * _Diffuse.rgb * difLight;
	return float4(diffuse + ambient, 1);
}
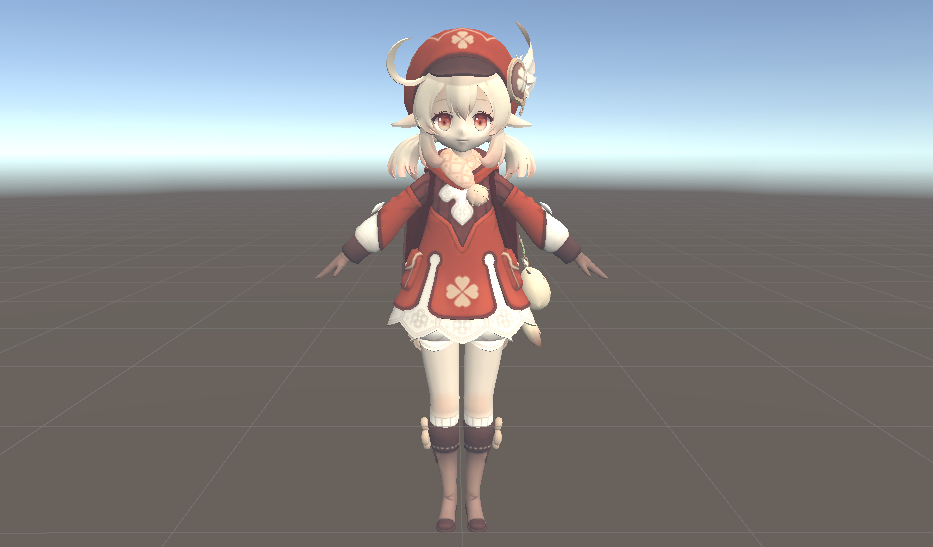
The code is very simple, all of which have been learned before. Let's see the effect directly
2. Stroke effect
To achieve the stroke effect, you can add a new Pass channel. In the new Pass channel, render the model with a solid color. Expands vertices outward along the normal direction. Then perform other rendering in another Pass channel to achieve the stroke effect.
First define the stroke width and color properties
_Outline("Outline",RANGE(0,0.05)) = 0
_OutlineColor("Outline Color",COLOR) = (0,0,0,0)
To create a new Pass channel, the front side needs to be cropped, and only the back side is rendered to prevent the stroke from covering the object. Then in the vertex shader expand the vertices along the normal direction
Pass
{


	Name "Outline"
	Cull Front

	CGPROGRAM
	#pragma vertex vert
	#pragma fragment frag
	#include "UnityCG.cginc"

	float _Outline;
	float4 _OutlineColor;

	struct v2f
	{


		float4 vertex:SV_POSITION;
	};

	v2f vert(appdata_base v)
	{


		v2f o;
		// 顶点坐标沿法线方向扩展
		v.vertex.xyz += v.normal*_Outline;
		o.vertex = UnityObjectToClipPos(v.vertex);
		return o;
	}
	fixed4 frag(v2f i):SV_Target
	{


		return _OutlineColor;
	}
	ENDCG
}
The effect is as follows
The above expansion method is performed in the world space, and we can also perform it in the perspective space
v2f vert(appdata_base v)
{


	v2f o;
	// 将顶点变换到视角空间
	float4 pos = mul(UNITY_MATRIX_V, mul(unity_ObjectToWorld,v.vertex));
	// 将法线变换到视角空间
	float3 normal = normalize(mul((float3x3)UNITY_MATRIX_IT_MV,v.normal));
	pos = pos + float4(normal,0)*_Outline;
	// 将顶点变换到裁剪空间
	o.vertex = mul(UNITY_MATRIX_P,pos);
	return o;
}
or in clip space
v2f vert(appdata_base v)
{


	v2f o;
	// 将顶点变换到裁剪空间
	o.vertex = UnityObjectToClipPos(v.vertex);
	// 将法线变换到视角空间
	float3 normal = normalize(mul((float3x3)UNITY_MATRIX_IT_MV,v.normal));
	// 再转换到裁剪空间
	float2 viewNormal = TransformViewToProjection(normal.xy);
	o.vertex.xy += viewNormal*_Outline;
	return o;
}
The effect is almost the same as expanding in world space and is not shown here.
3. Color processing
We know that the color of the cartoon rendering effect is relatively simple, with a feeling of splicing color blocks. To achieve this effect, it is necessary to discretize the color of the vertices.
First define two properties to set the transition effect between layers and color blocks
_Step("Step",Range(1,30)) = 1
_CartoonEffect("Cartoon Effect",Range(0,1)) = 0.5
The discretization of the colors is then performed before computing the diffuse.
fixed4 frag(v2f i) : SV_Target
{


	// 环境光
	const fixed3 ambient = UNITY_LIGHTMODEL_AMBIENT.xyz;
	// 纹理采样
	const fixed4 albedo = tex2D(_MainTex, i.uv);
	// 漫反射
	const fixed3 worldLightDir = UnityWorldSpaceLightDir(i.worldPos);
	float difLight = dot(i.worldNormal, worldLightDir) * 0.5 + 0.5;

	// 颜色离散化
	difLight=smoothstep(0,1,difLight);
	const float cartoonColor = floor(difLight*_Step)/_Step;
	difLight = lerp(difLight,cartoonColor,_CartoonEffect);

	const fixed3 diffuse = _LightColor0.rgb * albedo * _Diffuse.rgb * difLight;
	return float4(diffuse + ambient, 1);
}
The effect is as follows
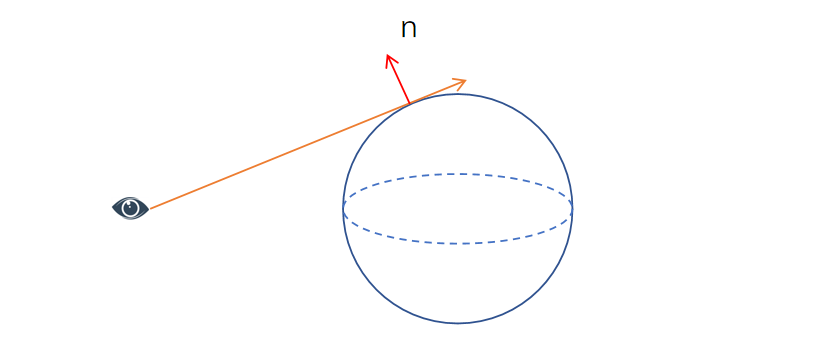
4. Rim light
To achieve the effect of glowing at the edge of an object, it is necessary to determine which part belongs to the edge. In fact, it is also very simple. When the viewing angle is parallel to the tangent, that is, perpendicular to the normal, it means that the vertex is at the edge of the current viewing angle. That is to say, as long as the dot product is performed between the viewing angle direction and the normal direction, the closer the result is to 0, the closer the vertex is to the edge.
First define two properties to control the color and intensity of the edge light
_RimColor("Rim Color",COLOR) = (0,0,0,0)
_RimPower("Rim Power",Range(0,1)) = 0
Then add the calculation result of edge light to the result returned by the fragment shader
fixed4 frag(v2f i) : SV_Target
{


	// ...
	// 边缘光
	const fixed3 viewDir = normalize(UnityWorldSpaceViewDir(i.worldPos));
	const float rim = 1-dot(i.worldNormal,viewDir);
	const fixed3 rimColor = _RimColor*pow(rim,1/_RimPower);
	return float4(diffuse + ambient+rimColor, 1);
}
The effect is as follows
