Preparation
1. The docker suite in Synology Nas has been installed
2. The mysql image has been downloaded (the required version can be selected according to personal projects and hobbies)

3. Create mysql data and error log folders
data folder address: /docker/mysql/data
Log folder address: /docker/mysql/log
Description: The docker folder is automatically created when the docker suite is installed
Configuration instructions
The screenshot below is a screenshot of non-container installation after clicking the edit button after stopping the container. The installation of the container is composed of N multiple next steps. Please convert according to the editing page, which is relatively easy to understand, and the installation page will not be intercepted separately.
1. Container name
The name of the container started by docker can be set by yourself, easy to remember and easy to understand
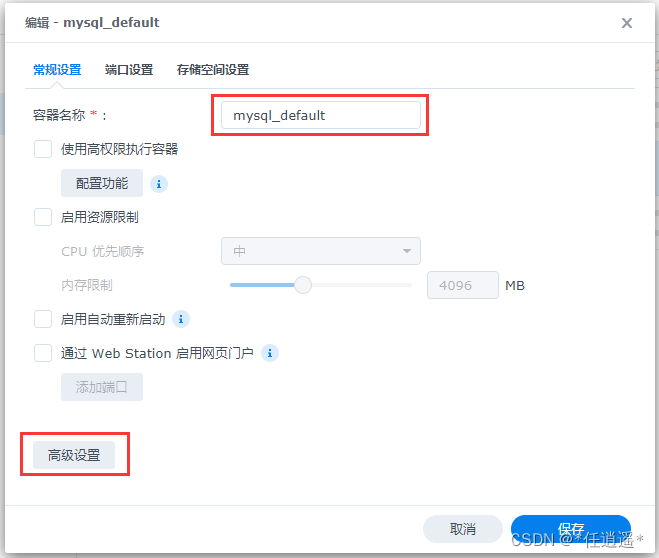
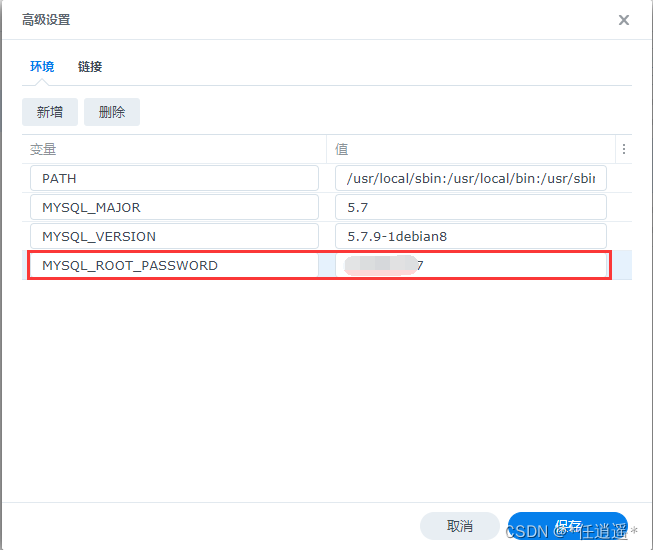
2. Environment variable setting (root password setting)
Click the advanced configuration button in the previous screenshot to open it, mainly to add a root password. After the mysql installation is complete, you can access the mysql database through the root account + the password configured on this page.
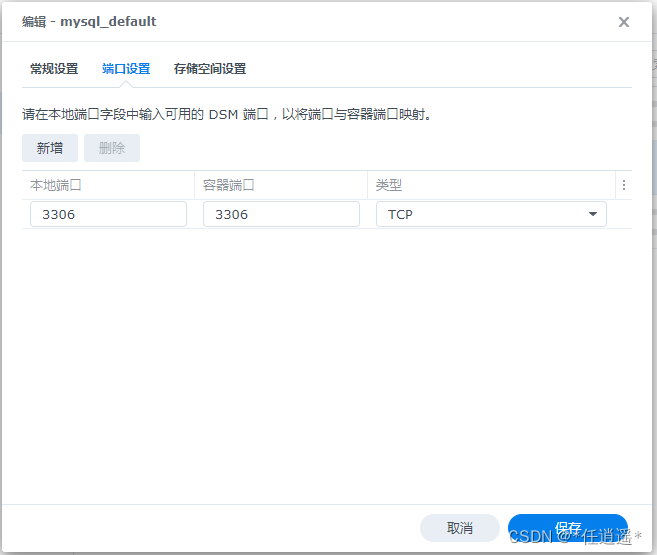
3. Port settings
If the local port and the container port are mapped, the local port is also set to 3306. If the Nas server LAN IP is 192.168.10.2, the database can be accessed through 192.168.10.2:3306
It is recommended that the local port and the container port be set to be the same. If there is a public network IP, in the router forwarding settings, the external port can be set to a port other than 3306 to increase the difficulty of theft. If you do not need to directly expose the database to the public network, do not Just configure routing forwarding.
4. Storage space setting
The data of the database is stored inside the pod and mapped to the Nas server. If no mapping is performed, the data will also be deleted when the pod is deleted; if the mapping is performed, the data will be stored separately on the Nas disk, and the deletion of the pod will not affect the data; after the pod is rebuilt according to the following configuration, the data in the database will remain Can continue to use.
Because pods in Nas are created manually, if you ensure that you will not delete pods manually, you can skip this mapping and let the data be stored in pods. You can set it yourself according to your personal habits.
File/folder: the path created by yourself on the Nas disk
Loading path: the storage path configured by default in the mysql image, you can enter the pod, check /etc/mysql/mysql.conf

data verification
1. Start the pod
2. Link to the database (tools and commands are both available)
3. Create database and data table
4. Check whether there are files written in the /docker/mysql/data folder
5. /docker/mysql/log maps the error log of mysql, and no file is normal