Cygwin is a unix simulation environment on the windows platform, mainly through recompilation, porting the software on the posix system to windows. I believe that many friends want to install cygwin, but they don’t know how to install it, because they are all in English, which is a painful thing for people who are not familiar with English. The following editor will share with you the installation steps of cygwin.
First download the installer cygwin . After the download is complete, run the setup.exe program (32-bit and 64-bit respectively), and the installation screen will appear. Just click "Next", and the installation mode dialog box will appear, as shown in the figure below:
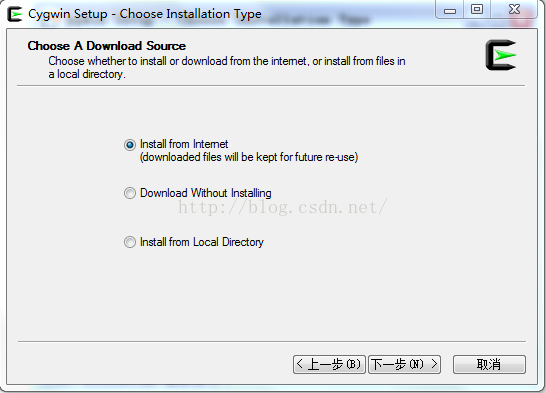
We see that there are three installation modes:
Install from Internet, this mode is installed directly from the Internet, which is suitable for the case of fast network speed;
Download Without Installing, this mode only downloads the Cygwin component package from the Internet, but does not install it;
Install from Local Directory, this mode corresponds to the second mode above, when your Cygwin component package has been downloaded locally, you can use this mode to install Cygwin locally.
Choose the installation mode that suits you from the above three modes. Here we choose the first installation mode and install directly from the Internet. Of course, while downloading, the Cygwin component is also saved locally so that it can be installed again later. Once selected, click "Next"

This step selects the installation directory of Cygwin and the settings of some parameters. Here I choose to install to E:\ProgramFiles\cygwin64, and then select "Next",

In this step, we can choose the storage location of the Cygwin component package downloaded from the Internet during the installation process. After the selection, click "Next"

In this step, select the connection method, select your connection method, and then click Next, and a dialog box for selecting the download site will appear, as shown in the figure below
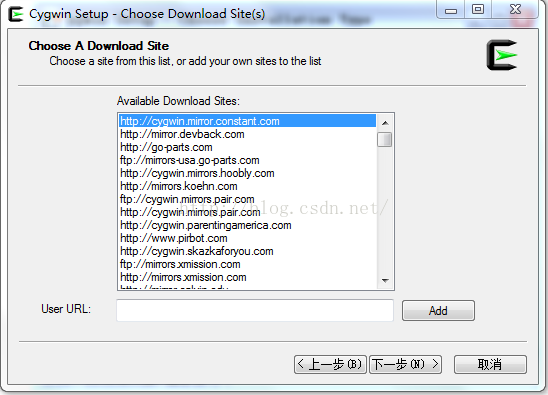
In this step, directly select the first item and click "Next"
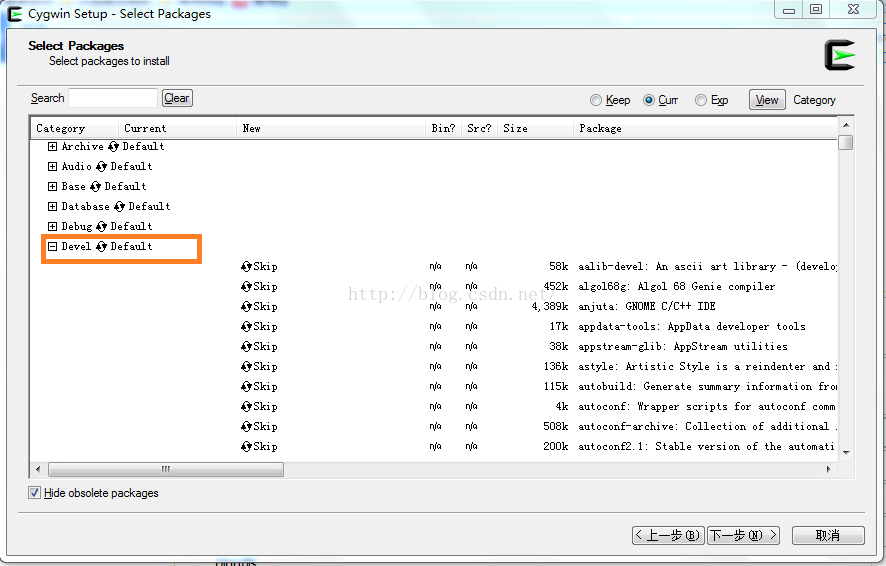
In this step, we select the component package that needs to be downloaded and installed. In order to enable the Cygwin we installed to compile the program, we need to install the gcc compiler. By default, gcc will not be installed, and we need to select it to install. In order to install gcc, we use the mouse to click on the "Devel" branch in the component list. Under this branch, there are many components. What we need is:
binutils
gcc
gcc-mingw
gdb
Click the cycle button in front of the component with the mouse, and the version date of the build will appear. We choose the latest version to install. The following figure is a screenshot of the four types of components after selection:

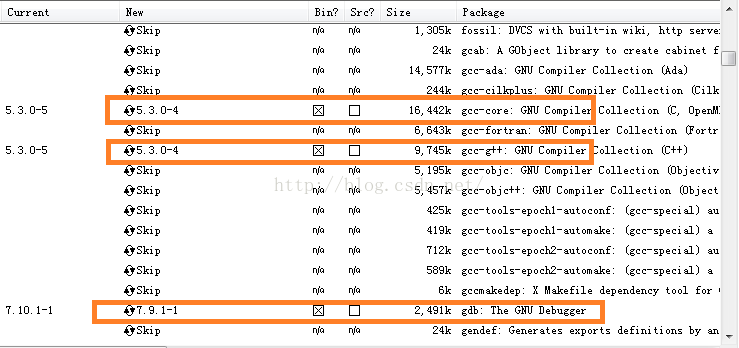

After the selection, we choose the next step to enter the installation process
The installation time depends on the components you choose and the network conditions. After the installation is complete, the installer will prompt whether to create a Cygwin icon on the desktop, etc., click Finish to exit the installer.