In the first article, we talked about the Vue3 framework
搭建and Vue3常用语法. This article will useAxiosand toElement Pluscomplete封装组件the table construction.
The knowledge you need to master in this issue is as follows:
- directory path alias
@ - Introduce and encapsulate
Axiosthe request - configuration
.envfile apiGet data through the interface
The knowledge you need to master in the next issue is as follows:
封装sum of components引入- Child components
emitchange the value of the parent component by - The parent component
defineExposechanges the value of the child component by
Because local projects do not require backend intervention, all apiwill request the project root directory JSONfile
1. @Alternative /srcpath aliases
vite.config.js
import {

     defineConfig } from 'vite'
import {

     resolve } from "path" // 引入 resolve 方法
import vue from '@vitejs/plugin-vue'

// https://vitejs.dev/config/
export default defineConfig({


  plugins: [vue()],
  // 添加 resolve 对象
  resolve: {


    alias: {


      // 在此设置路径别名
      "@": resolve(__dirname, "./src")
    }
  },
  server:{


		host:'0.0.0.0'
	}
})
2. axiosUse && .envconfiguration file
Install command:npm install axios vue-axios
main.jsIntroduced in after installationaxios
import axios from 'axios'
import VueAxios from 'vue-axios'

createApp(App)use(ElementPlus, {

     locale: zhCn }).use(VueAxios, axios).mount('#app')
configuration .envfile
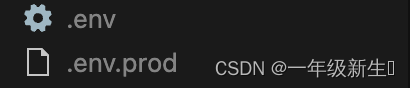
.envWe create a new and .env.prodfile in the project root directory
corresponding to 本地环境and 生产环境
// 这里是环境配置
VITE_NODE_ENV = "dev"
// 这里是设置的请求的基础路径 也就是 baseURL
VITE_NODE_BESE_API = '/'
VITE_NODE_ENV = "prod"
VITE_NODE_BESE_API = 'https://blog.csdn.net/Web_chicken'
The Vue3 project used Vite构建must VITE_NODEstart with , otherwise it will not take effect, or refer to other articles to expose environment variables starting with other characters
Packaging command configuration
//package.json
"scripts": {


    // 不设置mode的话 默认就是使用 .env 文件配置
    "dev": "vite --host",
    "build": "vite build",
    // 如需使用其他配置文件 在后边加上 --mode xxx 即可
    "build:prod": "vite build --mode prod",
    "preview": "vite preview"
  },
The page uses the env environment variable
const env = import.meta.env
secondary packagingaxios
srcCreate a new folder under the directory , utilsand create a new folder under this folder request.jsto encapsulate axiosthe request

import axios from 'axios'; // 引入axios
import {

     showNprogress, hideNprogress } from '@/mixin' // 封装的 NProgress顶部进度条方法,可忽略
const baseURL = import.meta.env.VITE_NODE_BESE_API // 根据 env 配置文件获取 baseURL , 如果暂时不了解的话可以先设置
const baseURL = '/'

// 创建 axios 请求
const service = axios.create({


  baseURL
})

// 请求拦截器
service.interceptors.request.use(
  config => {


    showNprogress() // 进度条开始
    return config // return config
  },
  err => {


    hideNprogress() // 进度条关闭
    return Promise.reject(err)  // 进入 err return err
  }
)

// 相应拦截器
service.interceptors.response.use(
  res => {


    showNprogress()
    // res.status === 200 说明请求成功 反之失败
    if (res.status === 200) {


      hideNprogress()
      return res.data
    } else {


      hideNprogress()
      return Promise.reject(res.data)
    }
  },
  err => {


    console.log(err)
    hideNprogress()
    return Promise.reject(err)
  }
);
// 导出 service
export default service;
Create table.jsonan interface to get data
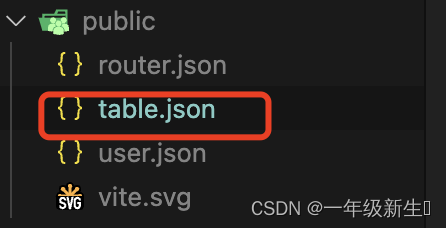
The public directory is the root directory of the project, /table.jsonwhich can be accessed by
{


  "data": [
    {


      "id": 1,
      "date": "2016-05-03",
      "name": "admin",
      "address": "No. 189, Grove St, Los Angeles"
    },
    {


      "id": 2,
      "date": "2016-05-02",
      "name": "Tom",
      "address": "No. 189, Grove St, Los Angeles"
    },
    {


      "id": 3,
      "date": "2016-05-04",
      "name": "Tom",
      "address": "No. 189, Grove St, Los Angeles"
    },
    {


      "id": 4,
      "date": "2016-05-01",
      "name": "Tom",
      "address": "No. 189, Grove St, Los Angeles"
    }
  ]
}
apiPackaging and use
srcCreate a new folder under the directory , apiand create a new folder under this folder index.jsto encapsulate apithe request
// 引入 axios
import request from '@/utils/request'
// 封装获取列表数据的方法并导出
export const getTableList = () => {


  return request({


  	// 请求地址
    url: 'table.json',
    // 请求方式
    method: 'GET'
  })
}
apiGet data using method
<el-table :data="tableData" style="width: 100%" border stripe>
  <el-table-column v-for="{id,prop,label} in tableColumn" :prop="prop" :key="id" :label="label" :width="label=='序号' ? 100 :''" align="center" />
  <el-table-column fixed="right" label="操作" align="center" width="240">
    <template #default="scope">
      <el-button link type="primary" size="small" @click="handlEmodify(scope.row)">编辑</el-button>
      <el-button link type="primary" size="small" @click="handleDel(scope.row)">删除</el-button>
      <el-button link type="primary" size="small" @click="handlDetail(scope.row)">查看</el-button>
      <el-button v-if="scope.row.name==='admin'" link type="primary" size="small" @click="handleAdmin(scope.row)">管理系统</el-button>
    </template>
  </el-table-column>
</el-table>
// 别忘了在script标签加上 setup
import {

     ref, onMounted } from 'vue' // 导入 ref 生命周期函数
import {

     ElMessage } from 'element-plus' // 导入 Element Plus 消息提示
import {

     getTableList } from '@/api/home.js' // 导入接口 api

/**
 * @type data
 * @description 所有数据都在此体现
 * **/

const tableData = ref([]) // 在此定义 tableData ,并使用 ref 使其具备响应式

// 用来循环列表字段的,如字段固定可不结构为响应式
const tableColumn = ref([
  {

     id: 1, prop: 'id', label: '序号' },
  {

     id: 2, prop: 'date', label: '时间' },
  {

     id: 3, prop: 'name', label: '姓名' },
  {

     id: 4, prop: 'address', label: '地址' }
])

/**
 * @type 生命周期
 * @description 所有生命周期函数都在此体现
 * **/

onMounted(() => {


  // 在生命周期函数中调用初始化表格方法
  initTable()
})


/**
* @type methods
* @description 所有方法、事件都在此层中体现
* **/

// 初始化表格
const initTable = async () => {


  // 调用 api 方法,获取数据 并赋值给 tableData
  let res = await getTableList()
  ElMessage.success('获取成功')
  // 注意 使用 ref结构的数据 在 js中必须使用.value来设置或获取它的值
  if (res.data) return tableData.value = res.data
}