1. Download and install vue
Official website download address: Download | Node.js
Windows download:

Double-click the installation package: go all the way down and go directly to next, if you encounter the following situation, don’t check it, and finally finish directly

Open the command line, enter
node -vnpm -v
As above, the nodejs installation is successful
Directory after installation:

Create two new folders in this directory: node_cache and node_global

Open the command line as an administrator and enter:
npm config set prefix "Your installation directory\node_global"
npm config set cache "Your installation directory\node_cache"
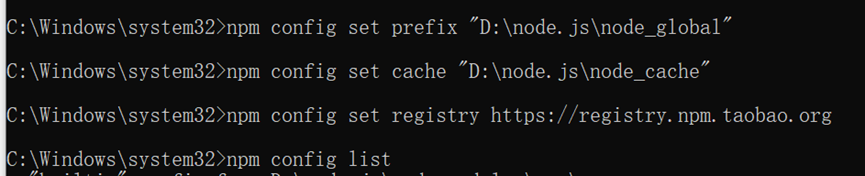
In order to download the package quickly in the future, modify the source to Taobao mirror. (It has been modified here, so we don’t need to install cnpm, because cnpm is the Node.js Taobao mirror accelerator, so if it’s configured here, it doesn’t need to be installed)
npm config set registry https://registry.npm.taobao.orgCheck whether the npm configuration modification is successful
npm config list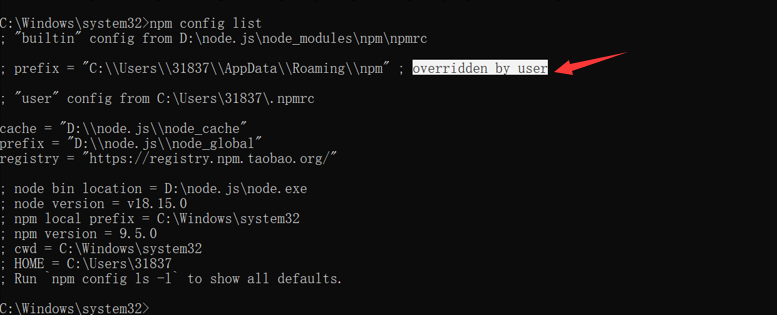
There must be the letter pointed by the red arrow: overridden by user, otherwise the modification will fail and the follow-up process will not proceed smoothly
At the same time, we will find an additional file: .npmrc file under C:\Users\username\

2. Configure environment variables
Right-click on My Computer, select Properties, and select Advanced System Settings

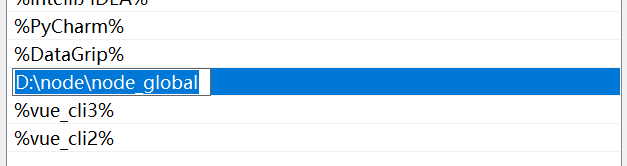
1. Environment Variables --- User Variables --- Select Path --- Edit

Modify the node_global path you created for yourself, and click OK
2. Click New under System Variables to create a new environment variable, and the variable value is the newly created node_cache

Click the path in the system variable, click on the right to create a new name as %NODE_PATH%, and then confirm all the way

3. Install vue
1. Install vue.js
Be sure to install under administrator privileges, otherwise an error will be reported
npm install vue -g
2. Install the webpack template
npm install [email protected] -gYou must remember @version number here, otherwise an error will be reported later, what version to choose depends on your needs
In addition, above webpack 4x, webpack puts all command-related content into webpack-cli, so webpack-cli needs to be installed
npm install [email protected] -gYou must remember @version number here, otherwise an error will be reported later, what version to choose depends on your needs
Enter webpack -v, if it is displayed as follows, it means the installation is complete

若显示如下,则是没有安装webpack的时候没有@版本号

四、安装vue2和vue3脚手架
1.在D盘新建vue2,vue3两个文件夹(此处可根据需求自选磁盘位置)

2.安装vue3脚手架
进入vue3,直接在图示位置输入cmd

在命令行中输入
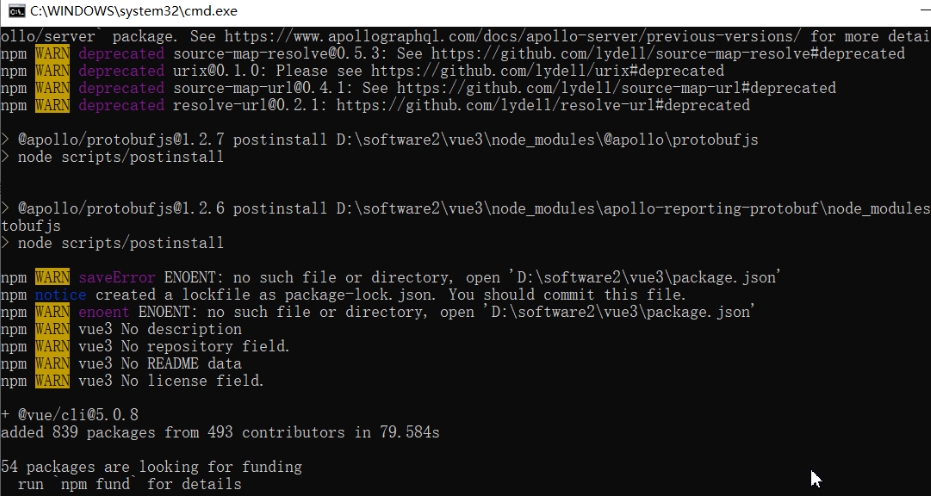
npm install @vue/cli若显示如下,则说明安装成功
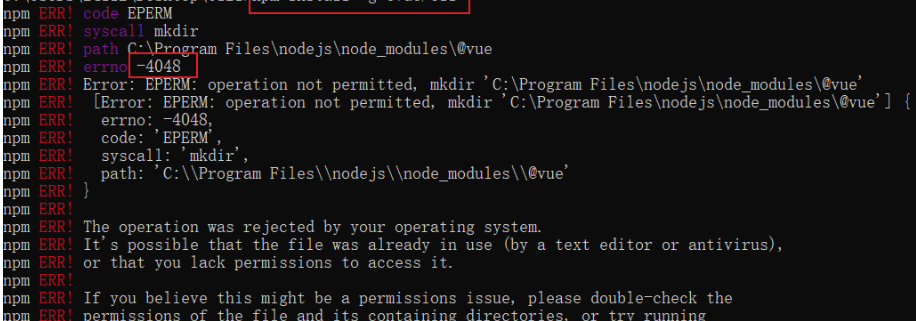
若出现如下报错,那么极有可能时安装webpack的时候没有@版本号,在这里出错一般不会是没有使用管理员权限造成的
安装后进入node_modules下的.bin目录,进入后将原来的vue和vue.cmd重命名,如下所示

配置脚手架环境变量:
新建系统环境变量

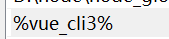
点击用户变量中的path,点击新建,添加环境变量%vue_cli3%

点击系统变量中的path,点击新建,添加环境变量%vue_cli3%
然后一路确定即可
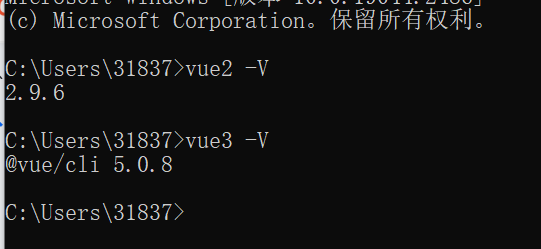
打开命令行,输入vue3 -V,可以看到vue3脚手架安装成功
3.安装vue2脚手架
具体步骤跟安装vue3的脚手架类似,但是安装脚手架的命令不一样,vue2的命令如下
npm install vue-cli其余的只要把3改成2即可
都安装成功后如下,如果没有出现下图,可以重启电脑试一下
4.安装vue-router
npm install vue-router -g四、创建vue2和vue3项目
1.创建vue3项目:
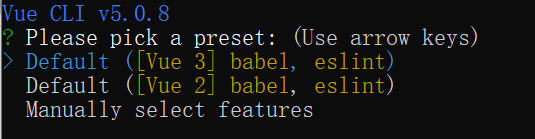
vue3 create myvue3选择vue3
创建完成:

进入如下网址:
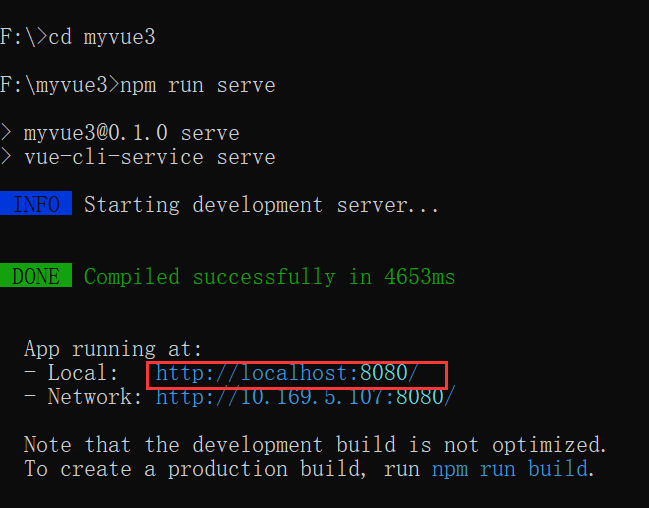
运行成功:

2.创建vue2项目:
vue2 init webpack myvue2
前面四个选项只需要一路回车就好,然后vue-router选择yes,其他的选no,最后一个直接回车
输入:
cd myvue2
npm run dev
进入网址:http://localhost:8080,如下则项目创建成功