foreword
Using arcpy to make arcgis scripting tools, the records are as follows.
First, the production of script tools
Making a script tool is a two-step process:
1. Write the python steps of the corresponding function first
. 2. Modify the script of the corresponding function to a script that can manually select input and output data.
3. Add the modified script to the toolbox
1. Write code
My example is used to extract the contour of a specific elevation, the source code is as follows:
# -*- coding: UTF-8 -*-
"""
@Date   :2023/6/25
"""
import time

"""
1、先写一段脚本
2、对脚本进行改写
"""
import os
import arcpy

print '程序开始:' + str(time.ctime())
# 设置工作空间
arcpy.env.workspace = r'E:\arcpy_study\Arcpy实例教程(数据)_小景空间_原始\6Arcpy脚本工具的制作-提取特殊等高线'

# 输入要素
inFeatures = 'coutour.shp'

# 添加一个字段,用来标记高程是否可以整除10
filedName = "Mark"  # 字段名称
filedPrecision = 2  # 字段长度
filedAlias = "整除50标记"  # 字段别名  能整除50标记为1,不能整除50标记为0

# 列出所有字段
filedObject = arcpy.ListFields(inFeatures)
# 得到所有字段名,如果mark字段存在的话,就删除该字段
filedNameList = []
for filed in filedObject:
    # filed.required:字段为必填项时为ture
    if not filed.required:
        filedNameList.append(filed.name)
print filedNameList
if filedName in filedNameList:
    arcpy.DeleteField_management(inFeatures, filedName)
    print '删除已有的mark字段'

# 添加字段
arcpy.AddField_management(inFeatures, filedName, "LONG", filedPrecision, "", "", filedAlias, "NULLABLE")

filed1 = "Elev"
filed2 = "Mark"

# 更新查询(为每一条记录做标记)
cursor = arcpy.UpdateCursor(inFeatures)
for row in cursor:
    if((int)(row.getValue(filed1))%50 == 0):
        row.setValue(filed2, 1)
    else:
        row.setValue(filed2, 0)
    cursor.updateRow(row)
print '程序结束:' + str(time.ctime())
On the basis of the original field, add a Markfield to identify whether the contour line is divisible by 50. If it is divisible by 50, it will be marked as 1, otherwise it will be 0.
In this example, there is an input feature, identifying the feature name to operate on.
2. Modify the script
In the source code, I hard-coded the name of the element to be modified, but the actual situation is definitely not good, so I want to modify it so that I can manually select the element, and the workspace is no longer needed. The modified code is as follows:
# -*- coding: UTF-8 -*-
"""
@Date   :2023/6/26
"""
import time
import os
import arcpy

print '程序开始:' + str(time.ctime())
# 设置工作空间
# arcpy.env.workspace = r'E:\arcpy_study\Arcpy实例教程(数据)_小景空间_原始\6Arcpy脚本工具的制作-提取特殊等高线'

# 输入要素
# inFeatures = 'coutour.shp'
# 自己选择输入要素
inFeatures = arcpy.GetParameterAsText(0)  # 获取第一个输入要素的文本

# 添加一个字段,用来标记高程是否可以整除10
filedName = "Mark"  # 字段名称
filedPrecision = 2  # 字段长度
filedAlias = "整除50标记"  # 字段别名  能整除50标记为1,不能整除50标记为0

# 列出所有字段
filedObject = arcpy.ListFields(inFeatures)
# 得到所有字段名,如果mark字段存在的话,就删除该字段
filedNameList = []
for filed in filedObject:
    # filed.required:字段为必填项时为ture
    if not filed.required:
        filedNameList.append(filed.name)
print filedNameList
if filedName in filedNameList:
    arcpy.DeleteField_management(inFeatures, filedName)
    print '删除已有的mark字段'

# 添加字段
arcpy.AddField_management(inFeatures, filedName, "LONG", filedPrecision, "", "", filedAlias, "NULLABLE")

filed1 = "Elev"
filed2 = "Mark"

# 更新查询(为每一条记录做标记)
cursor = arcpy.UpdateCursor(inFeatures)
for row in cursor:
    if ((int)(row.getValue(filed1)) % 50 == 0):
        row.setValue(filed2, 1)
    else:
        row.setValue(filed2, 0)
    cursor.updateRow(row)
print '程序结束:' + str(time.ctime())
Because we only have one input parameter, so get the name of the first input parameter, just remove the subscript as 0.
3. Add the script to the toolbox
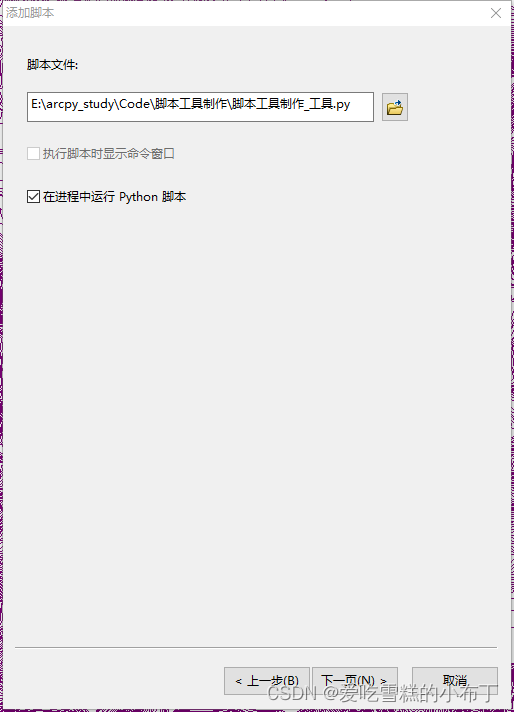
Create a new toolbox in the folder directory, then create a new script, fill in the script name, label, and description, leave the style sheet blank, check the store relative path name, check always run in the foreground, and click Next, as shown in the figure :

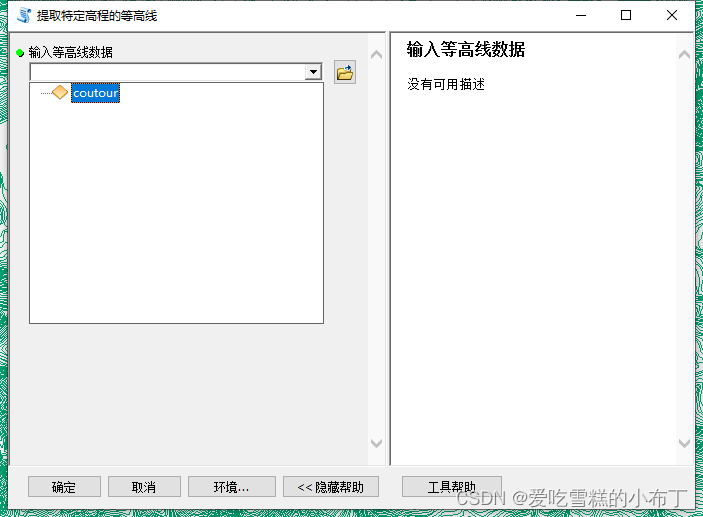
Select the written script tool and click the next page, as shown in the figure:
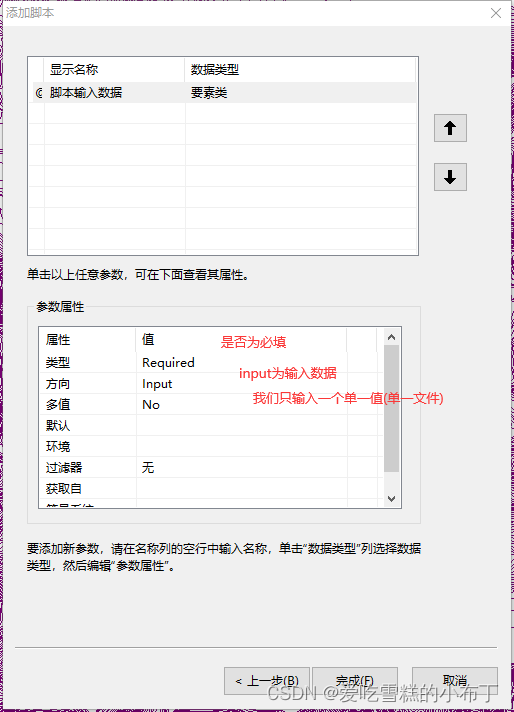
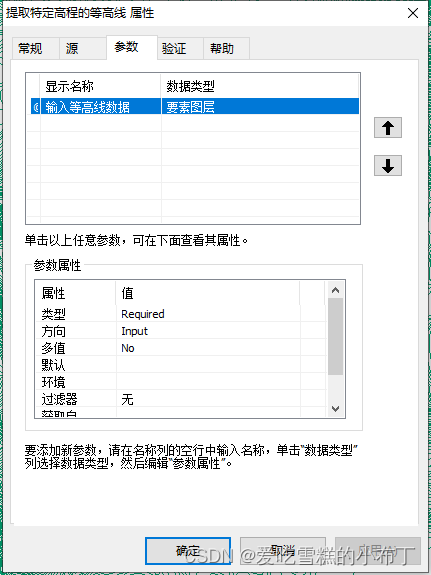
We need to set the input data and output data here, because we have an input element, so we need to set an input data. Fill in the display name and select the data type of the input data. My data type here is a feature class, and the parameter attributes can be ignored. Just be the same as mine, and click Finish. As shown in the picture:
4. Matters needing attention
If the error SyntaxError: EOL while scanning string literal is reported when running, it is caused by the code containing Chinese characters. The solution is according to the big blog:
https://zhuanlan.zhihu.com/p/371214194?utm_id=0
https://www.cnblogs.com/wodewei/p/14476061.html
Either way works.
2. Script Tool Message Prompt
There are three main types of script tool message prompts.
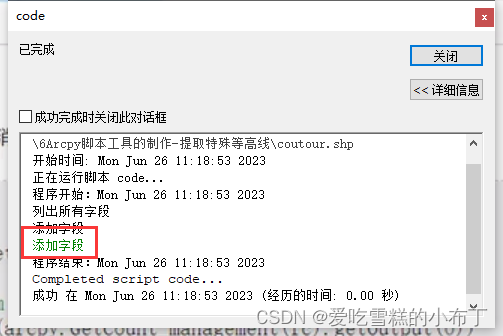
1. arcpy.AddMessage(str) general message
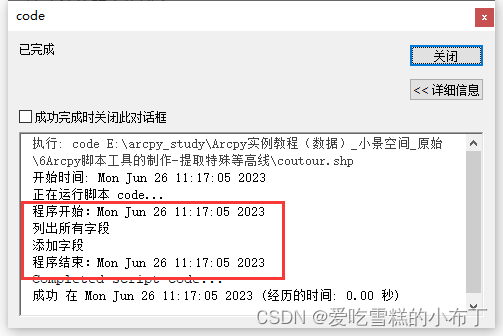
The running effect is as follows:
2. arcpy.AddWarning(str) warning message
The running effect is as follows:
3. arcpy.AddError(str) error message
The running effect is as follows:
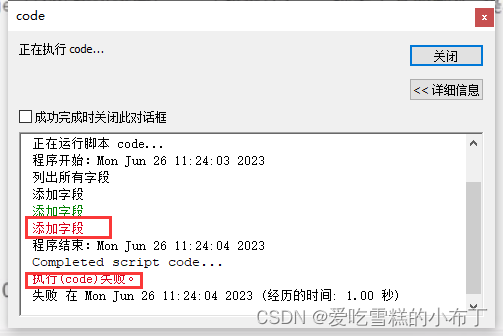
It should be noted here that as long as arcpy.AddError(str) is run in the program, a prompt of script execution failure will be automatically added at the end, no matter whether your code is right or wrong.
3. The arcpy tool automatically obtains data
When we use the segmentation tool of the system, click the inverted triangle in the input feature column, and all feature classes in the current layer will be automatically loaded, which is convenient for us to choose, as shown in the figure:
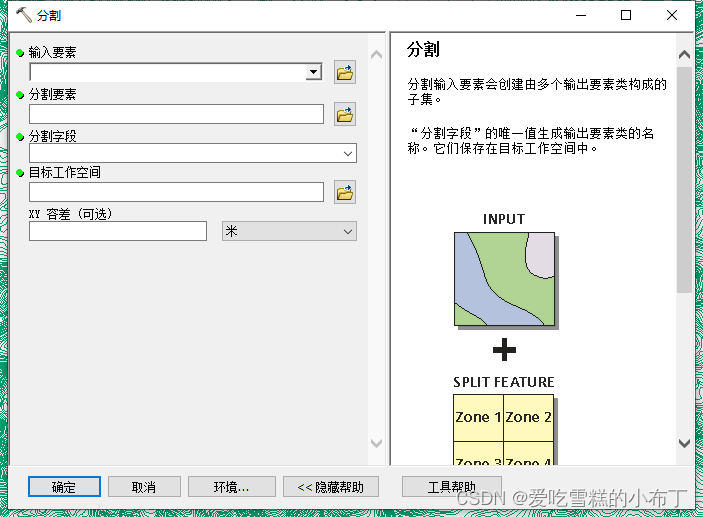

What we are going to do now is this effect.
1. Automatically acquire layers
This step is very simple, we only need to change the feature class to feature layer when setting the input parameters :
In this way, the feature class on the layer can be obtained automatically. If the input is raster data, you need to select the raster layer, etc... I won't list them one by one.
Even if the script tool has been added, don’t worry, just right-click the script tool, click Properties -> Parameters, and modify it.
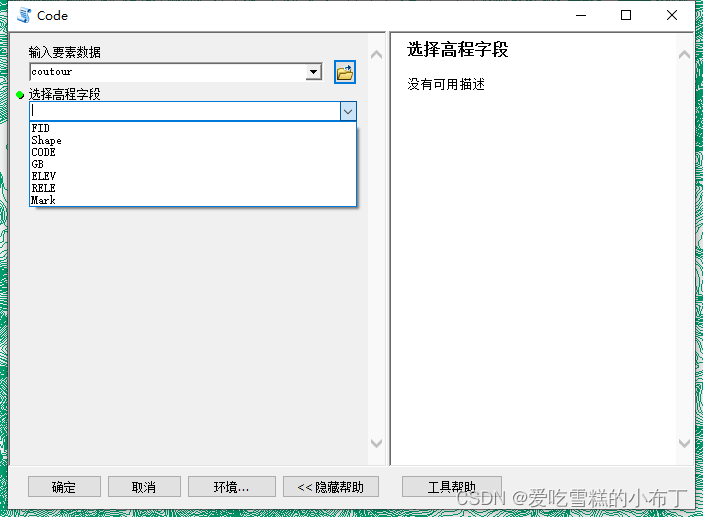
2. Automatically obtain the fields in the layer
This is also relatively simple. We create a new input data, select the data type as 字段, and 获取自here we select the first input data. In this way, when we select the first input data, the second data frame will display the first A field for entering data for us to choose:
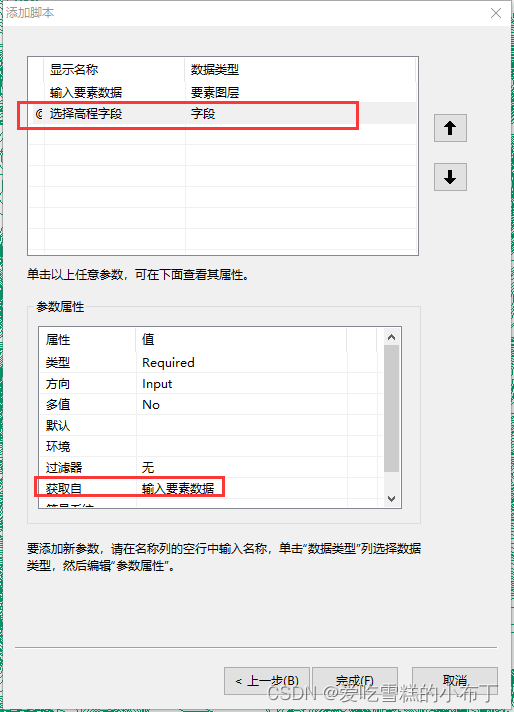
The effect is as follows: