First, what is webpack?
WebPack can be regarded as a module packer: what it does is to deal with the intricate dependencies of the front end (A requires plug-in B, plug-in B requires plug-in C, and plug-in C requires plug-in D) to analyze your Project structure, find JavaScript modules and other extended languages (Scss, TypeScript, etc.) that browsers cannot run directly, and package them into a suitable format for browsers to use.
The concept of webpack is that everything is modularized. Put a bunch of css files and js files in a general entry file, import them through require, and webpack will handle the rest, including the front and rear dependencies of all modules, packaging, compression, Combined into one js file, the common code is extracted into one js file, and some self-specified js are packaged separately, and the modules can be css/js/imsge/font and so on.
Second, what jobs can webpack handle?
- webpack can generate HTML according to the template, and automatically handle the above css/js reference path
- webpack can automatically process the image path inside, the path of the background image in css, the font reference
- webpack can open the local server, rewrite the code, and automatically update the content of the page
Three, install
- First come to our project directory to initialize the project
npm init -y //项目初始化
- In our project, we first need to install a webpack packaging tool, execute the following command
npm i webpack webpack-cli -D //开发环境下
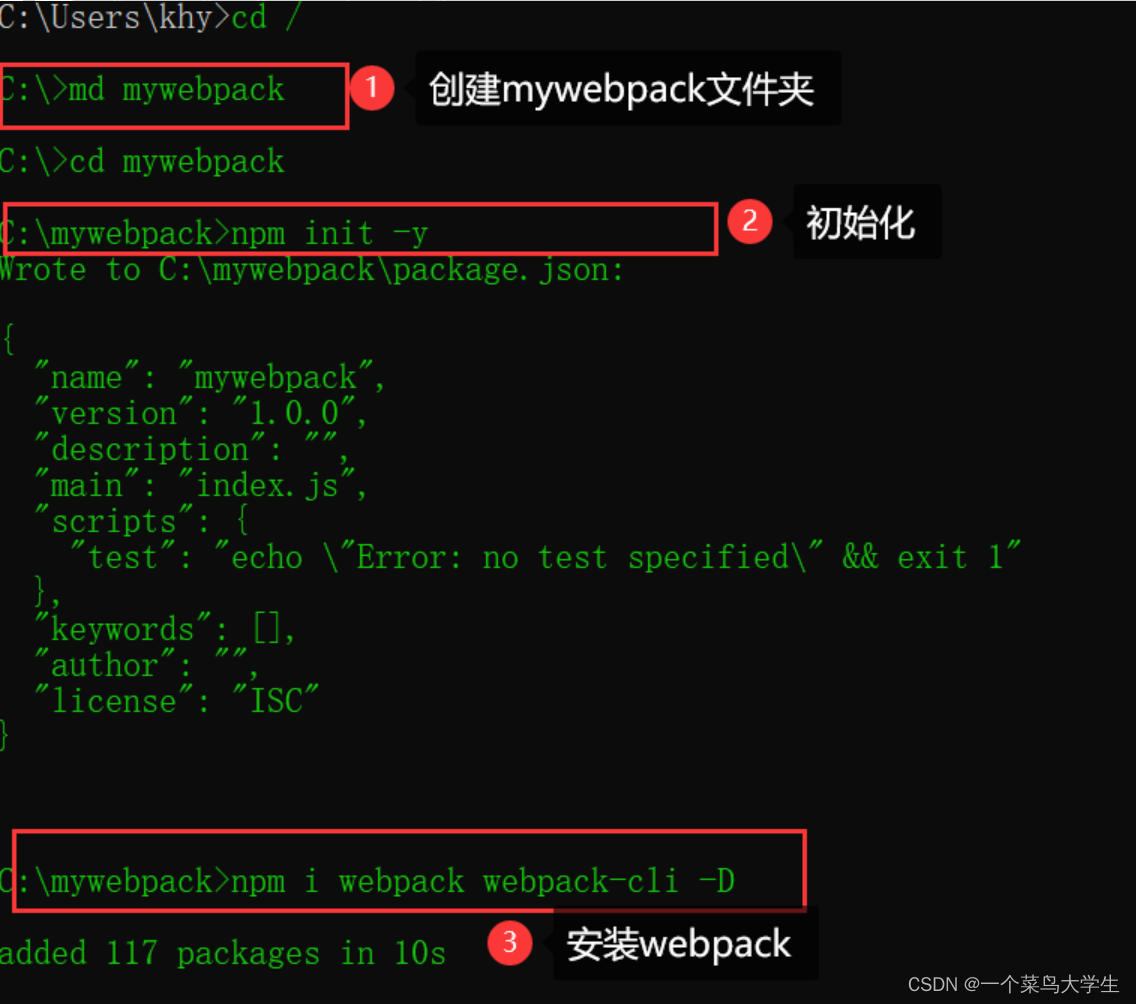
- After installing the packaging tool, don't forget to install our dependencies
npm i //安装node_moudles
4. Come to our project directory, there is only one node_modules at this time, and three folders need to be created at this time, dist-packaged directory, public-public template, src-source file directory, (it does not have to be called this three names, just get used to)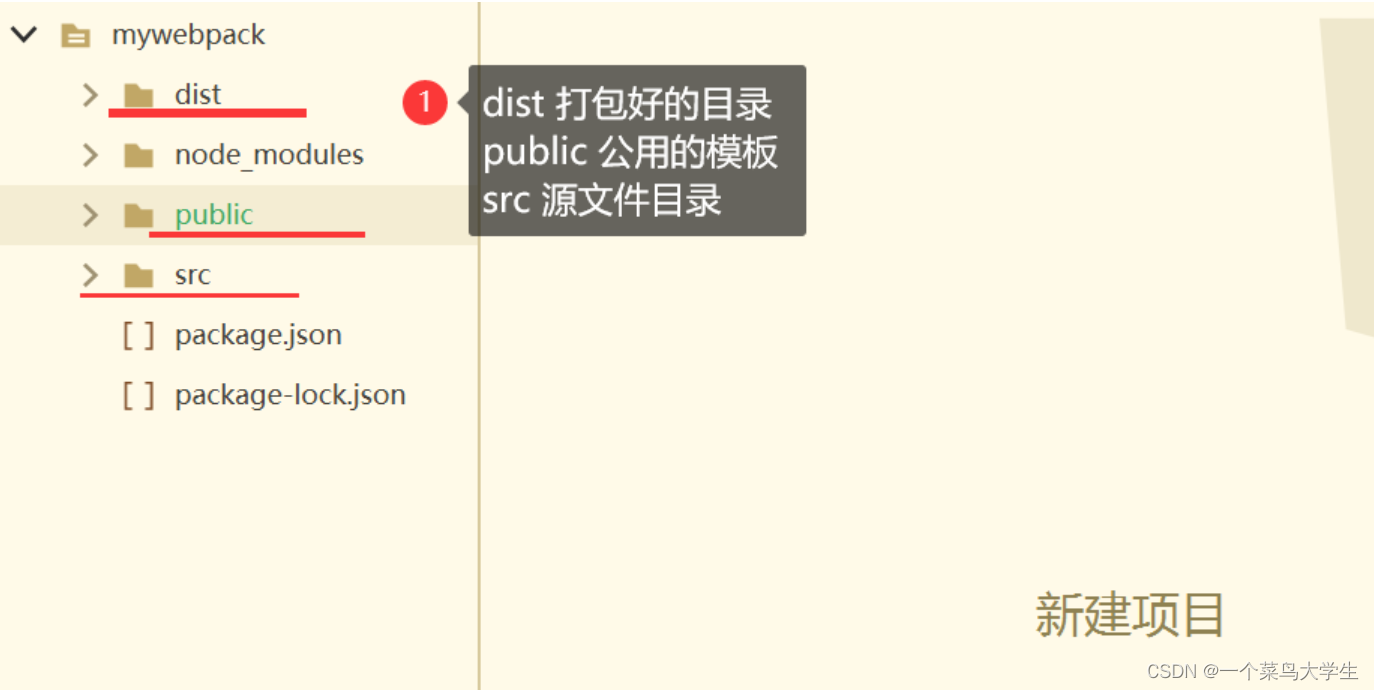
Fourth, configure webpack
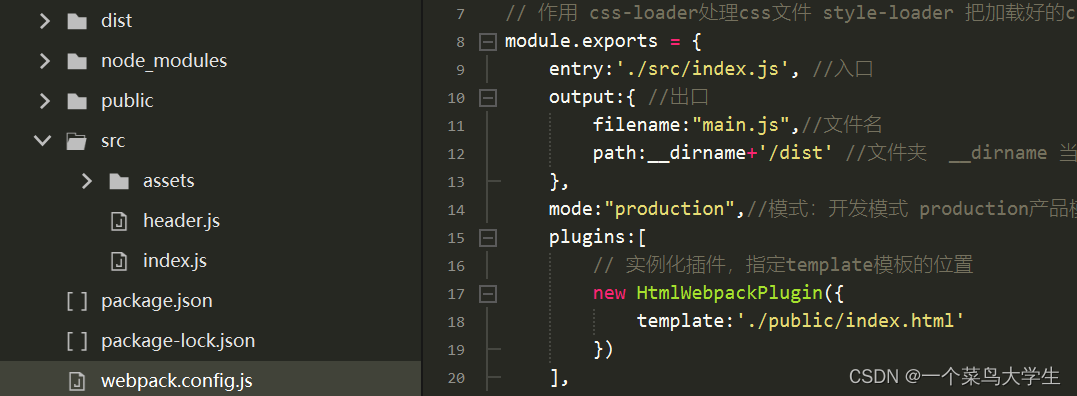
In our src folder, create a new file webpack.config.js, this file is the configuration file of webpack, webpack will read this configuration file before building and packaging, and package based on the configuration you set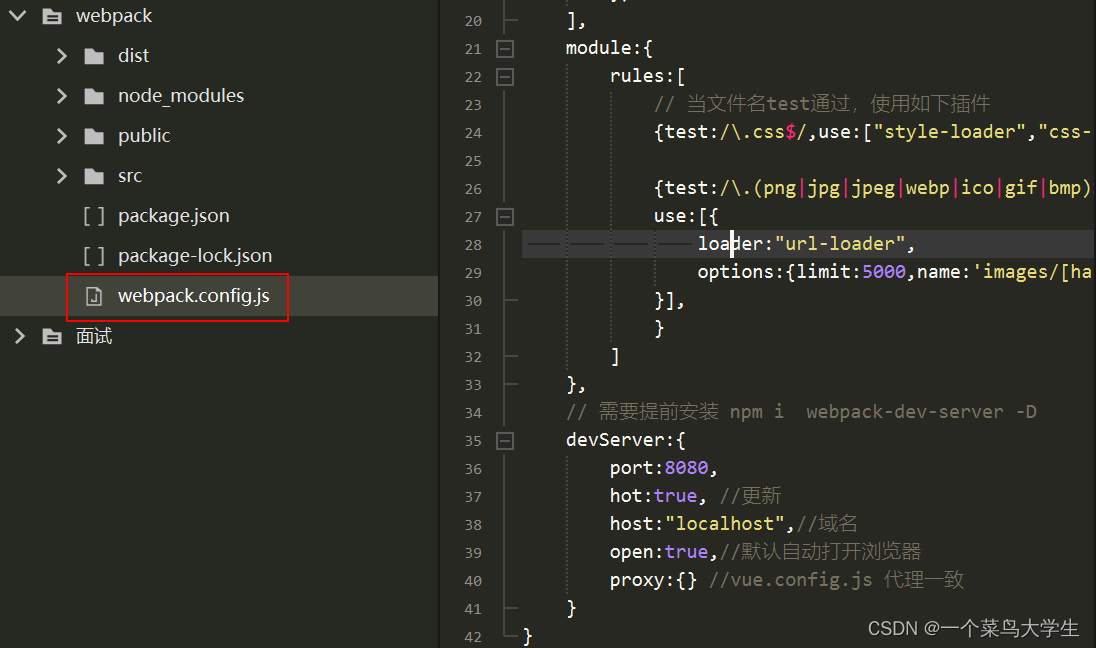
(1) Core concepts
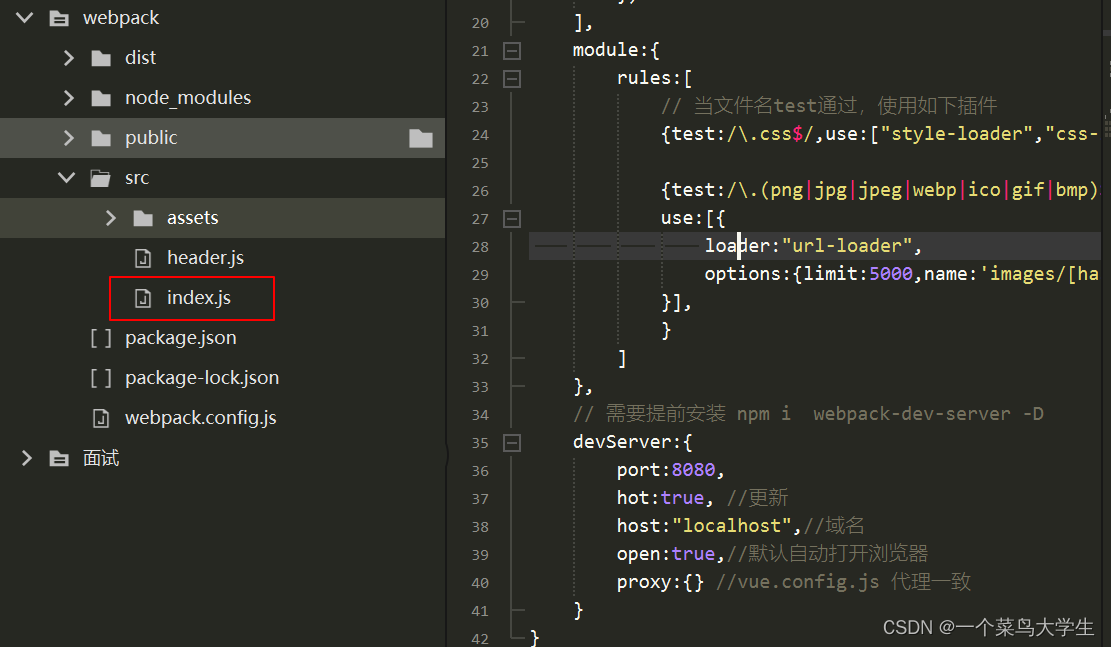
- entry entry: It specifies where webpack should start packaging. After entering the entry point, webpack will find out which modules and libraries are dependencies of the entry point. The default entry file here is the index.js file under src
But you can also configure the entry attribute in the webpack configuration to specify one or more different entry points. For example:
- webpack.config.js
- output The
output attribute tells webpack where to output the bundles it creates, and how to name those files. The default for the main output file is ./dist/main.js and other generated files are placed in the ./dist folder by default. You can configure these processes by specifying an output field in the configuration: - webpack.config.js
module.exports = {
entry:'./src/index.js', //入口
output:{
//出口
filename:"main.js",//文件名
path:__dirname+'/dist' //文件夹 __dirname 当前目录
},
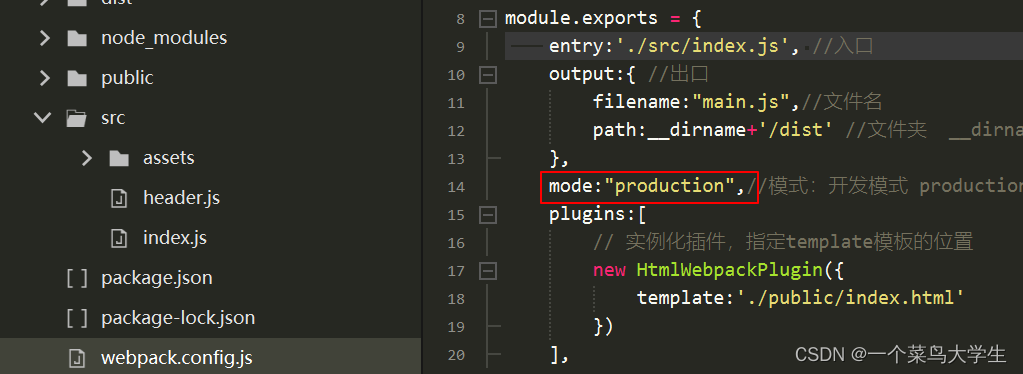
mode:"production",//模式:开发模式 production产品模式
plugins:[
// 实例化插件,指定template模板的位置
new HtmlWebpackPlugin({
template:'./public/index.html'
})
],
}
mode mode
By setting the mode parameter to one of development, production or none, you can enable the optimizations that webpack has built into that environment. Its default value is production.
There are two optional values for the mode node, which are:
development:
- development environment,
- Code compression and performance optimization will not be performed on the files generated by packaging, and the packaging speed is fast.
- suitable for use during the development phase
production
- Production Environment
- Code compression and performance optimization will be performed on the files generated by packaging
- The packaging speed is very slow and is only suitable for use in the project release phase
1. Configure in the webpack.config.js file
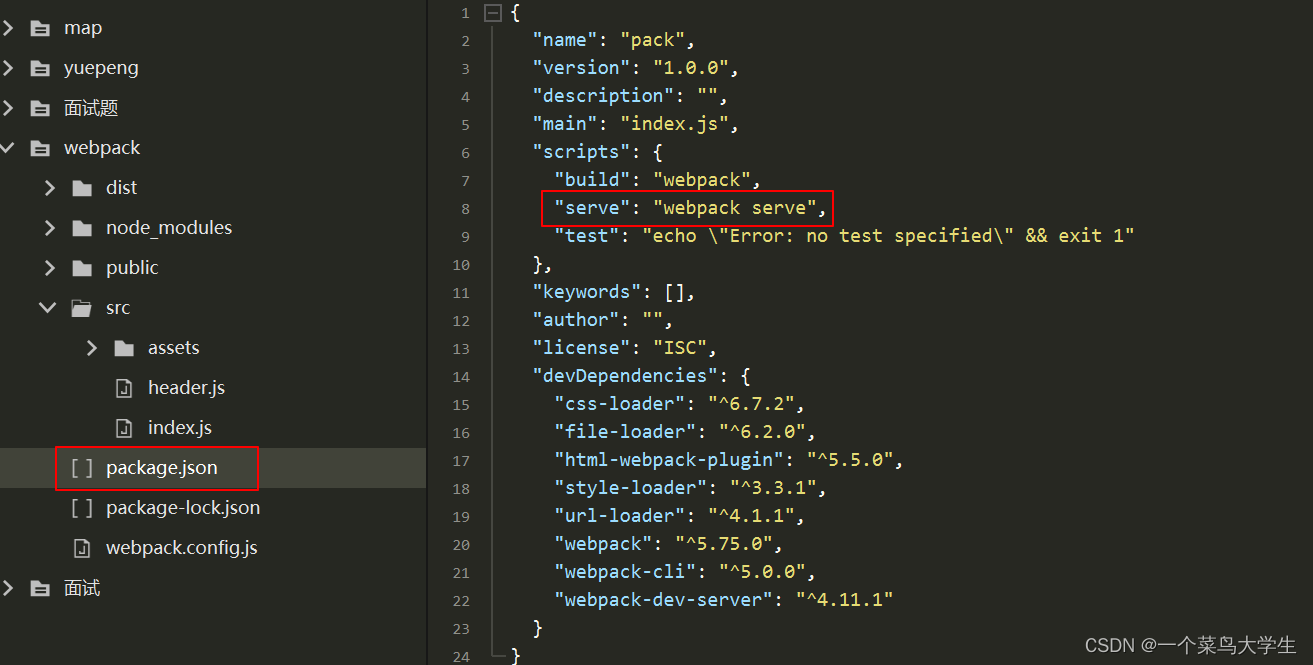
2. Add a new server under the scripts node in the pack.json file
3. Run the npm run serve command in the terminal to start webpack to package and build the project
(3)loader
In the actual development process, webpack can only package and process modules ending with the .js suffix by default. Other modules that do not end with .js suffixes cannot be processed by webpack by default, and the loader needs to be called to package normally, otherwise an error will be reported!
- The role of the loader loader: assist webpack to package and process specific file modules.
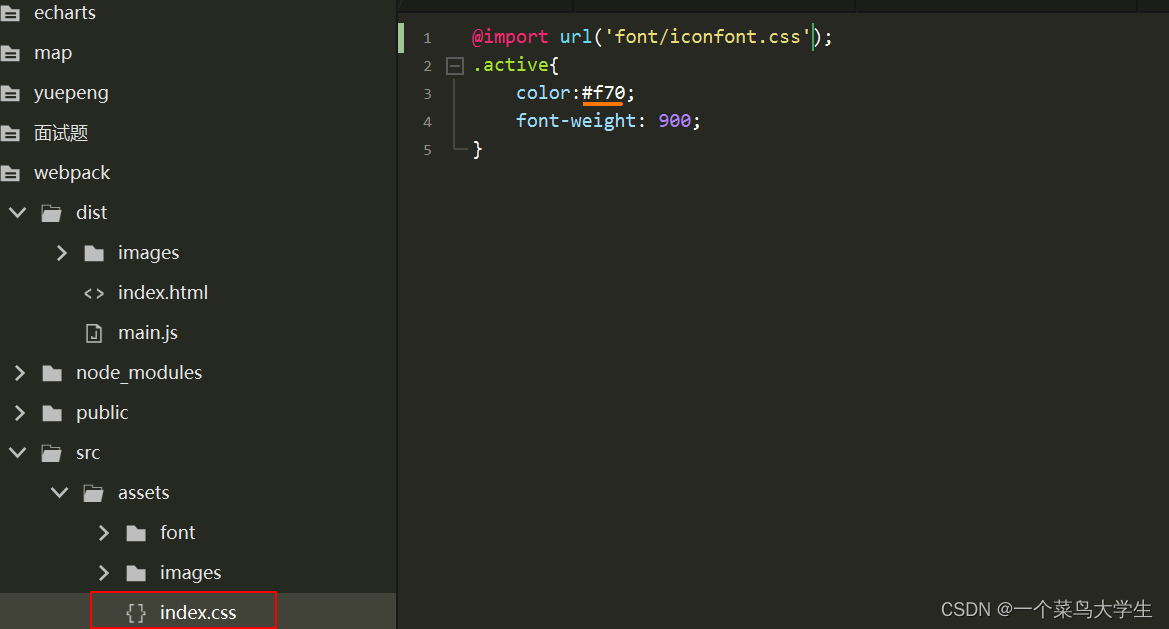
3.1 css processor
css-loader analyzes css relationship - merges a css (import)
function: css-loader processes .css files style-loader loads css into the style tag
- Installation
Run the following command to install this plugin in the project
npm i css-loader strle-loader -D
- Configuration
Write the following code in webpack.config.js:
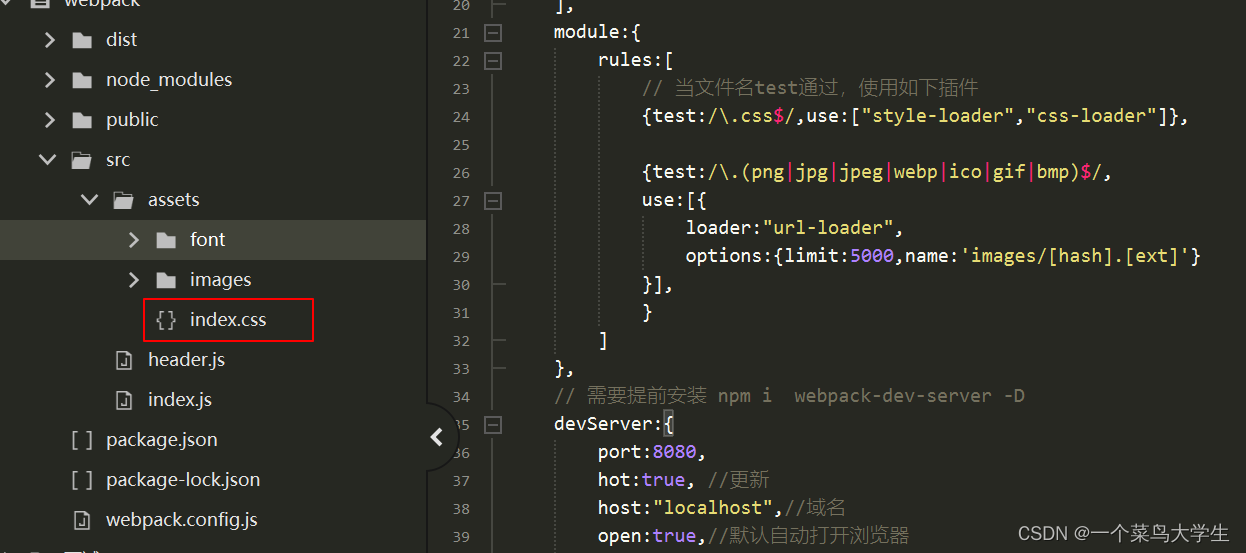
	module:{


		rules:[
			// 当文件名test通过,使用如下插件
			{

    test:/\.css$/,use:["style-loader","css-loader"]},

			{

    test:/\.(png|jpg|jpeg|webp|ico|gif|bmp)$/,
			use:[{


				loader:"url-loader",
				options:{

    limit:5000,name:'images/[hash].[ext]'}
			}],
			}
		]
	},
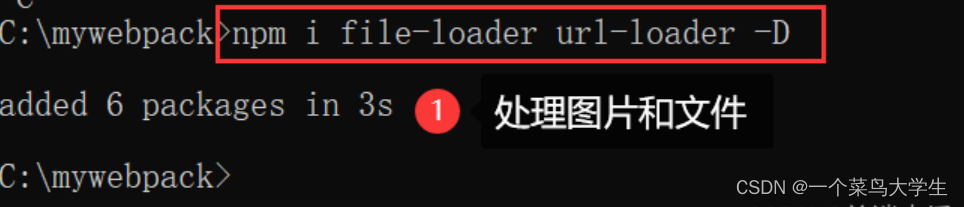
3.1 Image and file processing
file-loader can parse the url import in the project (not limited to css) to point to the correct file
url-loader will generate small pictures in base64 encoding format (url-loader encapsulates file-loader)
The image-webpack-loader plugin can compress large images to reduce the package size
html-loader The loader that handles img tags in html code.
- Installation: Run the following command to install this plugin in the project
npm i file-loader url-loader
- Configuration
Write the following code in webpack.config.js
module.exports = {


	entry:'./src/index.js', //入口
	output:{

     //出口
		filename:"main.js",//文件名
		path:__dirname+'/dist' //文件夹  __dirname 当前目录
	},
	mode:"production",//模式:开发模式 production产品模式
	plugins:[
		// 实例化插件,指定template模板的位置
		new HtmlWebpackPlugin({


			template:'./public/index.html'
		})
	],
	module:{


		rules:[
			// 当文件名test通过,使用如下插件
			{

    test:/\.css$/,use:["style-loader","css-loader"]},

			{

    test:/\.(png|jpg|jpeg|webp|ico|gif|bmp)$/,
			use:[{


				loader:"url-loader",
				options:{

    limit:5000,name:'images/[hash].[ext]'}
			}],
			}
		]
	},
	// 需要提前安装 npm i  webpack-dev-server -D
	devServer:{


		port:8080,
		hot:true, //更新
		host:"localhost",//域名
		open:true,//默认自动打开浏览器
		proxy:{

    } //vue.config.js 代理一致
	}
}

the case
- Image processing
in the index.js file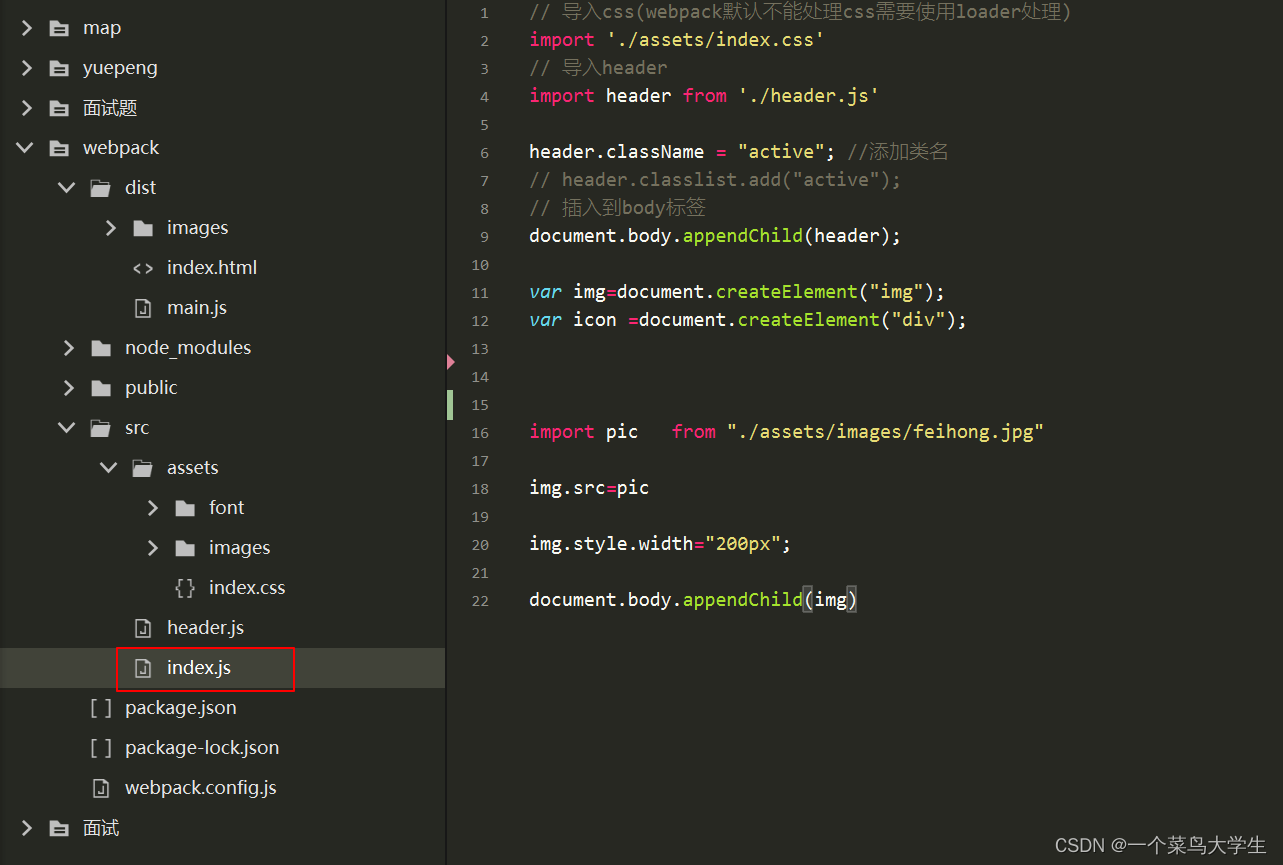
- Then we run the project npm run build

Note: No need to configure again - import css
Six, webpack-dev-server
webpack-dev-server allows webpack to listen to changes in the source code of the project, so as to automatically package and build.
- Installation
Run the following command to install this plugin in the project
npm i webpack -dev-server -D

- Configure webpack.config.js
In the webpack.config.js configuration file, you can configure more webpack-dev-server plug-ins through the devServer node. The sample code is as follows:
module.exports={


	devServer:{


		port:8080,
		hot:true, //更新
		host:"localhost",//域名
		open:true,//默认自动打开浏览器
		proxy:{

    } //vue.config.js 代理一致
	}
- Modify package.json
Modify the serve command in package.json -> scripts as follows: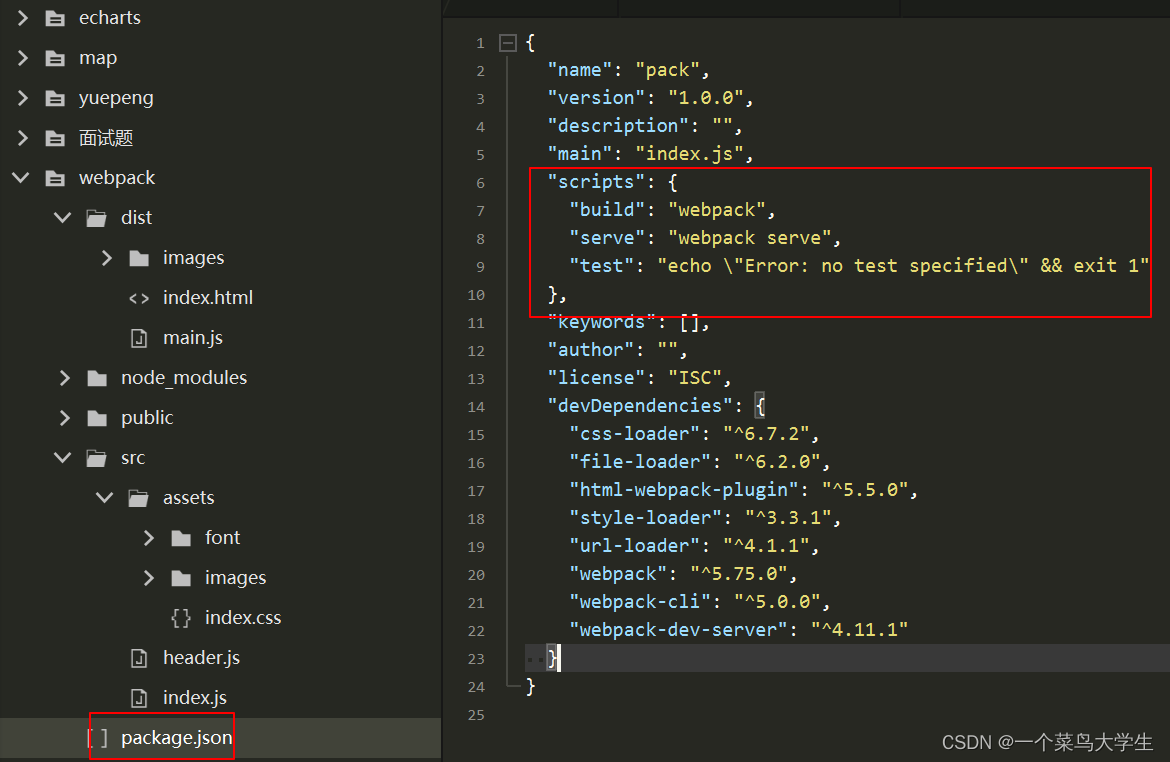
Run the npm run build command, repackage the project and then run the project with npm run serve, it will automatically jump to the browser to view the automatic packaging effect