Table of contents
2. Use Git to upload the project to Github
3. Use HTTPS to get the project on GitHub
1. Install Git locally
1. Git installation link: https://git-scm.com/downloads
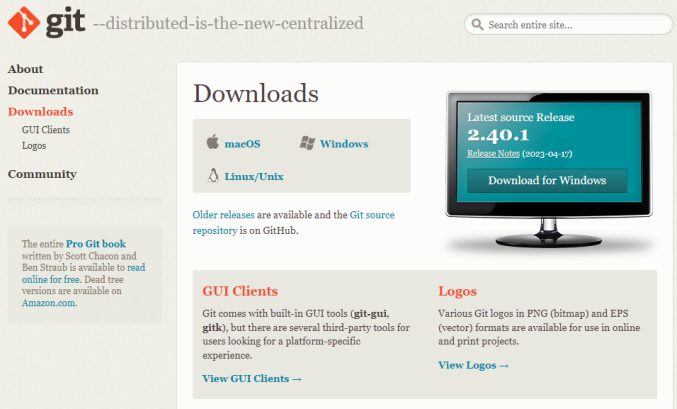
2. Download the installation package, double-click the exe file to install:
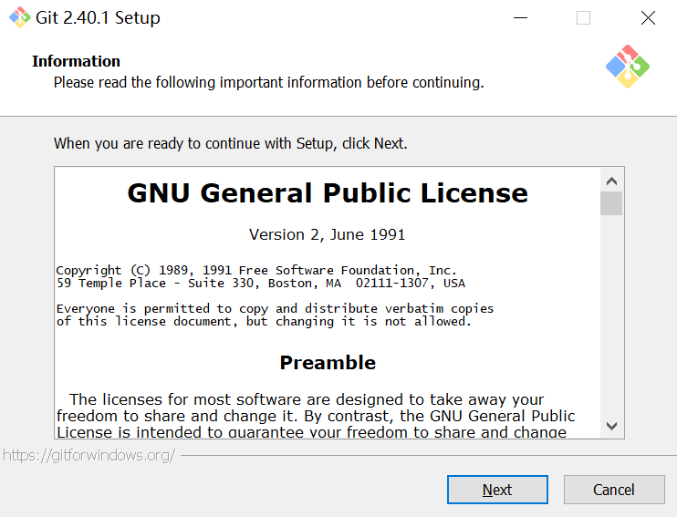
3. Next, a series of query boxes will pop up, all of which can be selected next:

4. After the installation is complete, select Finish:

5. Start the Git test, click Git Bash in the start menu, you can open the console:

2. Use Git to upload the project to Github
1. Visit and log in to GitHub official website:

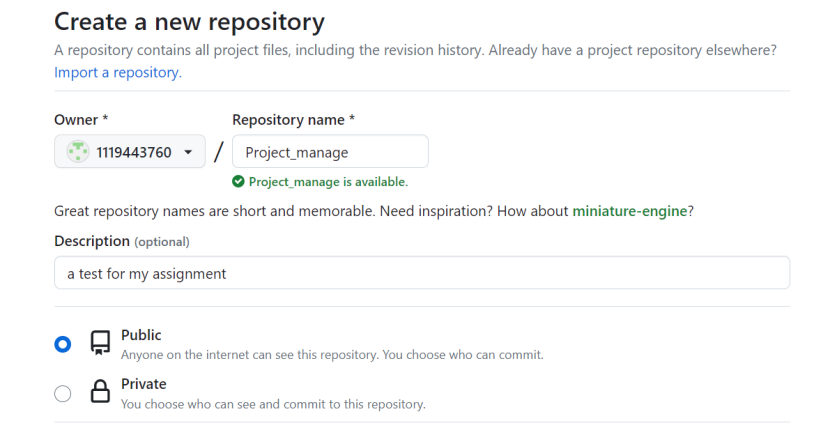
2. Create a warehouse, you can choose according to your actual needs:
3. Upload the project to GitHub in HTTPS mode
(1) Record the HTTPS address of the GitHub repository:

(2) In the workspace where the project is located, initialize the local warehouse:

(3) After executing the git init operation, the .git file is generated. Sometimes it cannot be seen because the file is hidden. You can open it to view the hidden file:

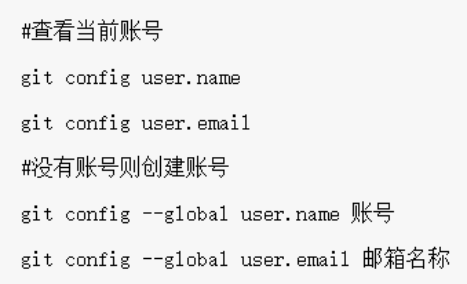
(4) Create name and email:

(5) Add the project to the temporary storage area (if there is no README.md outside the project, it needs to be created first, and this file is at the same level as the .git directory). Note that if there are multiple projects in the folder and you only want to upload one, use the git add project name directly; git add . means to upload all projects in the directory:

(6) Add the contents of the temporary storage area to the warehouse:
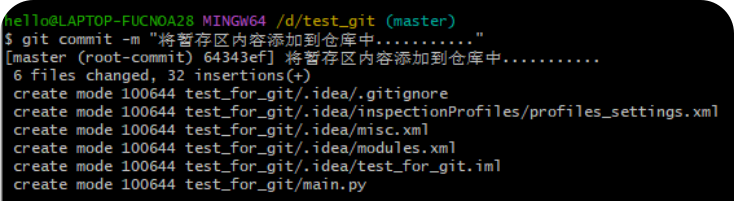
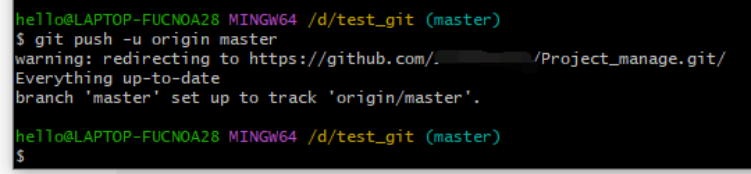
(7) Submit the project to the GitHub repository:
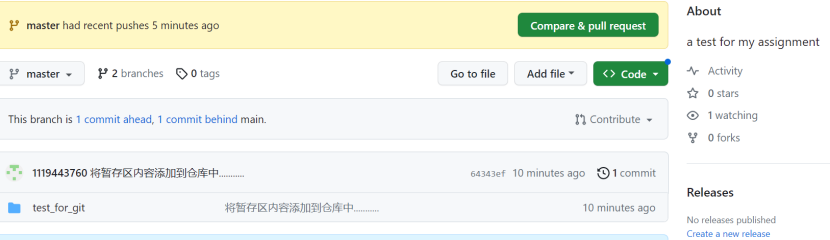
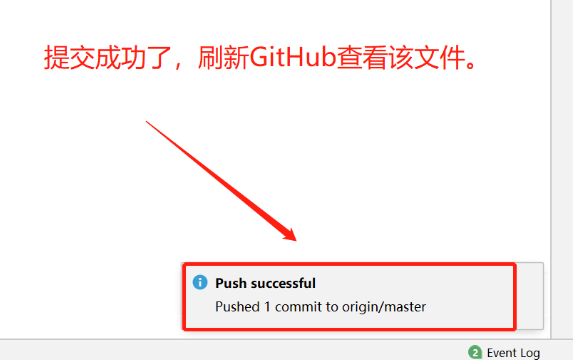
(8) Refresh the GitHub warehouse to see the project just uploaded:
(9) It is also possible to upload the project to GitHub in SSH mode, which will not be repeated here.
3. Use HTTPS to get the project on GitHub
1. Clone the project on GitHub into your own workspace:

2. You can see that the specified content has been cloned:

3. The way to obtain the project using SSH is similar, so I won’t repeat it here.
4. Version control
1. Submit content (take setting the port and submitting the configuration file as an example)
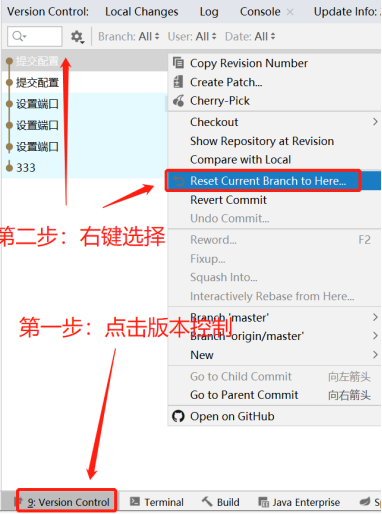
(1) Submit the file to the local library:


(2) Submit the file to the remote warehouse:


2. Management branch
(1) Enter the branch directory:

(2) Create a branch:


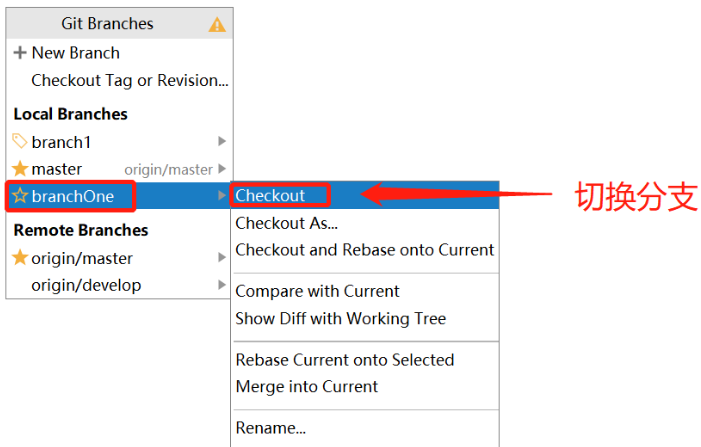
(3) switch branches
(4) View the current branch

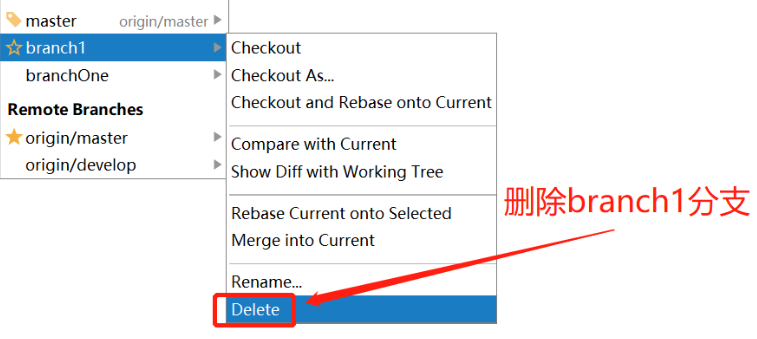
(5) Delete branch
(6) The branch is synchronized with the trunk
(7) Merge branches and submit content, same as above here.
5. This report is a record of the code version control learning process completed by referring to the tutorial. If there is any error, please correct me!
The detailed reference link is as follows: https://www.ngui.cc/el/3169924.html?action=onClick