Deep Learning First Experience
Level 1: What is a Neural Network
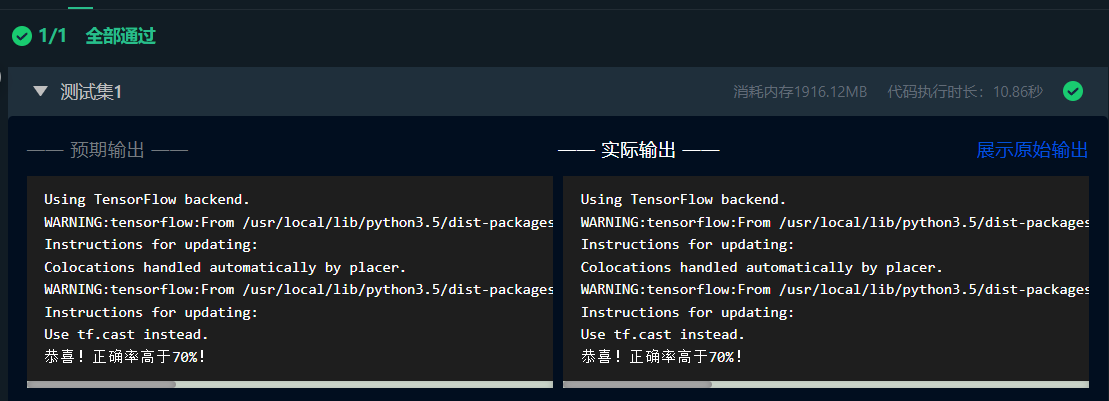
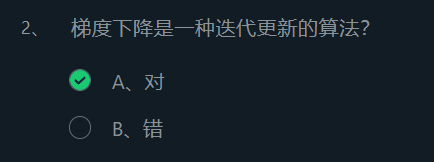
first question
There are also neurons in the neural network, and these neurons are also connected to other neurons, thus forming a neural network, and we call this network a fully connected network . As shown in the figure below ( squares represent neurons ):
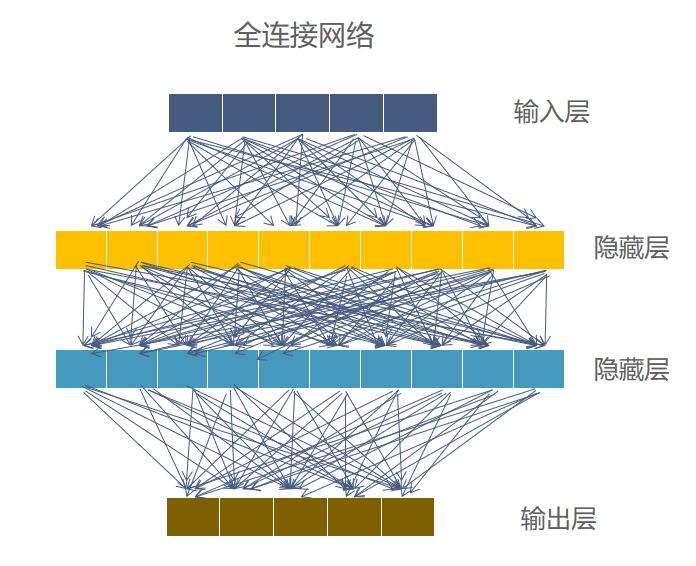
As can be seen from the figure, the neural network is composed of layers of neurons, and different layers have different names. The input layer represents a group of neurons used to receive data input. The output layer represents a set of neurons used for output. A hidden layer represents a group of neurons between the input layer and the output layer.
second question
If we build blocks very high, it will become a high-rise building. Similarly, if our neural network has more layers, we will become such a neural network as a deep neural network . If we use a deep neural network to accomplish what we want, we call it deep learning .
third question
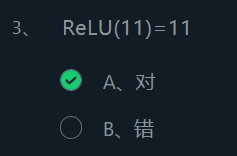
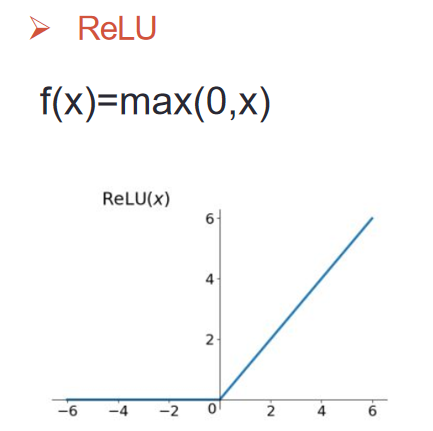
ReLU(11)=max(0,11)=11
fourth question
If our neural network has more layers, we will call such a neural network a deep neural network . If we use a deep neural network to accomplish what we want, we call it deep learning .
A neural network with 1 hidden layer has too few layers to be a deep neural network.
Pass 2: Backpropagation
first and second questions
The training process of the neural network is the process of constantly looking for the appropriate W and b to minimize the difference between the predicted output and the real label. Then we can disassemble the training process. First, we need to be able to measure the difference between the predicted output and the real label. Second, we need to be able to continuously optimize W and b to make the difference between the predicted output and the real label smaller.
First, to measure the difference, we can input the predicted output and the true label into a function, and then quantify the size of the difference through the calculation of this function. We call this function a loss function . There are many types of loss functions. For example, in the face of classification problems, cross-entropy loss is usually used, and in the face of regression problems, mean square error is usually used. In short, it can be regarded as a black box that can quantify the difference, and the smaller the quantified difference value, the more accurate the predicted output of our neural network is.
Second, we need to find out W and b to minimize the difference. At this time, we will use the gradient descent algorithm to update W and b iteratively . The idea of the gradient descent algorithm is to update W and b in the general direction of making the difference smaller, and how to obtain the general direction requires calculating the partial derivative (gradient) of W and b for the loss function. However, due to the calculation of the partial derivatives of W and b for the loss function, it is necessary to know the partial derivatives of W and b for the linear calculation part of the neuron and the partial derivatives of the linear calculation part for the loss function. So there is the backpropagation algorithm .
third question
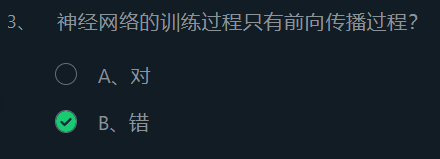
Neural networks, like other machine learning algorithms, also have the process of training and prediction. If summed up in one sentence, the prediction process is the process of forward propagation , and the training process is the process of repeated forward propagation and back propagation .
Level 3: Hands-on implementation of CNN to recognize handwritten digits
To add a convolutional layer, the code is as follows:
from keras.layers import Conv2D
model = Sequential()
'''
16表示该卷积层有16个卷积核
kernel_size=3表示卷积核的大小为3*3
activation='relu'表示卷积层的激活函数是relu
input_shape=[IMAGE_HEIGHT, IMAGE_WIDTH, 3]表示待卷积图像为32*32的3通道图像
'''
model.add(Conv2D(16, kernel_size=3, activation='relu', input_shape=[32, 32, 3]))
To add a layer of maximum pooling layer, the code is as follows:
from keras.layers import Conv2D
model = Sequential()
'''
pool_size=2表示池化窗口的大小为2*2
'''
model.add(MaxPooling2D(pool_size=2))
To add a flat layer, the code is as follows:
from keras.layers import Conv2D
model = Sequential()
'''
卷积或者池化后想要接上全连接层之前需要接入扁平层
'''
model.add(Flatten())
So, if you want to build a convolutional neural network with the following structure, you can write the following code:
# 1.有32个5*5的神经元的卷积层,激活函数为relu,输入的数据为宽28高28的灰度图像
# 2.有64个5*5的神经元的卷积层,激活函数为relu
# 3.最大池化层,池化核大小为2*2
# 4.扁平
# 5.有128个神经元的全连接层,激活函数为relu
# 6.有10个神经元的全连接层,激活函数为softmax
model = Sequential()
model.add(Conv2D(32, (5, 5), activation='relu', input_shape=[28, 28, 1]))
model.add(Conv2D(64, (5, 5), activation='relu'))
model.add(MaxPool2D(pool_size=(2, 2)))
model.add(Flatten())
model.add(Dense(128, activation='relu'))
model.add(Dense(10, activation='softmax'))
The complete code and running results are as follows:
from keras.models import Sequential
from keras.layers import Conv2D, MaxPool2D, Flatten, Dense
import numpy as np
# 设置随机种子
np.random.seed(1447)

def build_model():
    '''
    在Begin-End段中构建出如下结构的卷积神经网络
    1.64个5*5的卷积核组成的卷积层,激活函数为relu
    2.最大池化层,池化核大小为2*2
    3.扁平
    4.128个神经元的全连接层,激活函数为relu
    5.10个神经元的全连接层,激活函数为softmax
    :return: 构建好的模型
    '''
    model = Sequential()
    model.add(Conv2D(32, (5, 5), activation='relu', input_shape=[28, 28, 1]))
    #********* Begin *********#
    model.add(Conv2D(64, (5, 5), activation='relu'))
    model.add(MaxPool2D(pool_size=(2, 2)))
    model.add(Flatten())
    model.add(Dense(128, activation='relu'))
    model.add(Dense(10, activation='softmax'))

    #********* End *********#
    return model

Level 4: Hands-on implementation of RNN to analyze movie review sentiment
Build Recurrent Neural Networks with Keras
The structure of adding RNN in Keras is very simple, the code is as follows:
from keras.layers import Embedding, SimpleRNN, Dense
from keras import Sequential
model = Sequential()
# 对输入的影评进行word embedding,一般对于自然语言处理问题需要进行word embedding
model.add(Embedding(1000, 64))
# 构建一层有40个神经元的RNN层
model.add(SimpleRNN(40))
# 将RNN层的输出接到只有一个神经元全连接层
model.add(Dense(1, activation='sigmoid'))
programming requirements
Fill in the python code, and construct a cyclic neural network with the following structure in the Begin-End section:
SimpleRNN layer with 30 neurons;
There is a fully connected layer with 16 neurons, and the activation function is relu;
There is a fully connected layer with 1 neuron, and the activation function is sigmoid
code show as below:
from keras.models import Sequential
from keras.layers import Embedding, SimpleRNN, Dense

def build_model():
    '''
    在Begin-End段中构建如下结构的循环神经网络
    1.有30个神经元的SimpleRNN层
    2.有16个神经元的全连接层,激活函数为relu
    3.有1个神经元的全连接层,激活函数为sigmoid
    :return: 构建好的模型
    '''
    model = Sequential()
    model.add(Embedding(1000, 64))
    #********* Begin *********#
    model.add(SimpleRNN(30))
    model.add(Dense(units=16, activation='relu'))

    model.add(Dense(units=1, activation='sigmoid'))
    #********* End *********#
    return model
The complete code and running results are as follows:
from keras.models import Sequential
from keras.layers import Embedding, SimpleRNN, Dense

def build_model():
    '''
    在Begin-End段中构建如下结构的循环神经网络
    1.有30个神经元的SimpleRNN层
    2.有16个神经元的全连接层,激活函数为relu
    3.有1个神经元的全连接层,激活函数为sigmoid
    :return: 构建好的模型
    '''
    model = Sequential()
    model.add(Embedding(1000, 64))
    #********* Begin *********#
    model.add(SimpleRNN(30))
    model.add(Dense(units=16, activation='relu'))

    model.add(Dense(units=1, activation='sigmoid'))
    #********* End *********#
    return model
Level 5: Hands-on Realization of Cat and Dog War
read pictures
Reading pictures can be implemented using the API of OpenCV (OpenCV is an open source computer vision library, many functions have python interface).
To use opencv in python, you first need to import cv2.
import cv2
After importing cv2, you can use the imread function to read the picture, where filename is the path of the picture you want to read.
img = cv2.imread(filename)
Since the pictures in the training set are of different sizes, the read pictures need to be forcibly scaled to a fixed width and height. So you need to use the resize function, where (32, 32) means to scale the source image to an image with a width and height of 32 pixels.
resized_image = cv2.resize(img, (32, 32))
Image normalization
Since the parameters in the convolutional neural network are trained by gradient descent, and each pixel in the image can be regarded as a feature, normalizing the pixel values in the image can improve the performance of the convolutional neural network. The speed during gradient descent, reducing the degree of shock of the loss. It is very simple to normalize the image, because the image read by opencv is represented by the ndarray data structure of numpy, so the normalization only needs to use the following code:
img = img / 255.0
onehot encoding
When traversing the pictures in the train_data directory, the real label (0 (cat), 1 (dog)) corresponding to the picture can be determined according to the name of the picture. But before using the neural network training, onehot encoding processing is required for the labels.
Onehot encoding is the representation of categorical variables as binary vectors. This first requires mapping categorical values to integer values. Each integer value is then represented as a binary vector, which is zero-valued except for the index of the integer, which is labeled 1.
In this training, onehot encoding can be regarded as converting the left table into the right table:
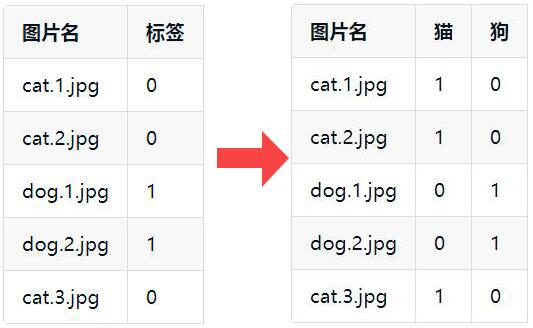
As can be seen from the above figure, onehot encoding takes all possible results in the real label as columns (there are only cats and dogs in the data set, so cats and dogs are used as columns), and then fills the corresponding columns with 1 and 0. For example, the name of the picture in the first row of the table is cat.1.jpg (it must be a cat), so fill in the cat column with 1 and the dog column with 0. The picture name in the third row is dog.1.jpg (it must be a dog), so fill in 1 in the dog column and 0 in the cat column.
It is also very simple to implement onehot encoding. You only need to use numpy's zeros function to allocate space first (row refers to how many training set pictures there are, and col refers to how many labels there are).
onehot = np.zeros((row, col))
Then fill in 1 in the corresponding column according to the picture name (assuming that the first column of onehot is a cat, and the second column is a dog).
In summary, the code of the get_train_data(data_path) function in the title can be completed:
def get_train_data(data_path):
    '''
    读取并处理数据
    :return:处理好的图像和对应的one-hot编码
    '''
    images = []
    onehot = np.zeros((500, 2))
    #********* Begin *********#
    for i, img_name in enumerate(os.listdir(data_path)):
        if 'cat' in img_name:
            onehot[i, 0] = 1
        else:
            onehot[i, 1] = 1
        img = cv2.imread(os.path.join(data_path, img_name))
        img = cv2.resize(img, (IMAGE_HEIGHT, IMAGE_WIDTH))
        images.append(np.array(img, "float32") / 255.0)

    #********* End *********#
    return np.array(images), onehot
Determine the type of picture by looking for 'cat' in img_name, and perform onehot encoding
Use os.path.join(data_path, img_name) to connect paths
Use np.array(img, "float32") / 255.0 to convert img to float and divide by 255.0
Implement cat and dog classification
After processing the data, you can start to build the model and train the model, such as:
model = keras.Sequential()
model.add(Conv2D(32, kernel_size=3, activation='relu', input_shape=[IMAGE_HEIGHT, IMAGE_WIDTH, 3]))
model.add(MaxPooling2D(pool_size=2))
model.add(Conv2D(32, kernel_size=3, activation='relu'))
model.add(MaxPooling2D(pool_size=2))
model.add(Flatten())
model.add(Dense(96, activation='relu'))
model.add(Dense(2, activation='softmax'))
model.compile(loss='categorical_crossentropy',    optimizer=keras.optimizers.Adam(lr=0.0001),
              metrics=['accu\fracy'])
model.fit(images, onehot, epochs=20, batch_size=32, verbose=0)
To sum up, complete the build_model() function code
def build_model():
    '''
    构建模型
    :return:构建好的模型
    '''
    model = keras.Sequential()
    #********* Begin *********#
    model.add(Conv2D(32, kernel_size=3, activation='relu', input_shape=[IMAGE_HEIGHT, IMAGE_WIDTH, 3]))
    model.add(MaxPooling2D(pool_size=2))
    model.add(Conv2D(32, kernel_size=3, activation='relu'))
    model.add(MaxPooling2D(pool_size=2))
    model.add(Flatten())
    model.add(Dense(96, activation='relu'))
    model.add(Dense(2, activation='softmax'))
    #********* End *********#
    return model
Finish compiling the model code
#********* Begin *********#
    # 编译模型
    model.compile(loss='categorical_crossentropy', optimizer=keras.optimizers.Adam(lr=0.0001), metrics=['accuracy'])
    #********* End *********#
The complete code and running results are as follows:
If you can't pass it once, you can pass it several times.
from keras.layers import Dense, Activation, Flatten, Dropout, Conv2D, MaxPooling2D
import keras
import os
import numpy as np
import cv2

# 设置随机种子
np.random.seed(1447)

IMAGE_HEIGHT = 128
IMAGE_WIDTH = 128


def get_train_data(data_path):
    '''
    读取并处理数据
    :return:处理好的图像和对应的one-hot编码
    '''
    images = []
    onehot = np.zeros((500, 2))
    #********* Begin *********#
    for i, img_name in enumerate(os.listdir(data_path)):
        if 'cat' in img_name:
            onehot[i, 0] = 1
        else:
            onehot[i, 1] = 1
        img = cv2.imread(os.path.join(data_path, img_name))
        img = cv2.resize(img, (IMAGE_HEIGHT, IMAGE_WIDTH))
        images.append(np.array(img, "float32") / 255.0)

    #********* End *********#
    return np.array(images), onehot

def build_model():
    '''
    构建模型
    :return:构建好的模型
    '''
    model = keras.Sequential()
    #********* Begin *********#
    model.add(Conv2D(32, kernel_size=3, activation='relu', input_shape=[IMAGE_HEIGHT, IMAGE_WIDTH, 3]))
    model.add(MaxPooling2D(pool_size=2))
    model.add(Conv2D(32, kernel_size=3, activation='relu'))
    model.add(MaxPooling2D(pool_size=2))
    model.add(Flatten())
    model.add(Dense(96, activation='relu'))
    model.add(Dense(2, activation='softmax'))
    #********* End *********#
    return model


def fit_and_predict(model, train_images, onehot, test_images):
    '''
    训练模型,并对测试图像进行预测
    :param model: 训练好的模型
    :param train_images: 训练集图像
    :param onehot: 训练集的one-hot编码
    :param test_images: 测试集图像
    :return: 预测结果
    '''
    #********* Begin *********#
    # 编译模型
    model.compile(loss='categorical_crossentropy', optimizer=keras.optimizers.Adam(lr=0.0001), metrics=['accuracy'])
    #********* End *********#
    model.fit(train_images, onehot, epochs=20, batch_size=32, verbose=0)
    result = model.predict(test_images, batch_size=10)
    predict_idx = np.argmax(result, axis=1)
    return predict_idx