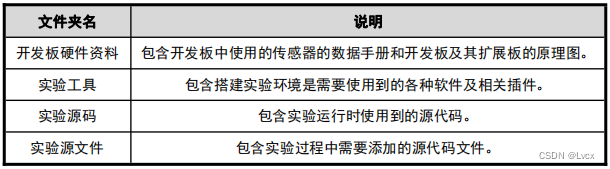
Experiment Checklist

resource acquisition
Open the link https://e.huawei.com/cn/talent/#/resources?tabKey=1 of the resource center on the official website of Huawei Talent Online , select "Professional Certification" in the tab on the left side of the page,
and click "Technical Check "Internet of Things" in "Direction", and check "HCIA" in "Level". Afterwards, the web page will display all
the materials related to the Internet of Things certification HCIA-IoT. Among these materials, select the file named "HCIA-IoT V3.0 Toolkit.rar"
to download.
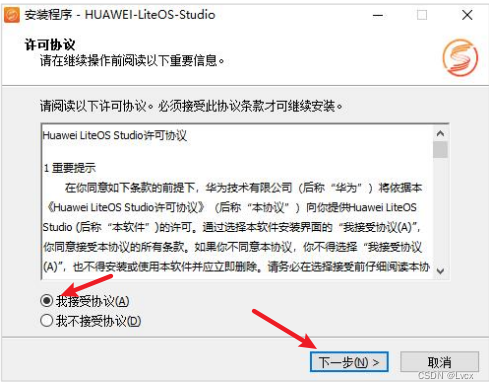
1. HUAWEI LiteOS Studio installation
Double-click the "HCIA-IoT V3.0 Toolkit/Experimental Tools/HUAWEI-LiteOS-Studio-Setup-x64-1.45.7.exe" file:
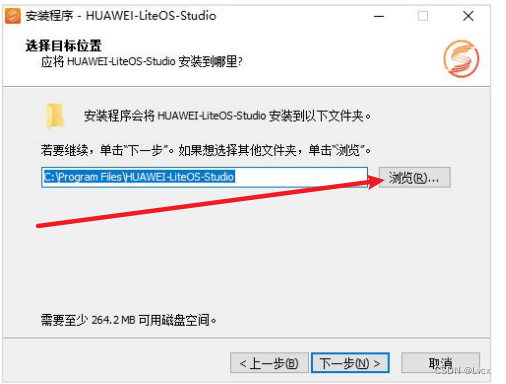
Select the installation location:
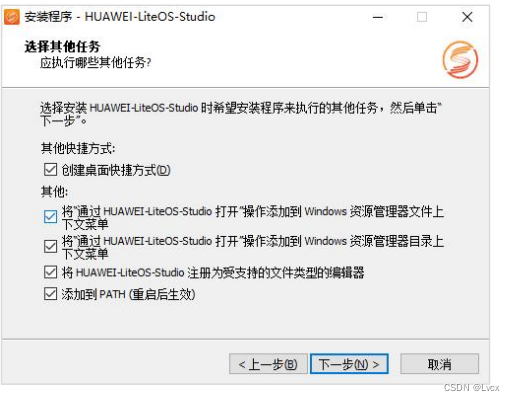
Add a shortcut:
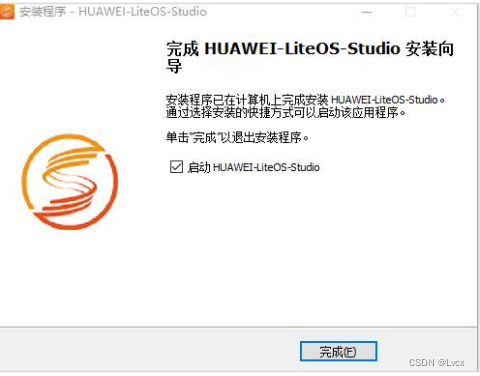
Install:

After the installation is complete, it is as follows:
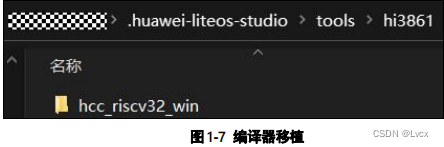
Transplant and compile Server:
After the installation is successful, the C:/Users/<UserName>/.huawei-liteos-studio directory will appear.
This directory is used to store tools such as plug-ins, compilers, and burners that will be used in the integrated development environment .
Copy and paste the HCIA-IoT V3.0 Toolkit/Experimental Tools/hcc_riscv32_win folder to the C:/Users/<UserName>/.huawei-liteos-studio/tools/hi3861 folder.
Install the Chinese language pack:
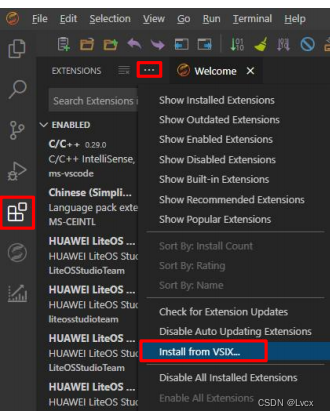
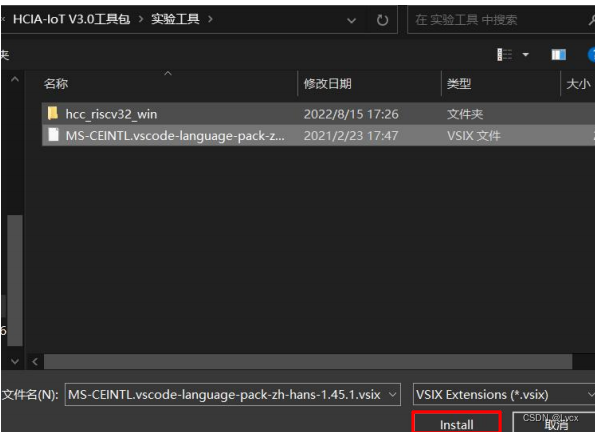
In the pop-up folder window, enter the HCIA-IoT V3.0 toolkit/experimental tool folder, select the
MS-CEINTL.vscode-language-pack-zh-hans-1.45.1.vsix file, and click "Install".
Restart HUAWEI LiteOS Studio after the installation is complete.
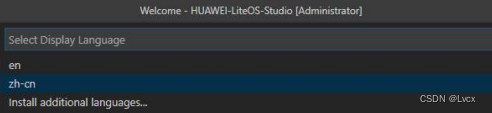
After restarting the integrated development environment, enter the shortcut key Ctrl+Shift+P on the keyboard to open the command panel, enter "Configure Display Language" in the command input box at the top of the interface and press Enter.

Select "zh-cn" in the language that pops up in the input box, and a prompt window pops up to restart the integrated development environment to complete the configuration. Click "
Restart" to complete the language switch.
Install the serial port driver:
Double-click HCIA-IoT V3.0 Toolkit/Experimental Tools/CH341SER.EXE driver to install the serial port driver.

2. The installation of the Python environment is very simple. You can refer to other tutorials on the Internet. The best version to install is version 3.8 and above.
The following libraries need to be installed:
pip install pycryptodome
pip install ecdsa
pip install pywin32
pip install scons
After the installation is complete, enter the following command on the command line to view the SCons library version:
scons -v
If the following content is returned, the installation is successful:

3. Experimental environment setting and compiling source code
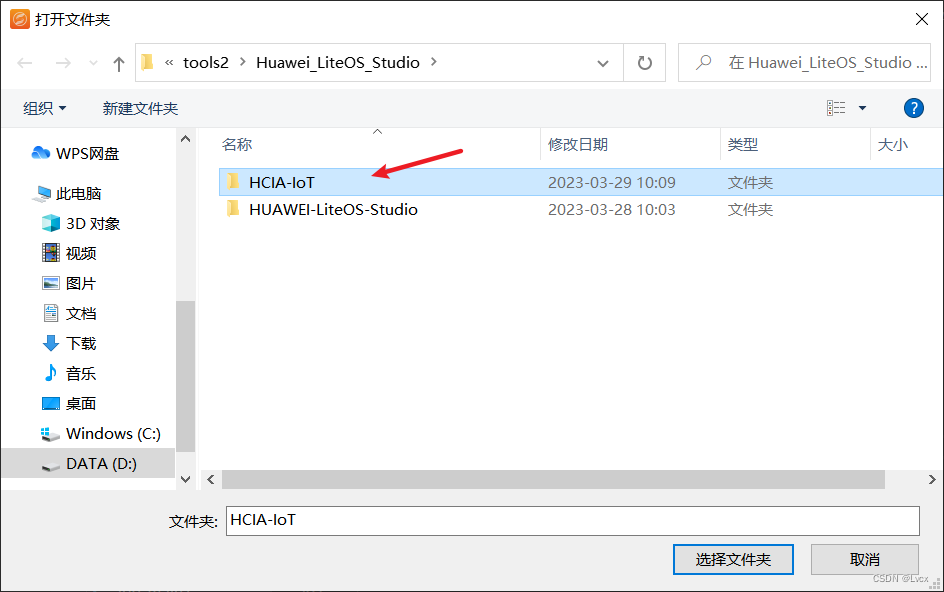
Before starting to compile the source code, you first need to confirm that there is no Chinese in the path of the source code. It is recommended to move the "HCIA-IoT V3.0 Toolkit/Experimental Source Code/HCIA-IoT" folder to the D disk directory, such as D:/HCIA-IoT to place the source code.
Open the HUAWEI LiteOS Studio integrated development environment, click "File" -> "Open Folder..." in the upper left corner, and open the D:/HCIA-IoT folder.
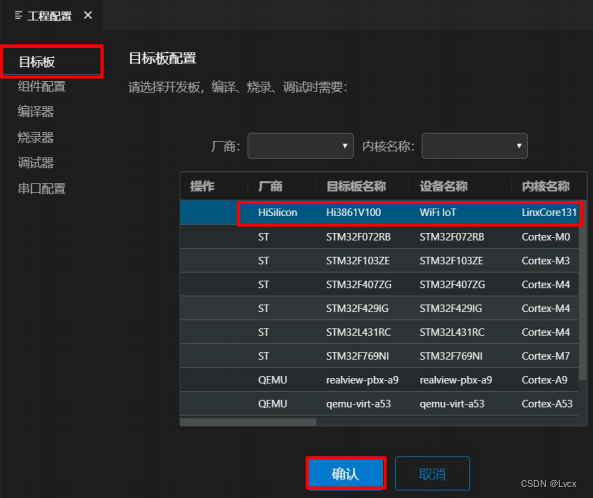
Click the "Project Configuration" button in the toolbar above the development environment to enter the configuration interface.

Target board configuration
compiler configuration
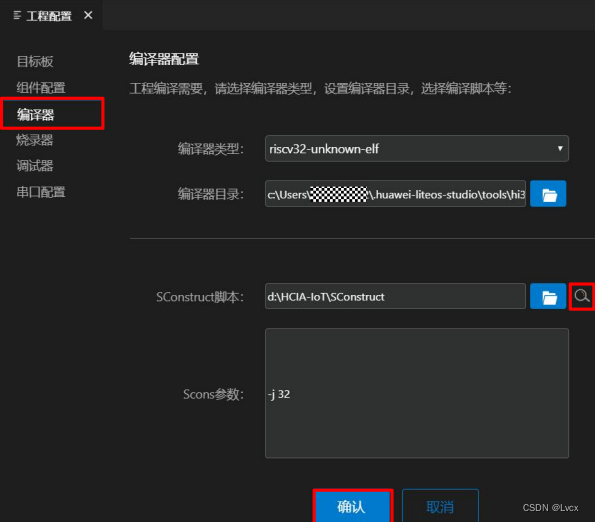
Select "Compiler" on the left side of the "Project Configuration" interface to enter the compiler configuration interface, select the compiler type as
"riscv32-unknown-elf", and select the compiler directory as the bin directory in the previously set compiler directory, such as: C:/Users/<UserName>/.huawei-liteos-studio/tools/hi3861/hcc_riscv32_win/bin. When selecting the SConstruct script directory, you can click the "magnifying glass" icon on the right to automatically search for scripts. If the automatic search fails,
you can select the SConstruct script in the source code directory, such as: D:/HCIA-IoT/SConstruct.
Compile the source code
Since the source code contains the burning files left in the previous test, you can click the recompile button to recompile the previously compiled files. After editing the code, select the "compile" button. Click the "Recompile" button in the toolbar above the integrated development environment to compile.

If the source code is compiled successfully, the terminal under the integrated development environment will display the words "BUILD SUCCESS":

4. Programming and debugging
Writer configuration
Click the "Project Configuration" button on the toolbar, and select "Recorder" on the left side of the interface to enter the recorder configuration interface. Select "HiBurner" in the burning method, keep the default burner directory, and select the
D:/HCIA-IoT/output/bin/Hi3861_demo_allinone.bin file for the burning file.

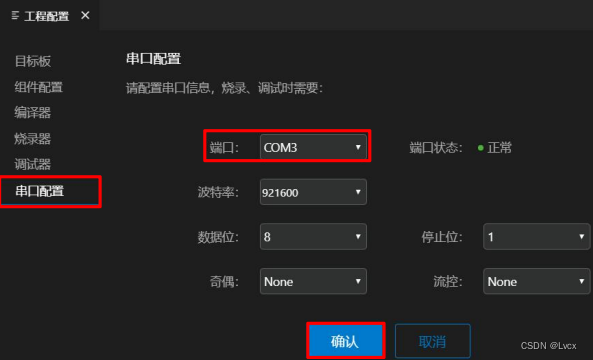
Serial port configuration
Connect the Hi3861 development board to the computer with a USB cable, open the "Project Configuration" interface, and select "Serial Port Configuration" on the left to enter the serial port configuration interface. If the development board is connected normally, you can observe the word "COM X" in "Port". (X is any number) Set the baud rate to 921600, and click "OK" to complete the configuration.
Burn and observe the experimental results
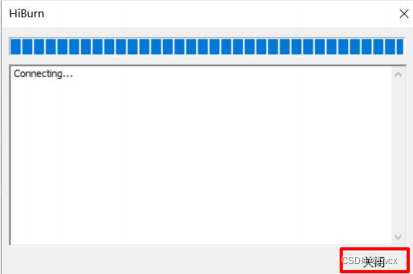
In the toolbar above the integrated development environment, select the "burn" button to start burning.

After clicking the "Burn" button, the HiBurn programming program will start. At this time, you need to press the "RST" button on the development board to burn. At this time, the HiBurn burning program will connect first, and then burn, it needs to wait for a while. After the following interface appears, it means that the burning is completed, click the "Close" button.
5. Commissioning
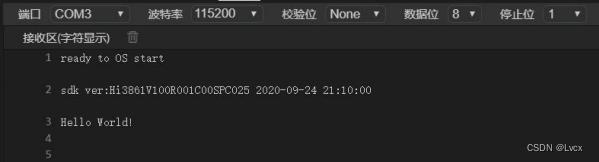
Click the "Serial Port Terminal" button in the upper toolbar of the integrated development environment to open the serial port terminal interface.

In the serial terminal that pops up, set the "baud rate" to 115200, and click the serial port switch on the right to open the serial port. At this time, click the "RST" button on the development board to reset the development board, and you can observe the printed "Hello World!" on the serial terminal, and at the same time, the LED1 light above "RST" on the development board will flash.
Q1: What is the difference between compilation and recompilation?
[Reference answer]
Compilation only compiles files that have changed since the last compilation, while recompilation compiles all files. Since recompilation compiles all files, it is generally equivalent to performing a clean and compile.
Q2: When determining the directories of the compiler and burner, some directories have very complete paths, and some paths have only part of them. What is the difference between them?
[Reference answer]
The complete path is an absolute path, and only part of the path is a relative path. The absolute path is the path where a file actually exists in the hard disk, and the relative path refers to the location related to its own target document. Among them, "./" is usually used before the relative path to indicate, and the "." here indicates the location of the current folder.