foreword
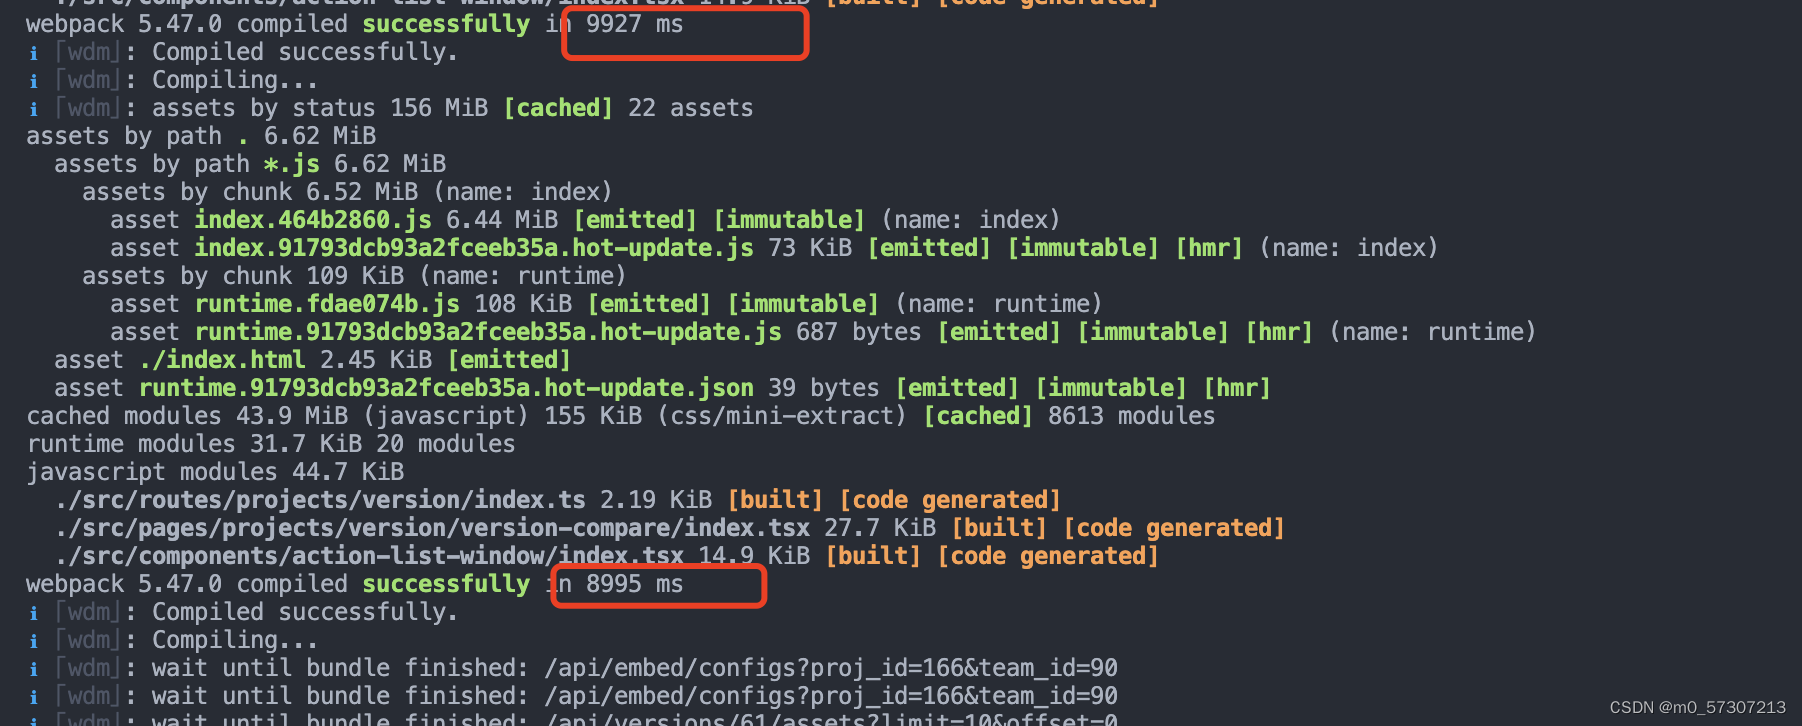
When developing a CDE project, it takes a long time to package and build the project each time. As shown in the figure below, it takes one minute to complete the build in the development environment. At the same time, it takes a long time to package and compile in real time in the development environment, as shown in the figure below
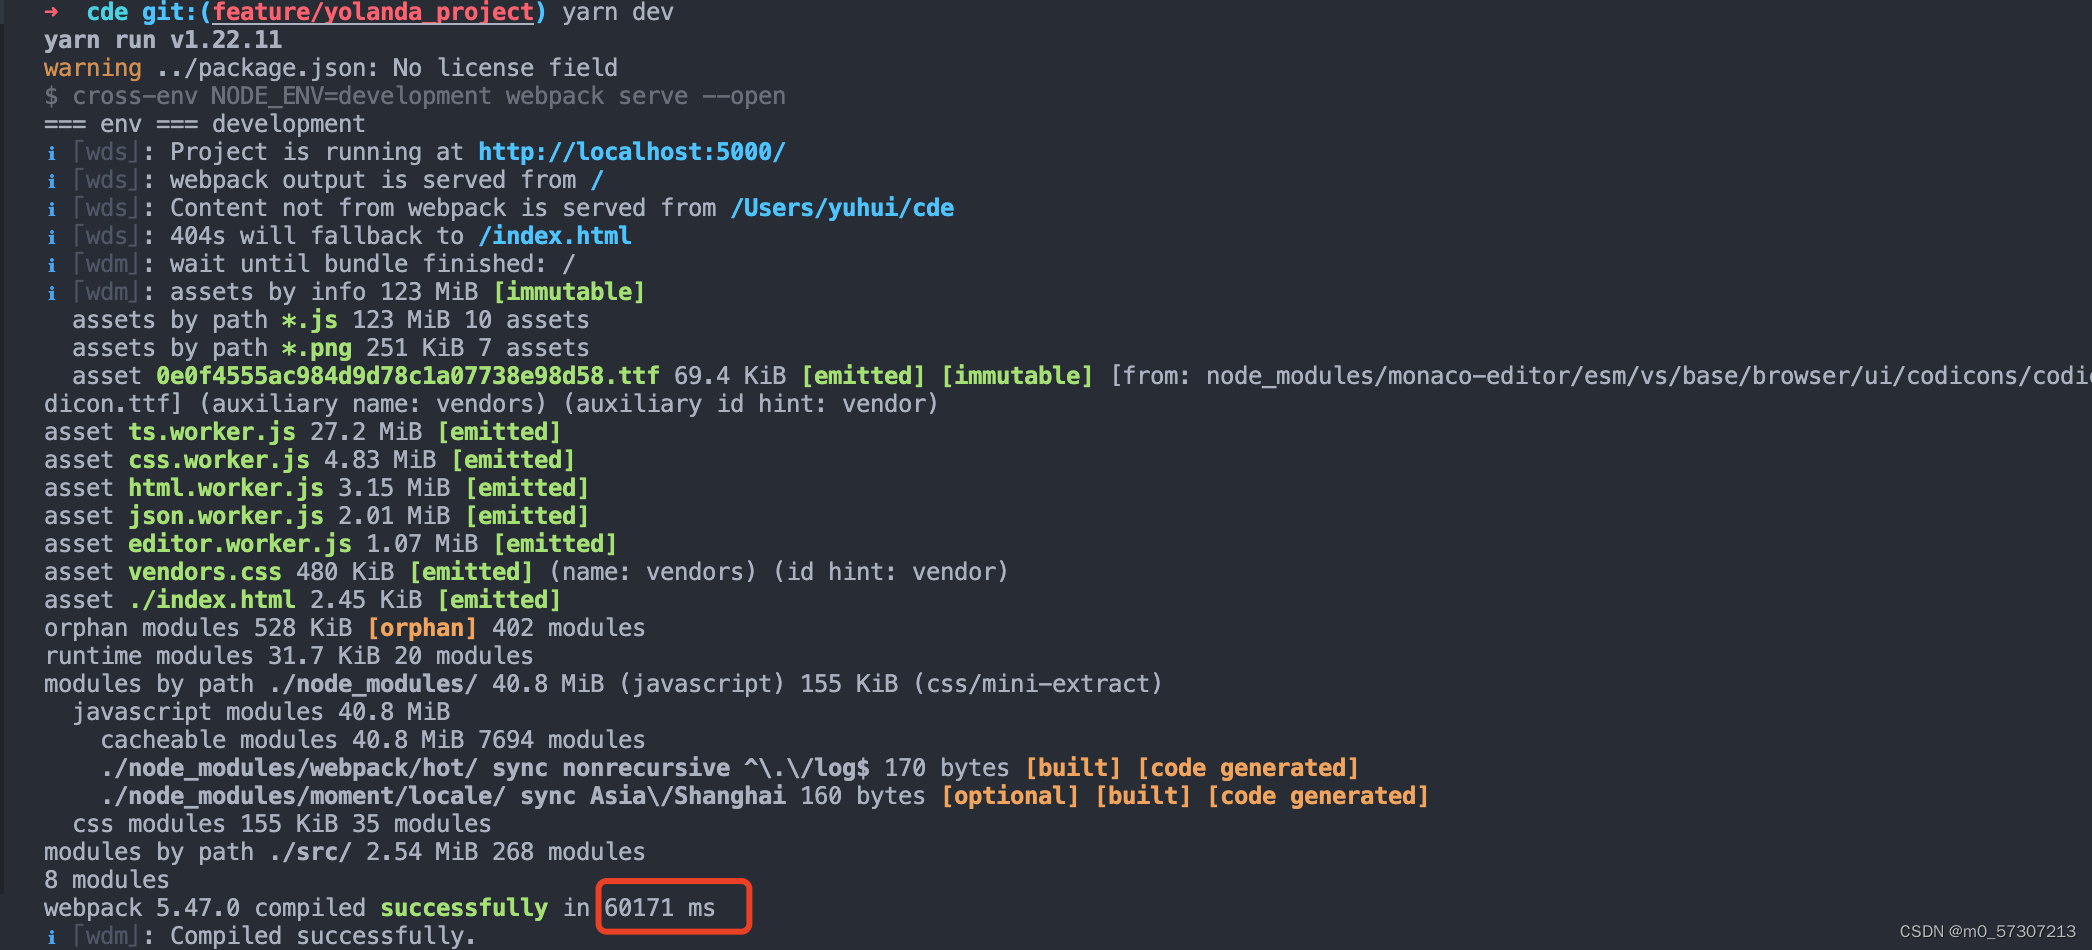
. shows that it is close to 10s. After reading the configuration of the project's webpack.config.js, I feel that there is room for optimization. In order to improve development efficiency, I refactored the relevant configuration of webpack.
Optimization 1: Merge and extract webpack public configuration
Webpack configuration is divided into development environment configuration and production environment configuration. In the configuration files of the two environments, there are a large number of repeated configurations and some different configurations. For example, in the development stage, in order to improve the operation efficiency and debugging efficiency, we generally pass dev-server to package in real time, so that there is no need to enter script commands in the terminal to package every time, and we need to get the real package file during the online stage, so it will not be packaged through dev-server. In order to improve packaging efficiency, the packaged content will not be compressed during the development phase; while in the online phase, in order to improve access efficiency, the packaged content needs to be compressed during packaging.
Problems with old configuration files and corresponding improvements
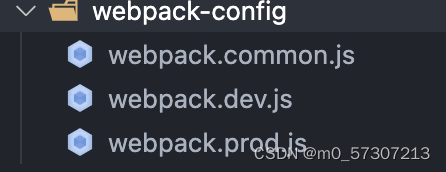
The old configuration file writes the configuration of the development environment and the online environment into one file, which is very unfavorable for us to maintain the configuration file, so we need to write different configurations into different files for different environments, we can in Create the following directory structure under the root path, and extract the common configurations in the two environments into the webpack.common.js file, and the webpack.dev.js file and webpack.prod.js file store the unique configurations in the development environment and production environment respectively
The merging of the unique and common configurations of the development environment and the production environment requires the use of the webpack-merge module.
Key code example
webpack.dev.js
const {

     merge } = require("webpack-merge");
const CommonConfig = require("./webpack.common.js");
module.exports = merge(CommonConfig, DevConfig);
webpack.prod.js
const {

     merge } = require("webpack-merge");
const CommonConfig = require("./webpack.common.js");
module.exports = merge(CommonConfig, ProdConfig);
package.json
"scripts": {


    "dev": "webpack-dev-server --config webpack-config/webpack.dev.js",
    "build": "webpack --config webpack-config/webpack.prod.js"
}
Optimization 2: HappyPack implements multi-process packaging (applicable to both development and production environments)
Webpack running on Node.js is a single-threaded model, which means that Webpack needs to process tasks one by one, and cannot process multiple tasks at the same time. And HappyPack allows Webpack to process multiple tasks at the same time, give full play to the functions of multi-core CPU computers, and improve the construction speed. It decomposes tasks to multiple sub-processes for concurrent execution, and after the sub-processes are processed, the results are sent to the main process. Since JavaScript is a single-threaded model, if you want to play the function of multi-core CPU, you can only realize it through multi-process, but not through multi-thread.
In actual use, the loader provided by HappyPack should be used to replace the original loader, and the original one should be passed in through the HappyPack plug-in.
Below we use HappyPack to transform the old configuration file:
Initial Webpack configuration (before using HappyPack)
module.exports = {


  //...
  module: {


    rules: [
      {


        test: /\.ts(x)?$/,
        include: [path.resolve(__dirname, 'src')],
        use: ['babel-loader', 'ts-loader'],
      },
    ],
  },
}
webpack.common.js (configuration using HappyPack)
const HappyPack = require('happypack');
module.exports = {


  //...
  module: {


    rules: [
       {


         test: /\.ts(x)?$/,
         include: [path.resolve(__dirname, '../src')],
         // 把对 .ts(x) 文件的处理转交给 id 为 ts 的 HappyPack 实例
         use: ['happypack/loader?id=ts']
       },
    ],
  },
  plugins: [
    new HappyPack({


      // 用唯一的标识符 id 来代表当前的 HappyPack 是用来处理一类特定的文件
        id: 'ts',
      // loaders属性表示如何处理 .ts(x) 文件,用法和 Loader 配置中一样
        loaders: ['babel-loader','ts-loader']
  ],
};
In the configuration of the loader, the processing of the file is handed over to happypack/loader, and the following queryString ( id=ts ) tells happypack-loader to choose which happypack instance to process the file;
In the plugin configuration, add a happypack instance to tell happypack/loader how to process ts(x) files. The id attribute value in the option corresponds to the queryString(id=babel) above, and the loaders attribute in the option is not used. The configuration of the loader before happypack remains the same;
Improved effect:
After being processed by happyPack, the build time in the development environment has been reduced from more than 60 seconds to more than 20 seconds, and the time spent on packaging and building is less than half of the previous time, and the effect of improving packaging performance is remarkable.
Points to note about enabling multi-processing:
Enabling multiple processes does not necessarily improve the construction speed, and the more sub-processes opened, the better, because the process needs to be started, destroyed, and communicated between processes, and the overhead of this process is also relatively large. For larger projects, packaging is slow, and multi-processing can increase the speed; for smaller projects, packaging is fast, and multi-processing will slow down.
The threads parameter of HappyPack is used to configure the number of sub-processes to open. The default is 3. When the author configures to open 4 sub-processes, the construction speed is almost the same as that of 3 sub-processes. When 5 sub-processes are opened, the construction speed is faster than 3 and 4 are slower. So whether to enable multi-process and how many processes to enable, we should use it as needed.
Optimization 3: Style file extraction and compression (applicable to production environment)
For the processing of style files, if style-loader is used at the end of the loader chain for processing, our css is directly packaged into js. In the production environment, we hope to generate css files separately. Because css is generated separately, css can be downloaded in parallel with js, improving page loading efficiency. At the same time, the css file also needs to be compressed in the production environment to reduce the file size and improve page loading efficiency. In the development environment, because the extraction and compression of files is time-consuming, in order to improve the speed of packaging and building and develop as soon as possible, in the development environment, we do not extract or compress the style files.
Problems with old configuration files and corresponding improvements
In the original configuration file, whether it is the development environment or the production environment, the last step of the scss file is processed by the style-loader, which is unreasonable. Then we will improve the processing of the scss file in the production environment. We use the mini- The css-extract-plugin extracts the style file and uses
the css-minimizer-webpack-plugin to compress the style file. Since the css-minimizer-webpack-plugin needs to configure the optimization.minimizer of webpack, this will override the default JS compression option, resulting in a production environment The JS code below is not compressed, so the JS code also needs to be compressed by the plug-in terser-webpack-plugin;
The code example is as follows:
webpack.prod.js
const MiniCssExtractPlugin = require('mini-css-extract-plugin');
const TerserJSPlugin = require('terser-webpack-plugin')
const CssMinimizerPlugin = require("css-minimizer-webpack-plugin")

module.exports = {


  //...
   module: {


    rules: [
          {


              test: /\.(sass|scss)$/,
              use:[
                // 使用MiniCssExtractPlugin.loader代替style-loader,抽离css文件
                  MiniCssExtractPlugin.loader,
                  'css-loader',
                  'sass-loader', {


                    loader: 'sass-resources-loader',
                    options: {


                      resources: path.join(
                        srcPath,
                        'styles/_variables.scss',
                      ),
                    },
               }]
          }
        ],
   },
   plugins: [
        // 抽离 css 文件
        new MiniCssExtractPlugin({


            filename:'css/main.[contenthash:8].css'
        }),

    ],
   optimization: {


      // 压缩 css
      //因为覆盖了原本的配置,所以只压缩css的话,js就不被压缩了,所以需要让js也压缩;
         minimizer: [new TerserJSPlugin(), new CssMinimizerPlugin()],
   }

}
Optimization 4: Dll dynamic link library (applicable to development environment)
In the development environment, every time the project is packaged and built, react, react-dom, antd and other third-party libraries that will not change will be repackaged once, and the Dll dynamic link library will be packaged in advance. The third-party modules are packaged into the dll file, and when they are packaged and built in the development environment, they can be obtained directly from the dll file, and these modules are no longer packaged, so that the third-party modules are only packaged once, avoiding repeated packaging and no change The third-party module improves the packaging efficiency of webpack.
Note that dllPlugin is only applicable to the development environment, because the production environment is packaged once and it is not necessary to be used in the production environment.
dll dynamic link library usage steps:

1. Separately configure a webpack.dll.js file, which is specially used to package the third-party library webpack.dll.js that will not change
module.exports = {


  mode: 'production',
  // JS 执行入口文件
  entry: {


    // 把 React, antd相关模块的放到一个单独的动态链接库
    vendor: ['react', 'react-dom','antd','react-router-dom'],
  },
  output: {


    // 输出的动态链接库的文件名称,[name] 代表当前动态链接库的名称,
    // 也就是 entry 中配置的 vendor
    filename: '[name].dll.js',
    // 输出的文件都放到 dll 目录下
    path: path.join(__dirname, '..', 'dll'),
    // library表示打包的是一个库,存放动态链接库的全局变量名称,
    // 例如对应 vendor 来说就是 _dll_vendor
    // 之所以在前面加上 _dll_ 是为了防止全局变量冲突
    library: '_dll_[name]',
  }
}
2. In the configuration file of the packaged project, insert the pre-packaged library into the html via add-asset-html-webpack-plugin
webpack.dev.js
const AddAssetHtmlWebpackPlugin = require('add-asset-html-webpack-plugin')
module.exports = {


//..
plugins: [
   new AddAssetHtmlWebpackPlugin({


     filepath:path.join(__dirname, '..', 'dll/vendor.dll.js'),
   })
}
3. Add the configuration to generate the manifest file manifest.json in the configuration file specially packaged with the third party (the manifest.json file clearly describes which modules are included in the corresponding vendor.dll.js file, as well as the path of each module and ID, is an index file)
webpack.dll.js
const DllPlugin = require('webpack/lib/DllPlugin')
module.exports = {


//..
plugins: [
    // 接入 DllPlugin
    new DllPlugin({


      // 动态链接库的全局变量名称,需要和 output.library 中保持一致
      // 该字段的值也就是输出的 manifest.json 文件 中 name 字段的值
      // 例如 vendor.manifest.json 中就有 "name": "_dll_vendor"
      name: '_dll_[name]',
      // 描述动态链接库的 manifest.json 文件输出时的文件名称
      path: path.join(__dirname, '..', 'dll/[name].manifest.json'),
    }),
  ]
}
4. In the configuration file of the packaged project, tell webpack which manifest file to query first when packaging the third-party library. If the list contains the currently used third-party library, it will not be packaged, because webpack has been manually introduced into the
html .dev.js
const DllReferencePlugin = require('webpack/lib/DllReferencePlugin');
module.exports = {


//..
 new DllReferencePlugin({


     manifest: require(path.join(__dirname, '..', 'dll/vendor.manifest.json'))
   }),
}
5. Vendor packaging
Configure an npm script in package.json
{


  ...
 "scripts": {


     "dll": "webpack --config webpack-config/webpack.dll.js",
  }
}
After running yarn dll, a dll directory will be generated, which contains two files vendor.dll.js and vendor.manifest.json, the former contains the code of the library, and the latter is the resource list.
6. Execute the construction project in the development environment and
run yarn dev
Improvement effect
After configuring the dynamic link library dll, the author found that the project construction time was reduced by about 2 seconds, which improved the construction efficiency to a certain extent.
Optimization 5: babel-loader opens the cache to improve the secondary construction speed (applicable to the development environment)
babel-loader can use the specified folder to cache the modules processed by babel, so that when compiling for the second time, it will directly use the cache for the parts that have not been changed, and will not compile again.
webpack.dev.js
module.exports = {


  //...
  module: {


    rules: [
      {


        test: /\.ts(x)?$/,
        include: [path.resolve(__dirname, 'src')],
        // 当有设置cacheDirectory时,指定的目录将用来缓存 loader 的执行结果。
        // 如下配置,loader 将使用默认的缓存目录 node_modules/.cache/babel-loader
        use: ['babel-loader?cacheDirectory', 'ts-loader'],
      },
    ],
  },
}
Optimization 6: Choose the right Source Map
When webpack packages source code, it may be difficult to track down the original location of errors and warnings in the source code, and Source Map can map the compiled code back to the original source code. Source Map is essentially an information file, which stores the corresponding location information before and after code conversion. It records the source code position before conversion corresponding to the converted and compressed code, which is the mapping between source code and production code. Source Map solves the problem that during the packaging process, after the code is compressed, whitespace-removed, and babel compiled and transformed, the code cannot be debugged due to the large differences between the codes.
Source Map configuration:
JavaScript Source Map configuration is very simple, just add devtool to the webpack configuration.
For css, scss, and less, you need to add additional Source Map configuration items. As shown in the following example:
module.exports = {


  // ...
  devtool: 'source-map',
  module: {


    rules: [
      {


        test: /\.scss$/,
        use: [
          'style-loader',
          {


            loader: 'css-loader',
            options: {


               sourceMap: true,
            },
          },
          {


            loader: 'sass-loader',
            options: {


              sourceMap: true,
            },
          }
        ] ,
      }
    ],
  },
};
Choice of JavaScript Source Map configuration:
Webpack supports multiple Source Map forms. In addition to being configured as devtool:'source-map', you can also choose cheap-source-map, eval-source-map, etc. according to different needs. Usually they are abbreviated versions of the source map, because generating a complete source map will prolong the overall construction time. If the packaging speed is relatively high, it is recommended to choose a simplified version of the source map. For example, in the development environment, eval-cheap-module-source-map is usually a good choice, which is a good compromise between packaging speed and source code information restoration.
The following introduces the meaning of the common components of the Source Map configuration:
(1) eval:
The Source Map file will not be generated separately, and the mapping relationship will be stored in the packaged file, and stored by eval
(2) source-map:
The Source Map file will be generated separately, and the mapping relationship will be stored in a separate file
(3) inline:
the Source Map file will not be generated separately, and the mapping relationship will be stored in a packaged file, and stored in the form of a base64 string
(4) cheap:
The generated mapping information can only locate the error row but not the error column
(5) module:
not only hope to store the mapping relationship of our code, but also hope to store the mapping relationship of the third-party module, so that the third-party module can also be better when there is an error Troubleshooting
eval-cheap-module-source-map only needs line error information, and contains third-party module error information, and does not generate a separate Source Map file. Code compression will not be performed in the development environment, so even if there is no column information in the Source Map, it will not affect breakpoint debugging. Because the speed of generating this Source Map is also faster. So in the development environment we set devtool to cheap-module-eval-source-map
Improved effect:
The source map in the development environment of the original configuration file of the project selects 'inline-source-map'. According to the author's practice, in the development environment, use 'inline-source-map' to modify a certain code, and the real-time compilation speed is 3 Seconds, change to use 'eval-cheap-module-source-map', make the same modification to the code, the speed of real-time compilation is 1-2 seconds, and the speed has been significantly improved.