1. Isolation and downgrade
Current limiting is a preventive measure. Although current limiting can try to avoid service failures caused by high concurrency, services may also fail due to other reasons.
To control these faults within a certain range and avoid avalanches, it is necessary to rely on thread isolation (bulkwall mode) and fuse downgrade methods.
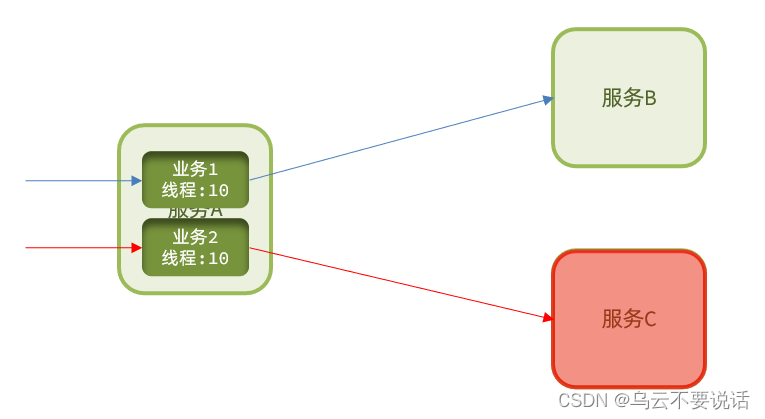
Thread isolation : When calling the service provider, the caller allocates an independent thread pool for each call request. When a failure occurs, at most the resources in this thread pool are consumed to avoid exhausting all the resources of the caller.
Fuse downgrade : It is to add a circuit breaker on the caller's side to count the calls to the service provider. If the failure rate of the call is too high, the service will be blown and access to the service provider will not be allowed.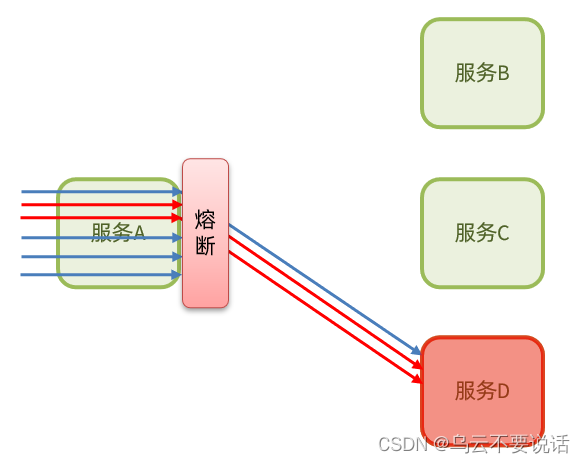
It can be seen that whether it is thread isolation or fuse downgrade, it is the protection of the client (caller). It is necessary to perform thread isolation or service fusing when the caller initiates a remote call.
And our microservice remote calls are all based on Feign, so we need to integrate Feign with Sentinel, and implement thread isolation and service fuse in Feign.
1.1, FeignClient integrates Sentinel
In Spring Cloud, microservice calls are all implemented through Feign, so Feign and Sentinel must be integrated for client protection.
Modify the configuration and enable the sentinel function
Modify the application.yml file of OrderService to enable Feign's Sentinel function:
feign:
  sentinel:
    enabled: true # 开启feign对sentinel的支持
Write failure downgrade logic
After a business failure, an error cannot be reported directly, but a friendly prompt or default result should be returned to the user. This is the failure downgrade logic.
Write downgrade logic for FeignClient after failure
① Method 1: FallbackClass, unable to handle exceptions of remote calls
②Method 2: FallbackFactory, which can handle the exception of remote calls, we choose this
Here we demonstrate the failure downgrade processing of the second method.
Step 1 : Define classes in the feeding-api project to implement FallbackFactory:
code:
@Slf4j
public class UserClientFallbackFactory implements FallbackFactory<UserClient> {
    @Override
    public UserClient create(Throwable throwable) {
        return new UserClient() {
            @Override
            public User findById(Long id) {
                log.error("查询用户异常", throwable);
                return new User();
            }
        };
    }
}
Step 2 : Register UserClientFallbackFactory as a Bean in the DefaultFeignConfiguration class in the feeding-api project:
@Bean
public UserClientFallbackFactory userClientFallbackFactory(){
    return new UserClientFallbackFactory();
}
Step 3 : Use UserClientFallbackFactory in the UserClient interface in the feeding-api project:
@FeignClient(value = "userservice", fallbackFactory = UserClientFallbackFactory.class)
public interface UserClient {

    @GetMapping("/user/{id}")
    User findById(@PathVariable("id") Long id);
}
After restarting, visit the order query service once, and then check the sentinel console, you can see the new cluster point link:

Summarize
Avalanche solutions supported by Sentinel:
-
Thread isolation (silo wall mode)
-
downgrade circuit breaker
Steps for Feign to integrate Sentinel:
-
Configure in application.yml: feign.sentienl.enable=true
-
Write a FallbackFactory for FeignClient and register it as a Bean
-
Configure FallbackFactory to FeignClient
1.2. Thread isolation (bulkwall mode)
Implementation of thread isolation
Thread isolation can be achieved in two ways:
thread pool isolation
Semaphore isolation (Sentinel uses it by default)
As shown in the picture:
Thread pool isolation : assign a thread pool to each service call business, and use the thread pool itself to achieve the isolation effect
Semaphore isolation : Instead of creating a thread pool, it uses a counter mode to record the number of threads used by the business. When the upper limit of the semaphore is reached, new requests are prohibited.
Pros and cons of both:


sentinel's thread isolation
Instructions for use :
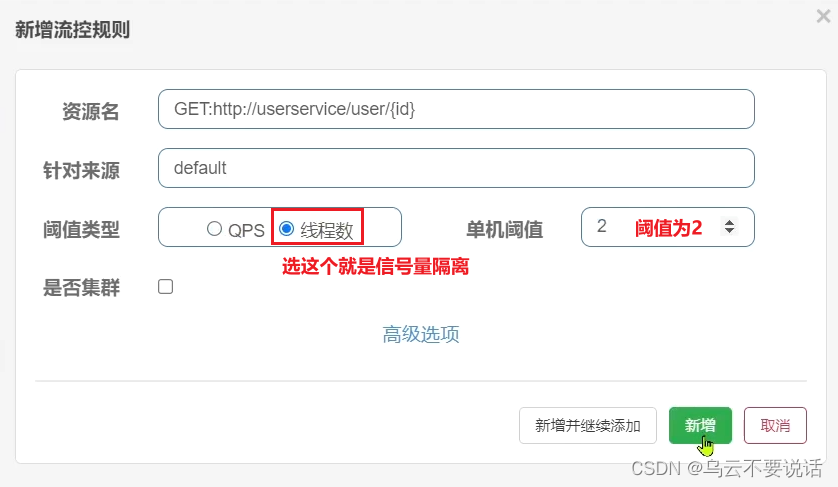
When adding a throttling rule, you can choose two threshold types:
QPS: It is the number of requests per second, which has been demonstrated in the quick start
Number of threads: It is the maximum number of tomcat threads that can be used by this resource. That is, by limiting the number of threads, thread isolation (bulkwall mode) is achieved.
Case requirements : Set flow control rules for the query user interface of UserClient in the order-service service, and the number of threads cannot exceed 2. Then use jemeter to test.
1) Configure isolation rules
Select the flow control button behind the feign interface:
Fill out the form:
2) Jmeter test
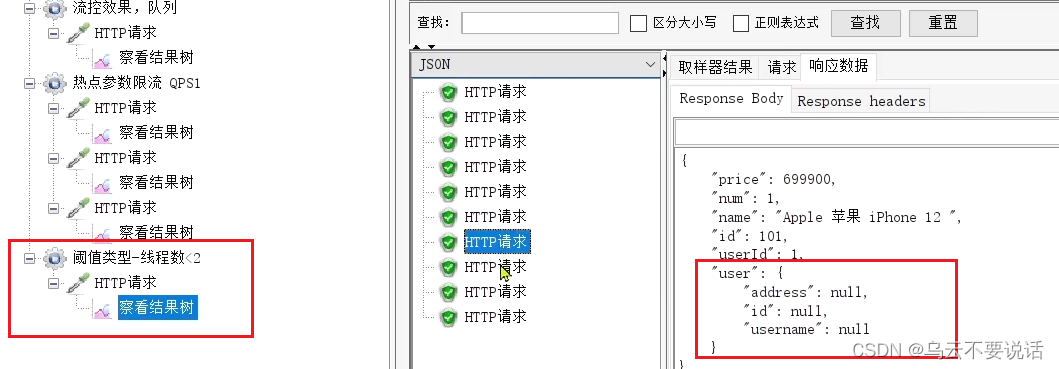
Select "Threshold Type - Number of Threads < 2":
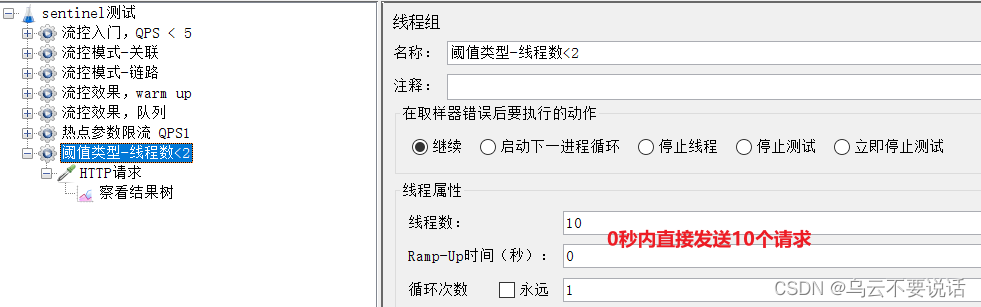
Check the running results:
It is found that although the results are all passed, the response to some requests is the null information returned by the downgrade.


Summarize
What are the two means of thread isolation?
-
Semaphore isolation
-
thread pool isolation
What are the characteristics of semaphore isolation?
-
Based on the counter mode, simple and low overhead
What are the characteristics of thread pool isolation?
-
Based on the thread pool mode, there is additional overhead, but the isolation control is stronger
1.3, fuse downgrade
Fuse downgrade is an important means to solve the avalanche problem. The idea is that the circuit breaker counts the abnormal proportion of service calls and the proportion of slow requests, and if the threshold is exceeded, the service will be broken . That is, all requests to access the service are intercepted; and when the service is restored, the circuit breaker will release the request to access the service.
Circuit breaker control fusing and release is done through the state machine:

The state machine consists of three states:
-
closed: closed state, the circuit breaker releases all requests, and starts to count the proportion of exceptions and slow requests. If the threshold is exceeded, switch to the open state
-
open: In the open state, the service call is interrupted , and the request to access the interrupted service will be rejected, fail fast, and go directly to the downgrade logic. After 5 seconds in the Open state, it will enter the half-open state
-
half-open: In the half-open state, a request is released, and the next operation is judged according to the execution result.
-
The request is successful: switch to the closed state
-
Request failed: switch to open state
-
There are three types of circuit breaker fusing strategies: slow call, abnormal ratio, abnormal number
1.3.1, slow call
Slow call : A request whose service response time (RT) is longer than the specified time is considered a slow call request. Within the specified time, if the number of requests exceeds the set minimum number and the proportion of slow calls is greater than the set threshold, a circuit breaker will be triggered.
For example:
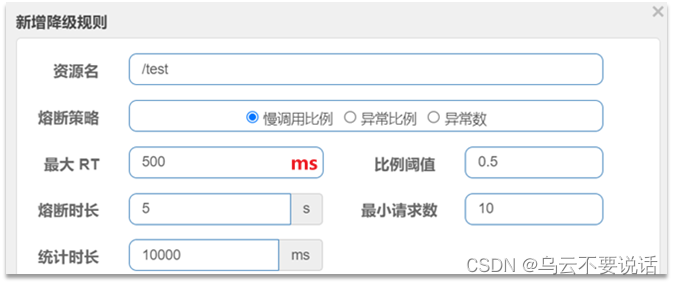
Interpretation: Calls with an RT of more than 500ms are slow calls. Count the requests within the last 10,000ms. If the number of requests exceeds 10 and the proportion of slow calls is not less than 0.5, a circuit breaker will be triggered, and the circuit breaker will last for 5 seconds. Then enter the half-open state and release a request for testing.
the case
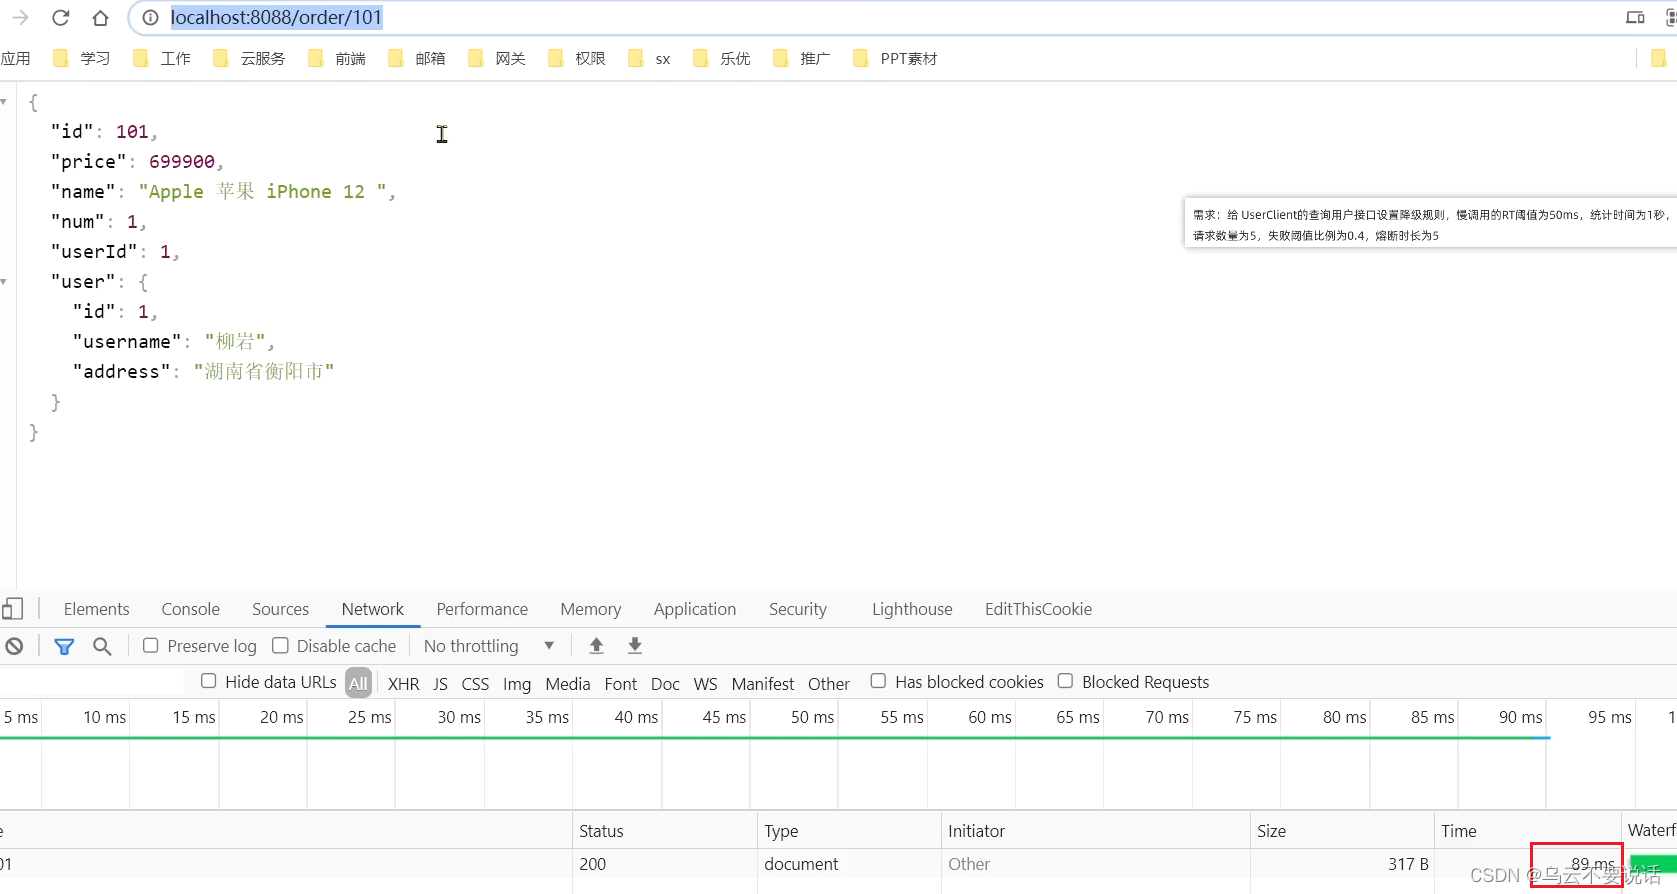
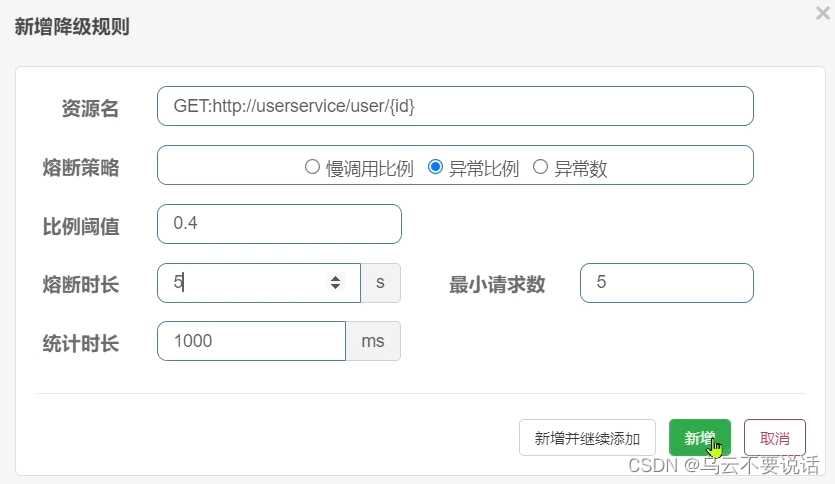
Requirements: Set downgrade rules for UserClient's query user interface. The RT threshold for slow calls is 50ms, the statistics time is 1 second, the minimum number of requests is 5, the failure threshold ratio is 0.4, and the fuse duration is 5
1) Set slow calls
Modify the service of the /user/{id} interface in user-service. Simulate a delay time by sleeping:
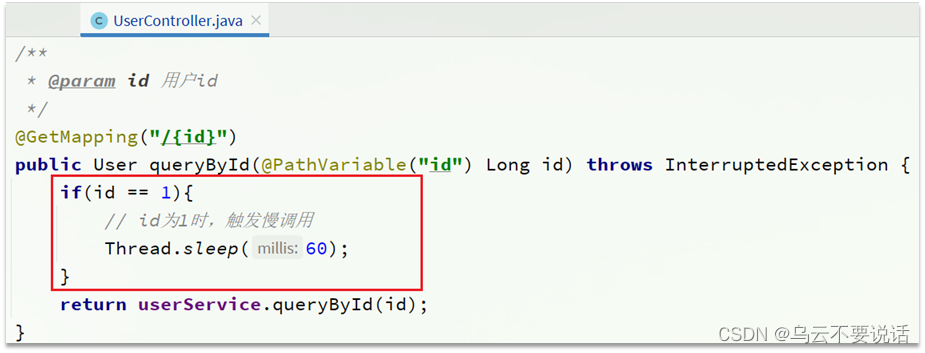
At this point, the order with orderId=101 is associated with the user whose id is 1, and the calling time is 60ms:

2) Set fuse rules
Next, set the downgrade rules for the feign interface:


Requests exceeding 50ms are considered slow requests
3) test
Visit in the browser: http://localhost:8088/order/101 , refresh 5 times quickly, you can find:

The circuit breaker was triggered, the request duration was shortened to 5ms, it failed quickly, and the degraded logic was followed, and null was returned
Access in the browser: http://localhost:8088/order/102 , it was also blown:

1.3.2. Abnormal ratio and abnormal number
Abnormal ratio or abnormal number : Count calls within a specified time period. If the number of calls exceeds the specified number of requests, and the proportion of abnormalities reaches the set ratio threshold (or exceeds the specified abnormal number), a circuit breaker will be triggered.
For example, an unusual scale setting:

Interpretation: Count the requests within the last 1000ms. If the number of requests exceeds 10 and the abnormality ratio is not less than 0.4, a circuit breaker will be triggered.
An exception number setting:

Interpretation: Count the requests within the last 1000ms. If the number of requests exceeds 10 and the abnormal ratio is not less than 2, a circuit breaker will be triggered.
the case
Requirements: Set downgrade rules for UserClient's query user interface, the statistics time is 1 second, the minimum number of requests is 5, the failure threshold ratio is 0.4, and the fuse duration is 5s
1) Set exception request
First, modify the business of the interface /user/{id} in user-service. Manually throw an exception to trigger a circuit breaker with an abnormal ratio:

In other words, when the id is 2, an exception will be triggered
2) Set fuse rules
Next, set the downgrade rules for the feign interface:

 In 5 requests, as long as the exception ratio exceeds 0.4, that is, there are more than 2 exceptions, the circuit breaker will be triggered.
3) test
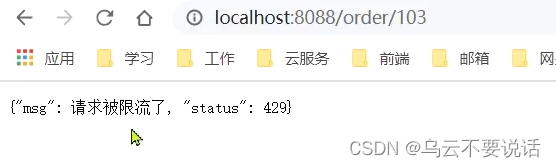
Quickly visit in the browser: http://localhost:8088/order/102 , refresh 5 times quickly, and trigger the circuit breaker:

At this point, we go to visit 103, which should be normal:

2. Authorization rules
Authorization rules can judge and control the source of the requester.
2.1. Basic rules
Authorization rules can control the source of the caller, and there are two ways: white list and black list.
-
Whitelist: callers whose origin is in the whitelist are allowed to access
-
Blacklist: Callers whose origin is in the blacklist are not allowed to access
Click Authorization on the left menu to see the authorization rules:
-
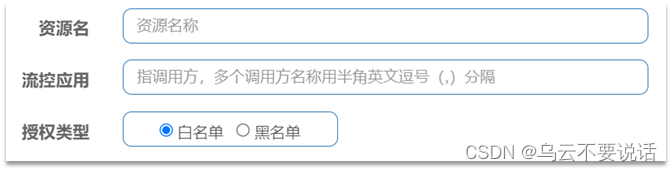
Resource name: It is the protected resource, such as /order/{orderId}
-
Flow control application: is the list of sources,
-
If the white list is checked, the sources in the list are allowed to access.
-
If the blacklist is checked, the sources in the list are prohibited from accessing.
-
for example:
 We allow requests from gateway to order-service, and do not allow browsers to access order-service, so the source name (origin) of the gateway must be filled in the white list .
2.2. How to get origin
Sentinel obtains the source of the request through the parseOrigin of the RequestOriginParser interface.
public interface RequestOriginParser {
    /**
     * 从请求request对象中获取origin,获取方式自定义
     */
    String parseOrigin(HttpServletRequest request);
}
The function of this method is to get the origin value of the requester from the request object and return it.
By default, no matter where the requester comes from, sentinel will always return the value default, which means that the source of all requests is considered to be the same value default.
Therefore, we need to customize the implementation of this interface so that different requests can return different origins .
For example, in the order-service service, we define an implementation class of RequestOriginParser:
@Component
public class HeaderOriginParser implements RequestOriginParser {
    @Override
    public String parseOrigin(HttpServletRequest request) {
        // 1.获取请求头
        String origin = request.getHeader("origin");
        // 2.非空判断
        if (StringUtils.isEmpty(origin)) {
            origin = "blank";
        }
        return origin;
    }
}
We will try to get the origin value from the request-header.
2.3. Add a request header to the gateway
Since the way to get the origin of the request is to get the origin value from the requests-header, we must make all requests routed from the gateway to the microservice have the origin header .
This needs to be realized by using a GatewayFilter learned before, AddRequestHeaderGatewayFilter.
Modify application.yml in the gateway service and add a defaultFilter:
spring:
  cloud:
    gateway:
      default-filters:
        - AddRequestHeader=origin,gateway
      routes:
       # ...略
In this way, all requests routed from the gateway will carry the origin header with the value gateway. Requests arriving at the microservice from elsewhere do not have this header.
2.4. Configure authorization rules
Next, we add an authorization rule to allow requests whose origin value is gateway.

The configuration is as follows:

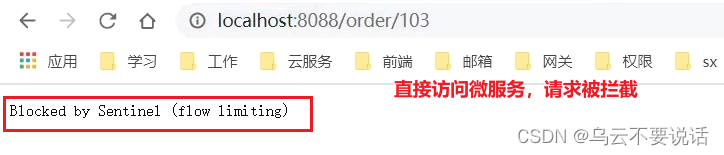
Now, we skip the gateway directly and access the order-service service:
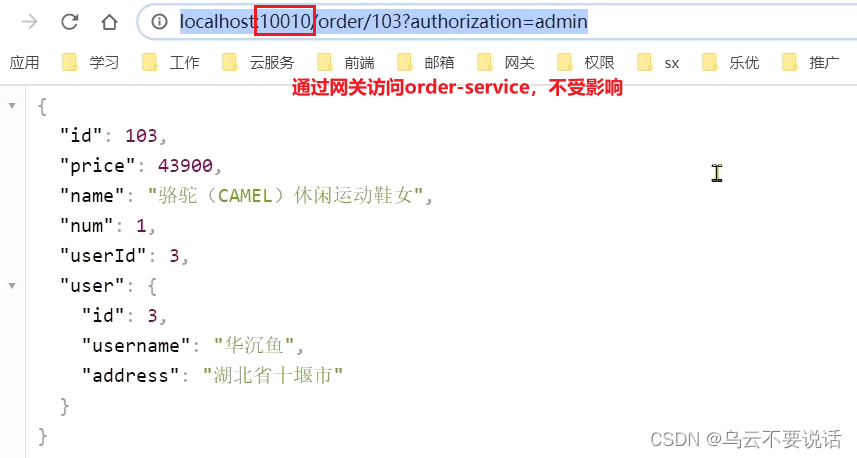
Access through the gateway:
2.5. Custom exception results
By default, when current limiting, downgrading, or authorization interception occurs, an exception will be thrown to the caller. Abnormal results are flow limiting (current limiting). This is not friendly enough, and it is impossible to know whether it is current limiting, downgrading or authorized interception.
exception type
And if you want to customize the return result when an exception occurs, you need to implement the BlockExceptionHandler interface:
public interface BlockExceptionHandler {
    /**
     * 处理请求被限流、降级、授权拦截时抛出的异常:BlockException
     */
    void handle(HttpServletRequest request, HttpServletResponse response, BlockException e) throws Exception;
}
This method has three parameters:
HttpServletRequest request:request对象
HttpServletResponse response:response对象
BlockException e: the exception thrown when intercepted by sentinel
BlockException here contains several different subclasses:
abnormal illustrate FlowException Current limit exception ParamFlowException Abnormal hotspot parameter current limit DegradeException downgrade exception AuthorityException Authorization rule exception SystemBlockException System rule exception
Custom exception handling
Next, we define a custom exception handling class in order-service:
@Component
public class SentinelExceptionHandler implements BlockExceptionHandler {
    @Override
    public void handle(HttpServletRequest request, HttpServletResponse response, BlockException e) throws Exception {
        String msg = "未知异常";
        int status = 429;

        if (e instanceof FlowException) {
            msg = "请求被限流了";
        } else if (e instanceof ParamFlowException) {
            msg = "请求被热点参数限流";
        } else if (e instanceof DegradeException) {
            msg = "请求被降级了";
        } else if (e instanceof AuthorityException) {
            msg = "没有权限访问";
            status = 401;
        }

        response.setContentType("application/json;charset=utf-8");
        response.setStatus(status);
        response.getWriter().println("{\"msg\": " + msg + ", \"status\": " + status + "}");
    }
}
Restart the test, and in different scenarios, different exception messages will be returned.
Limiting:
When authorizing interception:

3. Persistence of rules
Now, all rules of sentinel are stored in memory, and all rules will be lost after restarting. In a production environment, we must ensure the persistence of these rules to avoid loss.
3.1, rule management mode
Whether the rules can be persisted depends on the rule management mode. Sentinel supports three rule management modes:
-
Original mode: The default mode of Sentinel, the rules are saved in memory, and the service will be lost after restarting the service.
-
pull mode
-
push mode
pull mode
Pull mode: The console pushes the configured rules to the Sentinel client, and the client saves the configured rules in a local file or database. In the future, we will regularly query local files or databases to update local rules.

push mode
Push mode: The console pushes configuration rules to a remote configuration center, such as Nacos. The Sentinel client monitors Nacos, obtains push messages of configuration changes, and completes local configuration updates.

3.2. Realize the push mode
modify item
Modify the project to listen to the sentinel rule configuration in Nacos.
1. Introduce dependencies
Introduce sentinel to monitor nacos dependencies in order-service:
<dependency>
    <groupId>com.alibaba.csp</groupId>
    <artifactId>sentinel-datasource-nacos</artifactId>
</dependency>
2. Configure nacos address
Configure the nacos address and monitor configuration information in the application.yml file in order-service:
spring:
  cloud:
    sentinel:
      datasource:
        flow:
          nacos:
            server-addr: localhost:8848 # nacos地址
            dataId: orderservice-flow-rules
            groupId: SENTINEL_GROUP
            rule-type: flow # 还可以是:degrade、authority、param-flow
Modify sentinel-dashboard source code
SentinelDashboard does not support nacos persistence by default, and the source code needs to be modified.
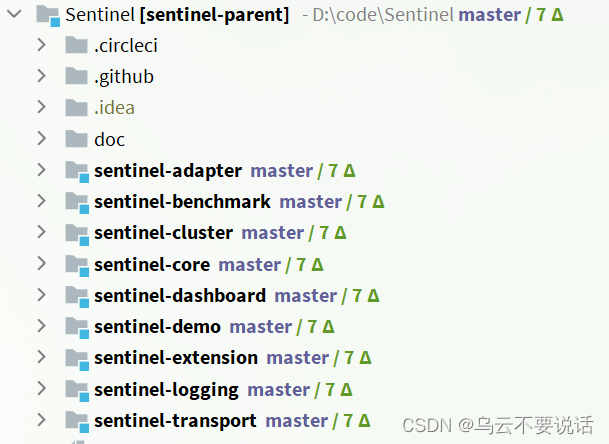
Open the sentinel source package with IDEA
1. Modify nacos dependencies
In the pom file of the sentinel-dashboard source code, nacos depends on the default scope of test, which can only be used during testing. Here it needs to be removed:
Remove the scope that sentinel-datasource-nacos depends on:
<dependency>
    <groupId>com.alibaba.csp</groupId>
    <artifactId>sentinel-datasource-nacos</artifactId>
</dependency>
2. Add nacos support
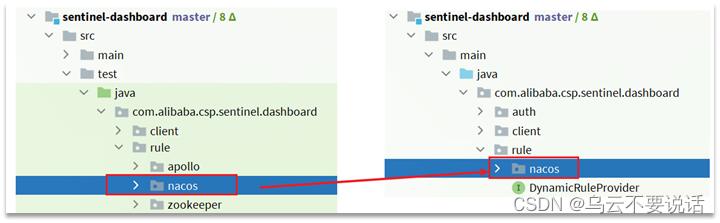
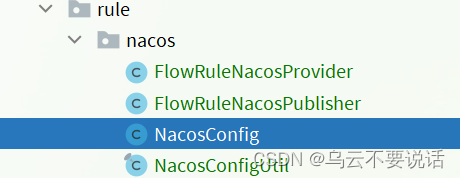
Under the test package of sentinel-dashboard, support for nacos has been written, and we need to copy it to main.
3. Modify nacos address
Then, you also need to modify the NacosConfig class in the test code:
Modify the nacos address and let it read the configuration in application.properties:
Add nacos address configuration in application.properties of sentinel-dashboard:
nacos.addr=localhost:8848
4. Configure nacos data source
In addition, you need to modify the FlowControllerV2 class under the com.alibaba.csp.sentinel.dashboard.controller.v2 package:
Let the Nacos data source we added take effect

5. Modify the front-end page
Next, modify the front-end page and add a menu that supports nacos.
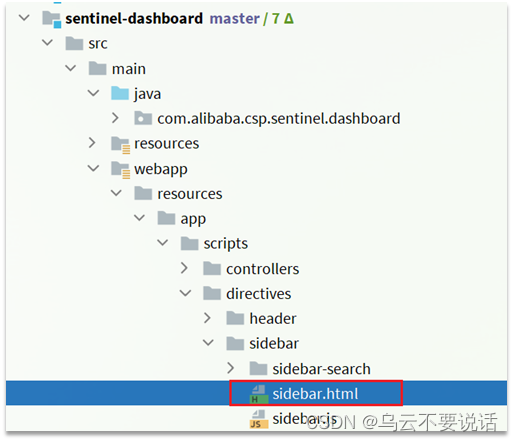
Modify the sidebar.html file in the src/main/webapp/resources/app/scripts/directives/sidebar/ directory:
Turn on this part of the comment:

Modify the text in it:

6. Recompile and package the project
Run the maven plug-in in IDEA, compile and package the modified Sentinel-Dashboard:
7. Start
The startup method is the same as the official one:
java -jar sentinel-dashboard.jarIf you want to modify the nacos address, you need to add parameters:
java -jar -Dnacos.addr=localhost:8848 sentinel-dashboard.jar