This article comes from the CSK6 visual AI development kit activity organized by Jishu Community and Lens Technology. For more development board trial activities, please pay attention to the Jishu Community website. Author: Li Kui
Because I want to make products based on CSK6 in the future, I am more concerned about the following points:
- **[Hardware Support]**Whether the hardware capabilities and AI capabilities provided by CSK6 meet the requirements;
- **【Software Support】**Whether the development SDK is stable and convenient for developers to develop more efficiently;
- **[Documentation Support]** Whether the open document is perfect, and whether there is timely technical support in the follow-up;
Summarize:
After playing the game as a whole, the documentation is still very rich. From the hardware reference design, software SDK and cases, and the knowledge and ability involved, it can be seen that a lot of thought has been spent, and it is well received.
Overall assessment The overall actual practical risk is not large, and some SDK and AI open capabilities have room for development .

The following combines the evaluation of the SDK to explain some of the problems, questions, and expectations for the follow-up .
1. AI capability evaluation
Through the official guidance documents, it is relatively easy to complete the demo verification of AI capabilities. For example, the face recognition provides the SDK source code download address and the sample download and operation routines and instructions, so Xiaobai can also easily get started.

After compiling and burning according to the document, you can preview the Demo effect of face recognition in real time through the official USB-based web browser and connect it to the USB port of the board. (The following is the use of mobile phones, and the people who leave the country are like flowers). In effect, due to the image compression, the displayed image quality is not high, and the actual algorithm is a resolution of 480*640.

Considering the practicability, some non-face verifications have been carried out on face recognition. Judging from the current situation, there will be a certain risk of recognition errors.
However, the score is relatively high in normal face recognition. When making judgments, higher scores need to be considered for judging the similarity of faces. For example, a score above 0.8 is judged as a face.
In addition, it is expected that AI capabilities will be opened up in the future, and some general machine learning and deep learning frameworks and models will be supported.
Compared with K210, V831, V833, and V853, some support in Tensorflow, Pytorch, YoLo, etc. has also increased the possibility of many gameplays and scene applications.
In addition, AIoT can be combined with the network to increase user stickiness, such as the MaixHub online training platform. After experiencing it, the online linkage of devices is relatively smooth, and the experience effect is good.

2. Wi-Fi capability evaluation
The capabilities of AIoT are mentioned above. Just as CSK6 is an AIoT solution, the ESP32-C3 module is also provided in the kit. Next, test and verify whether the functions of the network meet the requirements of some practical and practical scenarios. The following is the secondary development of the official Demo and SDK respectively, followed by the TCP network speed test and the actual practical scene evaluation.
2.1 Demo Verification
You can find cases of WIFI connection and network communication in the development practice -> network chapter of the official document. According to the description, it is easy to verify the ability of Wi-Fi and network communication. I won’t introduce too much here. You can refer to the official document and give it a thumbs up .

2.2 SDK secondary development
Since the network follows the Posix Socket API interface specification, students who have done Linux application development should be very happy, which is also a bright spot.
Considering that application layer developers do not need to be concerned with the Kconfig and DTS mechanisms, another encapsulation is made for the provided interfaces, such as the Wi-Fi module, which provides a unified upward interface exposure, which is convenient for recruited application layer business developers to use:
#include <wifi_core.h>
#include <log.h>

void wifi_test(void)
{
    // 初始化Wi-Fi模块
    wifi.init();

    // 连接AP热点
    wifi.connect_ap("mimi", "xxxxxxxx");
}
The above wifi\_core.c/h encapsulates the provided API, which is roughly as follows. Note that the connection to the AP hotspot here is asynchronous, and the interface provides status for judgment.
In practical and practical situations, it is best to use mechanisms such as semaphores to control.
wifi\_core.h interface file:
#ifndef _WIFI_BLE_H
#define _WIFI_BLE_H

#include <stdbool.h>

/// \brief Wi-Fi模块的返回状态
typedef enum {
    WIFI_OK,
    WIFI_ERROR
}wifi_status_t;

/// \brief Wi-Fi模块的当前模式
typedef enum {
    WIFI_NONE_MODE      = 0,
    WIFI_STA_MODE       = 1,
    WIFI_AP_MODE        = 2,
    WIFI_AP_STA_MODE    = 3,
}wifi_mode_t;

/**
 * @brief
 *  封装了STA相关的接口,后续增加AP和其他相关接口功能
 */
typedef struct {
    char mac[24];           /*!< MAC地址 */
    char ip[16];            /*!< 设备IP */
    char netmask[16];       /*!< 子网掩码 */
    char gw[16];            /*!< 网关 */
    char ssid[32];          /*!< 连接热点名称 */
    char passwd[32];        /*!< 连接热点密码 */

    /**
    * @brief 初始化wifi模块
    *
    * @return wifi_status_t 返回状态
    */
    wifi_status_t (*init)(void);

    /**
    * @brief 反初始化wifi模块
    *
    * @return wifi_status_t 返回状态
    */
    wifi_status_t (*uninit)(void);

    /**
    * @brief 连接热点
    *
    * @return wifi_status_t 返回状态
    */
    wifi_status_t (*connect_ap)(const char* ssid, const char* passwd);

    /**
     * @brief: 断开热点
     * @return wifi_status_t 返回状态
     */
    wifi_status_t (*disconnect_ap)(void);

    //
    /**
     * @brief: 扫描可用热点
     * @return wifi_status_t 返回状态
     */
    // wifi_status_t (*scan_ap)(void);

    /**
     * @brief: 检查Wi-Fi模块是否工作正常
     * @return wifi_status_t 返回状态
     */
    bool (*is_connect)(void);
    /*!< Wi-Fi当前连接状态 */
    bool connect_status;

}wifi_t;

///< wifi单例
///< ESP32-C3产品说明:https://www.espressif.com.cn/zh-hans/products/socs/esp32-c3
extern wifi_t wifi;

#endif
The contents of the wifi\_core.c file are as follows:
#include <stdio.h>
#include <string.h>
#include <stdlib.h>
#include <sys/printk.h>
#include <sys/sys_heap.h>

#include <net/net_if.h>
#include <net/net_core.h>
#include <net/net_context.h>
#include <net/net_mgmt.h>

#include "csk6/csk_wifi.h"

#include <log.h>
#include <wifi_core.h>

__weak wifi_status_t esp32_c3_wifi_init(void);
__weak wifi_status_t esp32_c3_wifi_uninit(void);
__weak wifi_status_t esp32_c3_wifi_connect_ap(const char* ssid,
                                            const char* passwd);
__weak wifi_status_t esp32_c3_wifi_disconnect_ap(void);
// __weak wifi_status_t esp32_c3_wifi_scan_ap(void);
__weak bool esp32_c3_wifi_is_connect(void);

wifi_t wifi = {
    .init           = esp32_c3_wifi_init,
    .uninit         = esp32_c3_wifi_uninit,
    .connect_ap     = esp32_c3_wifi_connect_ap,
    .disconnect_ap  = esp32_c3_wifi_disconnect_ap,
    // .scan_ap        = esp32_c3_wifi_scan_ap,
    .is_connect     = esp32_c3_wifi_is_connect,
    .connect_status = false,
};


static csk_wifi_event_cb_t wifi_event_cb;
static csk_wifi_result_t wifi_result;
static struct net_mgmt_event_callback dhcp_cb;
static void handler_cb(struct net_mgmt_event_callback *cb,
                    uint32_t mgmt_event, struct net_if *iface)
{
    if (mgmt_event != NET_EVENT_IPV4_DHCP_BOUND) {
        return;
    }

    char buf[NET_IPV4_ADDR_LEN];

    snprintf(wifi.ip, sizeof(wifi.ip), "%s",
        net_addr_ntop(AF_INET, &iface->config.dhcpv4.requested_ip,
                    buf, sizeof(buf)));
    snprintf(wifi.netmask, sizeof(wifi.netmask), "%s",
        net_addr_ntop(AF_INET, &iface->config.ip.ipv4->netmask,
                    buf, sizeof(buf)));
    snprintf(wifi.gw, sizeof(wifi.gw), "%s",
        net_addr_ntop(AF_INET, &iface->config.ip.ipv4->gw,
                    buf, sizeof(buf)));

    LOG(EDEBUG, "Your address: %s,Subnet: %s,Router: %s",
        wifi.ip, wifi.netmask, wifi.gw);

    wifi.connect_status = true;
}


static void wifi_event_handler(csk_wifi_event_t events, void *event_data,
                                uint32_t data_len, void *arg)
{
    if (events & CSK_WIFI_EVT_STA_CONNECTED) {
        // wifi.connect_status = true;
        LOG(EDEBUG, "[WiFi sta] connected");
    } else if (events & CSK_WIFI_EVT_STA_DISCONNECTED) {
        wifi.connect_status = false;
        LOG(EDEBUG, "[WiFi sta] disconnected");
    } else {
        abort();
    }
}


__weak wifi_status_t esp32_c3_wifi_init(void)
{
    uint8_t mac_addr[6] = {0};

    /* CSK WiFi 驱动初始化 */
    int rc = csk_wifi_init();
    if (rc != 0) {
        LOG(EERROR, "wifi get mac failed, ret: %d\n", rc);
        return WIFI_ERROR;
    }
    rc = csk_wifi_get_mac(CSK_WIFI_MODE_STA, mac_addr);
    if (rc != 0) {
        LOG(EERROR, "wifi get mac failed, ret: %d\n", rc);
        return WIFI_ERROR;
    }
    snprintf(wifi.mac, sizeof(wifi.mac), "%x:%x:%x:%x:%x:%x",
            mac_addr[0], mac_addr[1], mac_addr[2], mac_addr[3],
            mac_addr[4], mac_addr[5]);
    LOG(EDEBUG, "mac address:%s", wifi.mac);

    return (rc == 0)?WIFI_OK:WIFI_ERROR;
}


__weak wifi_status_t esp32_c3_wifi_uninit(void)
{
    /* CSK WiFi 驱动初始化 */
    int rc = csk_wifi_deinit();

    return (rc == 0)?WIFI_OK:WIFI_ERROR;
}


__weak wifi_status_t esp32_c3_wifi_connect_ap(const char* ssid,
                                                const char* passwd)
{
    /* 配置WiFi回调事件参数 */
    wifi_event_cb.handler = &wifi_event_handler;
    wifi_event_cb.events =
        CSK_WIFI_EVT_STA_CONNECTED | CSK_WIFI_EVT_STA_DISCONNECTED;
    wifi_event_cb.arg = NULL;

    /* 注册WiFi回调事件 */
    csk_wifi_add_callback(&wifi_event_cb);

    /* WiFi参数配置 */
    csk_wifi_sta_config_t sta_config = {0};
    snprintf(sta_config.ssid, sizeof(sta_config.ssid), "%s", ssid);
    snprintf(sta_config.pwd, sizeof(sta_config.pwd), "%s", passwd);
    sta_config.encryption_mode = CSK_WIFI_AUTH_WPA2_PSK;

    int retry_count = 0;
    do {
        LOG(EDEBUG, "connecting to wifi: %s ...", sta_config.ssid);
        /* 连接WiFi */
        int ret = csk_wifi_sta_connect(&sta_config, &wifi_result, K_FOREVER);
        if (ret == 0) {
            snprintf(wifi.ssid, sizeof(wifi.ssid), "%s", ssid);
            snprintf(wifi.passwd, sizeof(wifi.passwd), "%s", passwd);
            break;
        } else {
            if (wifi_result == CSK_WIFI_ERR_STA_FAILED) {
                retry_count++;
                LOG(EERROR, "retry to connecting wifi ... %d", retry_count);
            } else {
                LOG(EERROR, "AP not found or invalid password");
                return WIFI_ERROR;
            }
        }
    } while (retry_count < 10);

    if (retry_count >= 10) return WIFI_ERROR;

    /* 打印已连接WiFi信息 */
    LOG(EDEBUG, "--------------------------Current AP info-------------------------------");
    LOG(EDEBUG, "ssid: %s  pwd: %s  bssid: %s  channel: %d  rssi: %d\n",
        sta_config.ssid, sta_config.pwd, sta_config.bssid, sta_config.channel,
        sta_config.rssi);
    LOG(EDEBUG, "------------------------------------------------------------------------");
    /* 初始化并注册 DHCP BOUND 事件,设备获取 ipv4 地址后产生回调 */
    net_mgmt_init_event_callback(&dhcp_cb, handler_cb, NET_EVENT_IPV4_DHCP_BOUND);
    net_mgmt_add_event_callback(&dhcp_cb);
    struct net_if *iface = net_if_get_default();
    if (!iface) {
        LOG(EDEBUG, "wifi interface not available");
        return WIFI_ERROR;
    }
    /* 开启dhcp client,DHCP 用来分配 IP */
    net_dhcpv4_start(iface);

    return WIFI_OK;
}


__weak wifi_status_t esp32_c3_wifi_disconnect_ap(void)
{
    int rc = csk_wifi_sta_disconnect(&wifi_result, K_FOREVER);

    return (rc == 0)?WIFI_OK:WIFI_ERROR;
}


__weak bool esp32_c3_wifi_is_connect(void)
{
    return wifi.connect_status;
}
After burning the above program, the result of serial port printing is as follows:
[wifi_core.c esp32_c3_wifi_init:94][EDEBUG]mac address:10:91:a8:3e:9b:54
[wifi_core.c esp32_c3_wifi_connect_ap:129][EDEBUG]connecting to wifi: mimi ...
[wifi_core.c esp32_c3_wifi_connect_ap:150][EDEBUG]--------------------------Current AP info-------------------------------
[wifi_core.c esp32_c3_wifi_connect_ap:151][EDEBUG]ssid: mimi  pwd: xxxxxxxx  bssid: 52:fc:57:12:03:ec  channel: 1  rssi: -48
[wifi_core.c esp32_c3_wifi_connect_ap:154][EDEBUG]------------------------------------------------------------------------
[wifi_core.c handler_cb:56][EDEBUG]Your address: 192.168.43.96,Subnet: 255.255.255.0,Router: 192.168.43.1
2.3 Practical scenario - AP distribution network
After verifying the Wi-Fi capability, the next thing to consider is how to make the network distribution more convenient for users when using it.
In my impression, I have bought some hardware products without screens, one of which has a network distribution process as follows:
- Press and hold the button on the device for 3 seconds;
- The indicator light flashes quickly, indicating that it is in the network distribution mode;
- The mobile app guides the device to connect to the Internet;
- When the device changes from fast flashing to slow breathing effect, it means that the networking is successful;
Of course, in addition to the above methods, there are also AirKiss, EspTouch, WeChat applets, and sound wave distribution network supported by ESP32-C3. I plan to use the provided wifi\_ap case to complete the verification effect under the AP distribution network mode .
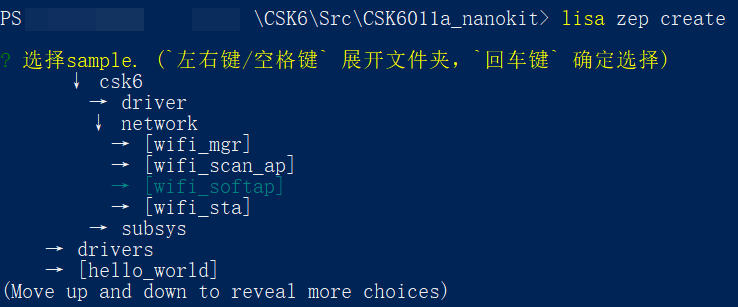
This case is here, created by the following command, just compile and burn, pay attention to select csk6011a\\_c3\\_nano as boards to compile when compiling.
After the program runs, search for the SSID of the ESP device through the mobile phone, and click to connect. However, the Demo here does not provide a DHCP service, and cannot automatically assign an IP to the device. You need to manually set the IP on the mobile phone to connect to the device normally. I remember that there is ESP32-C3, but I don't know SDK是否提供了DHCP服务的能力.
The above AP distribution network does not provide the function of automatically assigning IP to the client because the Demo does not continue to find the relevant interface. After thinking about it, it still has the ability of BLE, but it requires a mobile phone app, which will be more troublesome. Forget it, let’s ask the big-breasted brothers of Lingsi
Although AP and BLE are not used for the time being, but as a developer, when you need to use the network function, you can't write the Wi-Fi SSID and password on the device. Next time, throw it to others to debug the network function. , It will be very inconvenient, and the password needs to be changed, so thinking of the serial port command function provided by the SDK, we can design a wifi connect command to dynamically configure the network, and then try it.
3. Realize one-key network distribution by serial port command
I saw a Wi-Fi case provided in the development document Development Practice->Shell Use, but the function of Wi-Fi network distribution has not been implemented specifically, so let’s implement it next. The final effect is that after the device is started, you can see the wifi command by entering tab on the command line. By outputting on the command line wifi connect ssid passwd 1, you can dynamically connect to the AP network with one click, and save the need to change the code to connect to the network.
uart:~$
  clear    device   devmem   flash    help     history  kernel   pwm
  resize   shell    wifi
uart:~$ wifi connect mimi 12348765 1
[shell_command.c cmd_wifi_connect:75][EDEBUG]cmd_wifi_connect ssid: mimi psw: 12348765 save: 1
[wifi_core.c esp32_c3_wifi_init:94][EDEBUG]mac address:10:91:a8:3e:9b:54
[wifi_core.c esp32_c3_wifi_connect_ap:129][EDEBUG]connecting to wifi: mimi ...
[wifi_core.c esp32_c3_wifi_connect_ap:150][EDEBUG]--------------------------Current AP info-------------------------------
[wifi_core.c esp32_c3_wifi_connect_ap:151][EDEBUG]ssid: mimi  pwd: xxxxxxxx  bssid: 52:fc:57:12:03:ec  channel: 1  rssi: -48
[wifi_core.c esp32_c3_wifi_connect_ap:154][EDEBUG]------------------------------------------------------------------------
[wifi_core.c handler_cb:56][EDEBUG]Your address: 192.168.43.96,Subnet: 255.255.255.0,Router: 192.168.43.1
The above functions are completed through shell\\_command.c, shell\\_command.c is as follows:
/* connect 指令处理函数,附带wifi连接的参数 */
static int cmd_wifi_connect(const struct shell *shell,
                            size_t argc, char **argv)
{
    int rc = 0;

    LOG(EDEBUG, "cmd_wifi_connect ssid: %s psw: %s save: %d \n",
        argv[1], argv[2], atoi(argv[3]));

    // 判断是否已经初始化Wi-Fi模块
    if (!wifi.connect_status) {
        if (WIFI_OK != wifi.init()) {
            LOG(EERROR, "wifi init failed");
            return -1;
        }
        // 连接AP热点
        if (WIFI_OK != wifi.connect_ap(argv[1], argv[2])) {
            LOG(EERROR, "wifi connect ap ssid:%s failed", argv[1]);
            return -1;
        }
    }

    return rc;
}

/// @brief 添加wifi命令的子命令(connect)
SHELL_STATIC_SUBCMD_SET_CREATE(init_deinit_command,
SHELL_CMD(connect, NULL,
    "<ssid> <pwd> <save>, example:mimi 12345678 1",
    cmd_wifi_connect),
SHELL_SUBCMD_SET_END /* Array terminated. */
);

/// @brief 添加WiFi命令集的根命令
SHELL_CMD_REGISTER(wifi, &init_deinit_command, "wifi command", NULL);
Through the above commands, the friendliness of distribution network for developers is satisfied. But there is still a problem, the device will not be reconnected when it is powered off, and it will have to be re-entered next time to configure the network. Therefore, we are going to verify the onboard 16M SPI Flash and littlefs file system again. When the wifi account password is entered and the connection is successful, the connection information will be saved in the Flash, and the automatic reconnection mechanism will be executed next time the power is turned on.
4. File system SDK evaluation - Wi-Fi automatic networking
This part is to borrow littlefs to save the Wi-Fi account password to Flash. After the system is powered on, it will read the Wi-Fi account password in Flash and automatically connect to the Internet.
This piece of documentation is in the development practice->file system usage chapter. Note that you need to use the mklittlefs tool to make a file system image, and then burn it into the relevant partitions of the board through commands. Finally, according to the csk6011a\_nano.overlay provided Document, configure the mount point of the device tree and the system fixed partition, and write the address and space you burned.
After completion, you need to write a test demo to verify the case of mounting, traversing the file system directory, creating and deleting files, and reading and writing files to verify the integrity of the functions. The code to complete these function verifications is flash\_test.c, and the content is as follows:
#include <log.h>
#include <zephyr/fs/fs.h>
#include <flash_core.h>

#define MAX_PATH_LEN            255
#define FLASH_MAX_DATA_LEN      256
#define FLASH_TEST_DATA         "this is a flash read/write test data"
#define FLASH_TEST_FILE_NAME    "/lfs/test.txt"

void flash_test()
{
    int rc;
    struct fs_dirent dirent;
    char* fname = FLASH_TEST_FILE_NAME;
    char test_data[FLASH_MAX_DATA_LEN] = {0};
    struct fs_file_t file = {0};    /*!< 初始化结构体 */

    // 初始化挂载flash设备到/lfs节点
    user_flash_init();

    /* 如果文件先删除 */
    fs_unlink(fname);

    /* 打开文件 */
    rc = fs_open(&file, fname, FS_O_CREATE | FS_O_RDWR);
    if (rc < 0) {
        LOG(EERROR, "FAIL: open %s: %d", fname, rc);
        return ;
    }

    /* 获取文件状态信息 */
    rc = fs_stat(fname, &dirent);
    if (rc < 0) {
        LOG(EERROR, "FAIL: stat %s: %d", fname, rc);
        goto out;
    }

    /* 写文件内容 */
    rc = fs_write(&file, FLASH_TEST_DATA, strlen(FLASH_TEST_DATA));
    if (rc < 0) {
        LOG(EERROR, "FAIL: write %s: %d", fname, rc);
    }

    /* 重定向文件读写指针到开始 */
    rc = fs_seek(&file, 0, FS_SEEK_SET);
    if (rc < 0) {
        LOG(EERROR, "FAIL: seek %s: %d", fname, rc);
        goto out;
    }

    /* 读文件内容 */
    rc = fs_read(&file, test_data, sizeof(test_data));
    if (rc < 0) {
        LOG(EERROR, "FAIL: read %s: [rd:%d]", fname, rc);
        goto out;
    }
    LOG(EDEBUG, "read from %s, data:%s", fname, test_data);

out:
    fs_close(&file);
}
The content of the encapsulation layer flash\\_core.c/h called by the flash\\_test.c file is as follows.
flash\_core.h file content:
#ifndef _FLASH_CORE_H
#define _FLASH_CORE_H

/**
 * @brief flash文件系统初始化,根目录为/lfs1,初始化之后,可以使用zephyr的文件系统API接口访问文件
 * @return 0成功,其他值失败
 */
int user_flash_init(void);

/**
 * @brief 注销flash文件系统
 * @return 0成功,其他值失败
 */
int user_flash_uninit(void);

#endif
The contents of the flash\_core.c file are as follows:
#include <zephyr/zephyr.h>
#include <zephyr/device.h>
#include <zephyr/fs/fs.h>
#include <zephyr/fs/littlefs.h>
#include <zephyr/storage/flash_map.h>
#include <delay.h>
#include <log.h>

#include <flash_core.h>


/// 文件系统设备树信息
#ifdef CONFIG_APP_LITTLEFS_STORAGE_FLASH
static int littlefs_flash_erase(unsigned int id)
{
    const struct flash_area *pfa;
    int rc;

    rc = flash_area_open(id, &pfa);
    if (rc < 0) {
        LOG(EERROR, "FAIL: unable to find flash area %u: %d\n",
            id, rc);
        return rc;
    }

    LOG(EDEBUG, "Area %u at 0x%x on %s for %u bytes\n",
           id, (unsigned int)pfa->fa_off, pfa->fa_dev_name,
           (unsigned int)pfa->fa_size);

    /* Optional wipe flash contents */
    if (IS_ENABLED(CONFIG_APP_WIPE_STORAGE)) {
        rc = flash_area_erase(pfa, 0, pfa->fa_size);
        LOG(EERROR, "Erasing flash area ... %d", rc);
    }

    flash_area_close(pfa);
    return rc;
}
#define PARTITION_NODE DT_NODELABEL(lfs1)

#if DT_NODE_EXISTS(PARTITION_NODE)
FS_FSTAB_DECLARE_ENTRY(PARTITION_NODE);
#else /* PARTITION_NODE */
FS_LITTLEFS_DECLARE_DEFAULT_CONFIG(storage);
static struct fs_mount_t lfs_storage_mnt = {
    .type = FS_LITTLEFS,
    .fs_data = &storage,
    .storage_dev = (void *)FLASH_AREA_ID(storage),
    .mnt_point = "/lfs",
};
#endif /* PARTITION_NODE */

    struct fs_mount_t *mp =
#if DT_NODE_EXISTS(PARTITION_NODE)
        &FS_FSTAB_ENTRY(PARTITION_NODE)
#else
        &lfs_storage_mnt
#endif
        ;

static int littlefs_mount(struct fs_mount_t *mp)
{
    int rc;

    rc = littlefs_flash_erase((uintptr_t)mp->storage_dev);
    if (rc < 0) {
        return rc;
    }

    /* Do not mount if auto-mount has been enabled */
#if !DT_NODE_EXISTS(PARTITION_NODE) ||                      \
    !(FSTAB_ENTRY_DT_MOUNT_FLAGS(PARTITION_NODE) & FS_MOUNT_FLAG_AUTOMOUNT)
    rc = fs_mount(mp);
    if (rc < 0) {
        LOG(EDEBUG, "FAIL: mount id %" PRIuPTR " at %s: %d\n",
               (uintptr_t)mp->storage_dev, mp->mnt_point, rc);
        return rc;
    }
    LOG(EDEBUG, "%s mount: %d\n", mp->mnt_point, rc);
#else
    LOG(EDEBUG, "%s automounted\n", mp->mnt_point);
#endif

    return 0;
}
#endif /* CONFIG_APP_LITTLEFS_STORAGE_FLASH */

#ifdef CONFIG_APP_LITTLEFS_STORAGE_BLK_SDMMC
struct fs_littlefs lfsfs;
static struct fs_mount_t __mp = {
    .type = FS_LITTLEFS,
    .fs_data = &lfsfs,
    .flags = FS_MOUNT_FLAG_USE_DISK_ACCESS,
};
struct fs_mount_t *mp = &__mp;

static int littlefs_mount(struct fs_mount_t *mp)
{
    static const char *disk_mount_pt = "/"CONFIG_SDMMC_VOLUME_NAME":";
    static const char *disk_pdrv = CONFIG_SDMMC_VOLUME_NAME;

    mp->storage_dev = (void *)disk_pdrv;
    mp->mnt_point = disk_mount_pt;

    return fs_mount(mp);
}
#endif /* CONFIG_APP_LITTLEFS_STORAGE_BLK_SDMMC */


static int lsdir(const char *path)
{
    int res;
    struct fs_dir_t dirp;
    static struct fs_dirent entry;

    fs_dir_t_init(&dirp);

    /* Verify fs_opendir() */
    res = fs_opendir(&dirp, path);
    if (res) {
        LOG(EERROR, "Error opening dir %s [%d]", path, res);
        return res;
    }

    LOG(EDEBUG, "Listing dir %s ...", path);
    for (;;) {
        /* Verify fs_readdir() */
        res = fs_readdir(&dirp, &entry);

        /* entry.name[0] == 0 means end-of-dir */
        if (res || entry.name[0] == 0) {
            if (res < 0) {
                LOG(EERROR, "Error reading dir [%d]", res);
            }
            break;
        }

        if (entry.type == FS_DIR_ENTRY_DIR) {
            LOG(EDEBUG, "[DIR ] %s", entry.name);
        } else {
            LOG(EDEBUG, "[FILE] %s (size = %zu)",
                   entry.name, entry.size);
        }
    }

    /* Verify fs_closedir() */
    fs_closedir(&dirp);

    return res;
}


int user_flash_init()
{
    static bool is_init = false;
    struct fs_statvfs sbuf;
    int rc;

    if (is_init) return 0;

    /* 挂载文件系统 */
    rc = littlefs_mount(mp);
    if (rc < 0) {
        LOG(EERROR, "fs mount failed.");
        return -1;
    }

    /* 检索文件系统的信息,返回文件系统中的总空间和可用空间。 */
    rc = fs_statvfs(mp->mnt_point, &sbuf);
    if (rc < 0) {
        LOG(EERROR, "FAIL: statvfs: %d", rc);
        return -1;
    }

    LOG(EDEBUG, "%s: bsize = %lu ; frsize = %lu ;"
           " blocks = %lu ; bfree = %lu",
           mp->mnt_point,
           sbuf.f_bsize, sbuf.f_frsize,
           sbuf.f_blocks, sbuf.f_bfree);

    /* 检索文件系统的目录 */
    rc = lsdir(mp->mnt_point);
    if (rc < 0) {
        LOG(EERROR, "FAIL: lsdir %s: %d\n", mp->mnt_point, rc);
    }

    if (rc == 0) is_init=true;
    return rc;
}


int user_flash_uninit(void)
{
    /* 卸载文件系统 */
    int rc = fs_unmount(mp);
    LOG(EDEBUG, "%s unmount: %d", mp->mnt_point, rc);

    return rc;
}
After the above code is compiled, the results printed by the serial port are as follows, indicating that the read and write data is normal:
[flash_core.c littlefs_flash_erase:26][EDEBUG]Area 0 at 0x700000 on FLASH_CTRL for 1048576 bytes

[flash_core.c littlefs_mount:81][EDEBUG]/lfs1 automounted

[flash_core.c user_flash_init:172][EDEBUG]/lfs1: bsize = 16 ; frsize = 4096 ; blocks = 256 ; bfree = 253
[flash_core.c lsdir:125][EDEBUG]Listing dir /lfs1 ...
[flash_core.c lsdir:141][EDEBUG][FILE] boot_count (size = 1)
[flash_core.c lsdir:141][EDEBUG][FILE] pattern.bin (size = 547)
[flash_core.c lsdir:141][EDEBUG][FILE] test.txt (size = 36)
[flash_test.c flash_test:75][EDEBUG]read from /lfs1/test.txt, data:this is a flash read/write test data
Next, re-implement the shell\_command.c file, so that the command line supports the successful connection to wifi, and saves it to flash. The command is as follows
wifi connect ssid passwd 1
The last 1 means save to Flash, and 0 means not to save to Flash.
The transformation of shell\_command.c is as follows:
#include <cJSON_user_define.h>

static int cmd_write_to_flash(const char* pathname, const char* data)
{
    int rc;
    ssize_t size;
    struct fs_file_t file = {0};    /*!< 初始化结构体 */

    // 初始化flash
    user_flash_init();

    // 写入文件
    rc = fs_open(&file, pathname, FS_O_CREATE | FS_O_WRITE);
    if (rc < 0) {
        LOG(EERROR, "FAIL: open %s: %d", pathname, rc);
        return -1;
    }

    /* 写入文件 */
    size = fs_write(&file, data, strlen(data));
    if (size < 0) {
        LOG(EERROR, "FAIL: write %s: %d", pathname, rc);
        goto out;
    }

    LOG(EDEBUG, "write %s to file %s successed", data, pathname);

out:
    fs_close(&file);
    return rc;
}


/* connect 指令处理函数,附带wifi连接的参数 */
static int cmd_wifi_connect(const struct shell *shell,
                            size_t argc, char **argv)
{
    int rc = 0;
    char json_data[100] = {0};
    int data_len = sizeof(json_data);

    LOG(EDEBUG, "cmd_wifi_connect ssid: %s psw: %s save: %d \n",
        argv[1], argv[2], atoi(argv[3]));

    // 判断是否已经初始化Wi-Fi模块
    if (!wifi.connect_status) {
        if (WIFI_OK != wifi.init()) {
            LOG(EERROR, "wifi init failed");
            return -1;
        }
        // 连接AP热点
        if (WIFI_OK != wifi.connect_ap(argv[1], argv[2])) {
            LOG(EERROR, "wifi connect ap ssid:%s failed", argv[1]);
            return -1;
        }
    }

    // 判断是否需要把SSID和Password保存到Flash中
    if (atoi(argv[3]) == 1) {
        // 构造json数据,格式为
        // {
        //     "ssid": "xxxxxx",
        //     "passwd": "xxxxxx"
        // }
        JSON_SERIALIZE_CREATE_OBJECT_START(json_root_obj);
        JSON_SERIALIZE_ADD_STRING_TO_OBJECT(json_root_obj, "ssid", argv[1]);
        JSON_SERIALIZE_ADD_STRING_TO_OBJECT(json_root_obj, "passwd", argv[2]);
        JSON_SERIALIZE_STRING(json_root_obj, json_data, data_len);
        JSON_SERIALIZE_CREATE_END(json_root_obj);

        rc = cmd_write_to_flash(SHELL_COMMAND_WIFI_AP_INFO_PATHNAME,
                                json_data);
        if (0 != rc) {
            LOG(EERROR, "can not write %s to %s",
                json_data, SHELL_COMMAND_WIFI_AP_INFO_PATHNAME);
        }
    }

    return rc;
}

/// @brief 添加wifi命令的子命令(connect)
SHELL_STATIC_SUBCMD_SET_CREATE(init_deinit_command,
SHELL_CMD(connect, NULL,
    "<ssid> <pwd> <save>, example:mimi 12345678 1",
    cmd_wifi_connect),
SHELL_SUBCMD_SET_END /* Array terminated. */
);

/// @brief 添加WiFi命令集的根命令
SHELL_CMD_REGISTER(wifi, &init_deinit_command, "wifi command", NULL);

void shell_command_init(void)
{
#if defined(CONFIG_USB_UART_CONSOLE)
    const struct device *dev;
    uint32_t dtr = 0;

    /* 获取Shell设备实例 */
    dev = DEVICE_DT_GET(DT_CHOSEN(zephyr_shell_uart));
    if (!device_is_ready(dev) || usb_enable(NULL)) {
        LOG(EDEBUG, "device is not ready");
        return;
    }

    while (!dtr) {
        uart_line_ctrl_get(dev, UART_LINE_CTRL_DTR, &dtr);
        k_sleep(K_MSEC(100));
    }
#endif
}
After the transformation, compile and burn the code, and wifi connect ssid passwd 1the printed results after executing the command on the serial terminal are as follows:
uart:~$
  clear    device   devmem   flash    help     history  kernel   pwm
  resize   shell    wifi
uart:~$ wifi connect mimi 12348765 1
[shell_command.c cmd_wifi_connect:75][EDEBUG]cmd_wifi_connect ssid: mimi psw: 12348765 save: 1

[shell_command.c cmd_wifi_connect:98][EDEBUG]start json
[shell_command.c cmd_wifi_connect:104][EDEBUG]json data:{"ssid":"mimi","passwd":"xxxxxxxx"}
[shell_command.c cmd_write_to_flash:59][EDEBUG]write {"ssid":"mimi","passwd":"xxxxxxxx"} to file /lfs/wifi.conf successed
It can be seen that the flash is successfully written, and after the device is powered off, the wifi information saved in the flash can be read for automatic networking.
It should be noted that the json format is used here to save to Flash, the cJson library is used, and cJson is encapsulated. All the code implementations in this chapter may not be introduced one by one, and will be provided at the end of the article.
5. Wi-Fi speed measurement and practical scene evaluation
Considering that there is a Wi-Fi module, I originally wanted to send the AI identification information displayed through the USB to the web page display through the Wi-Fi module through the video stream, so that there is no need to connect an extra USB cable.
However, this has requirements on the Wi-Fi rate. It has been considered that audio and video may be transmitted in practical scenarios, so the stability of transmission also needs to be guaranteed. Next is the testing process.
First of all, lisa zep create provides a weboscket case, but the websocket service is not very easy to build, we can use the more commonly used tcp and udp server tools as test verification. Something like this:

Here I found a udp test case in the sdk, the code is in csk-sdk/zephyr/samples/net/sockets/tcp, because it is a local speed test verification, using udp verification.
Let me talk about the conclusion first. The tested udp speed is about 220KB/s . The mobile phone hotspot used is close to the ESP32-C3 module and there is no obstruction. In addition, the test code is to send a udp message to the network every 1ms in the main thread, and the length of the message is 1024 bytes. You have to ask me why it is this length and why it is delayed. I don’t know for the time being. The reason is that if the delay processing is not done, the main thread will be blocked and the data will not be sent out. In addition, if 1024 is not used, the system will crash. This It may be a problem with the size of the stack configured by my CONFIG. Since time is running out, the lady mentioned the deadline to me many times, and I will continue to optimize and verify this follow-up. The code and CONFIG configuration for the next test are provided below
udp\_test.c
void udp_test()
{
    const char* send_msg = "this is a udp test message.";
    const char* server_ip = "192.168.43.66";
    const short server_port = 8888;
    struct sockaddr_in addr = {0};

    // 等待Wi-Fi连接成功,实际实用场景使用信号量等阻塞方式,不使用下面这种轮询占用CPU资源
    while(!wifi.connect_status) { delay_ms(100); }

    // 初始化本地socket,获取套接字描述符
    int fd = socket(AF_INET, SOCK_DGRAM, 0);
    if (fd < 0) {
        LOG(EERROR, "socket init failed");
        return ;
    }

    LOG(EDEBUG, "udp init successed");

    // 配置UDP服务端IP和端口号
    net_sin((struct sockaddr *)&addr)->sin_family = AF_INET;
    net_sin((struct sockaddr *)&addr)->sin_port = htons(server_port);
    inet_pton(AF_INET, server_ip, &net_sin((struct sockaddr *)&addr)->sin_addr);

    // 速度测试
    for (;;) {
        ssize_t len = sendto(fd, message, 1024, 0,
                            (struct sockaddr*)&addr, sizeof(addr));
        if (len < 0) {
            LOG(EERROR, "socket send failed, errorcode:%d", len);
        }
        delay_ms(1);
    }
}
Although the above tests are not standardized, the speed of 220KB/s can already transmit two-channel 16K 16bit PCM data without any problem. If it is an application scenario of image frame data and needs to use network transmission, you need to consider how to optimize it. The actual situation is that the ESP32-C3 code and antenna scheme have been optimized, and it must be more than 220KB/s. According to previous experience, the actual test should be able to reach a rate of 800-900KB/s, and it should be possible to transmit some low-bit-rate video streams.
This experiment also encountered a serious problem, that is, once the network communication configuration is added, there will be a fixed 30-second delay before the main function is executed after the program is burned . I don’t know why, but I turned on CONFIG\\_WIFI \\_LOG\\_LEVEL\\_DBG=y did not see the relevant print log.
6. Basic SDK evaluation - LED on and off, blinking and breathing
Hardware products are inseparable from the indicator light. The indicator light generally has on, off, blinking and breathing effects. Using the SDK+timer to realize these functions of the LED, the test code is as follows:
#include <zephyr/kernel.h>
#include <delay.h>
#include <led_core.h>

void led_test()
{
    led.on(GREEN_LED);
    delay_ms(1000);

    led.off(GREEN_LED);
    delay_ms(1000);

    // 绿色LED每隔100ms闪烁一次,共闪烁5秒钟的时间
    led.blink(GREEN_LED, 100, 3000);
    delay_ms(3000);
    // 绿色LED每隔1000ms呼吸一次,共呼吸5秒钟的时间
    led.breathing(GREEN_LED, 1000, 0);
}
The code is implemented as follows (the on and off part can use GPIO)
The content of led\_core.h is as follows:
#ifndef _LED_SENSOR_H
#define _LED_SENSOR_H

/// \brief LED的类型,目前板载只有绿色LED
typedef enum {
    GREEN_LED,
} led_type_t;


/// \brief LED灯状态,有开关、闪烁和呼吸4个状态
///
/// 其中的绿色LED不支持呼吸灯的效果,使用时需注意
typedef enum {
    LED_OFF         = 1,
    LED_ON          = 2,
    LED_BLINK       = 3,
    LED_BREATHING   = 4,
}led_status_t;


/// \brief LED灯当前信息
typedef struct {
    led_type_t      led_type;
    led_status_t    led_status;
    int             interval;
    int             duration;
    int             current_interval;
    int             current_duration;
    int             pwm_flap;
    int             pwm_cnt;
}led_info_t;


/**
 * @brief
 *  LED灯的亮灭、闪烁、呼吸的控制接口
 */
typedef struct {
    /*!< @brief 绿色LED信息 */
    led_info_t      green_led;

    /*!< @brief LED周期 */
    int             period;

    /// LED闪烁定时器
    void*           blink_timer;
    /// LED呼吸定时器
    void*           breathe_timer;

    /**
    * @brief 点亮LED灯
    *
    * @param led 要被点亮的led灯,可以是red_led和green_led
    * @return
    */
    void (*on)(led_type_t led_type);

    /**
    * @brief 熄灭LED灯
    *
    * @param led 要被熄灭的led灯,可以是red_led和green_led
    * @return
    */
    void (*off)(led_type_t led_type);

    /**
    * @brief LED灯闪烁
    *
    * @param led 闪烁的led灯,可以是red_led和green_led
    * @param interval 闪烁间隔时间,以毫秒为单位
    * @param duration 灯闪烁或呼吸持续的时间,以毫秒为单位,开关LED不关心这个值
    * @return
    */
    void (*blink)(led_type_t led_type, int interval, int duration);

    /**
    * @brief LED呼吸灯
    *
    * @param led 呼吸的led灯,注意仅red_led支持呼吸灯
    * @param interval 灯间隔时间,以毫秒为单位,开关LED不关心这个值
    * @param duration 灯闪烁或呼吸持续的时间,以毫秒为单位,开关LED不关心这个值
    * @return
    */
    void (*breathing)(led_type_t led_type, int interval, int duration);

}led_core_t;


/*! @brief led灯单例 */
extern led_core_t led;

#endif
The content of led\_core.c is as follows:
#include <zephyr/zephyr.h>
#include <zephyr/kernel.h>
#include <zephyr/device.h>
#include <zephyr/drivers/gpio.h>
#include <zephyr/drivers/pwm.h>
#include <log.h>
#include <delay.h>
#include <led_core.h>

#define LED_DEFAULT_INTERVAL 20U
#define LED_MIN_PERIOD PWM_MSEC(1U)
#define LED_MAX_PERIOD PWM_MSEC(LED_DEFAULT_INTERVAL)

#define LED_TIMER_INIT(timer, timer_expiry, timer_stop) \
    static struct k_timer timer; \
    k_timer_init(&timer, timer_expiry, timer_stop); \
    led.timer = (void*)&timer;

/* 通过别名获取 "led0" 设备树 node id */
#define LED0_NODE DT_ALIAS(led0)

/* 通过 node id 获取 led0 设备树信息 */
static const struct gpio_dt_spec led0 = GPIO_DT_SPEC_GET(LED0_NODE, gpios);

/* 获取设备树配置 */
static const struct pwm_dt_spec pwm_led0 = PWM_DT_SPEC_GET(DT_ALIAS(pwm_led0));

/// 接口实现声明
__weak void csk6011a_nano_led_on(led_type_t led_type);
__weak void csk6011a_nano_led_off(led_type_t led_type);
__weak void csk6011a_nano_led_blink(led_type_t led_type,
                                        int interval,
                                        int duration);
__weak void csk6011a_nano_led_breathing(led_type_t led_type,
                                        int interval,
                                        int duration);

// led单例初始化
led_core_t led = {
    .green_led      = {GREEN_LED, LED_OFF, 0, 0, 0, 0, 0, 0},
    .on             = csk6011a_nano_led_on,
    .off            = csk6011a_nano_led_off,
    .blink          = csk6011a_nano_led_blink,
    .breathing      = csk6011a_nano_led_breathing,
    .period         = LED_MAX_PERIOD,
};


static void blink_timer_expiry(struct k_timer *timer)
{
    /* 关闭LED闪烁 */
    csk6011a_nano_led_off(GREEN_LED);
    // LOG(EDEBUG, "blink_timer_expiry called");
}


static void blink_timer_stop(struct k_timer *timer)
{
    // LOG(EDEBUG, "blink_timer_stop called");
}


static void breathe_timer_expiry(struct k_timer *timer)
{
    if(led.green_led.pwm_flap)led.green_led.pwm_cnt -= led.green_led.interval;
    else led.green_led.pwm_cnt += led.green_led.interval;

    if(led.green_led.pwm_cnt >= led.period) {
        led.green_led.pwm_cnt = led.period - 1;
        led.green_led.pwm_flap = 1;
    }
    if(led.green_led.pwm_cnt <= 0) {
        led.green_led.pwm_cnt = 1;
        led.green_led.pwm_flap = 0;
    }

    pwm_set_dt(&pwm_led0, led.period, led.green_led.pwm_cnt);

    if (led.green_led.duration > 0) {
        led.green_led.current_duration += LED_DEFAULT_INTERVAL;
        if (led.green_led.current_duration >= led.green_led.duration) {
            k_timer_stop((struct k_timer *)led.breathe_timer);
        }
    }
}


static void breathe_timer_stop(struct k_timer *timer)
{
    // LOG(EDEBUG, "breathe_timer_stop");
}


static void csk6011a_nano_led_init(void)
{
    static bool is_init = false;
    if (!is_init) {
        if (!device_is_ready(led0.port)) {
            LOG(EERROR, "led0 is not ready");
            return ;
        }
        if (!device_is_ready(pwm_led0.dev)) {
            LOG(EERROR, "Error: PWM device %s is not ready",
                pwm_led0.dev->name);
            return ;
        }
        /* 配置LED闪烁定时器 */
        LED_TIMER_INIT(blink_timer, blink_timer_expiry, blink_timer_stop);
        /* 配置LED呼吸灯定时器 */
        LED_TIMER_INIT(breathe_timer,
            breathe_timer_expiry, breathe_timer_stop);
        is_init = true;
    }
}


__weak void csk6011a_nano_led_on(led_type_t led_type)
{
    csk6011a_nano_led_init();

    if (led_type == GREEN_LED) {
        pwm_set_dt(&pwm_led0, led.period, 1);
        // TODO: 按照以下设置后,无法使用新的周期设置占空比,后续使用pwm_cycles_to_usec重新初始化尝试
        // pwm_set_dt(&pwm_led0, PWM_SEC(1U), 1);
        // gpio_pin_configure_dt(&led0, GPIO_OUTPUT_INACTIVE);
    }
}


__weak void csk6011a_nano_led_off(led_type_t led_type)
{
    csk6011a_nano_led_init();

    if (led_type == GREEN_LED) {
        pwm_set_dt(&pwm_led0, led.period, led.period-1);
        // pwm_set_dt(&pwm_led0, PWM_SEC(1U), PWM_SEC(1U)-1);
        // gpio_pin_configure_dt(&led0, GPIO_OUTPUT_ACTIVE);
    }
}


__weak void csk6011a_nano_led_blink(led_type_t led_type,
                                    int interval,
                                    int duration)
{
    csk6011a_nano_led_init();

    if (led_type == GREEN_LED) {
        k_timer_stop((struct k_timer *)led.blink_timer);
        k_timer_stop((struct k_timer *)led.breathe_timer);
        pwm_set_dt(&pwm_led0, PWM_MSEC(interval), PWM_MSEC(interval)/2);
        if (duration > 0) {
            k_timer_start((struct k_timer *)led.blink_timer,
                K_MSEC(duration), K_MSEC(0));
        }
    }
}


__weak void csk6011a_nano_led_breathing(led_type_t led_type,
                                        int interval,
                                        int duration)
{
    csk6011a_nano_led_init();

    if (led_type == GREEN_LED) {
        led.green_led.led_status = LED_BREATHING;
        led.green_led.interval =
            (int)((1000.0/interval)*(led.period/(1000/LED_DEFAULT_INTERVAL)));
        led.green_led.duration = duration;
        led.green_led.current_duration = 0;
        led.green_led.current_interval = 0;
        led.green_led.pwm_flap = 0;
        led.green_led.pwm_cnt = 0;

        k_timer_stop((struct k_timer *)led.blink_timer);
        k_timer_stop((struct k_timer *)led.breathe_timer);
        k_timer_start((struct k_timer *)led.breathe_timer,
            K_MSEC(LED_DEFAULT_INTERVAL), K_MSEC(LED_DEFAULT_INTERVAL));
    }
}
7. Basic SDK evaluation - Button software debounce
Schematic diagram of BUTTON

According to the above schematic diagram, the abnormal interruption caused by mechanical vibration cannot be guaranteed. The phenomenon is that you think there is only one interruption, but in fact it may be multiple times, which may cause the program to misjudge and cause execution logic errors.
The solution is software debounce. A better solution is the timer. This requires multiple attempts. Look at the waveform of the oscilloscope to see the longest interval between the first jitter and the last jitter, and set a maximum timer value. It’s ok, here we use 10ms to ensure that only the timer that is generated until the last interrupt is executed, then the principle of task button interrupt.
The test code is as follows, shielding the configuration of dts, which is convenient for application personnel to develop application logic.
#include <log.h>
#include <key_core.h>
#include <user_test.h>

void on_key_event(key_event_t event, void* user_data)
{
    switch(event) {
        case KEY_EVENT_RELEASE:
            LOG(EDEBUG, "key is released.");
            break;
        case KEY_EVENT_PRESSED:
            LOG(EDEBUG, "key is pressed.");
            break;
        case KEY_EVENT_LONG_PRESSED:
            LOG(EDEBUG, "key is long pressed.");
            break;
        default:
            LOG(EDEBUG, "key event is error.");
            break;
    }
}

void key_test()
{
    // 经过消抖的按键按下、抬起、长按功能测试
    key.init();
    key.event_register(on_key_event, NULL);
}
The specific implementation is completed by key\\_core.c/h, and the content of key\\_core.h is as follows.
#ifndef KEY_CORE_H
#define KEY_CORE_H

#include <stdbool.h>

/// 按键消抖延迟事件,根据实际硬件情况更改,机械按键推荐5-10毫秒
#define KEY_DEJITTER_TIME       10
/// 长按事件的时间间隔
#define KYE_LONG_PRESSED_TIME   3000

/// \brief 支持的按键事件
typedef enum {
    KEY_EVENT_RELEASE,
    KEY_EVENT_PRESSED,
    KEY_EVENT_LONG_PRESSED,
} key_event_t;

/// 定义按键的事件回调函数指针
typedef void (*on_key_event_t)(key_event_t event, void* user_data);

/**
 * @brief 按键用户核心层接口
 *
 * @details
 *  实现了按键的引脚配置,使用init完成;
 *  实现了按键的事件注册,支持的事件
 */
typedef struct key_ {

    /// 记录按键当前的状态
    key_event_t         event;

    /// 引脚配置句柄
    void*               gpio_handle;

    /// 按键消抖定时器
    void*               dejitter_timer;
    /// 长按判断定时器
    void*               long_pressed_timer;

    /// 按键事件回调函数指针
    on_key_event_t      on_event;
    void*               user_data;

    /**
     * @brief 按键初始化
     *
     * @return  成功返回true, 失败返回false
     */
    bool (*init)(void);

    /**
     * @brief 按键逆初始化
     *
     */
    void (*uninit)(void);

    /**
     * @brief: 注册按键事件
     *
     * @param on_key_event 按键事件
     * @param user_data 向按键回调提供的用户私有数据
     *
     * @return 成功返回true,识别返回false
     */
    bool (*event_register)(on_key_event_t on_key_event, void* user_data);

    /**
     * @brief: 反注册按键事件
     *
     */
    void (*event_unregister)(void);

} user_key_t;

/*!< 按键单例 */
extern user_key_t key;

#endif
The content of key\_core.c is as follows:
#include <zephyr/zephyr.h>
#include <zephyr/kernel.h>
#include <zephyr/device.h>
#include <zephyr/drivers/gpio.h>
#include <log.h>

#include <key_core.h>

#define SW0_NODE    DT_ALIAS(sw0)
#if !DT_NODE_HAS_STATUS(SW0_NODE, okay)
#error "Unsupported board: sw0 devicetree alias is not defined"
#endif

static const struct gpio_dt_spec button = GPIO_DT_SPEC_GET_OR(SW0_NODE, gpios,
                                     {0});
static struct gpio_callback button_cb_data;

/// 接口实现声明
__weak bool csk6011a_nano_key_init(void);
__weak void csk6011a_nano_key_uninit(void);
__weak bool csk6011a_nano_key_event_register(on_key_event_t on_key_event,
                                            void* user_data);
__weak void csk6011a_nano_key_event_unregister(void);

/// @brief 按键单例初始化
user_key_t key = {
    .event              = KEY_EVENT_RELEASE,    /*!< 初始化引脚为抬起状态 */
    .init               = csk6011a_nano_key_init,
    .uninit             = csk6011a_nano_key_uninit,
    .event_register     = csk6011a_nano_key_event_register,
    .event_unregister   = csk6011a_nano_key_event_unregister,
    .gpio_handle        = (void*)&button,       /*!< 初始化引脚配置的句柄 */
};


static void dejitter_timer_expiry(struct k_timer *timer)
{
    /* 更新电平状态 */
    int level = gpio_pin_get_dt(&button);
    if (level == 0) key.event = KEY_EVENT_RELEASE;
    else if (level == 1) key.event = KEY_EVENT_PRESSED;

    /* 上报用户按键事件 */
    if (key.on_event) {
        key.on_event(key.event, key.user_data);
    }

    // LOG(EDEBUG, "Button pressed at %u, level:%d",
    //         k_cycle_get_32(), gpio_pin_get_dt(&button));
}


static void dejitter_timer_stop(struct k_timer *timer)
{
    // LOG(EDEBUG, "dejitter_timer_stop");
}


static void long_pressed_timer_expiry(struct k_timer *timer)
{
    /* 上报用户按键事件 */
    key.event = KEY_EVENT_LONG_PRESSED;
    if (key.on_event) {
        key.on_event(key.event, key.user_data);
    }
}


static void long_pressed_timer_stop(struct k_timer *timer)
{
    // LOG(EDEBUG, "long_pressed_timer_stop");
}


static void button_pressed(const struct device *dev, struct gpio_callback *cb,
        uint32_t pins)
{
    /* 长按判断逻辑,按键按下启动长按定时器,抬起关闭 */
    int level = gpio_pin_get_dt(&button);
    if (level == 0) {
        k_timer_stop((struct k_timer *)key.long_pressed_timer);
    }
    else if (level == 1) {
        k_timer_start((struct k_timer *)key.long_pressed_timer, K_MSEC(KYE_LONG_PRESSED_TIME), K_MSEC(0));
    }

    /* 触发定时器, 使用10ms间隔进行按键消抖,定时器只触发一次 */
    k_timer_start((struct k_timer *)key.dejitter_timer, K_MSEC(10), K_MSEC(0));
}


__weak bool csk6011a_nano_key_init()
{
    int32_t ret;

    /* 检查硬件设备是否就绪 */
    if (!device_is_ready(button.port)) {
        LOG(EERROR, "Error: key %s is not ready", button.port->name);
        return false;
    }

    /* 配置引脚功能为输入模式 */
    ret = gpio_pin_configure_dt(&button, GPIO_INPUT | GPIO_PULL_DOWN);
    if (ret != 0) {
        LOG(EERROR, "Error %d: failed to configure %s pin %d",
            ret, button.port->name, button.pin);
        return false;
    }

    /* 配置引脚中断模式,支持上升沿和下降沿触发 */
    ret = gpio_pin_interrupt_configure_dt(&button, GPIO_INT_EDGE_BOTH);
    if (ret != 0) {
        LOG(EERROR, "Error %d: failed to configure interrupt on %s pin %d",
            ret, button.port->name, button.pin);
        return false;
    }

    /* 配置按键定时器 */
    static struct k_timer dejitter_timer;
    k_timer_init(&dejitter_timer, dejitter_timer_expiry, dejitter_timer_stop);
    key.dejitter_timer = (void*)&dejitter_timer;

    /* 配置按键定时器 */
    static struct k_timer long_pressed_timer;
    k_timer_init(&long_pressed_timer, long_pressed_timer_expiry, long_pressed_timer_stop);
    key.long_pressed_timer = (void*)&long_pressed_timer;

    /* 根据原理图设置默认电平状态,保存按键设备树操作接口 */
    key.event =
        (gpio_pin_get_dt(&button) == 1)?KEY_EVENT_PRESSED:KEY_EVENT_RELEASE;
    key.gpio_handle = (void*)&button;

    return true;
}


__weak void csk6011a_nano_key_uninit()
{
    k_timer_stop((struct k_timer *)key.dejitter_timer);
    k_timer_stop((struct k_timer *)key.long_pressed_timer);
    key.init                = NULL;
    key.uninit              = NULL;
    key.event_register      = NULL;
    key.event_unregister    = NULL;
    key.gpio_handle         = NULL;
    key.event               = KEY_EVENT_RELEASE;
}


__weak bool csk6011a_nano_key_event_register(on_key_event_t on_key_event,
                                    void* user_data)
{
    int32_t ret;

    /* 初始化中断回调 */
    gpio_init_callback(&button_cb_data, button_pressed, BIT(button.pin));
    /* 注册回调事件 */
    ret = gpio_add_callback(button.port, &button_cb_data);
    LOG(EDEBUG, "Set up button at %s pin %d", button.port->name, button.pin);

    key.on_event = on_key_event;
    key.user_data = user_data;

    return (ret==0)?true:false;
}


__weak void csk6011a_nano_key_event_unregister()
{
    gpio_remove_callback(button.port, &button_cb_data);
}
After burning, short press and long press will no longer cause vibration, and support short press and long press action recognition:
[key_test.c on_key_event:12][EDEBUG]key is pressed.
[key_test.c on_key_event:15][EDEBUG]key is long pressed.
[key_test.c on_key_event:9][EDEBUG]key is released.
8. Problem
[Minor] Under the schematic diagram of the development practice->peripheral driver->PWM example, the control pin is changed from GPIOA\\_06 to GPIOB\\_06;

[Minor] There is a problem with the documentation of the Wi-Fi distribution network. The lisa zep build -b csk6002\\_9s\\_nano version is used in the development practice->system service->network->WIFI connection compilation and burning->compilation , actually passed the verification lisa zep build -b csk6011a\\_c3\\_nano compilation passed;
[General] Provide integrated application cases of image recognition, speech recognition, and Wi-Fi, and evaluate the chip's capabilities in integrated application scenarios. Because the AI samples currently provided are all independent samples and will download a separate SDK, I don’t know the difference from the SDK installed on the system at the beginning, and it is difficult to compare and track problems encountered;
[Serious] When using the SDK involving the network, it needs to wait for a fixed 30 seconds before entering the main function;
9, expectations
- Provide AI open capabilities and support some common frameworks and models;
- Provide HIFI DSP-related capabilities. It is expected that there will be a multi-microphone array + recovery solution to support the function of sound source positioning. Although head and shoulder recognition and face recognition on the screen can complete the positioning, some scenes also require multi-modal recognition for location information. acquisition and processing;
10. The source code of this case
The source code of this case has been uploaded here github, and those who are interested can download and experience it:
git clone https://github.com/aibittek/HsdVideoStreamAPP.git
As can be seen from the project name, in fact, if you want to make a video streaming application at the beginning, you don’t need to plug in an extra USB cable to preview the AI recognition results. Unfortunately, there are two problems that are not sure why. See the description in the problem section for details. After solving Let's improve this piece