Kotlin and anko fusion for Android development

Kotlin is a JVM-based programming language, and research on kotlin and anko has been done recently. And combined with the current APP design mode, a preliminary development method is envisaged. And ready to be applied in new projects.
Kotlin is a jvm language developed by the famous JB company. The official website address is; http://kotlinlang.org/ The introduction of the official website is:
Statically typed programming language for the JVM, Android and the browser
The design idea of Kotlin is very lightweight, and Java code should be reused as much as possible. Unless it is a last resort, it will generally not implement a large and comprehensive library by itself. This makes Kotlin very lightweight, and the integration into the Android project does not significantly affect the final package size. Regarding the advantages of Kotlin, I have summarized a few points by myself: 1. The seamless call with Java does not require a lot of effort in the early stage. Just make it java. 2. A lot of grammatical sugar makes the code very concise, and the development efficiency after familiarity is also higher than that of Java. For example, extension functions, simple encapsulation no longer needs to write a lot of Utils tool classes, just add extension methods to certain classes directly and flexibly. For example:
inline fun Activity.toast(message : Int) {
     Toast.makeText(this, message, Toast.LENGTH_SHORT).show()
 }
In this way, there is an extra toast method in the Activity class. In fact, in anko, there are also a large number of extension methods that have been written. You can directly use DSL syntax to write UI. Another example of how to write the when statement:
when(x) {
1-> {}
2-> {}
}
copy
Obviously, compared with the traditional Java writing method, the language is more concise after using anko.
switch(x) {
case 1:
 break;
case 2:
 break;
default:
 break;
}
3. It is safer. Kotlin seems to want to eliminate null references. In Java, calling a null object will throw NullPointException. In Kotlin, an object that cannot be null, such as a String object, will be written as:
var a: String? = "abc"
4. Good ecological environment and development community. Kotlin is still a relatively new technology, and many people are trying its advantages. Including the Rx series, RxKotlin is also released, which is the Kotlin version of RxJava
#Kotlin and Anko use Anko's github address at https://github.com/Kotlin/anko. The steps to integrate anko are as follows: First, add the following code to the build file of the project:
dependencies {
        classpath 'com.android.tools.build:gradle:2.2.3'
        classpath "org.jetbrains.kotlin:kotlin-gradle-plugin:$kotlin_version"  //这是需要你加入的
    }

allprojects {
    repositories {
        jcenter()
        maven {url 'https://dl.bintray.com/jetbrains/anko'} //这是你需要加入的
    }
}
Then, add dependencies to your app moudle's build file:
compile "org.jetbrains.anko:anko-sdk15:0.9.1" // So here it's 15 too
    compile "org.jetbrains.anko:anko-appcompat-v7:0.9.1"
    compile "org.jetbrains.anko:anko-design:0.9.1"
    compile "org.jetbrains.anko:anko-recyclerview-v7:0.9.1"
According to the advantages of kotlin, choose to use anko to write, not to use xml to write. Such benefits are described in anko's github README file as follows:
- unsafe
- no air safety
- Force you to write a lot of similar or even duplicate code for each layout
- XML wastes CPU time and power on the device (should be the reason for parsing) and does not allow code reuse (not fully understood, maybe it is not the include tag but the custom layout)
- As for the contract interface and entity objects, they can be written directly in Kotlin. The first is for concise syntax, and the second is not to write a lot of setter/getter methods.
Specifically, first write the MainActivity class to perform logic such as UI display and events.
class MainActivity : AppCompatActivity(), MainContract.View {
    override fun onCreate(savedInstanceState: Bundle?) {
        super.onCreate(savedInstanceState)
    }
}
Next, write the ui layout in onCreate. The login layout is relatively simple, just 2 input boxes and a button. Of course, in order to try multi-point common controls, I added a Toolbar at the top.
relativeLayout {

            var mToolbar =
            toolbar(R.style.Base_ThemeOverlay_AppCompat_Dark_ActionBar) {
                id = ID_TOOLBAR
                title = "登录"
                backgroundColor = ContextCompat.getColor(this@MainActivity, R.color.colorPrimary)

                popupTheme = R.style.Base_ThemeOverlay_AppCompat_Light
                inflateMenu(R.menu.main)

                setNavigationIcon(R.mipmap.img_back_white)

                onMenuItemClick {
                    menuItem ->
                    val itemId = menuItem!!.itemId
                    when (itemId) {
                        R.id.menu_main -> {
                            toast(R.string.main_toast)
                        }
                    }
                    false
                    }

                lparams {
                    width = matchParent
                    height = wrapContent
                }

                setNavigationOnClickListener {
                    finish()
                }
            }

            var mUserEdit = editText {
                id = ID_USER_EDIT
                hint = "请输入同户名"
                maxLines=1

                lparams {
                    width = matchParent
                    height = wrapContent
                    margin=dip(8)
                    centerInParent()
                }
            }

            var mPsdEdit = editText {
                id= ID_PSD_EDIT
                hint="请输入密码"
                maxLines=1
                maxWidth = 16

                lparams {
                    width = matchParent
                    height = wrapContent
                    margin = dip(8)
                    below(ID_USER_EDIT)
                }
            }


            var mButton = button("登录") {
                id= ID_BTN_LOGIN

                onClick {
                    var username = mUserEdit.text.toString()
                    var password = mPsdEdit.text.toString()

                    mPresenter!!.login(username,password)
                }

                lparams {
                    width= matchParent
                    height = wrapContent
                    margin = dip(8)
                    below(ID_PSD_EDIT)
                }
            }
        }
The id in the code uses constants. There is no static concept in Kotlin, but there is a companion object (companion object) that can simulate and implement functions similar to static.
companion object static {
        val ID_TOOLBAR: Int = 1
        val ID_USER_EDIT: Int = 2
        val ID_PSD_EDIT: Int = 3
        val ID_BTN_LOGIN: Int = 4
    }
As you can see, the code for writing the UI in this way is very concise. And the readability is very high. I believe that students who are familiar with XML writing layout can understand the meaning of the code inside. At the same time, an official Android Stduio plug-in is also released, called anko SDL preview. It is very convenient for developers to preview the effect of writing. Next, write the BaseView and BasePresenter interfaces according to the idea of MVP.
interface BaseView<T> {
    fun setPresenter(presenter: T)
}
interface BasePresenter
Use Kotlin to write the MainContract interface, which establishes the communication between the V layer and the P layer.
interface MainContract {
    interface View : BaseView<Presenter> {
        fun login()
        fun loginNUll()
    }

    interface Presenter : BasePresenter {
        fun login(username: String, password: String)
    }
}
Use Java to write P layer code.
public class MainPresenter implements MainContract.Presenter {

    private MainContract.View mView;

    public MainPresenter(MainContract.View view) {
        mView = view;
        mView.setPresenter(this);
    }

    @Override
    public void login(String username, String password) {
        if (TextUtils.isEmpty(username) || TextUtils.isEmpty(password)) {
            mView.loginNUll();
            return;
        }
        mView.login();
    }
}
This is just to simulate the logic of login, but not to actually implement a login back to MainActivity, and add our code here.
var mPresenter : MainContract.Presenter? = null
override fun setPresenter(presenter: MainContract.Presenter) {
    mPresenter = presenter!!
}
copy
Implement the callback method that the V layer should implement:
override fun loginNUll() {
    toast("用户名密码不得为空")
}

override fun login() {
    toast("执行登录逻辑...")
}
So far, we have completed the example of Kotlin and anko developing Android. If you want to use it more skillfully, you need to practice more.
at last
More Kotlin learning materials can be scanned for free!

" Advanced Kotlin Enhanced Combat "
Chapter 1 Kotlin Getting Started Tutorial
            ● Kotlin 概述

            ● Kotlin 与 Java 比较

            ● 巧用 Android Studio

            ● 认识 Kotlin 基本类型

            ● 走进 Kotlin 的数组

            ● 走进 Kotlin 的集合

            ● 完整代码

            ● 基础语法
Chapter 2 Kotlin Practical Pit Avoidance Guide
            ● 方法入参是常量,不可修改

            ● 不要 Companion、INSTANCE?

            ● Java 重载,在 Kotlin 中怎么巧妙过渡一下?

            ● Kotlin 中的判空姿势

            ● Kotlin 复写 Java 父类中的方法

            ● Kotlin “狠”起来,连TODO都不放过!

            ● is、as` 中的坑

            ● Kotlin 中的 Property 的理解

            ● also 关键字

            ● takeIf 关键字

            ● 单例模式的写法
Chapter 3 Project Combat "Kotlin Jetpack Combat"
            ● 从一个膜拜大神的 Demo 开始

            ● Kotlin 写 Gradle 脚本是一种什么体验?

            ● Kotlin 编程的三重境界

            ● Kotlin 高阶函数

            ● Kotlin 泛型

            ● Kotlin 扩展

            ● Kotlin 委托

            ● 协程“不为人知”的调试技巧

            ● 图解协程:suspend
" The most detailed Android version of kotlin coroutine entry advanced combat in history "
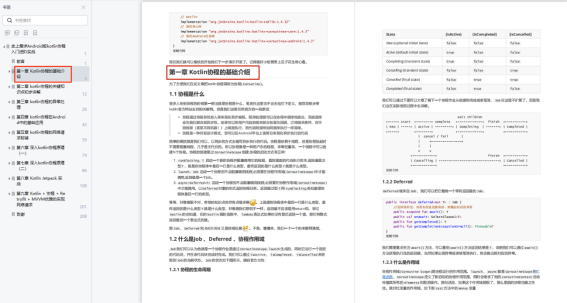
Chapter 1 Introduction to the Basics of Kotlin Coroutines
            ● 协程是什么

            ● 什么是Job 、Deferred 、协程作用域

            ● Kotlin协程的基础用法
Chapter 2 Preliminary Explanation of Key Knowledge Points of Kotlin Coroutine
            ● 协程调度器

            ● 协程上下文

            ● 协程启动模式

            ● 协程作用域

            ● 挂起函数
Chapter 3 Exception Handling of Kotlin Coroutines
            ● 协程异常的产生流程

            ● 协程的异常处理
Chapter 4 Basic application of kotlin coroutines in Android
            ● Android使用kotlin协程

            ● 在Activity与Framgent中使用协程

            ● ViewModel中使用协程

            ● 其他环境下使用协程