introduce:
Due to the large differences between mobile phones, HBuilder does not provide an App simulator. Regardless of the uni-app or 5+App/wap2app project, it is necessary to connect a real mobile phone or a mobile phone simulator to run the test, which is called "real machine operation".
iOS platform
HBuilder supports the itunes protocol. On the computer running HBuilder, use a usb cable to connect to iPhone or iPad; if it is a mac computer, you can connect to the iOS simulator that comes with XCode. If it is an arm architecture cpu, you can also directly start the real machine to run the base.
The purpose of running on the real machine is to realize the hot refresh of code modification and avoid packaging to see the effect. Edit the code in HBuilder, see the modification effect in real time on the mobile phone, and see the log on the HBuilder console.
Run entry:
Click the Run button on the Run menu toolbar at the top of HBuilder
Here we mainly talk about the operation steps of the real machine operation of ios devices:
HBuilderX 3.6.9+ is required for mac
and HBuilderX 3.6.20+ is required for win
Because Apple prohibits enterprise certificates from being used by non-enterprise internal developers. Therefore, developers can no longer use DCloud's standard operating base signed by the enterprise certificate.
Before running the standard base to the real iOS device, the base needs to be signed with the developer's certificate before it can run. (Runs to xcode simulator unrestricted)
Note: Every time HBuilderX is upgraded, because the standard base is updated, the iOS standard base needs to be re-signed.
first step:
1. Make sure the connection of the usb cable is smooth (some data cables are of poor quality, you need to use a high-voltage usb port, if you can’t recognize it, please try to replace the data cable) 2. If the windows computer is connected to the iOS
device, the computer needs to install Aisi assistant software
3. After the mobile phone is connected to the computer, make sure to click the "Trust" button in the pop-up "Do you want to trust this computer?" prompt box on the mobile phone
4. At this time, we can see our device information in Aisi Assistant
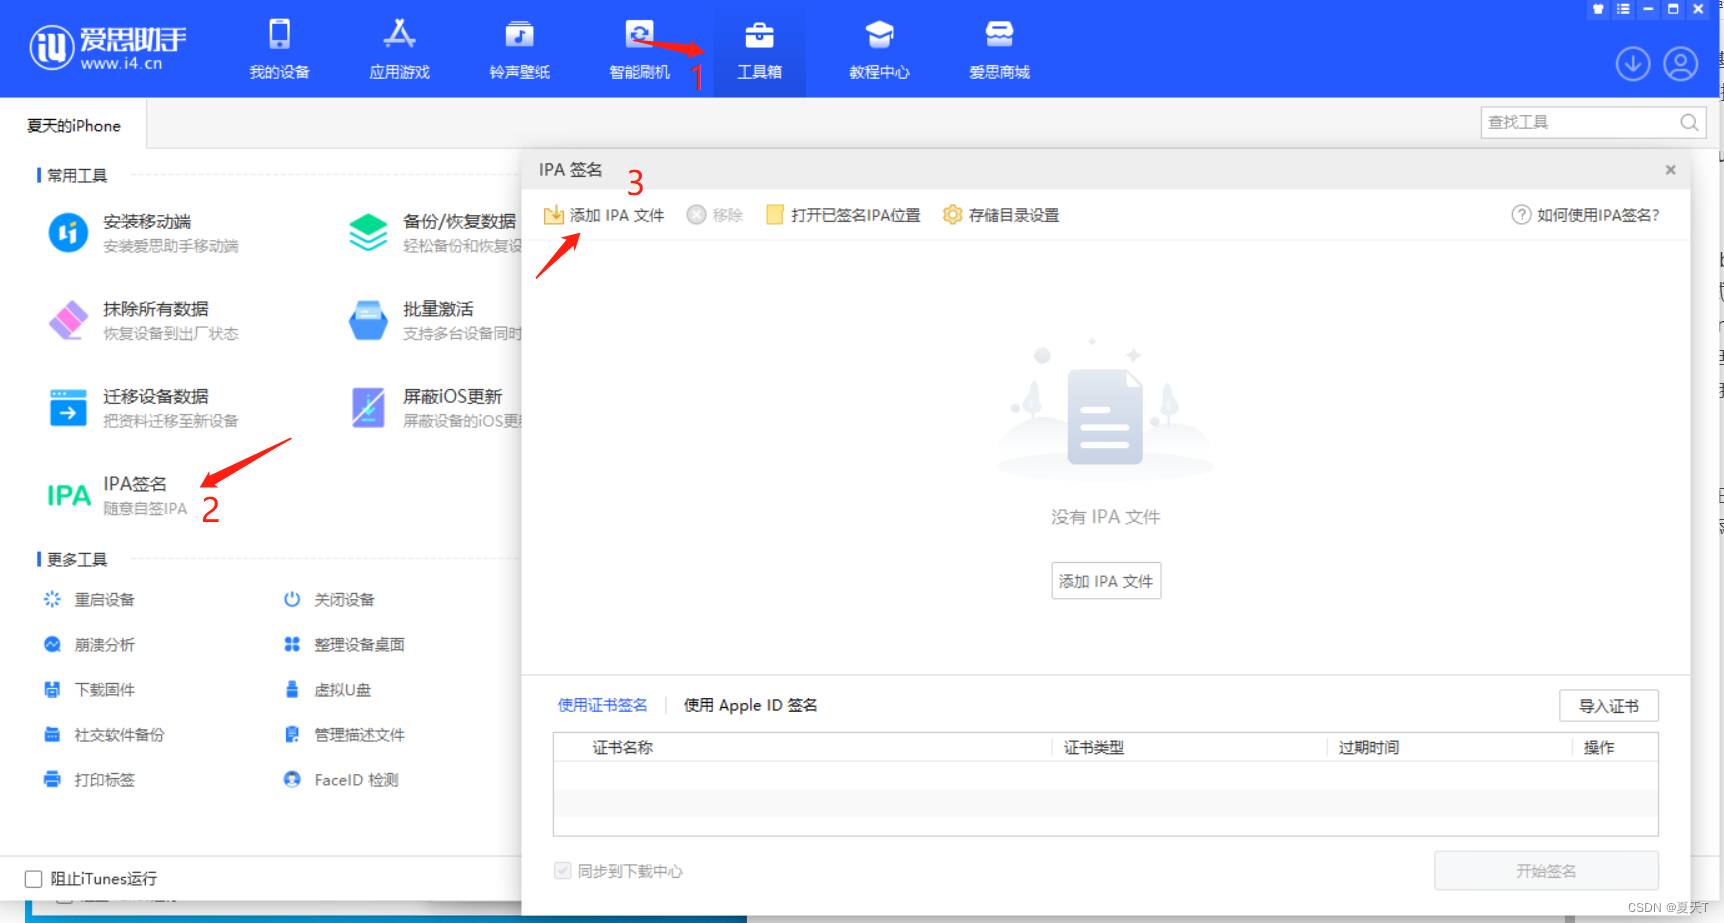
Step two:
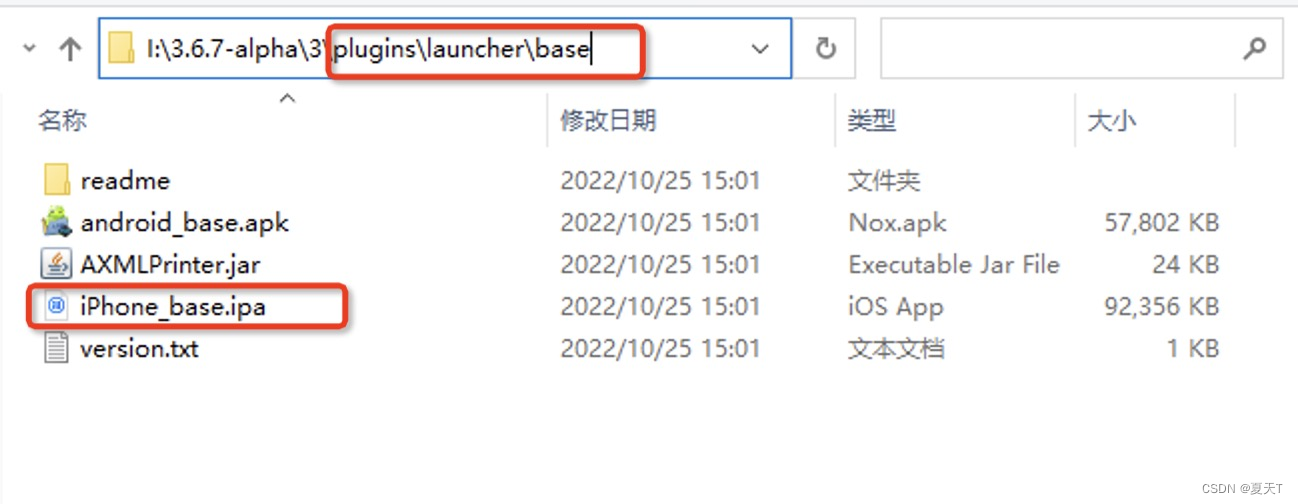
We find the toolbox option at the top, find the IPA signature option to open, and then we can see the pop-up option, we click to add the IPA file and
then we will import the iOS standard base path: HBuilderX installation directory\plugins\launcher\base \iPhone_base.ipa
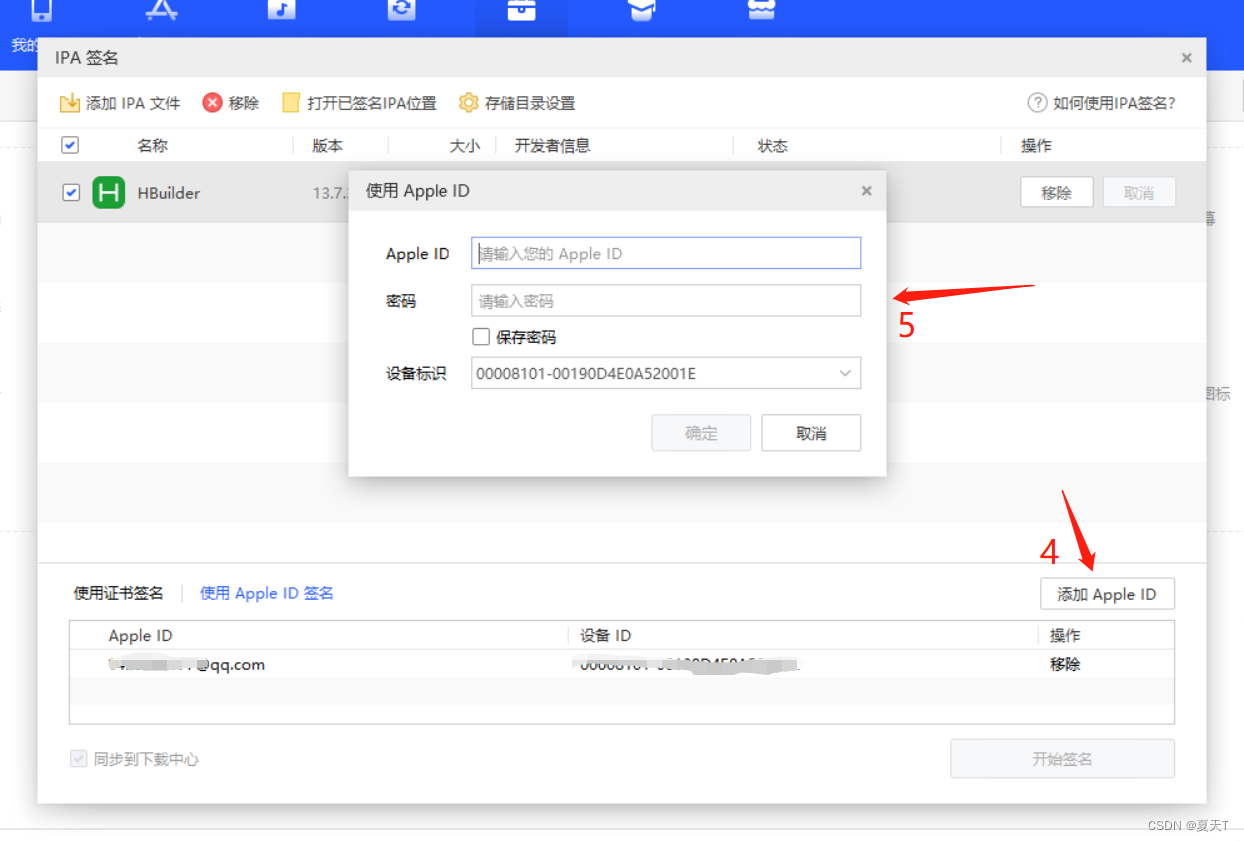
Note: Because we are personal development for real machine debugging, there is no certificate, we choose to use Apple ID signature to sign
third step:
Note: Because most of our ios system mobile phones use the mobile phone number to log in, there are some problems in my own test. It is recommended that we go to the Apple official development center to register a developer account ID. The official development center address https://developer.apple . com/
Remember: Be sure to use your email address to register and fill in your email address

the fourth step:
After registration, we need to log in to the developer account we applied for on our ios device. Remember: it is the developer account we just applied for with the email
the fifth step:
Note: The iOS system version of some of our devices will be above or below 16.0. On the 16.0 version of the device, we need to open Settings>Privacy and Security>Developer Mode and we will enable this option
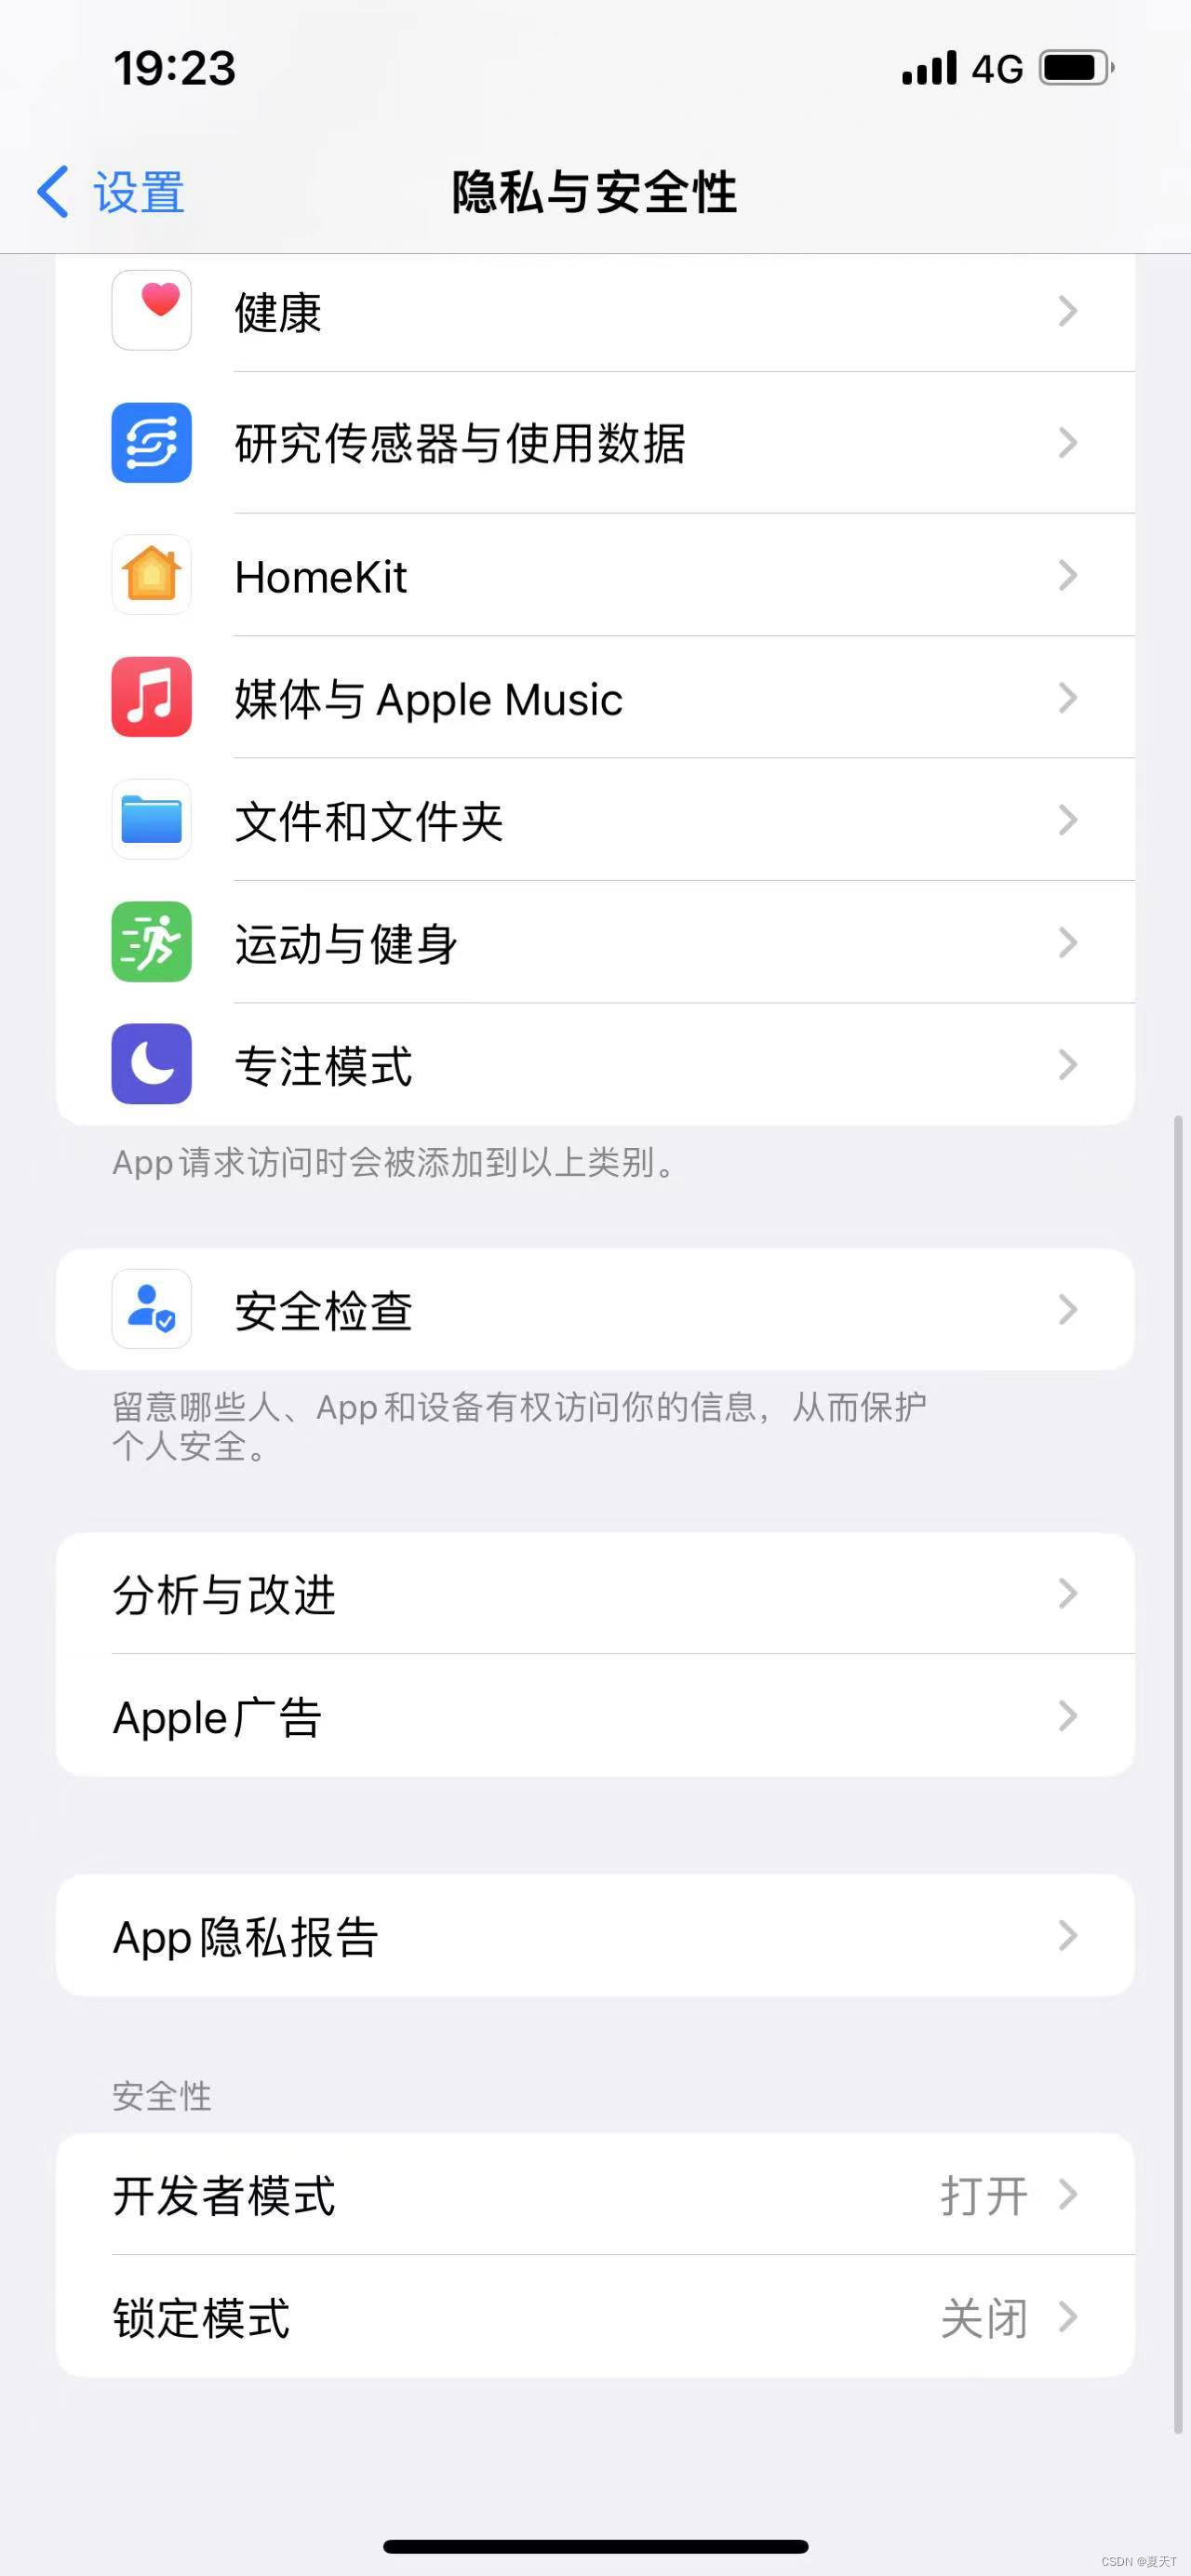

Note: If it is a version below 16.0, we can't find the developer option, you don't need to open this option, we will go down the steps
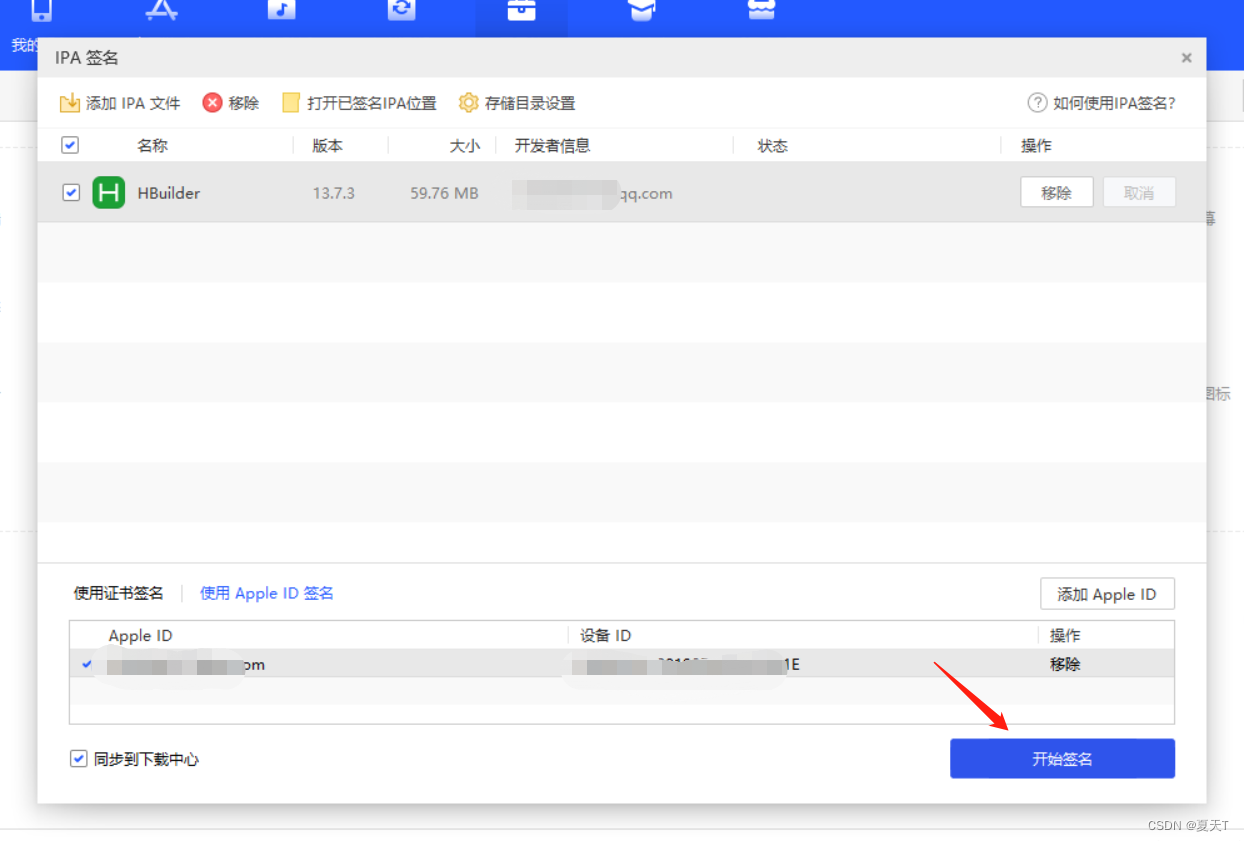
Step six:
Let's go back to the IPA signature of our Aisi Assistant and fill in the developer account ID we just applied for.
After we add it, we can click the Start Signing button. At this time, we need to wait for the signature to be completed.
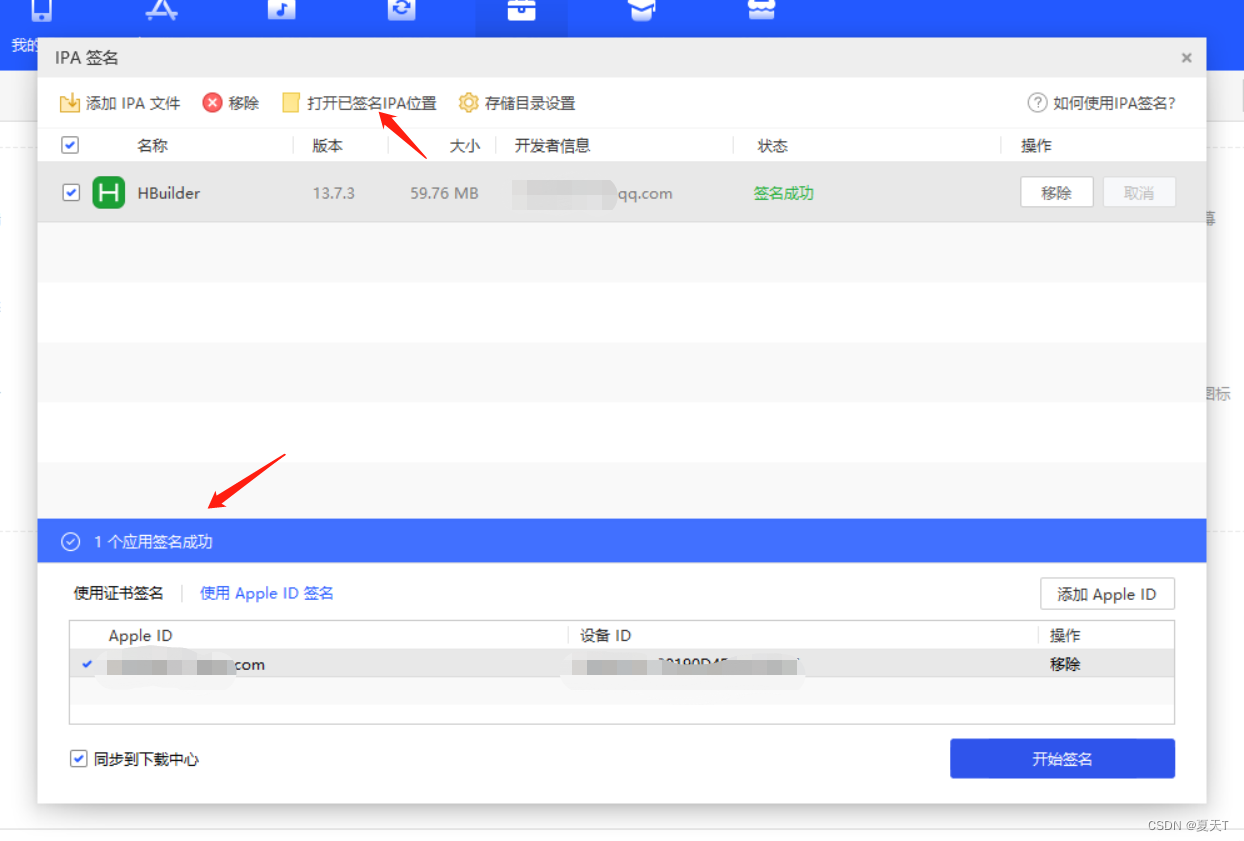
At this time, we have signed successfully, and we can open the storage location of the signed IPA
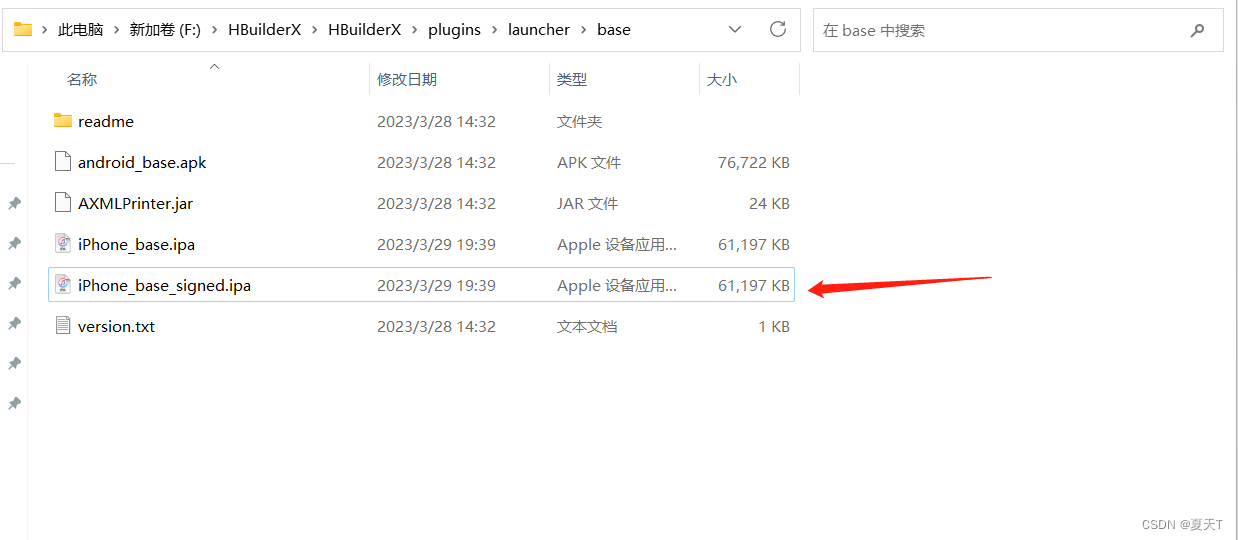
Step seven:
At this time, we can see the following files when we open the signed IPA folder
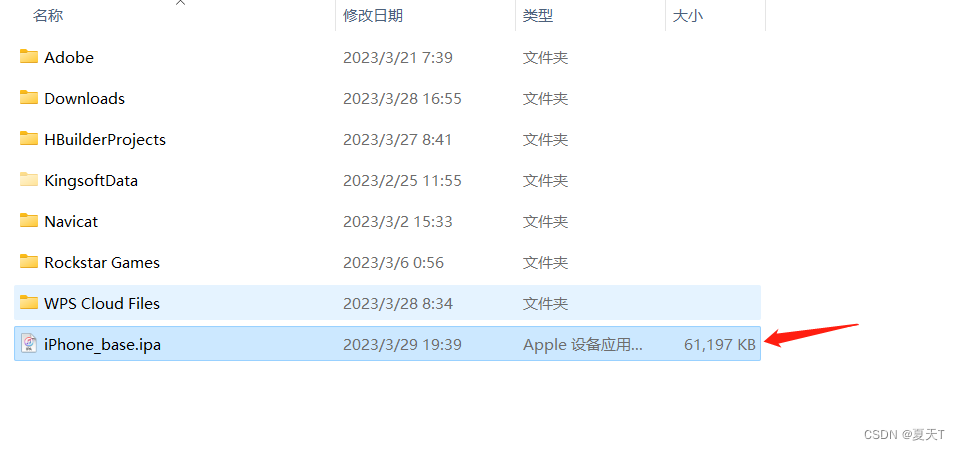
Find the signed ipa file and name it iPhone_base_signed.ipa, then copy it to the HBuilderX installation directory\plugins\launcher\base
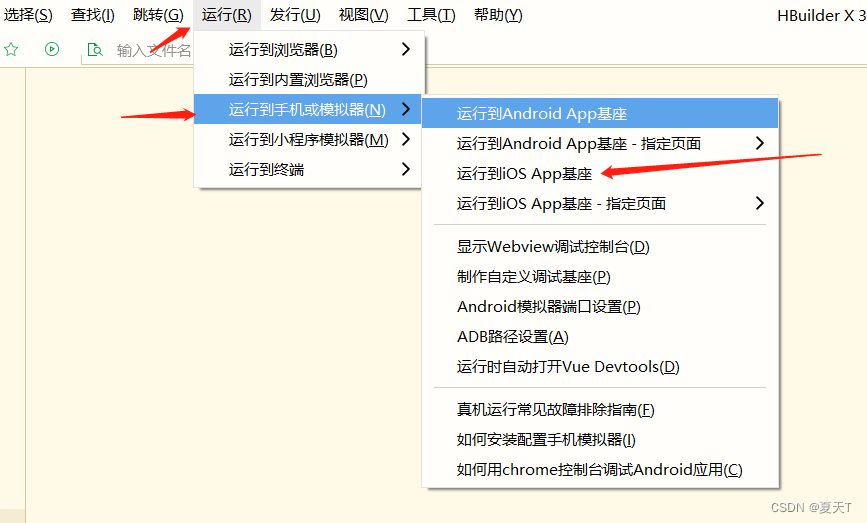
Step eight:
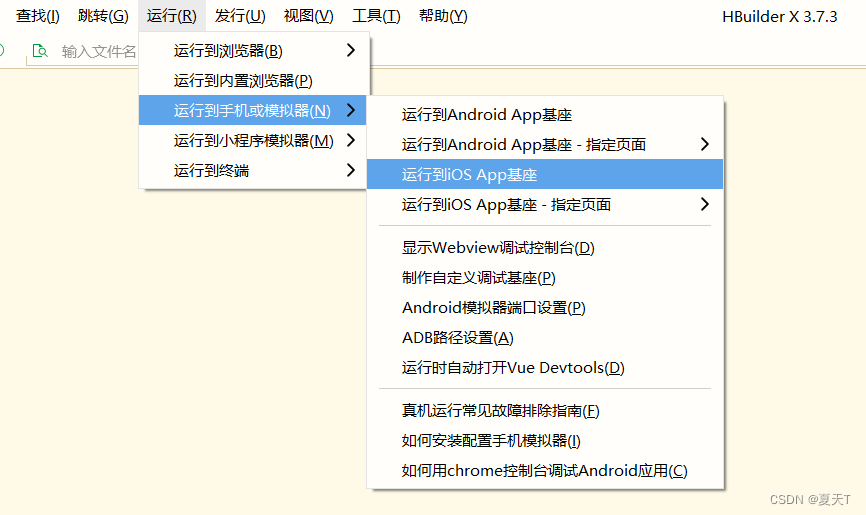
After the above operations are completed, open HBuilderX, select the project to run, click the run icon on the toolbar, and select [Run to iOS
App Dock], as shown in the figure below, you can run the standard dock to the real iOS device.
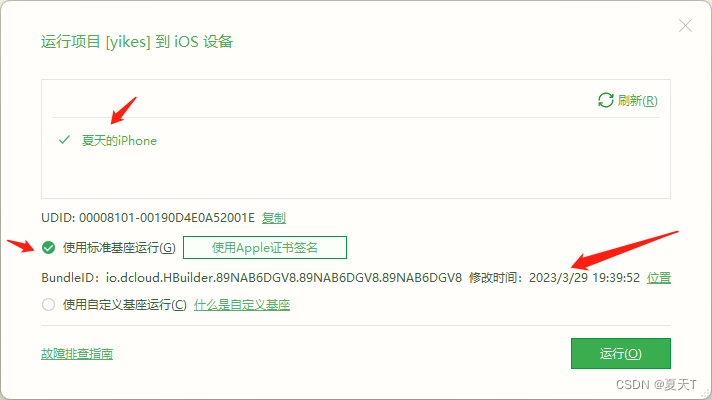
As shown in the figure below, we find our own equipment and select the standard base to run, and the unique identifier of the software, BundleID, can be displayed. At this time, we can click Run and wait for the compilation and installation of the HBuilder debugging base on the mobile phone.
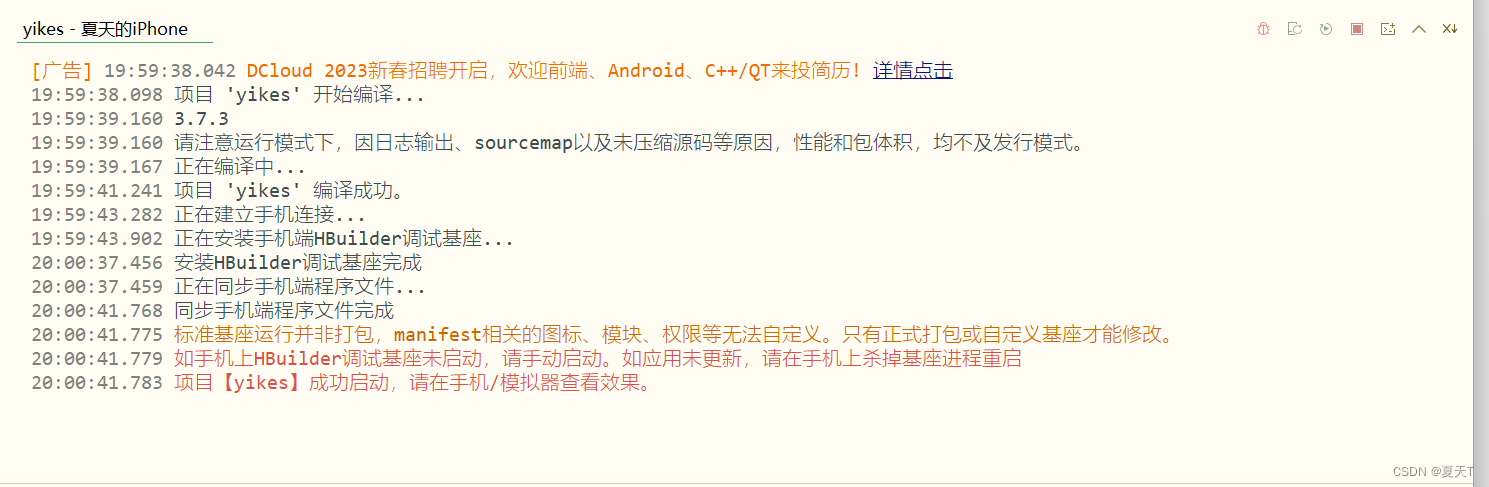
If the following figure is displayed, the installation is successful
Step Nine:
At this time, when we go back to our mobile device, we can see that our debugging APP is installed on our mobile device. When we click on it, a pop-up box will appear.
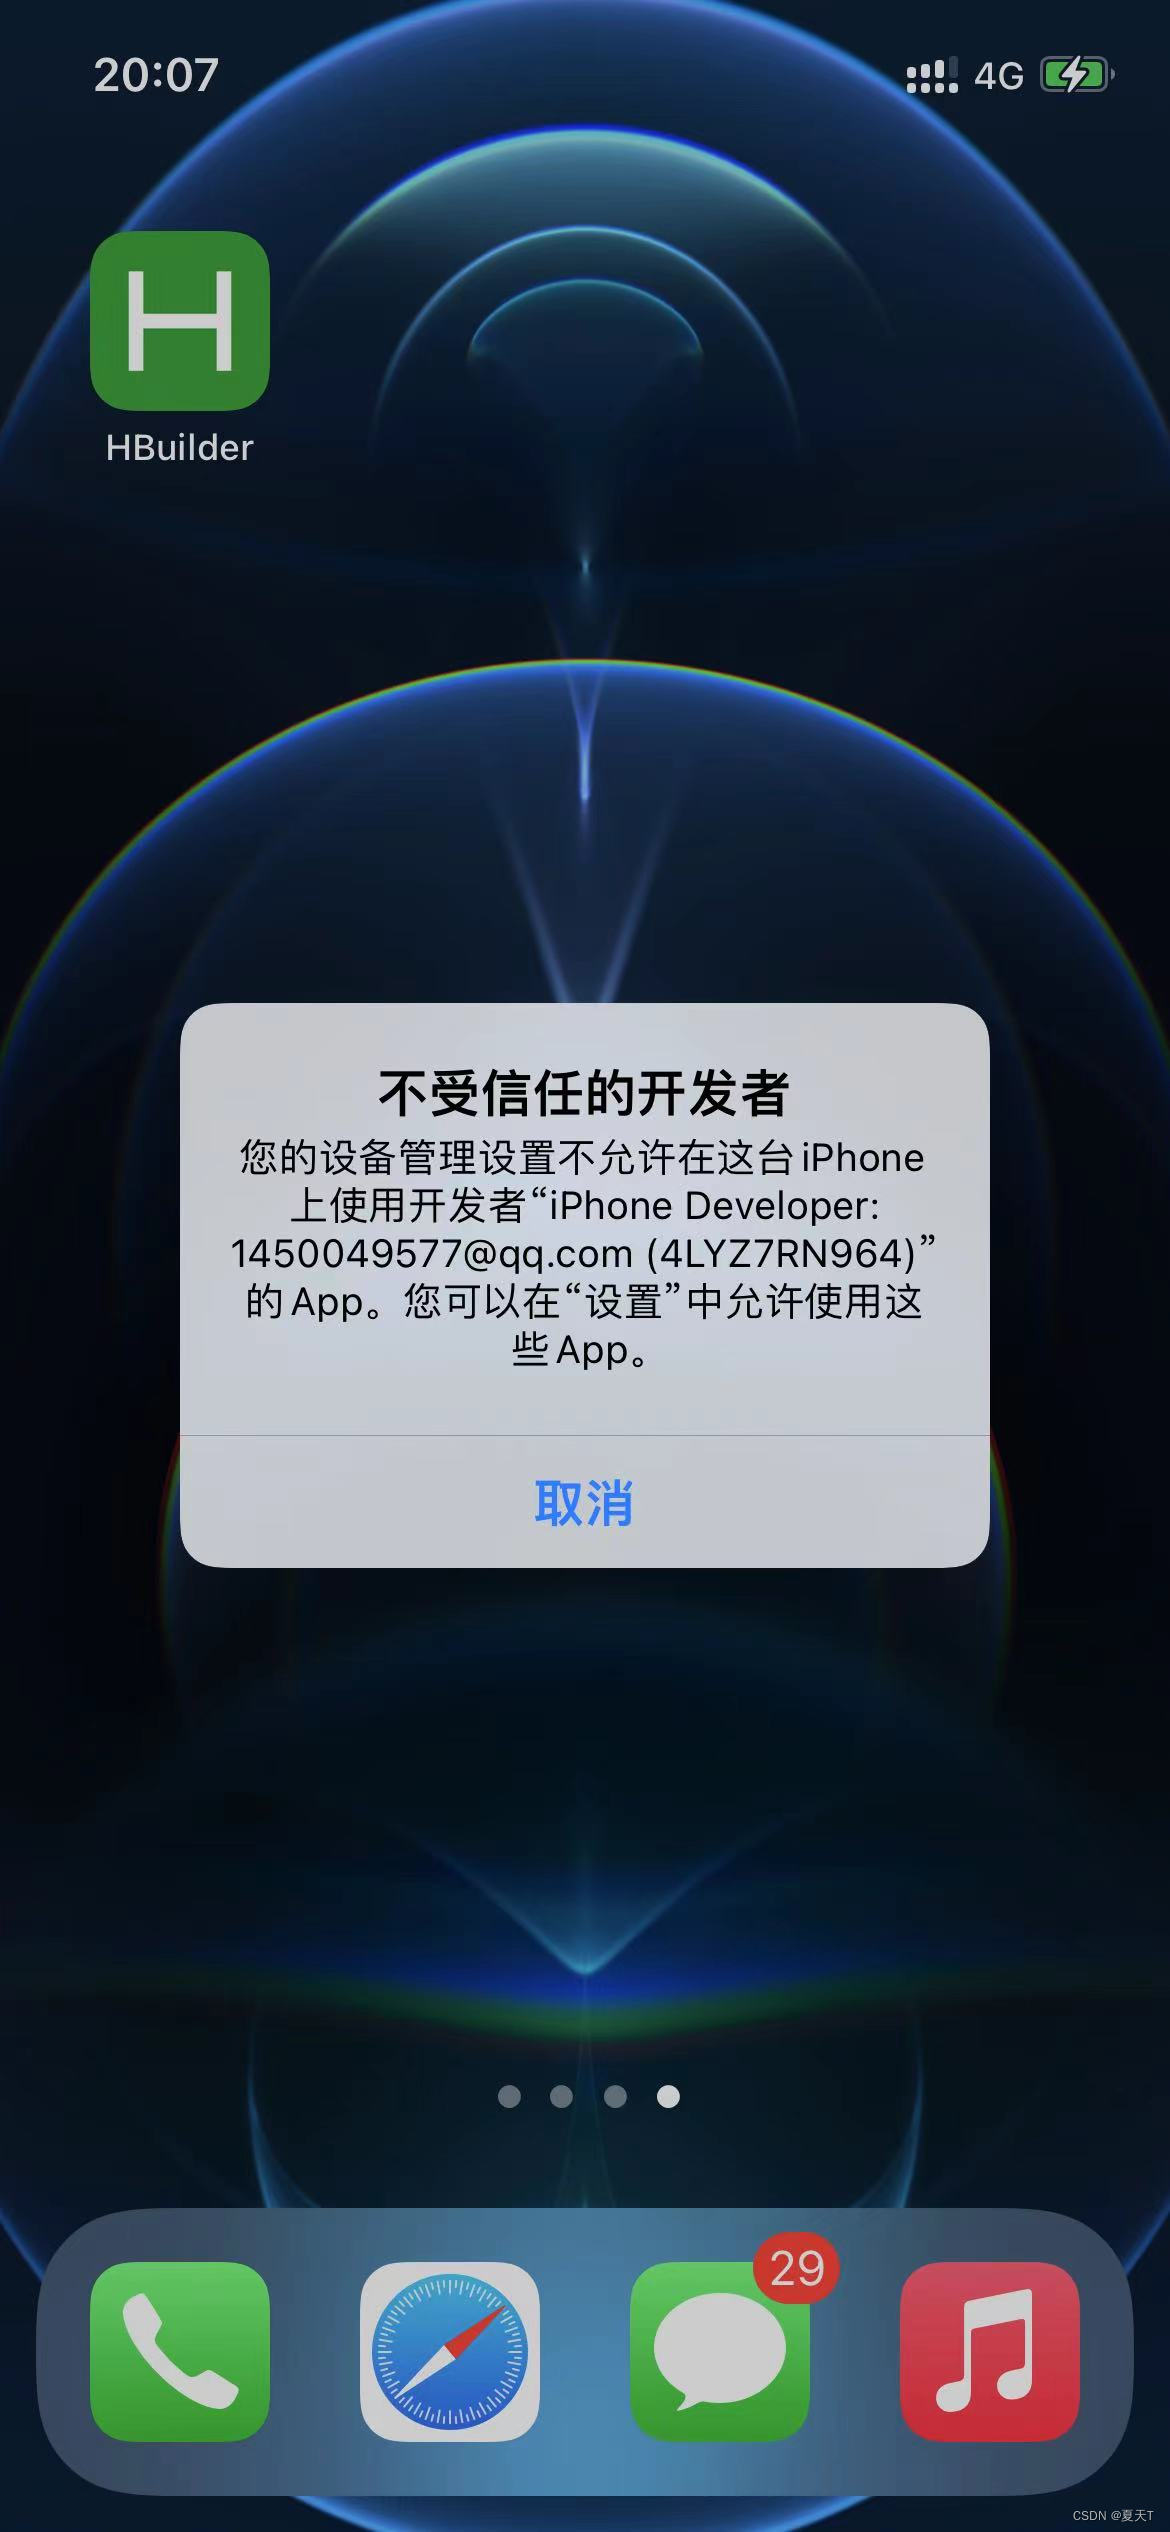
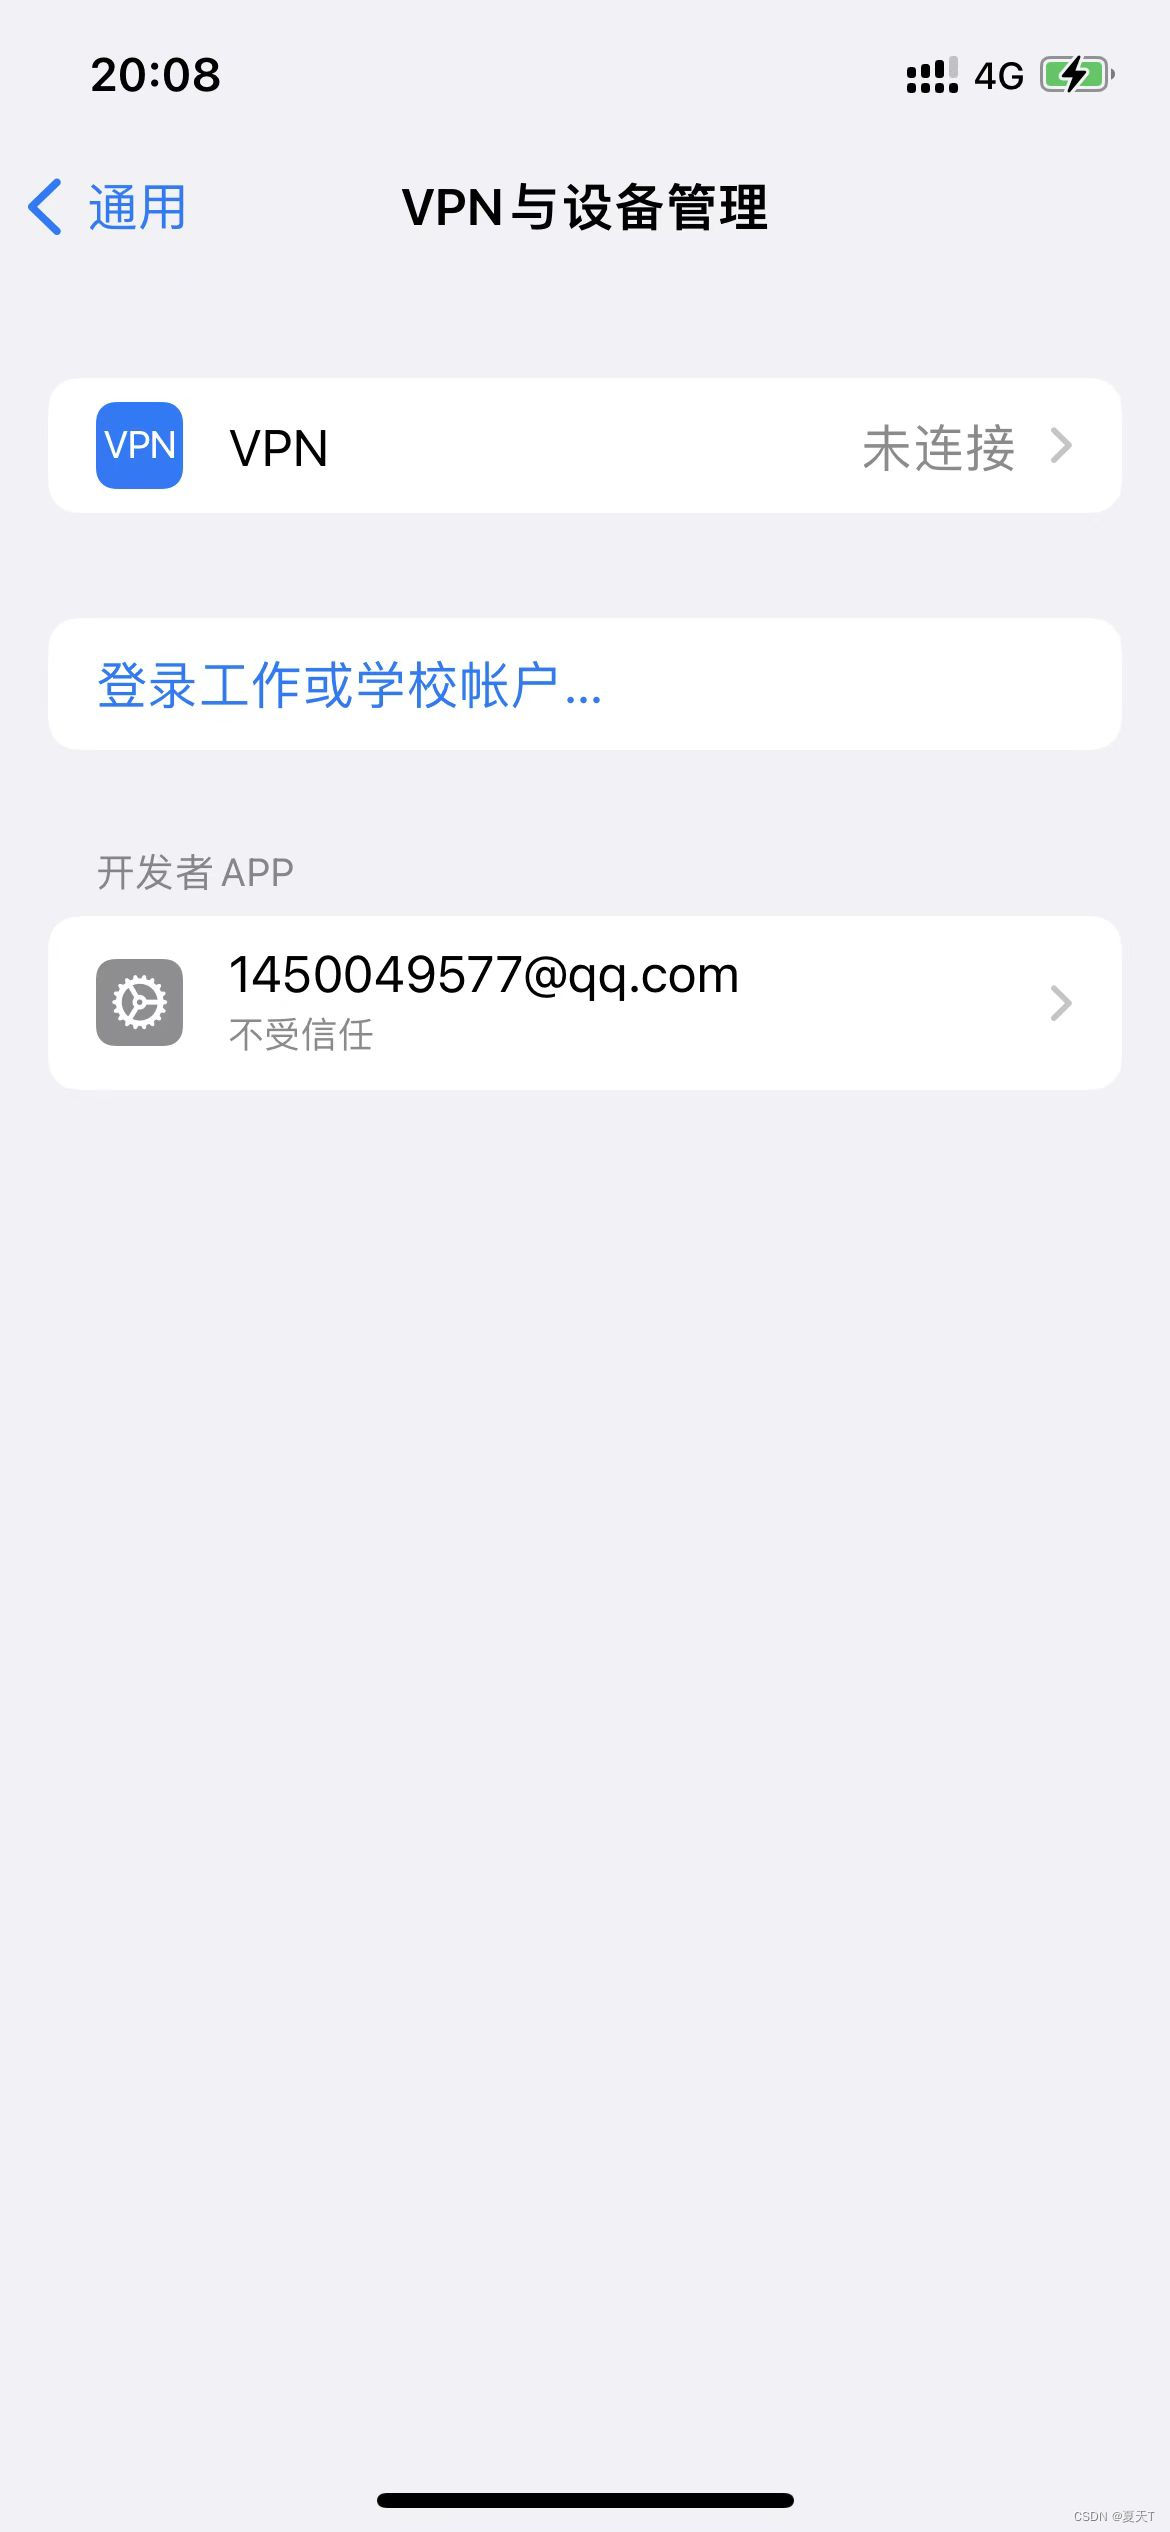
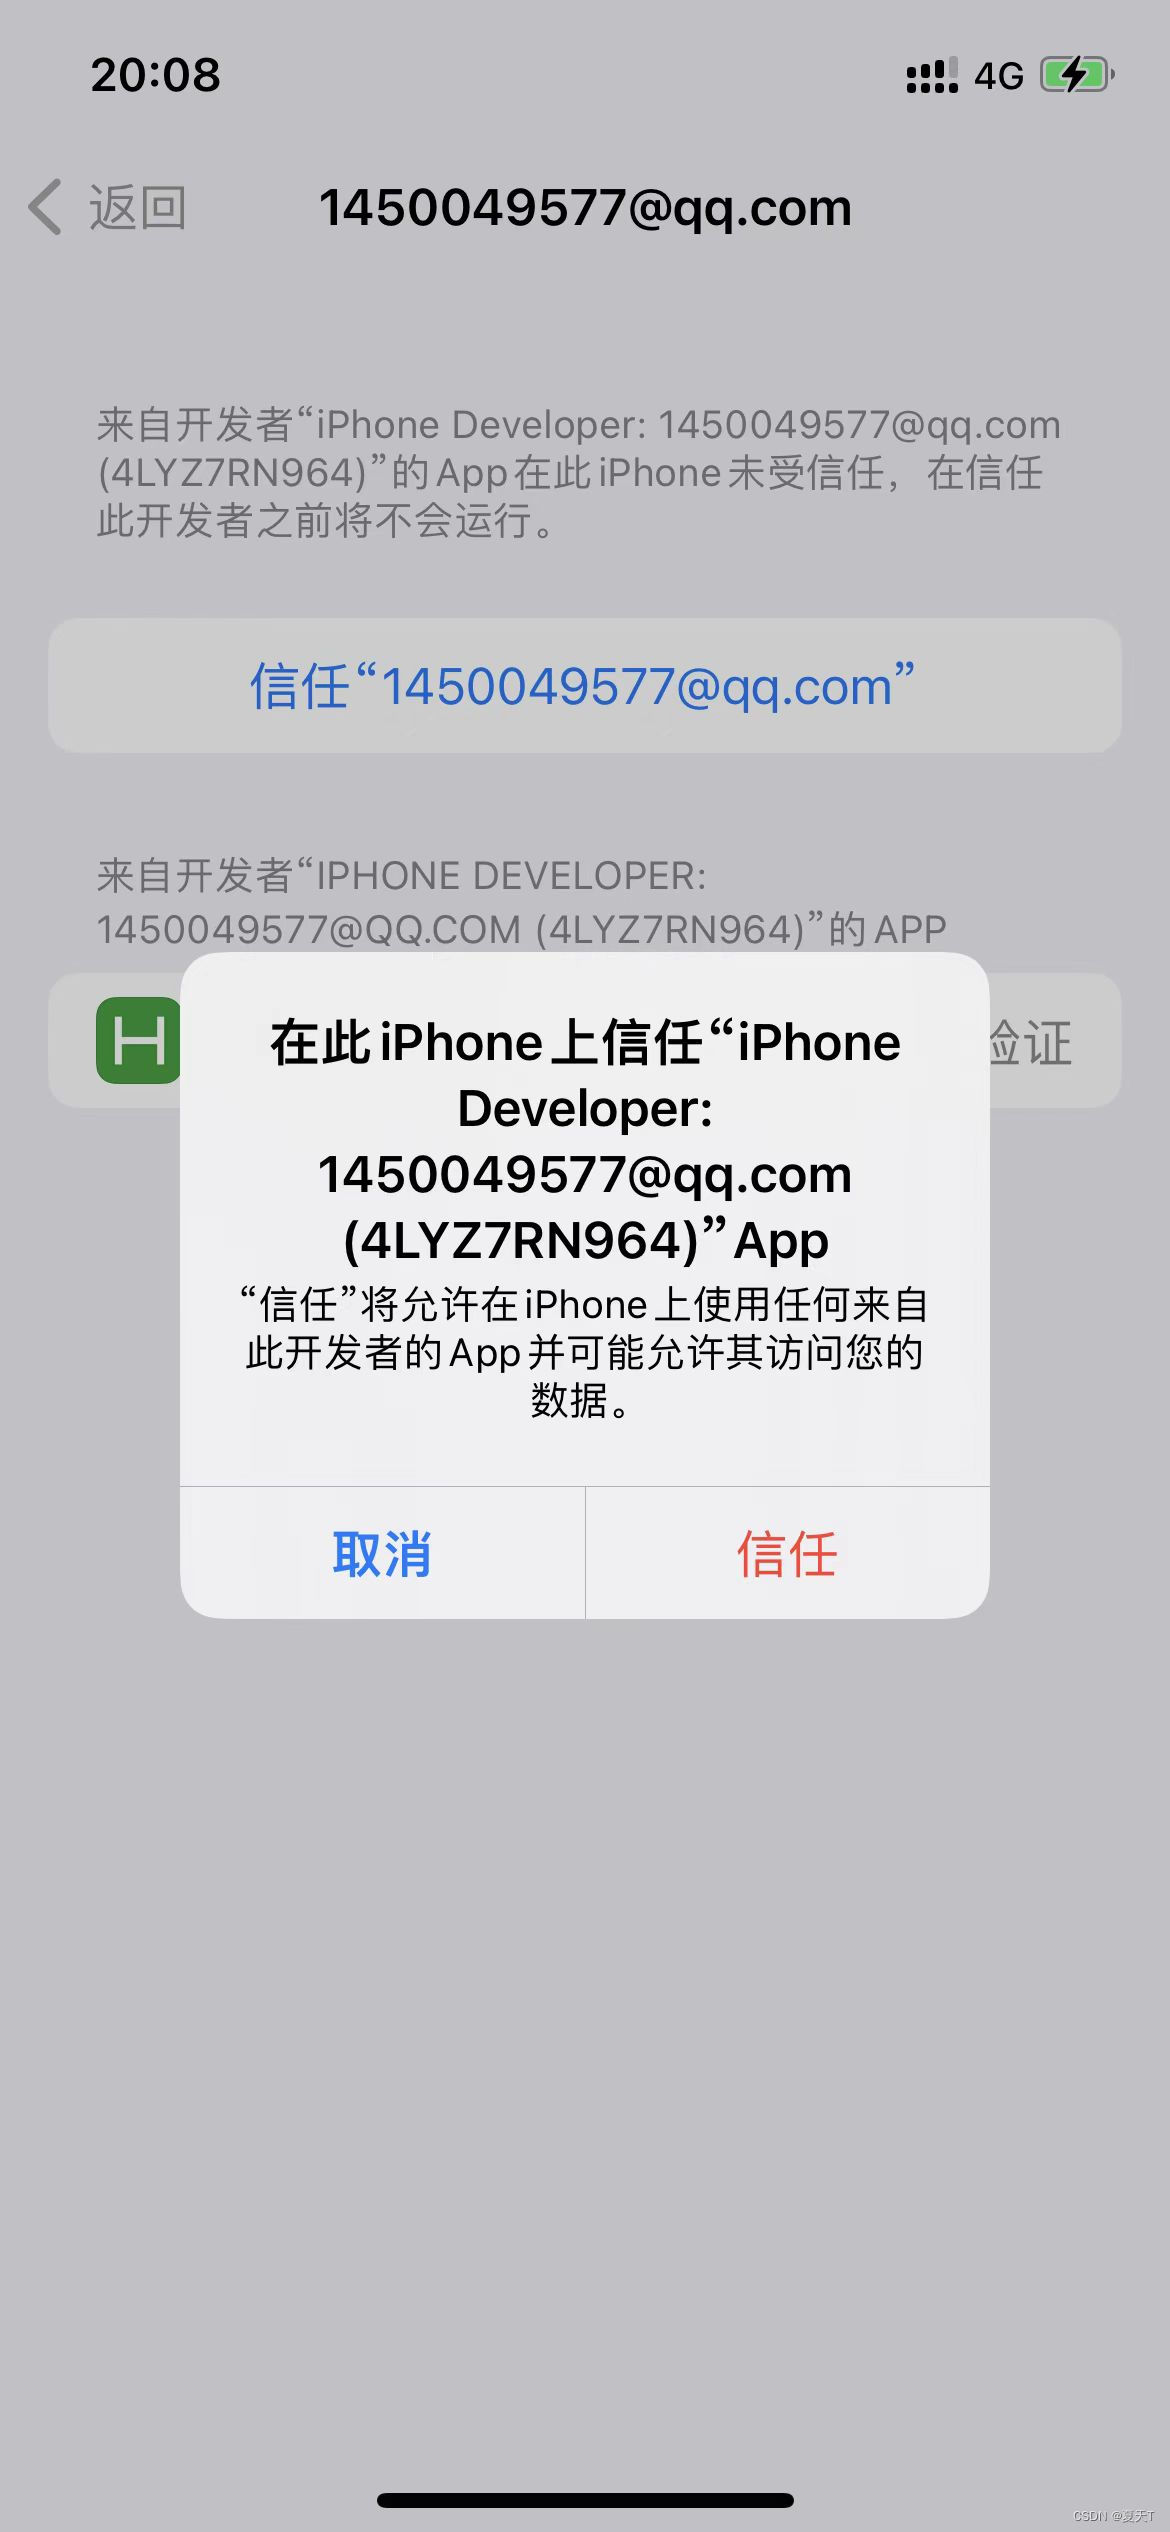
At this time, find the option of Settings>General>Vpn and Device Management on our device, and we can see that our developer APP is currently untrusted. We only need to click on it to trust the current development APP.
Finally, we try to open the app again, and we can find that we can already preview the iOS real device.
When we modify the code, the app will be refreshed in real time, so that the real device debugging effect can be restored to the real mobile phone app when we develop. Effect

Summarize:
At present, it is only used for testing, and there will be other methods for real machine debugging in the future, which will be updated