Use the HALCON calibration plate to quickly calibrate and correct imaging distortion
1 Generate calibration board description file
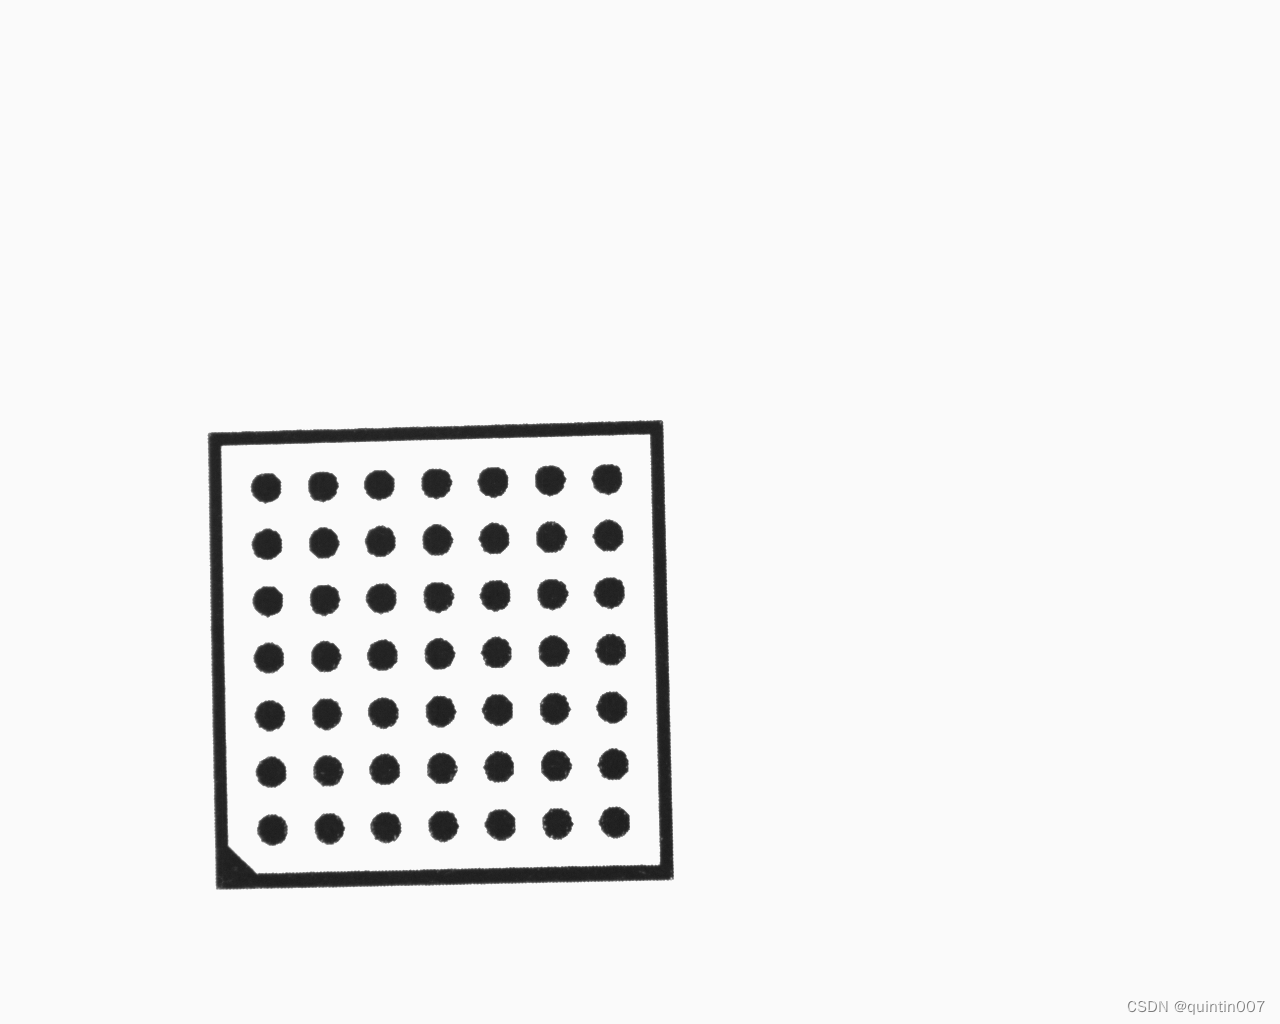
gen_caltab (7, 7, 0.00375, 0.5, 'caltab.descr', 'caltab.ps')

gen_caltab
( : : XNum, YNum, MarkDist, DiameterRatio, CalPlateDescr, CalPlatePSFile : )
Generate a calibration plate description file and corresponding postscript file for a calibration plate with a rectangular array of markers.
This operator can create the required calibration board parameter file Caltab.descr and calibration board image file Caltab.ps.
Parameters:
Input:
XNum
The number of marker points in the X direction.
Default value: 7
Suggested value: 5, 7, 9
Suggested increase: 1
Limit: XNum > 1
YNum
The number of marker points in the Y direction.
Default value: 7
Suggested value: 5, 7, 9
Suggested increase: 1
Limit: YNum > 1
MarkDist
Mark distance (meters).
Default: 0.0125
Recommended: 0.1, 0.0125, 0.00375, 0.00125
Limit: 0.0 < MarkDist
DiameterRatio
The ratio of the marker diameter to the marker distance.
Default: 0.5
Suggested values: 0.5, 0.55, 0.6, 0.65
Limits: 0.0 < diameter atio < 1.0
output:
CalPlateDescr
Calibration plate name description.
Default: 'caltab.descr'
List of values: 'caltab.descr', 'caltab_100mm.descr', 'caltab_10mm.descr', 'caltab_200mm.descr', 'caltab_30mm.descr'
File extension: .descr
CalPlatePSFile
The filename of the PostScript file.
Default value: "caltab.ps"
File extension: .ps
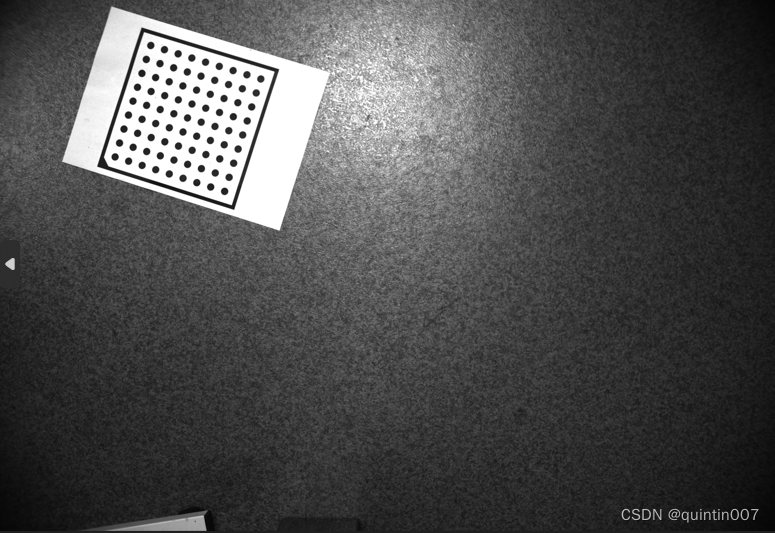
Calibration plate production process reference:
Calibration plate production
Generate caltab.ps file, which is the calibration plate canvas, you can choose to use Adobe Acrobat DC tool to convert to PDF, and then print.
2) Use the printed calibration board to take photos in the camera environment and collect materials.
3) Open the halcon calibration assistant
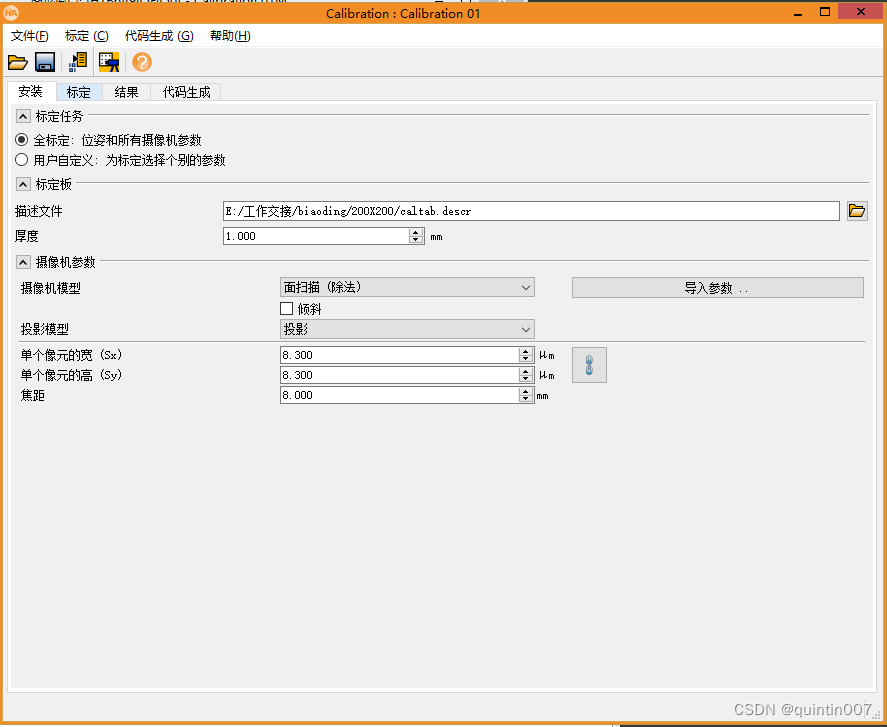
Calibration plate description file, choose to import the caltab.descr file generated when making the calibration plate just now
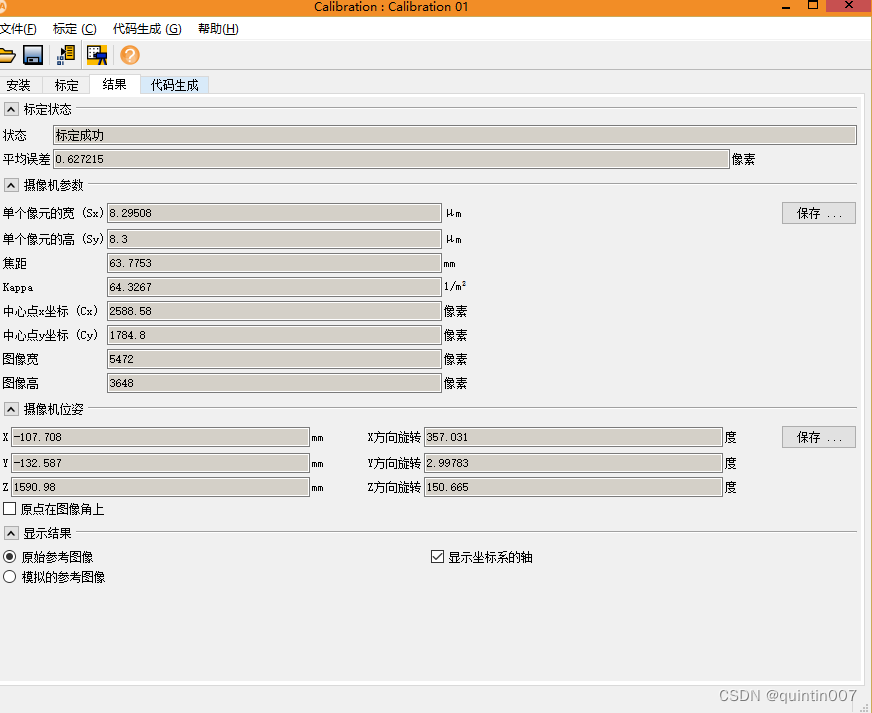
4) Import the captured photo material, click Calibrate, and automatically calibrate with the help of the calibration board tool

After the calibration is completed, the calibration result will be displayed
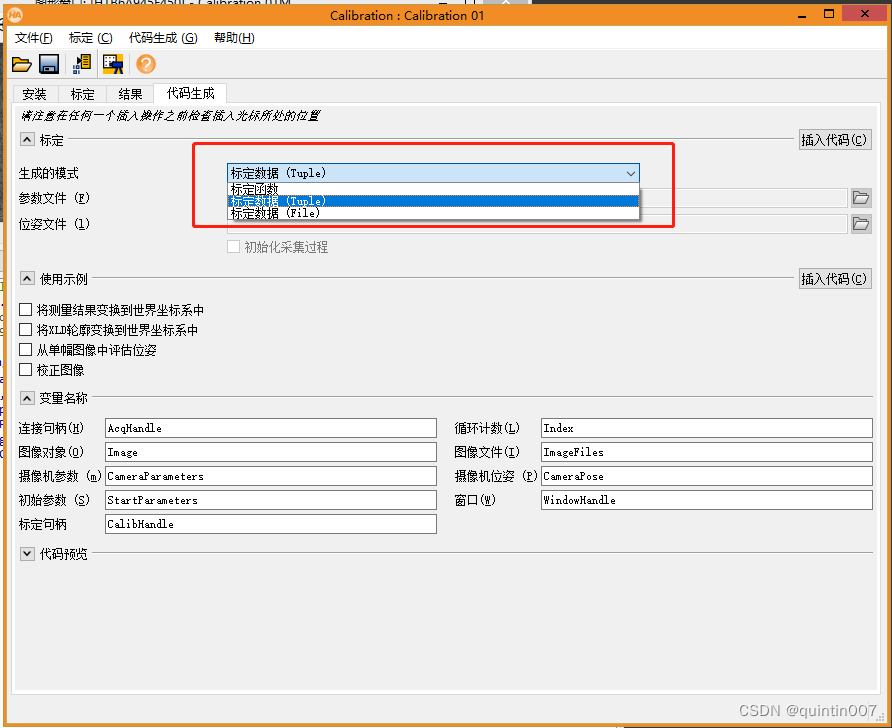
5) Select the required data to insert or export
Calibration function: Calibration code process
Calibration data: Calibration result: Camera internal parameters and external parameters
Calibration data (File): Save the camera internal and external parameter data files, which can be imported and used later.
6) Use calibration results to correct image distortion
*By Quintin
*2023/04/26 10:10
#Cameraparameters inside and outside the camera
: = ['AREA_SCAN_DIVISION', 0.0637753,64.3267,8.29508E-06,2588,1784.8,5472 , 3648]
Camerapose: = [ -0.107708,-0.132587,1.59098,357.031,2.99783,150.665,0]
read_image (Image, ‘E:/Quintin/Image.bmp’)
change_radial_distortion_cam_par (‘adaptive’, CameraParameters, 0, CamParamOut)
gen_radial_distortion_map (Map, CameraParameters, CamParamOut, ‘bilinear’)
map_image (Image, Map, ImageMapped)
*By Quintin
*2023/04/26 10:10
#相机内外参
CameraParameters := ['area_scan_division',0.0637753,64.3267,8.29508e-06,8.3e-06,2588.58,1784.8,5472,3648]
CameraPose := [-0.107708,-0.132587,1.59098,357.031,2.99783,150.665,0]

read_image (Image, 'E:/Quintin/Image.bmp')
change_radial_distortion_cam_par ('adaptive', CameraParameters, 0, CamParamOut)
gen_radial_distortion_map (Map, CameraParameters, CamParamOut, 'bilinear')
map_image (Image, Map, ImageMapped)
It's done~~~ go and try it