Prerequisites
- It is necessary to know the use of basic Linux commands, such as the use of vim
Tutorial recommendation: https://blog.csdn.net/weixin_55305220/article/details/123588501
Preparation
- The Centos image that was just installed is used here
Resource download:
JDK: https://www.jianguoyun.com/p/DaJ9OJ0Q7uH1ChiJr9cEIAA
Hadoop: https://www.jianguoyun.com/p/DdSqSrkQ7uH1ChiHr9cEIAA
- Configure the network first
Recommended network configuration tutorial: https://blog.csdn.net/qq_41474121/article/details/108929640
- Change the host name, here use Xshell to connect to the virtual machine
vim /etc/hostname
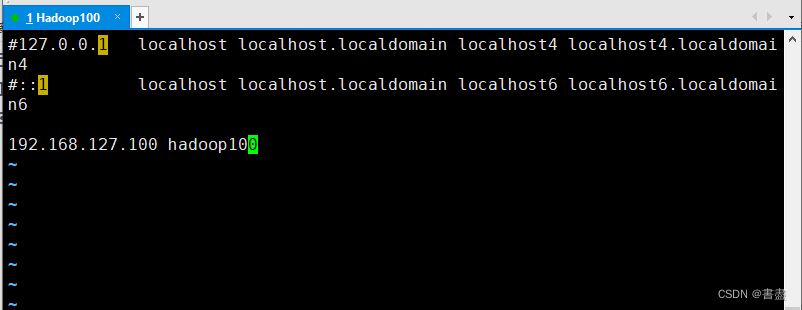
#修改IP及主机名映射
vim /etc/hosts
- reboot
#重启虚拟机
reboot
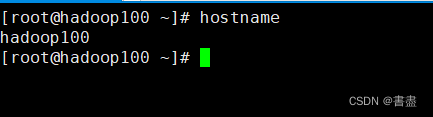
#查看主机名
hostname
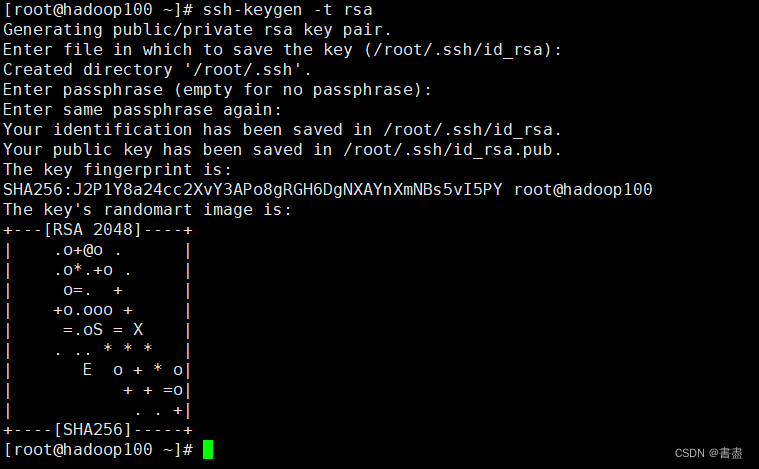
SSH password-free login
# 连续三次回车即可
ssh-keygen -t rsa
ssh-copy-id root@hadoop100

#测试ssh
ssh root@hadoop100
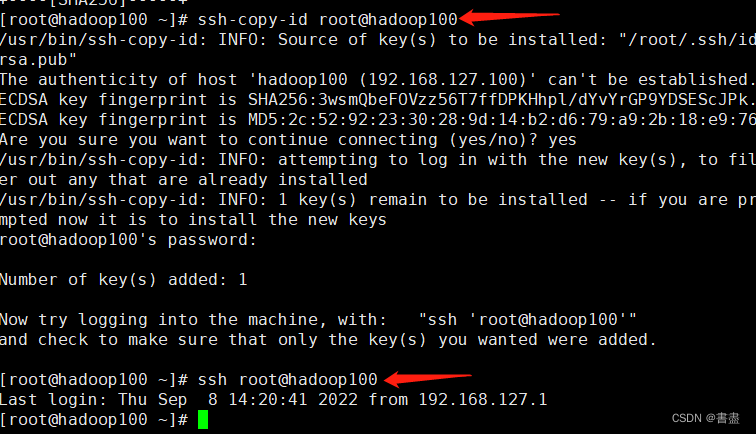
No problem, complete the configuration
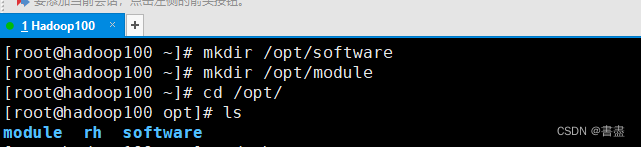
#创建两个文件夹
mkdir /opt/software   #放安装包
mkdir /opt/module	  #放解压好的组件
JDK configuration
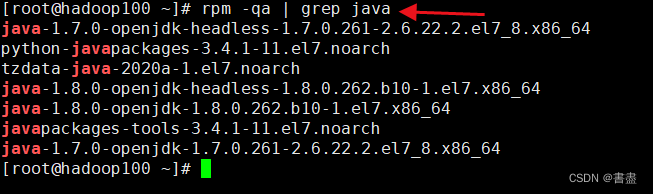
- Note that you must first uninstall the built-in JDK

openjdk =>> uninstall it first
#查看自带的JDK
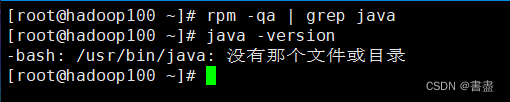
rpm -qa | grep java
#卸载命令,一一卸载
 rpm -e --nodeps #使用这个
 rpm -e --nodeps java-1.7.0-openjdk-headless-1.7.0.261-2.6.22.2.el7_8.x86_64
......
#出现如下即可

Upload using Xftp

Or use Xshell to drag in directly from windows
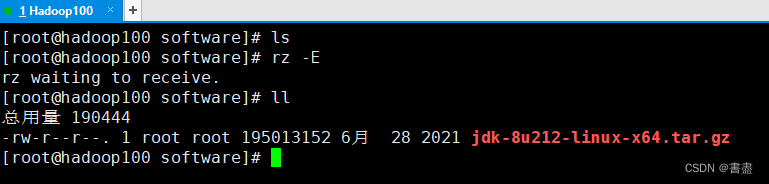
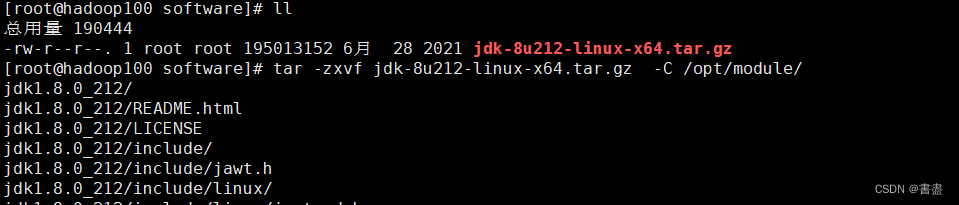
- decompress
tar -zxvf jdk-8u212-linux-x64.tar.gz -C /opt/module/

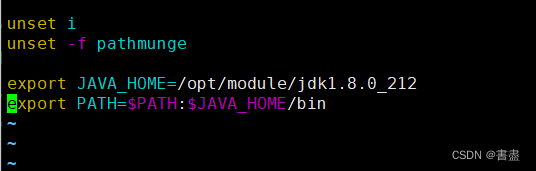
- Configure environment variables
vim /etc/profile
#加入如下配置
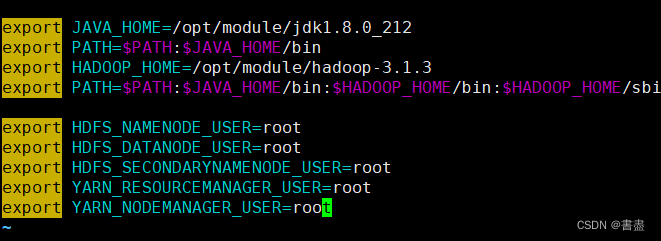
export JAVA_HOME=/opt/module/jdk1.8.0_212
export PATH=$PATH:$JAVA_HOME/bin
#保存后刷新环境变量
source /etc/profile

#查看JDK 如下
java -version

Hadoop configuration
- Upload compressed package
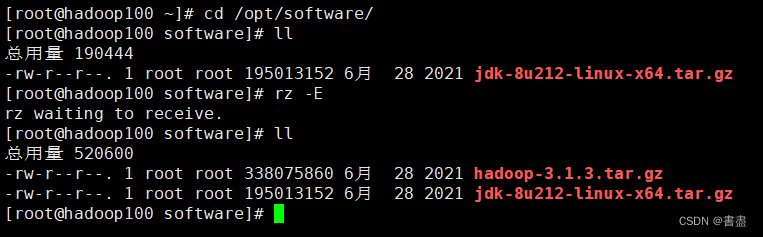
- decompress
tar -zxvf hadoop-3.1.3.tar.gz -C /opt/module/

- Modify the configuration file
cd /opt/module/hadoop-3.1.3/etc/hadoop/

#修改 hadoop-env.sh 文件
vim hadoop-env.sh
export JAVA_HOME=/opt/module/jdk1.8.0_212
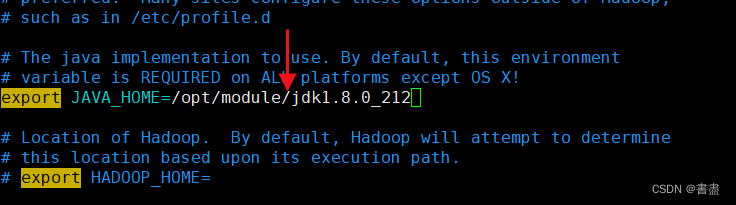
Pay attention to the JDK path, it must be correct
#修改 core-site.xml
vim core-site.xml
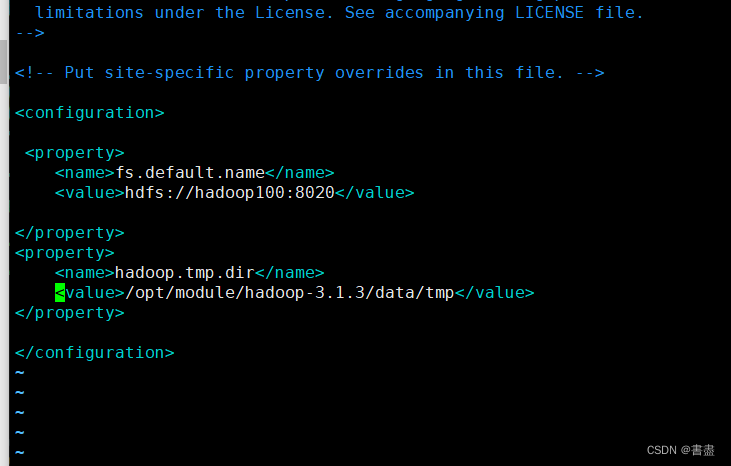
<configuration>
 <property>
    <name>fs.default.name</name>
    <value>hdfs://hadoop100:8020</value>
</property>
<property>
    <name>hadoop.tmp.dir</name>
    <value>/opt/module/hadoop-3.1.3/data/tmp</value>
</property>
</configuration>
# 修改 hdfs-site.xml
vim hdfs-site.xml

<configuration>
        <property>
            <name>dfs.replication</name>
            <value>3</value>
        </property>
         <property>
             <name>dfs.permissions.enabled</name>
             <value>false</value>
          </property>
          <property>
              <value>hadoop100:9870</value>
           </property>
</configuration>
#修改 mapred-site.xml
vim mapred-site.xml
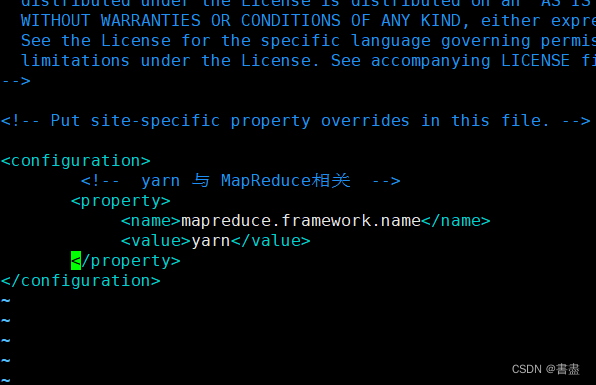
<configuration>
        <!--  yarn 与 MapReduce相关  -->
       <property>
            <name>mapreduce.framework.name</name>
            <value>yarn</value>
       </property>
</configuration>
#修改 yarn-site.xml
vim yarn-site.xml

<configuration>
         <property>
          <name>yarn.nodemanager.aux-services</name>
          <value>mapreduce_shuffle</value>
  </property>
</configuration>
- Configure Hadoop environment variables
vim /etc/profile
export HADOOP_HOME=/opt/module/hadoop-3.1.3
export PATH=$PATH:$HADOOP_HOME/bin:$HADOOP_HOME/sbin
export HDFS_NAMENODE_USER=root
export HDFS_DATANODE_USER=root
export HDFS_SECONDARYNAMENODE_USER=root
export YARN_RESOURCEMANAGER_USER=root
export YARN_NODEMANAGER_USER=root
# 刷新环境变量
source /etc/profile
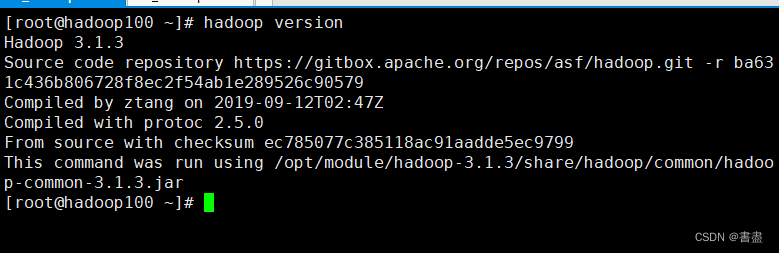
- Verify that the environment variable is configured successfully
hadoop version
- Format NameNode
hadoop namenode -format
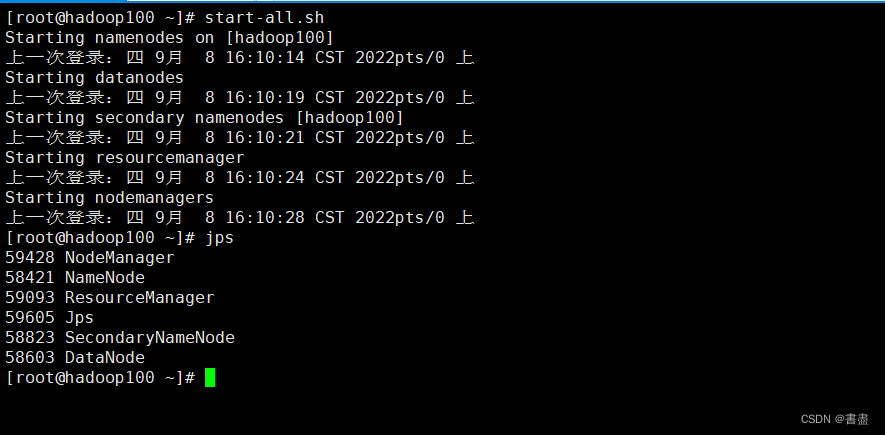
- Hadoop start and stop command
  start-all.sh #启动
  stop-all.sh  #停止
#输入 jps 查看进程
jps
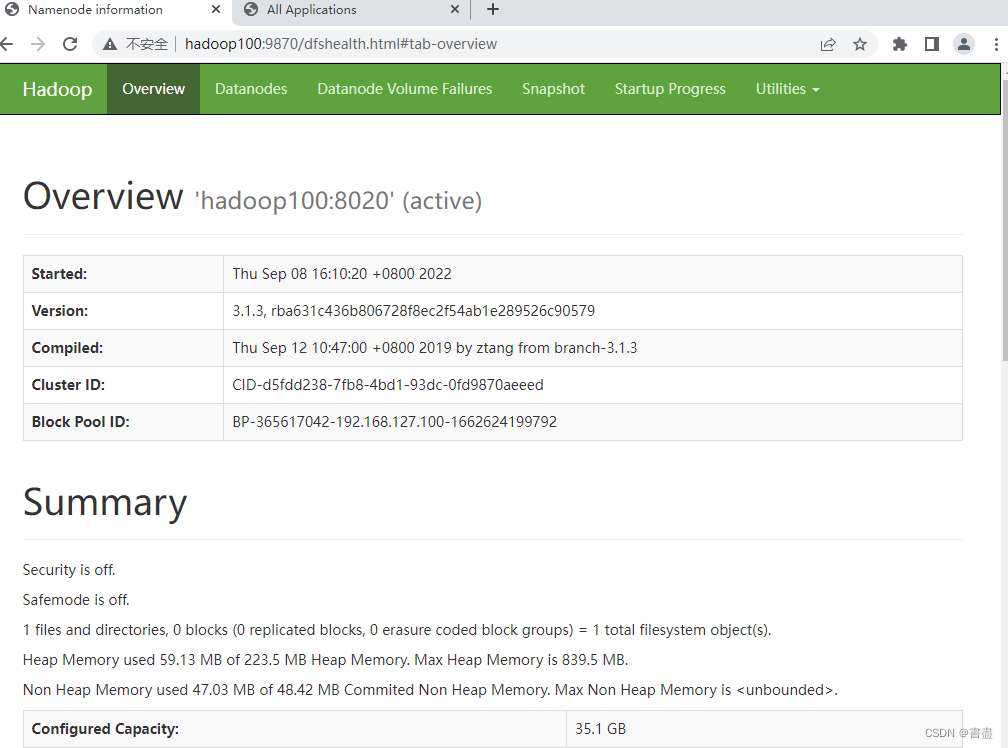
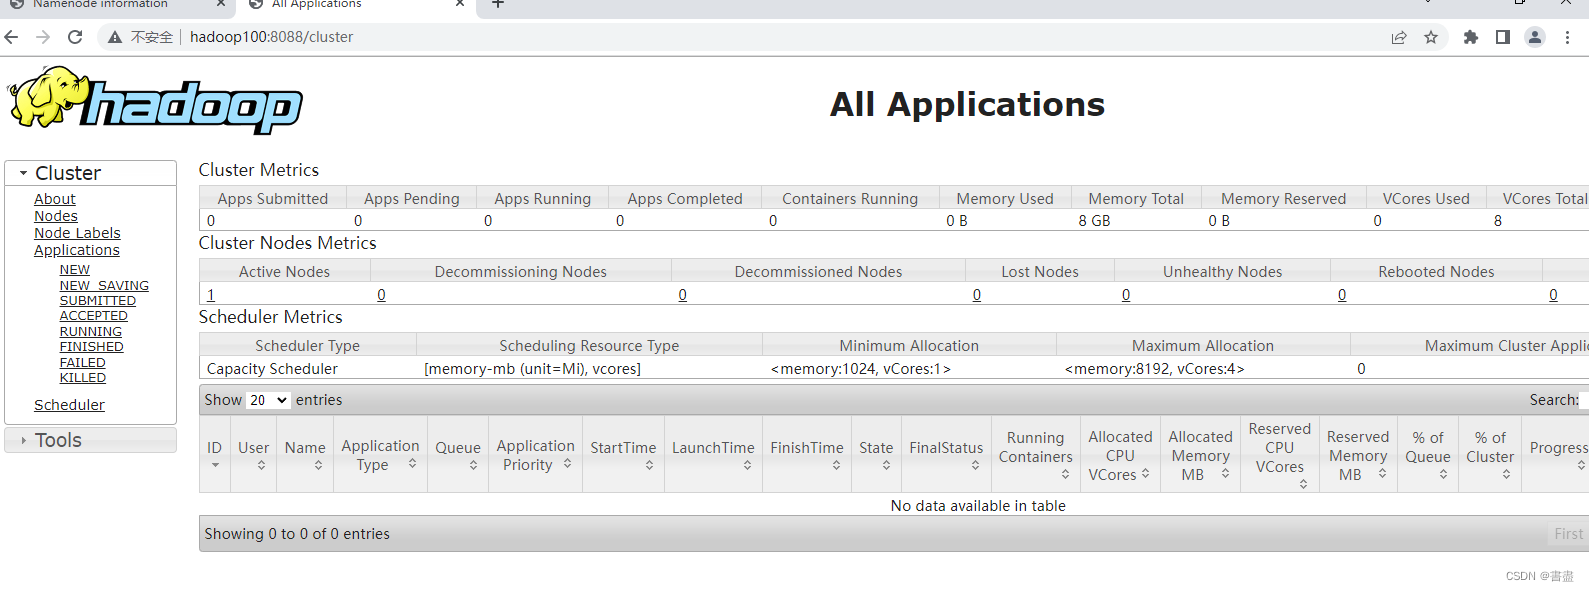
Pay attention to your own IP address, here you have to use your own IP
http://192.168.127.100:9870 to access hdfs
http://192.168.127.100:8088 to access yarn
- If you open a browser, you cannot view

- Check if the firewall is turned off
查看防火墙状态:
service iptables status
关闭防火墙:
service iptables stop
irewalld 方式
启动: systemctl start firewalld
查看状态: systemctl status firewalld
禁用,禁止开机启动: systemctl disable firewalld
停止运行: systemctl stop firewalld
重启:firewall-cmd --reload
- Firewall is off

- open browser again
Summarize
- The network must be configured
- There cannot be spaces after the hostname
- be careful