目录
一、需求

二、前端整合发送验证码
点击获取验证码后先对手机号进行验证是否为空,其次禁用发送验证码按钮防止重复提交,然后显示倒计时,调用后端的阿里云微服务发送验证码,下面这篇文章提到如何整合阿里云短信微服务整合阿里云短信服务![]() https://blog.csdn.net/m0_62946761/article/details/129625885?spm=1001.2014.3001.5501
https://blog.csdn.net/m0_62946761/article/details/129625885?spm=1001.2014.3001.5501
methods: {
//发短信
send() {
if (!this.userInfo.mobile) {
this.$message.error('请输入手机号')
return
}
//防止重复提交
if (this.sending) return
this.sending = true
//倒计时
this.timeDown()
//远程调用发送短信的接口
this.$axios
.$get('/api/sms/send/' + this.userInfo.mobile)
.then((response) => {
this.$message.success(response.message)
})
},
//倒计时
timeDown() {
console.log('进入倒计时')
this.leftSecond = this.second
//创建定时器
const timmer = setInterval(() => {
//计数器减一
this.leftSecond--
if (this.leftSecond <= 0) {
//停止定时器
clearInterval(timmer)
//还原计数器
this.leftSecond = this.second
//还原按钮状态
this.sending = false
}
}, 1000)
},
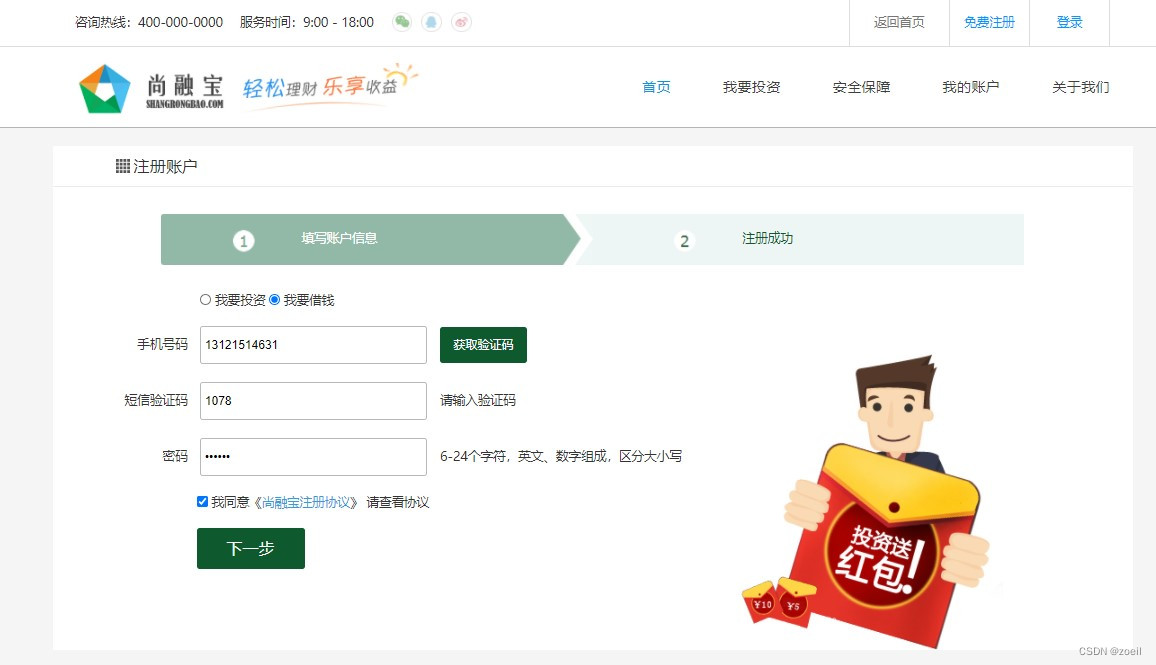
},三、实现用户注册
1、创建VO对象
service-core中创建vo(value object),根据表单创建出来的对象,这里其实可以用复用原本的userInfo对象,它已经包含了这些属性
@Data
@ApiModel(description="注册对象")
public class RegisterVO {

    @ApiModelProperty(value = "用户类型")
    private Integer userType;

    @ApiModelProperty(value = "手机号")
    private String mobile;

    @ApiModelProperty(value = "验证码")
    private String code;

    @ApiModelProperty(value = "密码")
    private String password;
}
2、定义常量
UserInfo中添加常量
public static final Integer STATUS_NORMAL = 1;
public static final Integer STATUS_LOCKED = 0;
3、引入MD5工具类
guigu-common中util包,引入工具类:
MD5.java:MD5加密,对用户密码加密后再存入数据库
4、Controller
先对手机,密码,验证码进行校验判断,最后再调用service的注册方法
@Api(tags = "会员接口")
@RestController
@RequestMapping("/api/core/userInfo")
@Slf4j
@CrossOrigin
public class UserInfoController {

    @Resource
    private UserInfoService userInfoService;

    @Resource
    private RedisTemplate redisTemplate;

    @ApiOperation("会员注册")
    @PostMapping("/register")
    public R register(@RequestBody RegisterVO registerVO){

        String mobile = registerVO.getMobile();
        String password = registerVO.getPassword();
        String code = registerVO.getCode();

        //MOBILE_NULL_ERROR(-202, "手机号不能为空"),
        Assert.notEmpty(mobile, ResponseEnum.MOBILE_NULL_ERROR);
        //MOBILE_ERROR(-203, "手机号不正确"),
        Assert.isTrue(RegexValidateUtils.checkCellphone(mobile), ResponseEnum.MOBILE_ERROR);
        //PASSWORD_NULL_ERROR(-204, "密码不能为空"),
        Assert.notEmpty(password, ResponseEnum.PASSWORD_NULL_ERROR);
        //CODE_NULL_ERROR(-205, "验证码不能为空"),
        Assert.notEmpty(code, ResponseEnum.CODE_NULL_ERROR);

        //校验验证码
        String codeGen = (String)redisTemplate.opsForValue().get("srb:sms:code:" + mobile);
        //CODE_ERROR(-206, "验证码不正确"),
        Assert.equals(code, codeGen, ResponseEnum.CODE_ERROR);

        //注册
        userInfoService.register(registerVO);
        return R.ok().message("注册成功");
    }
}
5、Service
接口:UserInfoService
public interface UserInfoService extends IService<UserInfo> {

    void register(RegisterVO registerVO);
}
实现:UserInfoServiceImpl
先判断用户表是否已经注册过该用户,如果没有就插入用户信息表和用户账户表,新建账户0块钱,这里涉及两张表的操作,在类上加上事务回滚
@Service
public class UserInfoServiceImpl extends ServiceImpl<UserInfoMapper, UserInfo> implements UserInfoService {

    @Resource
    private UserAccountMapper userAccountMapper;

    @Transactional(rollbackFor = {Exception.class})
    @Override
    public void register(RegisterVO registerVO) {

        //判断用户是否被注册
        QueryWrapper<UserInfo> queryWrapper = new QueryWrapper<>();
        queryWrapper.eq("mobile", registerVO.getMobile());
        Integer count = baseMapper.selectCount(queryWrapper);
        //MOBILE_EXIST_ERROR(-207, "手机号已被注册"),
        Assert.isTrue(count == 0, ResponseEnum.MOBILE_EXIST_ERROR);

        //插入用户基本信息
        UserInfo userInfo = new UserInfo();
        userInfo.setUserType(registerVO.getUserType());
        userInfo.setNickName(registerVO.getMobile());
        userInfo.setName(registerVO.getMobile());
        userInfo.setMobile(registerVO.getMobile());
        userInfo.setPassword(MD5.encrypt(registerVO.getPassword()));
        userInfo.setStatus(UserInfo.STATUS_NORMAL); //正常
        //设置一张静态资源服务器上的头像图片
        userInfo.setHeadImg("https://srb-file.oss-cn-beijing.aliyuncs.com/avatar/07.jpg");
        baseMapper.insert(userInfo);

        //创建会员账户
        UserAccount userAccount = new UserAccount();
        userAccount.setUserId(userInfo.getId());
        userAccountMapper.insert(userAccount);
    }
}
6、前端整合
pages/register.vue
//注册
register() {
this.$axios
.$post('/api/core/userInfo/register', this.userInfo)
.then((response) => {
this.step = 2
})
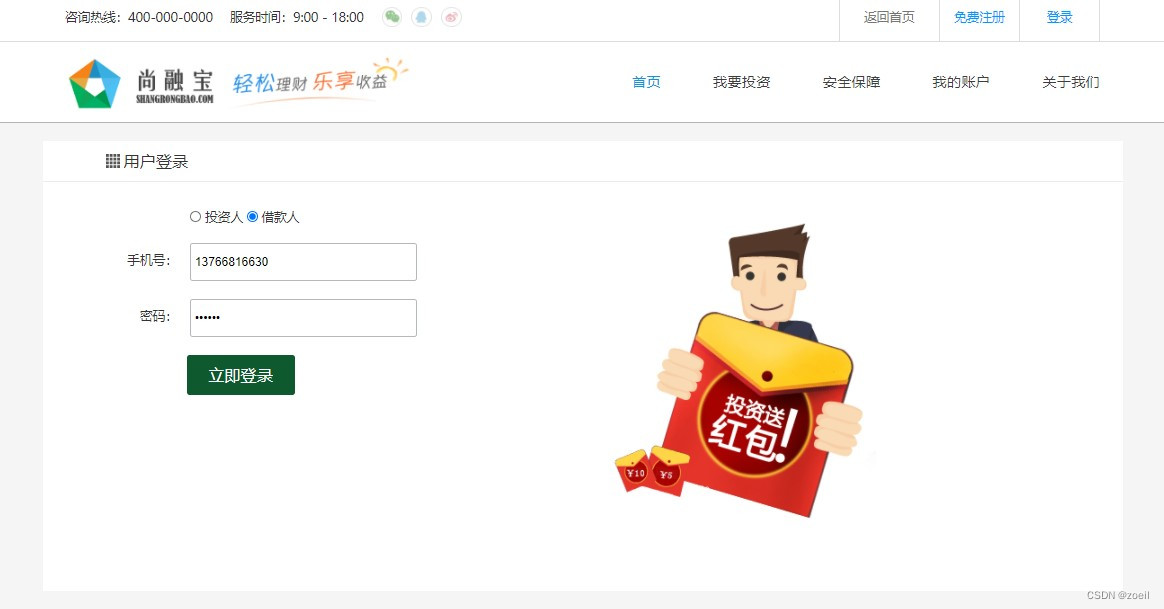
},四、实现用户登录
1、后端整合JWT
这里使用JWT令牌来校验用户的登录,下面这篇文章讲解了JWT令牌尚融宝18-JWT令牌和测试_zoeil的博客-CSDN博客![]() https://blog.csdn.net/m0_62946761/article/details/129962876?spm=1001.2014.3001.5502&ydreferer=aHR0cHM6Ly9ibG9nLmNzZG4ubmV0L20wXzYyOTQ2NzYxP3R5cGU9YmxvZw%3D%3D
https://blog.csdn.net/m0_62946761/article/details/129962876?spm=1001.2014.3001.5502&ydreferer=aHR0cHM6Ly9ibG9nLmNzZG4ubmV0L20wXzYyOTQ2NzYxP3R5cGU9YmxvZw%3D%3D
导入依赖
<dependency>
    <groupId>io.jsonwebtoken</groupId>
    <artifactId>jjwt</artifactId>
</dependency>
JWT工具
service-base中添加util包
添加JwtUtils类,包括生成token,校验token等主要功能
public class JwtUtils {

    private static long tokenExpiration = 24*60*60*1000;
    private static String tokenSignKey = "A1t2g3uigu123456";

    private static Key getKeyInstance(){
        SignatureAlgorithm signatureAlgorithm = SignatureAlgorithm.HS256;
        byte[] bytes = DatatypeConverter.parseBase64Binary(tokenSignKey);
        return new SecretKeySpec(bytes,signatureAlgorithm.getJcaName());
    }

    public static String createToken(Long userId, String userName) {
        String token = Jwts.builder()
                .setSubject("SRB-USER")
                .setExpiration(new Date(System.currentTimeMillis() + tokenExpiration))
                .claim("userId", userId)
                .claim("userName", userName)
                .signWith(SignatureAlgorithm.HS512, getKeyInstance())
                .compressWith(CompressionCodecs.GZIP)
                .compact();
        return token;
    }

    /**
     * 判断token是否有效
     * @param token
     * @return
     */
    public static boolean checkToken(String token) {
        if(StringUtils.isEmpty(token)) {
            return false;
        }
        try {
            Jwts.parser().setSigningKey(getKeyInstance()).parseClaimsJws(token);
            return true;
        } catch (Exception e) {
            return false;
        }
    }


    public static Long getUserId(String token) {
        Claims claims = getClaims(token);
        Integer userId = (Integer)claims.get("userId");
        return userId.longValue();
    }

    public static String getUserName(String token) {
        Claims claims = getClaims(token);
        return (String)claims.get("userName");
    }

    public static void removeToken(String token) {
        //jwttoken无需删除,客户端扔掉即可。
    }

    /**
     * 校验token并返回Claims
     * @param token
     * @return
     */
    private static Claims getClaims(String token) {
        if(StringUtils.isEmpty(token)) {
            // LOGIN_AUTH_ERROR(-211, "未登录"),
            throw new BusinessException(ResponseEnum.LOGIN_AUTH_ERROR);
        }
        try {
            Jws<Claims> claimsJws = Jwts.parser().setSigningKey(getKeyInstance()).parseClaimsJws(token);
            Claims claims = claimsJws.getBody();
            return claims;
        } catch (Exception e) {
            throw new BusinessException(ResponseEnum.LOGIN_AUTH_ERROR);
        }
    }
}
创建VO对象
service-core中创建登录对象
@Data
@ApiModel(description="登录对象")
public class LoginVO {

    @ApiModelProperty(value = "用户类型")
    private Integer userType;

    @ApiModelProperty(value = "手机号")
    private String mobile;

    @ApiModelProperty(value = "密码")
    private String password;
}
用户信息对象
@Data
@ApiModel(description="用户信息对象")
public class UserInfoVO {

    @ApiModelProperty(value = "用户姓名")
    private String name;

    @ApiModelProperty(value = "用户昵称")
    private String nickName;

    @ApiModelProperty(value = "头像")
    private String headImg;

    @ApiModelProperty(value = "手机号")
    private String mobile;

    @ApiModelProperty(value = "1:出借人 2:借款人")
    private Integer userType;

    @ApiModelProperty(value = "JWT访问令牌")
    private String token;
}
UserInfoController,返回给前端用户信息对象供展示用
@ApiOperation("会员登录")
@PostMapping("/login")
public R login(@RequestBody LoginVO loginVO, HttpServletRequest request) {

    String mobile = loginVO.getMobile();
    String password = loginVO.getPassword();
    Assert.notEmpty(mobile, ResponseEnum.MOBILE_NULL_ERROR);
    Assert.notEmpty(password, ResponseEnum.PASSWORD_NULL_ERROR);

    String ip = request.getRemoteAddr();
    UserInfoVO userInfoVO = userInfoService.login(loginVO, ip);

    return R.ok().data("userInfo", userInfoVO);
}
接口:UserInfoService
UserInfoVO login(LoginVO loginVO, String ip);实现:UserInfoServiceImpl
@Resource
private UserLoginRecordMapper userLoginRecordMapper;

@Transactional( rollbackFor = {Exception.class})
@Override
public UserInfoVO login(LoginVO loginVO, String ip) {
    String mobile = loginVO.getMobile();
    String password = loginVO.getPassword();
    Integer userType = loginVO.getUserType();

    //获取会员
    QueryWrapper<UserInfo> queryWrapper = new QueryWrapper<>();
    queryWrapper.eq("mobile", mobile);
    queryWrapper.eq("user_type", userType);
    UserInfo userInfo = baseMapper.selectOne(queryWrapper);

    //用户不存在
    //LOGIN_MOBILE_ERROR(-208, "用户不存在"),
    Assert.notNull(userInfo, ResponseEnum.LOGIN_MOBILE_ERROR);

    //校验密码
    //LOGIN_PASSWORD_ERROR(-209, "密码不正确"),
    Assert.equals(MD5.encrypt(password), userInfo.getPassword(), ResponseEnum.LOGIN_PASSWORD_ERROR);

    //用户是否被禁用
    //LOGIN_DISABLED_ERROR(-210, "用户已被禁用"),
    Assert.equals(userInfo.getStatus(), UserInfo.STATUS_NORMAL, ResponseEnum.LOGIN_LOKED_ERROR);

    //记录登录日志
    UserLoginRecord userLoginRecord = new UserLoginRecord();
    userLoginRecord.setUserId(userInfo.getId());
    userLoginRecord.setIp(ip);
    userLoginRecordMapper.insert(userLoginRecord);

    //生成token
    String token = JwtUtils.createToken(userInfo.getId(), userInfo.getName());
    UserInfoVO userInfoVO = new UserInfoVO();
    userInfoVO.setToken(token);
    userInfoVO.setName(userInfo.getName());
    userInfoVO.setNickName(userInfo.getNickName());
    userInfoVO.setHeadImg(userInfo.getHeadImg());
    userInfoVO.setMobile(userInfo.getMobile());
    userInfoVO.setUserType(userType);

    return userInfoVO;
}
2、前端整合
登录脚本pages/login.vue,按下登录按钮后请求后台获取用户信息对象,跳转到主页
methods: {
    //登录
    login() {
      this.$axios
        .$post('/api/core/userInfo/login', this.userInfo)
        .then((response) => {
          // 把用户信息存在cookie中
          cookie.set('userInfo', response.data.userInfo)
          window.location.href = '/user'
        })
    },
},
登陆后,免费注册这里需要换成用户的电话以证明登录

页面头信息
components/AppHeader.vue
脚本
<script>
import cookie from 'js-cookie'

export default {
  data() {
    return {
      userInfo: null,
    }
  },

  mounted() {
    this.showInfo()
  },

  methods: {
    //显示用户信息
    showInfo() {
      // debugger
      let userInfo = cookie.get('userInfo')
      if (!userInfo) {
        console.log('cookie不存在')
        this.userInfo = null
        return
      }
      userInfo = JSON.parse(userInfo)
      this.userInfo = userInfo
    },

    //退出
    logout() {
      cookie.set('userInfo', '')
      //跳转页面
      window.location.href = '/login'
    },
  },
}
</script>
五、校验用户登录
1、后端
显示用户信息时需要先进行token的校验,service-core 中 UserInfoController添加令牌校验接口
@ApiOperation("校验令牌")
@GetMapping("/checkToken")
public R checkToken(HttpServletRequest request) {
String token = request.getHeader("token");
boolean result = JwtUtils.checkToken(token);
if(result){
return R.ok();
}else{
//LOGIN_AUTH_ERROR(-211, "未登录"),
return R.setResult(ResponseEnum.LOGIN_AUTH_ERROR);
}
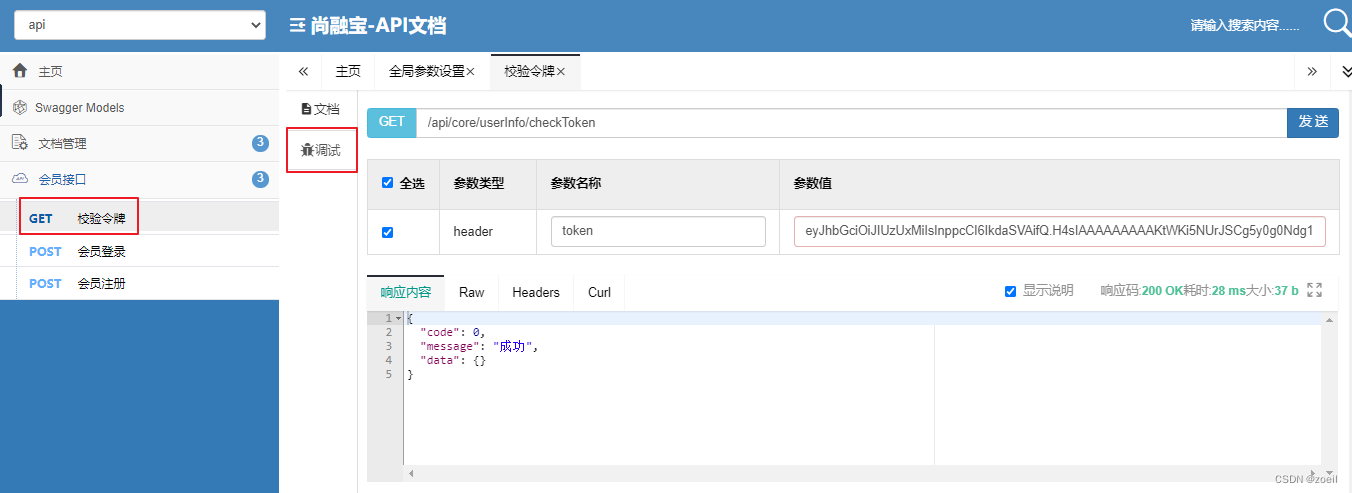
}这里我们原本测试使用的是基本的swagger2无法在请求头中添加token字段,可以使用postman,也可以使用民间加强版的swagger2,只需要以下几个步骤:
step1:service-base导入以下依赖
<dependency>
    <groupId>com.github.xiaoymin</groupId>
    <artifactId>swagger-bootstrap-ui</artifactId>
    <version>1.9.2</version>
</dependency>
step2:访问
http://localhost:8110/doc.html
step3:添加全局参数

2、前端
对于原本的显示用户信息的函数showInfo我们需要优化一下,在拿到cookie中的用户信息后,先请求后端服务器校验token,成功才显示信息
showInfo() {
    // debugger
    let userInfo = cookie.get('userInfo')

    if (!userInfo) {
        console.log('cookie不存在')
        this.userInfo = null
        return
    }

    userInfo = JSON.parse(userInfo)

    //先在服务器端校验token
    this.$axios({
        url: '/api/core/userInfo/checkToken',
        method: 'get',
        headers: {
            //如果token校验成功,再展示user信息
            token: userInfo.token,
        },
    }).then((response) => {
        console.log('校验成功')
        this.userInfo = userInfo
    })
},
可能你会有疑问为什么上面拿到响应数据进入then就代表着成功,因为axios响应拦截器中已经帮我们处理了未登录的情况
$axios.onResponse((response) => {
    console.log('Reciving resposne', response)
    if (response.data.code === 0) {
      return response         // 后端对于未登录的情况返回的状态码为-211
    } else if (response.data.code === -211) {
      console.log('token校验失败')
      cookie.set('userInfo', '')
      //debugger
      //跳转到登录页面
      window.location.href = '/login'
    } else {
      Message({
        message: response.data.message,
        type: 'error',
        duration: 5 * 1000,
      })
      return Promise.reject(response)
    }
  })