Table of contents
4.1 git add--add temporary storage area
4.2 git commit--submit the local warehouse
4.3 git push--Push remote warehouse
4.4 git pull--update local warehouse
5. Complete development process
5.2 Step 2: Create your own development branch
5.3 Step 3: Code in your own local branch
5.4 Step 4: Switch to the local master branch
5.5 Step 5: Merge your own branch code into the master branch
5.6 Step 6: Push the branch of the local master to the master branch of the remote warehouse
5.7 Step 7: Simulate colleagues to merge code into remote warehouse
5.8 Step 8: Pull the latest code from the remote warehouse master to the local master branch
5.9 Step 9: Switch to your own local branch, merge master, and continue development
5.10 Step 10: Repeat steps 5 to 9 back and forth
5.11 Step 11: Remote backup of local branch
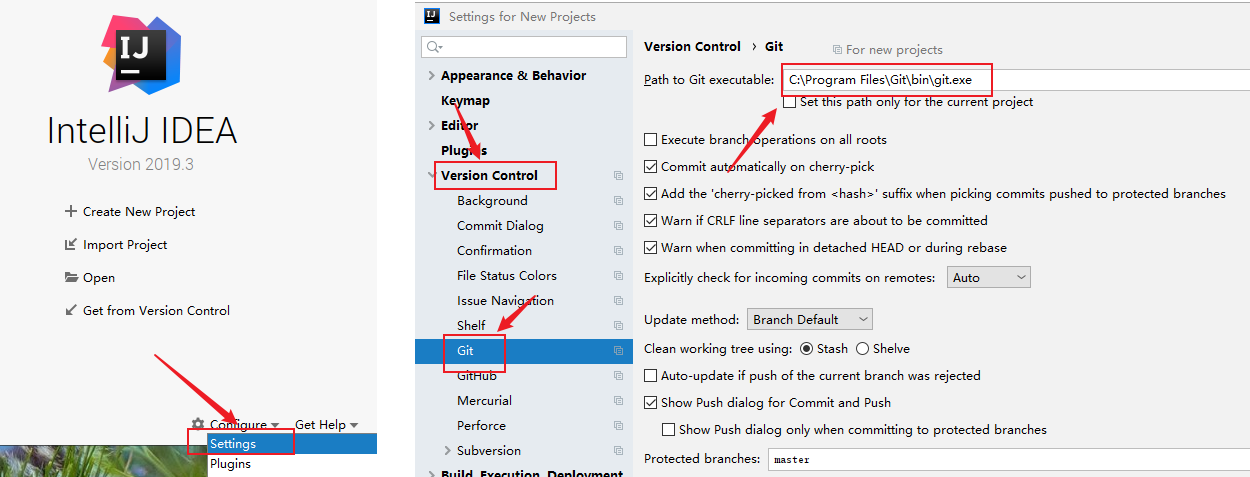
1. Configure Idea
idea comes with a Git plugin, but in many cases the plugin version is not the latest, it can be configured as the installed version of Git before general operation
2. Project cloning
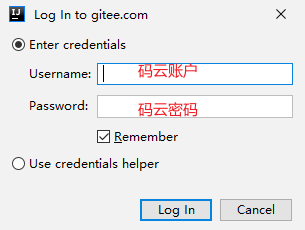
Generally speaking, after entering the company, you will be sent a remote Git warehouse account password and warehouse address. After you get the warehouse address, you can download the warehouse to the local in the development tool


Note: In the case of microservice development or development by module, because a warehouse may contain multiple project files, it is recommended to use the command git clone to clone the remote warehouse to the local first, and then import the projects in the warehouse one by one. idea
3. File Status Identification
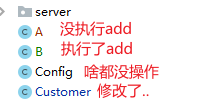
In idea, different colors are used to identify different states of files.
Usually, there are several colors:
Brown: The color means that it is not managed by Git (not added to the temporary storage area)
Green: represents a newly added file and has been added to the temporary storage area
Blue: means that the file has been submitted to the remote and the file has been edited
Black: Indicates that the current version of the file is consistent with the remote
Gray: Indicates that the file has been submitted to the warehouse before (whether remote or local), but it has been deleted
Red: Indicates that the content of the file is in conflict
When creating a new file, idea will pop up a prompt box to confirm whether to add it to the git temporary storage area

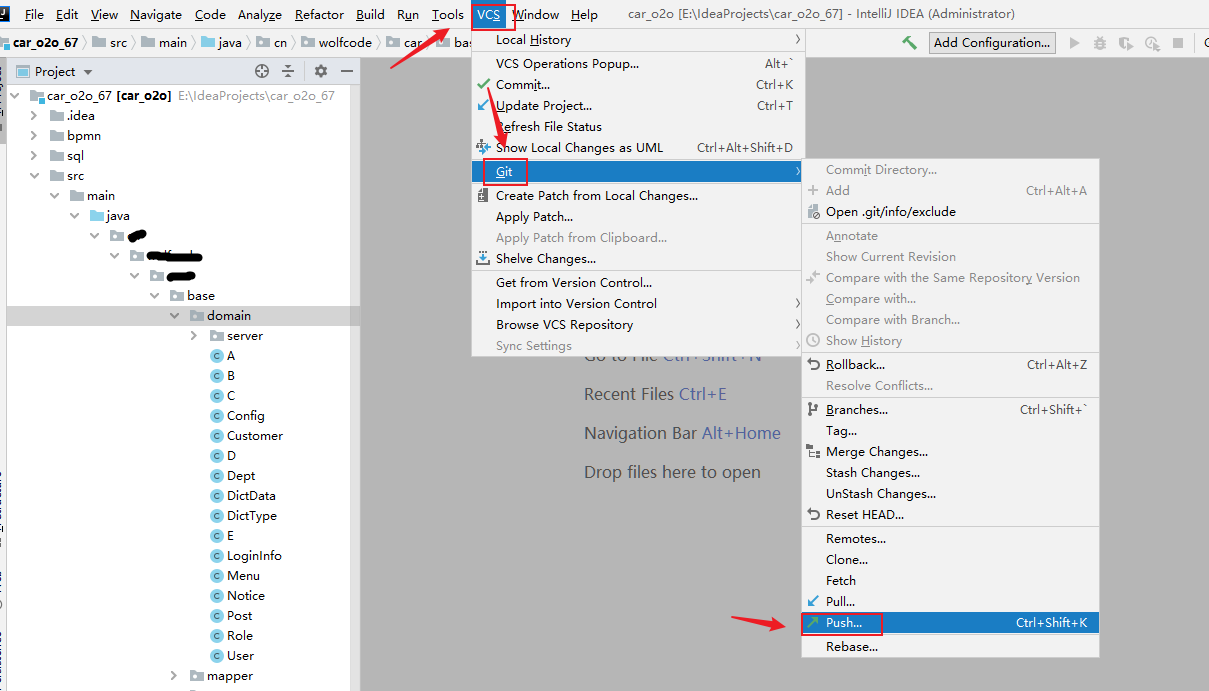
Four, Git operation
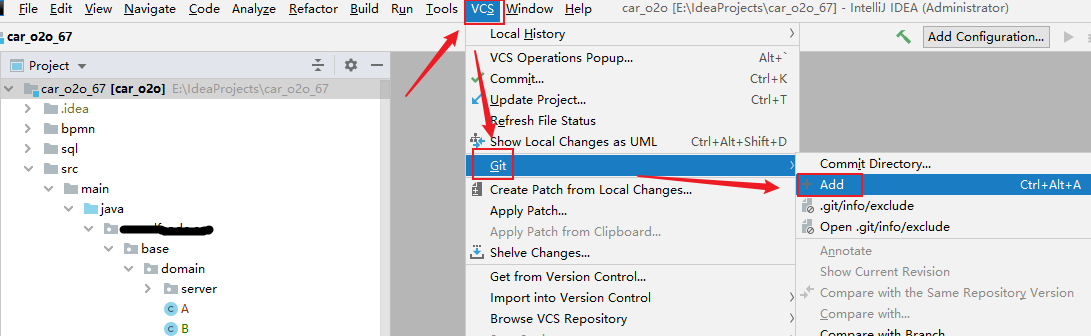
4.1 git add--add temporary storage area
method one

way two
4.2 git commit--submit the local warehouse
method one
way two

way three

After clicking submit

4.3 git push--Push remote warehouse
method one

way two

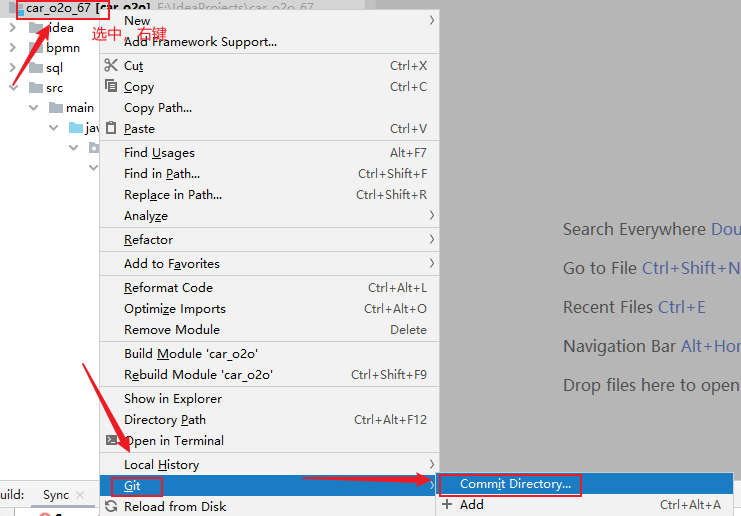
4.4 git pull--update local warehouse
method one
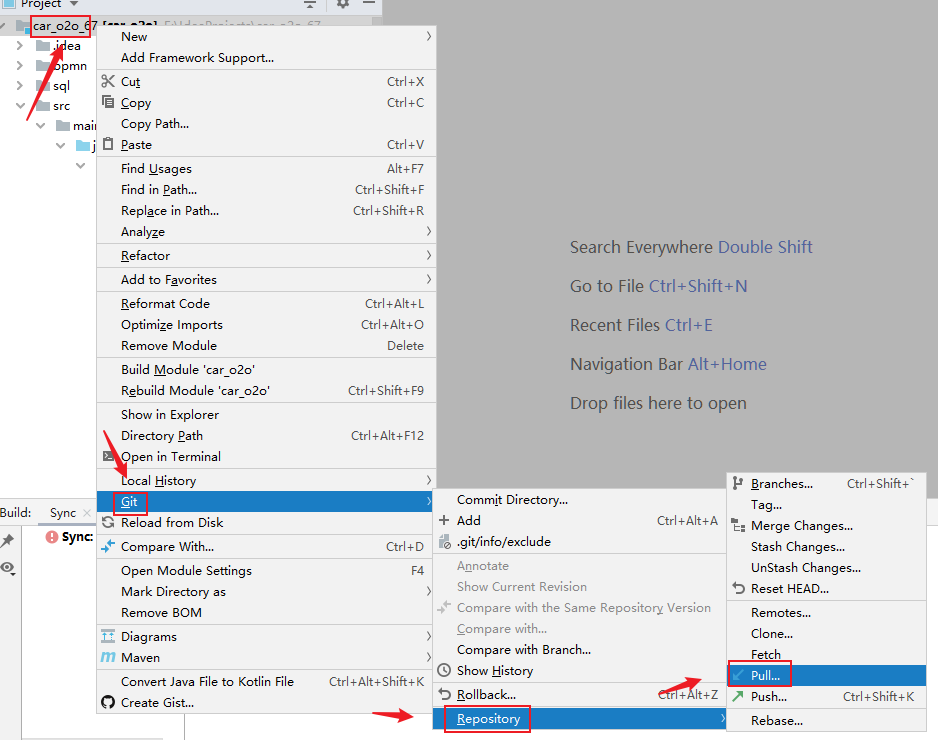
way two
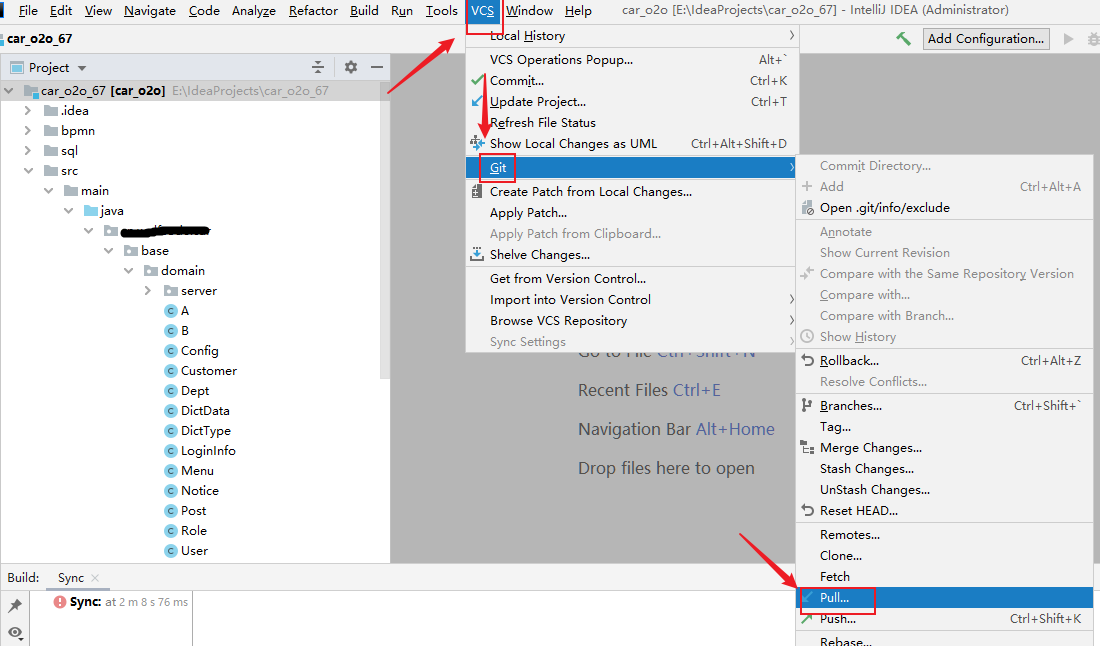
way three

5. Complete development process

5.1 Step 1: Clone the project

5.2 Step 2: Create your own development branch
There is an agreement in team development that you cannot write code on the master branch, including your own local branch, so you need to pull out your own development branch when developing.
In the lower right corner of the idea, create
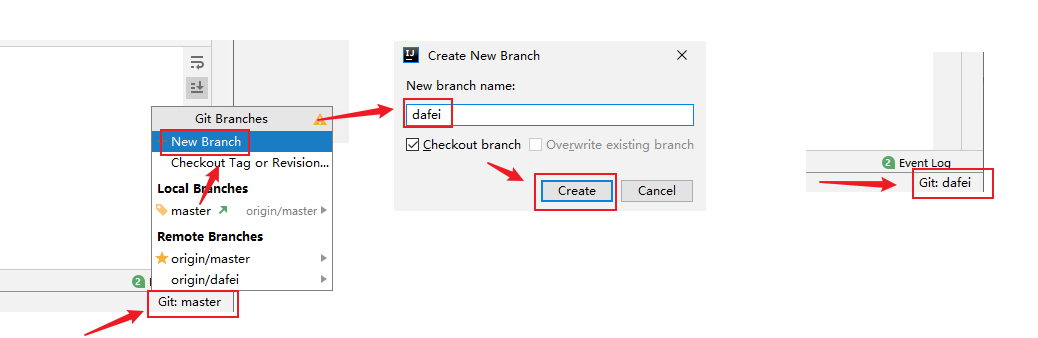
After the creation is successful, it will switch to the newly created branch by default.
5.3 Step 3: Code in your own local branch
For a requirement development, you usually pull a branch by yourself, and realize the requirements you are responsible for in this branch. When the development completes some independent requirements (such as implementing a complete logic), you can unit test yourself. After the test passes, git add git commit submits your local branch.
It should be noted here that you must branch your own code and execute step 4 after commit
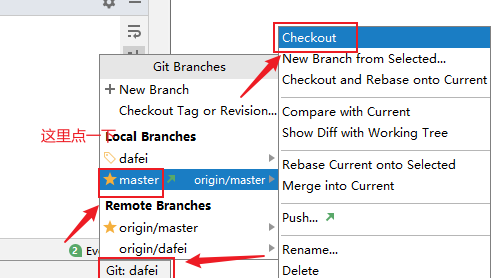
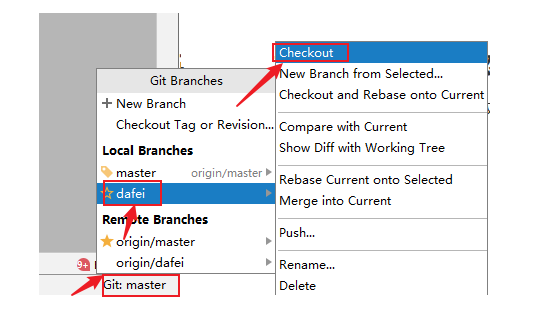
5.4 Step 4: Switch to the local master branch
After developing your own local branch, after testing that there are no bugs, and ensuring that you have committed, switch to the master branch
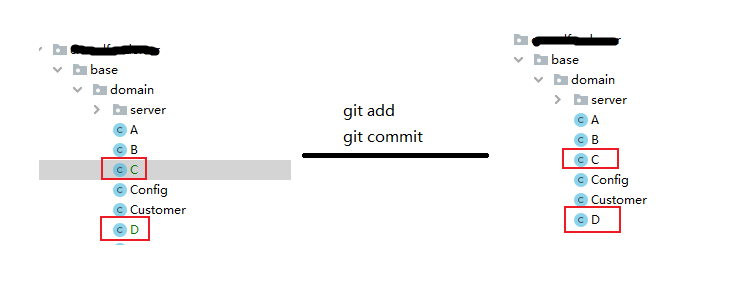
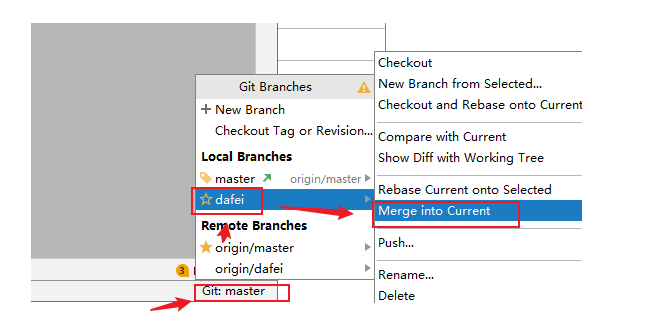
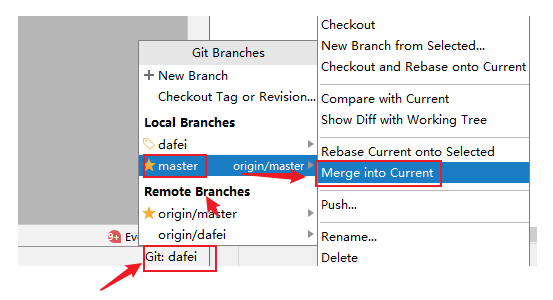
5.5 Step 5: Merge your own branch code into the master branch
When the branch code is ok, merge it into the master branch

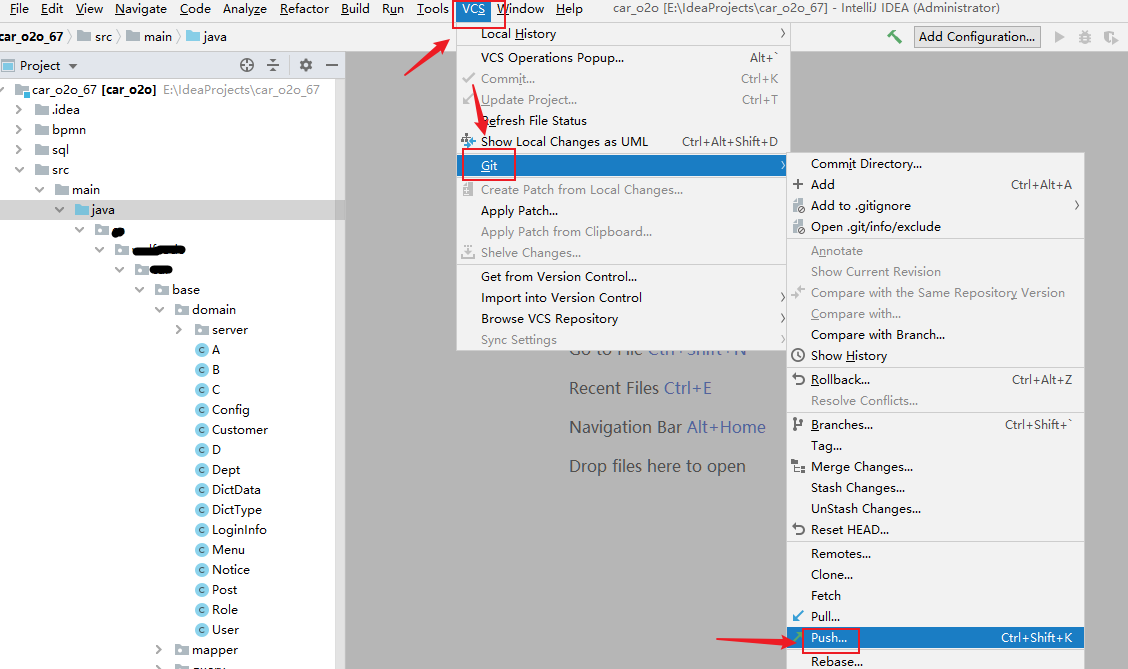
5.6 Step 6: Push the branch of the local master to the master branch of the remote warehouse
Note: After merging your own branch into the master branch, you need to test your own code. After the test is ok, if you change the code, you need to commit again, and then push it to the master branch of the remote warehouse.

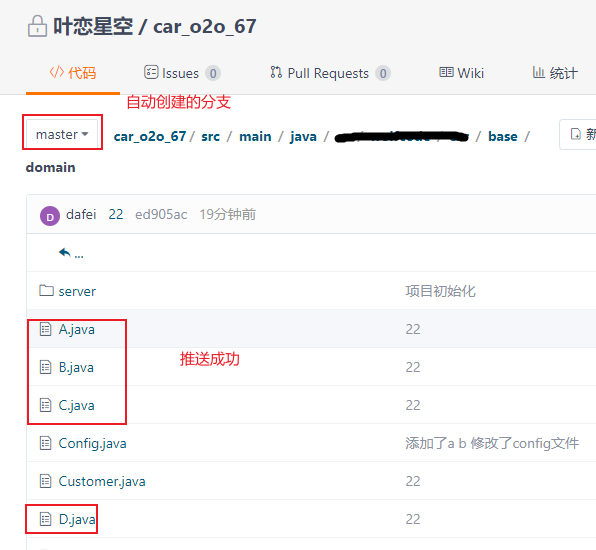
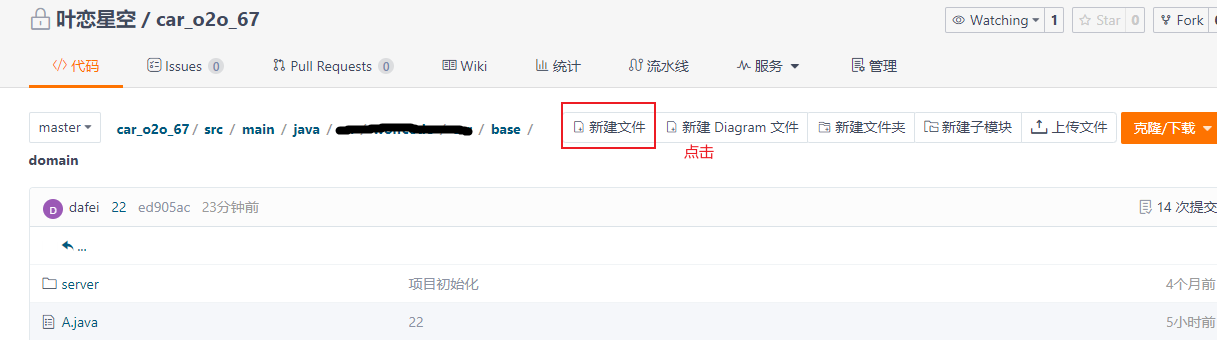
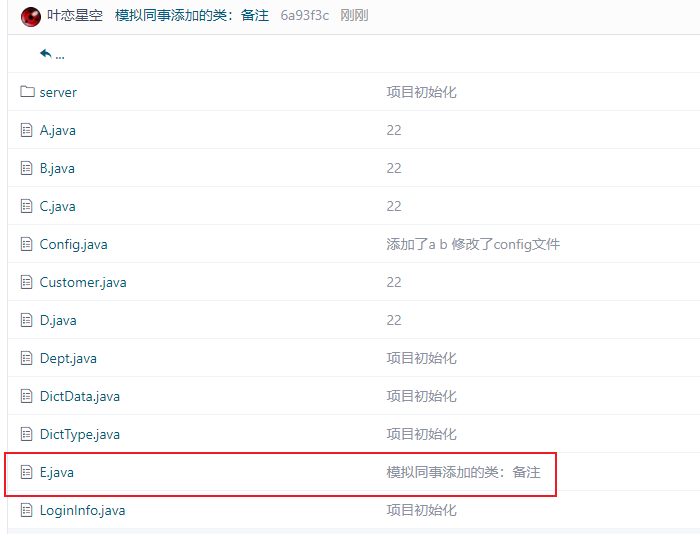
5.7 Step 7: Simulate colleagues to merge code into remote warehouse
The company's projects are carried out in the form of a team. The code you submit is submitted by your colleagues, and the code cloud warehouse console is used to simulate colleagues merging code into the remote warehouse.
write class name
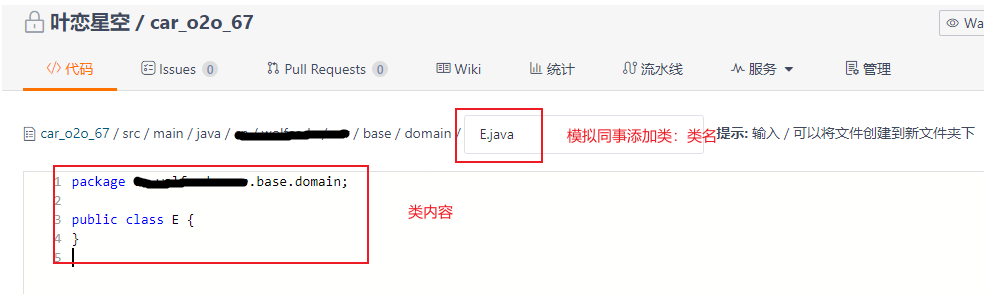
write notes

Added successfully
5.8 Step 8: Pull the latest code from the remote warehouse master to the local master branch
The code of the remote warehouse has been updated. Before the start of coding on a new day, pull the latest code from the remote warehouse. Note that the latest code is in the remote master branch. To pull the latest code, you should switch to the local master branch and then execute the git pull command.

5.9 Step 9: Switch to your own local branch, merge master, and continue development
Again, development can only be carried out in its own branch. In step 8, the local master has pulled the latest code, immediately switch to its own local branch, merge the latest code, and continue development.
5.10 Step 10: Repeat steps 5 to 9 back and forth
Subsequent development is the repetition of steps 5 to 9.
5.11 Step 11: Remote backup of local branch
In addition to pushing the local master branch to the remote master branch, the local own branch can also push a copy to the remote warehouse's own branch.
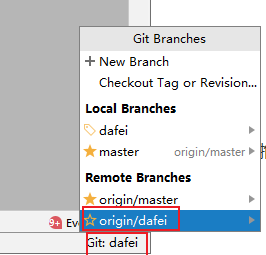


The benefits of pushing your own local branch to a remote branch:
1> backup
2> Tianxuan hired workers, the company did not finish the work, went home and downloaded the code from the remote warehouse to continue development.
5.12 Step 12: Final Notes
For the sake of ease of operation, the master branch is used to store the code submitted by the daily development members in class. Real development cannot be played like this. The master branch generally stores some project versions that are to be released or have been released, not those that have not been formally tested and developed. code.
For real development, use develop first to store the daily development code. Therefore, after arriving at the company, you must ask which one the development branch is.
From step 1 to step 11 above, just change master to develop
6. File Conflicts
Git file conflicts occur in 2 situations
1> Merge local branches with each other
2> The local branch and the remote branch are merged with each other
Here is a demonstration of the second case.
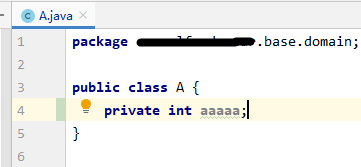
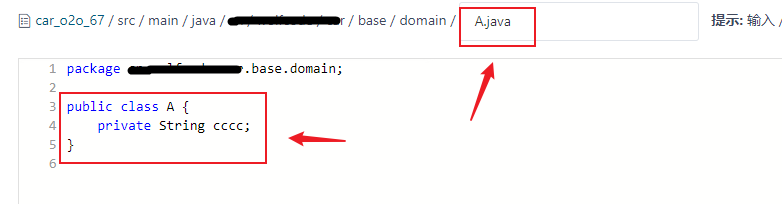
Step 1: In the local master branch, write the following code in the A.java file, then add, and commit
Step 2: Switch to the code cloud console, change the A.java file in the remote master branch, and simulate that a colleague has modified the file at the same time

modify file
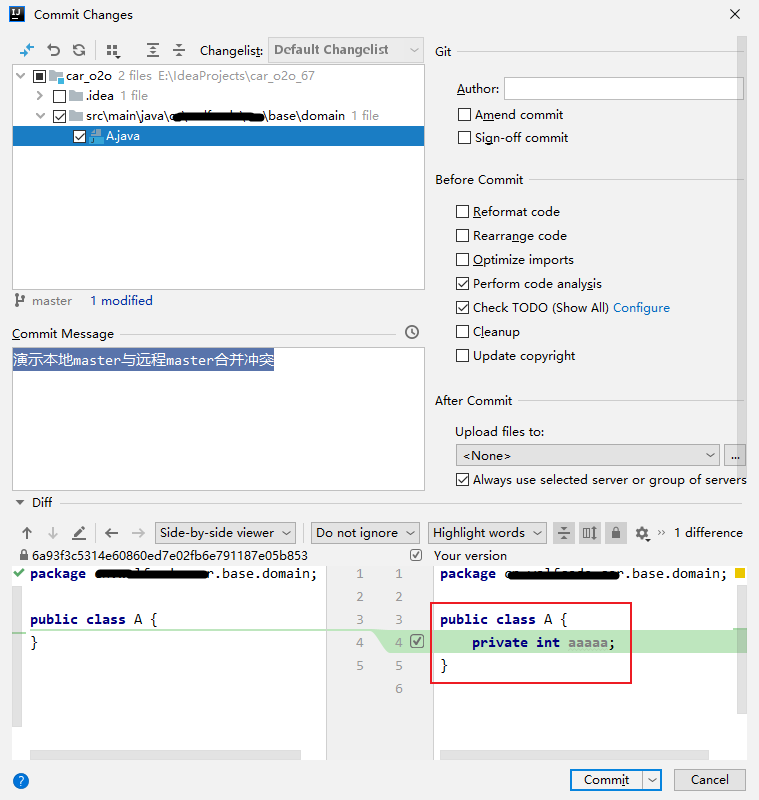
Step 3: Switch to idea and push the local master branch to the remote branch
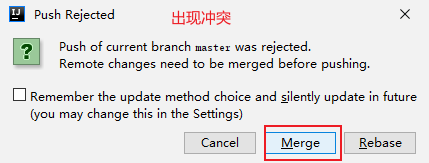
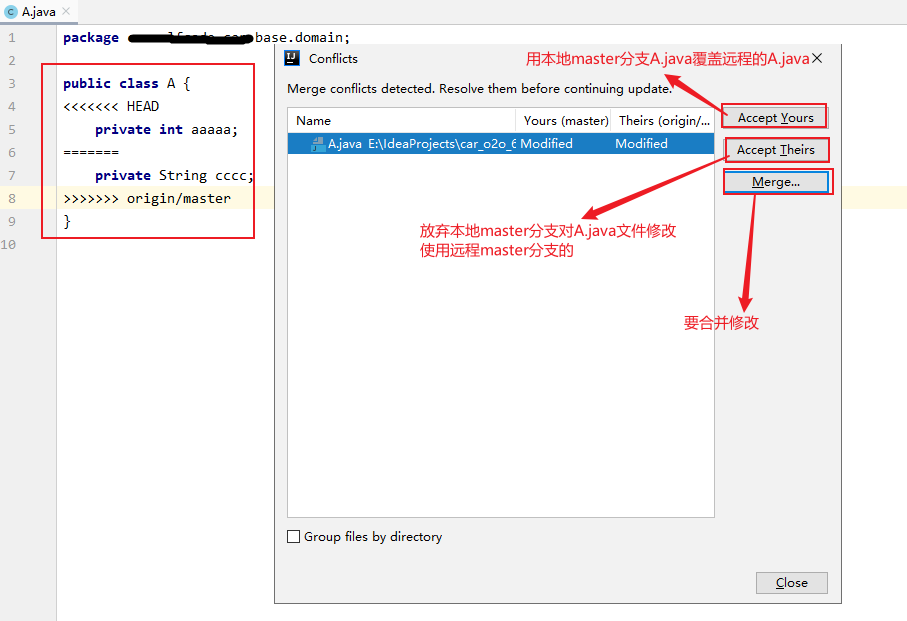
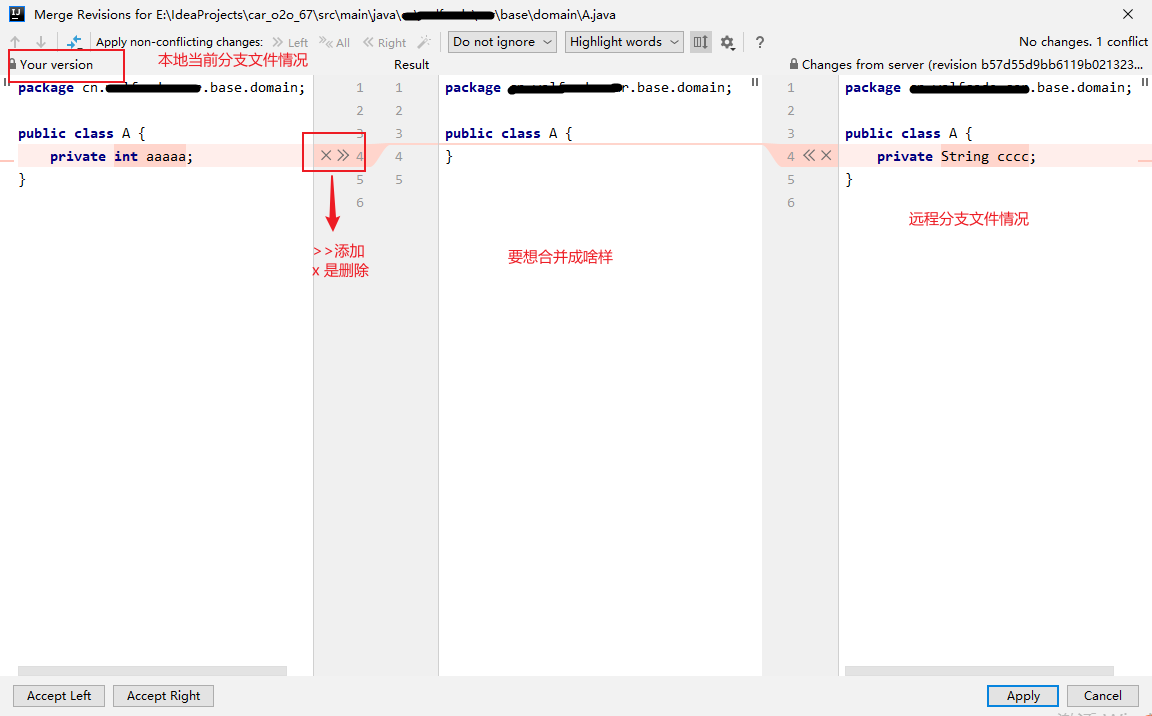

After resolving the conflict, push again to merge the latest code into the remote master branch.


Seven, life-saving summary
1> In the company, it is necessary to know what each branch line is for. If you are not sure, just ask
2> Every time you merge branches, especially push pull, it is best to make a hard backup of the code, which is equivalent to buying a resurrection armor.
3> Let go of the operation during the study period, and eliminate the problem in the study period.
At this point, this article is over. If you want to know what will happen next, please listen to the next chapter to break it down~
8. Turn to video version
If you are not addicted to reading text, you can switch to the video version: 4 hours for you to get started directly with Git operations