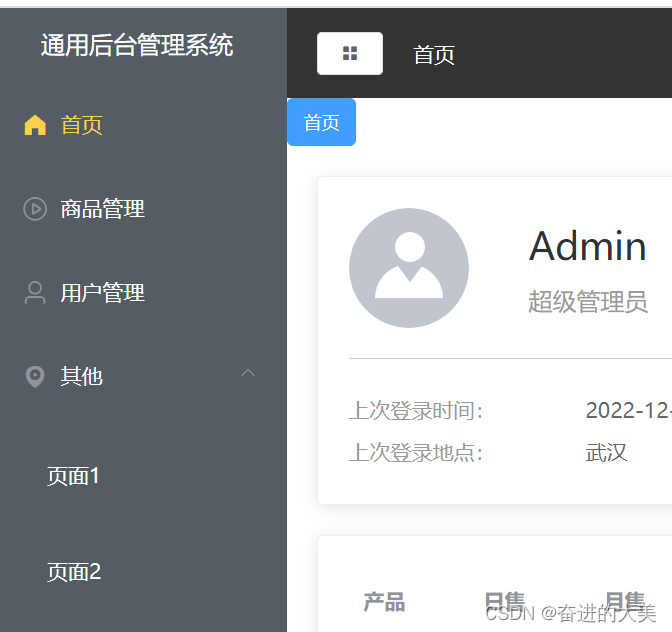
The effect achieved is as follows:
Login with admin account to display
Log in with xiaoxiao account:
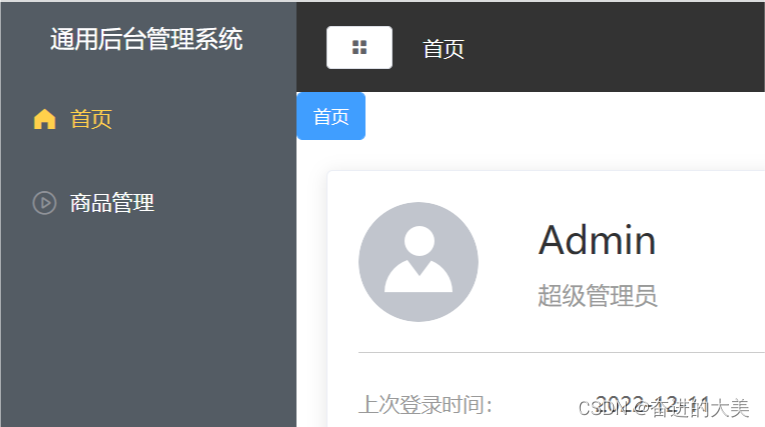
And in the system where xiaoxiao logs in, manually enter '/user' in the address bar, and the user management page will be displayed only after requesting the admin user, and the page will not be displayed.
The implementation idea is as follows:
1. When the user logs in, the data returned by the backend contains menu data, and the menu data is stored in vuex, and the menu data stored in vuex is obtained in the sidebar component, and the sidebar is dynamically generated according to the data.
In this project, I use Mock to simulate the data, and the interface data returned by the backend is as follows:
import Mock from 'mockjs'
export default {
  getMenu: config => {
    const { username, password } = JSON.parse(config.body)
    // 先判断用户是否存在
    // 判断账号和密码是否对应
    if (username === 'admin' && password === 'admin') {
      return {
        code: 20000,
        data: {
          menu: [
            {
              path: '/home',
              name: 'home',
              label: '首页',
              icon: 's-home',
              url: 'Home.vue'
            },
            {
              path: '/mall',
              name: 'mall',
              label: '商品管理',
              icon: 'video-play',
              url: 'Mall.vue'
            },
            {
              path: '/user',
              name: 'user',
              label: '用户管理',
              icon: 'user',
              url: 'User.vue'
            },
            {
              label: '其他',
              icon: 'location',
              children: [
                {
                  path: '/page1',
                  name: 'page1',
                  label: '页面1',
                  icon: 'setting',
                  url: 'PageOne.vue'
                },
                {
                  path: '/page2',
                  name: 'page2',
                  label: '页面2',
                  icon: 'setting',
                  url: 'PageTwo.vue'
                }
              ]
            }
          ],
          token: Mock.Random.guid(),
          message: '获取成功'
        }
      }
    } else if (username === 'xiaoxiao' && password === 'xiaoxiao') {
      return {
        code: 20000,
        data: {
          menu: [
            {
              path: '/home',
              name: 'home',
              label: '首页',
              icon: 's-home',
              url: 'Home.vue'
            },
            {
              path: '/video',
              name: 'video',
              label: '商品管理',
              icon: 'video-play',
              url: 'Mall.vue'
            }
          ],
          token: Mock.Random.guid(),
          message: '获取成功'
        }
      }
    } else {
      return {
        code: -999,
        data: {
          message: '密码错误'
        }
      }
    }

  }
}
Define a menu data in the state of store/tab.js to store the menu bar data returned by the backend, define a setMenu method in mutations, call this method when the login is successful, and store the data returned by the backend into the menu middle
export default {
    state:{
        //菜单栏数据
        menu:[]
    },
    mutations:{
        // 设置menu的数据
        setMenu(state,val){
            state.menu = val
        },
    }
}
In the Login.vue component, click Login to call the backend interface to get the data returned by the backend
//登录
        submit(){
            this.$refs.form.validate((valid) => {
                if(valid){
                    getMenu(this.form).then(({ data }) => {
                        console.log(data)
                        if(data.code === 20000){

                            //获取菜单的数据存入store中
                            this.$store.commit('setMenu',data.data.menu)

                        }else{
                            this.$message.error(data.data.message)
                        }
                    })
                }
            })
        }
Dynamically calculate menuData in CommonAside.vue, and then generate a menu bar structure based on menuData

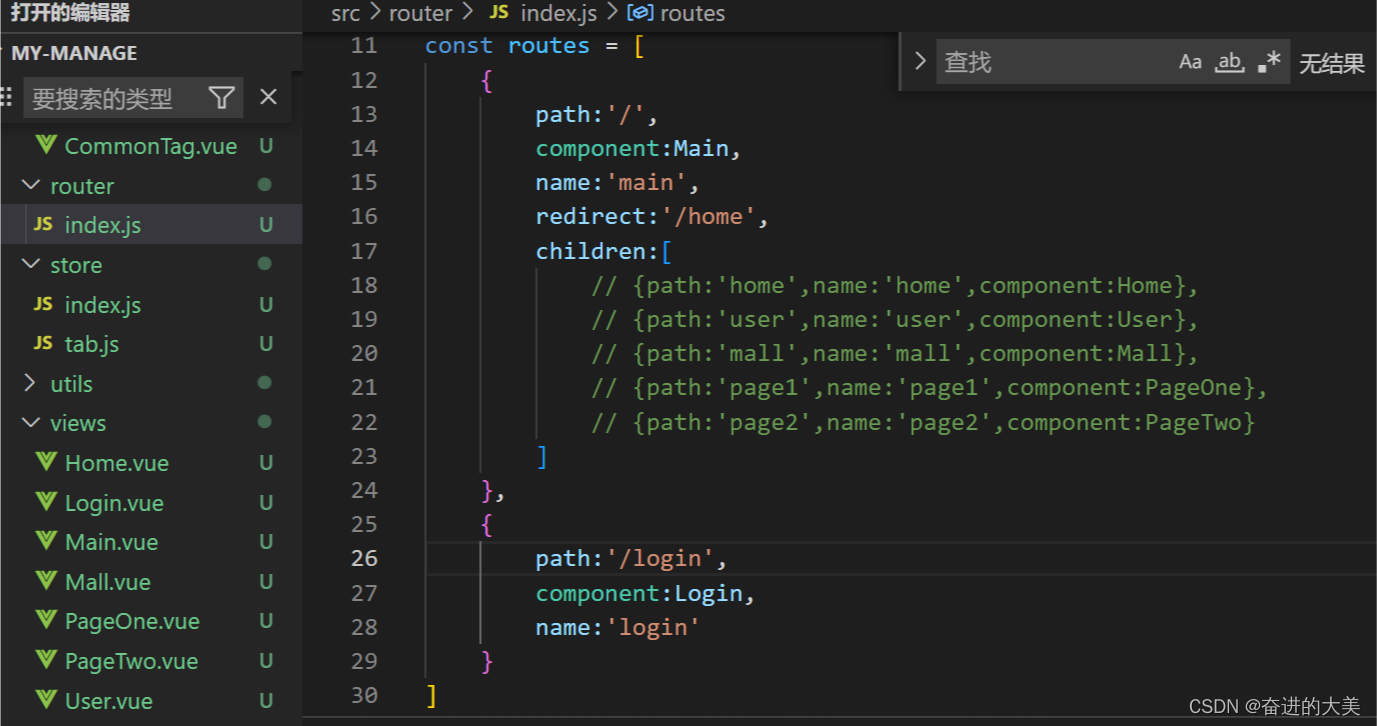
This enables different account logins to display different sidebars. However, when we manually enter some paths in the address bar, we can still access them. For example, in the system logged in by xiaoxiao, inputting '/user' is still displayed. The reason is that the routing table in the project is hard-coded, just like the commented out part in router/index.js:
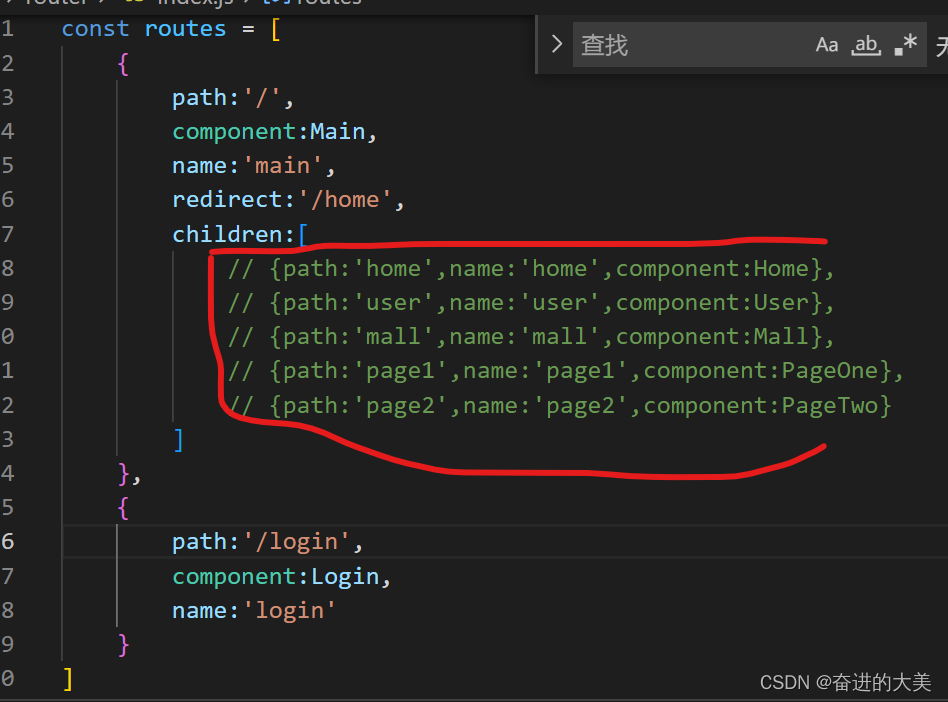
Therefore, the next thing we need to do is to use the router.addRoute method to make this part of the content dynamic.
code show as below:
Still in store/tab.js
Define the method of dynamically adding routes, traverse the menu data stored in the state, and change it from this
          menu: [
            {
              path: '/home',
              name: 'home',
              label: '首页',
              icon: 's-home',
              url: 'Home.vue'
            },
            {
              path: '/mall',
              name: 'mall',
              label: '商品管理',
              icon: 'video-play',
              url: 'Mall.vue'
            },
            {
              path: '/user',
              name: 'user',
              label: '用户管理',
              icon: 'user',
              url: 'User.vue'
            },
            {
              label: '其他',
              icon: 'location',
              children: [
                {
                  path: '/page1',
                  name: 'page1',
                  label: '页面1',
                  icon: 'setting',
                  url: 'PageOne.vue'
                },
                {
                  path: '/page2',
                  name: 'page2',
                  label: '页面2',
                  icon: 'setting',
                  url: 'PageTwo.vue'
                }
              ]
            }
          ]
Become the same as the commented out part, and then call router.addRoute() to add the content to the routing table.
The implementation code is as follows:
export default {
    state:{
        //菜单栏数据
        menu:[]
    },
    mutations:{
        // 设置menu的数据
        setMenu(state,val){
            state.menu = val
        },

        //动态注册路由
        addMenu(state,router){
            if(state.menu.length == 0 ) return

            //组装动态路由的数据
            const menuArray = []
            state.menu.forEach(item => {
                if(item.children){
                    item.children = item.children.map(childItem => {
                        childItem.component = () => import(`../views/${childItem.url}`)
                        console.log(childItem.component)
                        return childItem
                    })
                    console.log(item.children)
                    menuArray.push(...item.children)
                }else{
                    item.component = () => import(`../views/${item.url}`)
                    menuArray.push(item)
                }

                console.log(menuArray,'menuArray')

                //路由的动态添加
                menuArray.forEach(item => {
                    router.addRoute('main',item)
                })
            })

        }


    }
}
Because the api of the router is used, the routing instance must be passed in as a parameter when defining the addMenu method.
In the Login.vue component, the login successfully calls the addMenu method:
//登录
        submit(){
            this.$refs.form.validate((valid) => {
                if(valid){
                    getMenu(this.form).then(({ data }) => {
                        console.log(data)
                        if(data.code === 20000){
                            //token信息存入cookie用于不同页面间的通信
                            Cookie.set('token', data.data.token)

                            //获取菜单的数据存入store中
                            this.$store.commit('setMenu',data.data.menu)

                            //动态添加路由表中的数据
                            this.$store.commit('addMenu',this.$router)

                            //跳转到首页
                            this.$router.push('/home')
                        }else{
                            this.$message.error(data.data.message)
                        }
                    })
                }
            })
        }
After the above operation, the data in the routing table has been successfully dynamically generated, and then set up routing interception:
In router/index.js:
//添加前置导航守卫
router.beforeEach((to, from, next) => {
    // 判断token存不存在
    const token = Cookie.get('token')
    // token不存在,说明当前用户是未登录,应该跳转至登录页
    if(!token && to.name !== 'login'){
        next({name:'login'})
    }else if (token && to.name === 'login'){  //token存在,说明用户已经登录了
       next({name:'home'})
    }else{
        next()
    }
})
In this way, dynamic routing is realized, but there are two problems:
1. Refresh the page, the menu in vuex will be initialized to []
Solution: For vuex persistence, please refer to my other blog:
vuex persistent storage plugin vuex-persistedstate
2. Refresh the page, and the routing table data will also be reset
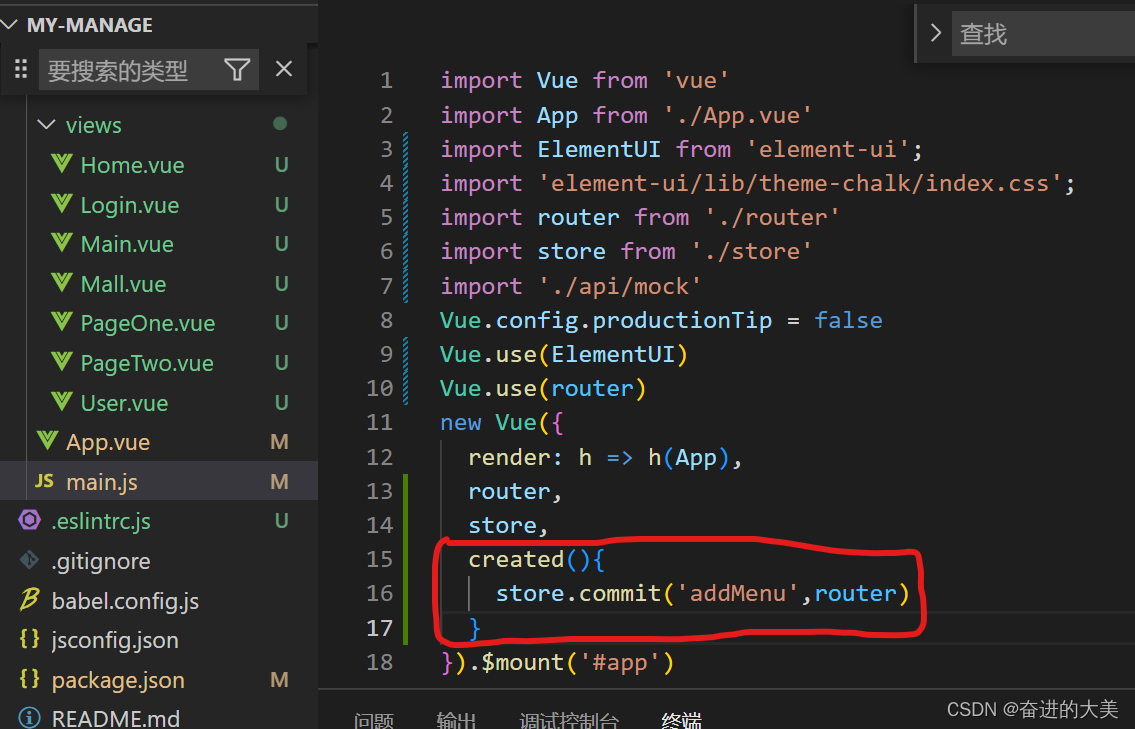
Solution:
Call the addMenu method in main.js: