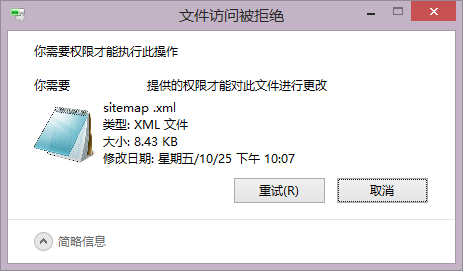
Generally, when users delete or use a file, they will prompt trustedinstaller permission to change. The prompt of access denial is actually that their permission level to the system is not enough. Many users don’t know how to solve it. In fact, it is very simple. Let’s take a look together. .
What is trustedinstaller permission
Answer: TrustedInstaller is one of many system built-in security subjects in the Windows system , and it is an important service of the system .
It is a group on the operating system used to maintain , update, etc. the system , and users cannot directly run a program or another service in the context of this service.
Its SID is S - 1-5-80-956008885-3418522649-1831038044-1853292631-2271478464 . _
1. The meaning of the TrustedInstaller permission is to prevent programs or users from inadvertently or maliciously destroying system files .
2. The security principal itself is a service named: Windows Modules Installer .
In Windows XP and before, the System account and administrator group have full access to system files.
3. This means that programs running as administrators can change the system arbitrarily, reducing system security.
TrustedInstaller changed this situation, so that only the system process with the token can change the important content of the system,
Most other system services do not have permissions.
4. This is because programs running with SYSTEM privileges do not necessarily have this privilege at the same time.
It can only be obtained after passing the authentication of the Service Control Manager ( service startup controller).

Trustedinstaller permission to obtain manual method:
Step 1: Right-click on the file and click " Properties ".

Step 2: Click the " Advanced " option in the " Security Options " .

Step 3: Click " administrators " (personal accounts are named differently for each person) and click " Add ".
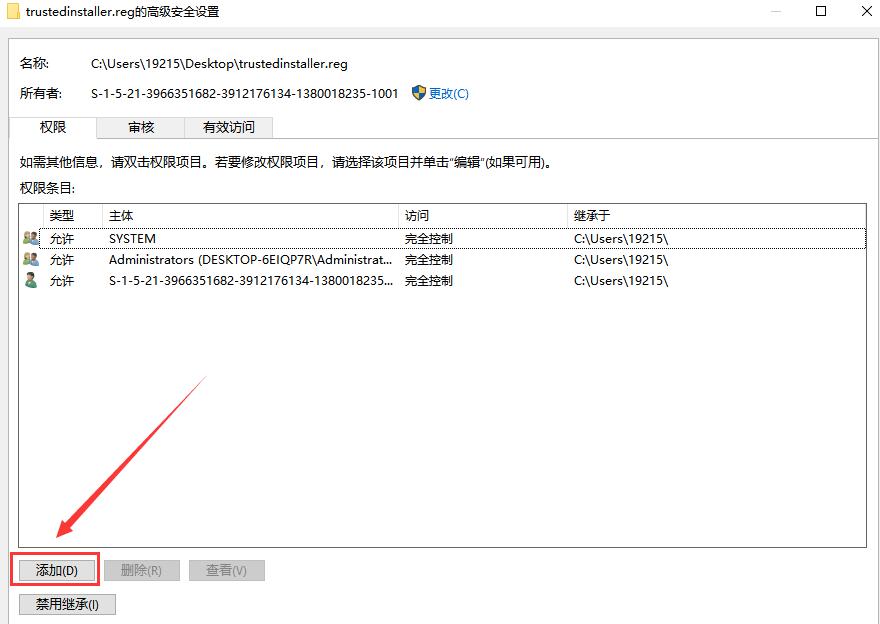
Step 4: Click to select " Select Subject "

Step 5: Click on the " Advanced " option.

Step 6: Click " Find Now "

Step Seven: Select the default first account .

Step 8: Select a user or group and click " OK "

Step Nine: Then there is the most important option, Full Control .

Step 10: Finally, click OK to have a fully controlled account .
