Previous: 【Add Conditional Behavior in Kotlin】
1. Preparation
In this article, you'll add dice images to the existing Dice Roller Android application. Be sure to complete the previous article on building the basics of a Dice Roller application first.
Instead of displaying the resulting value of a dice roll in TextViewthe displays an image of the dice corresponding to the number rolled. This will make your app more intuitive and enhance the user experience.
We will provide you with a download link of the dice image, which you can add to your application as a resource. In order to code the dice image to use, you need to use whenthe statement .
prerequisite
- Completed the "Creating an Interactive Dice Roller Application" article.
- Ability to write control flow statements (
if / else,whenstatement). - Ability to update application interface (modify
MainActivity.ktfile . - Ability to
Button.add . - Ability to add image resources to Android applications.
Learning Content
- How to update while the app is running
ImageView. - How (using
whenstatements ) to customize app behavior based on different conditions.
what you will build
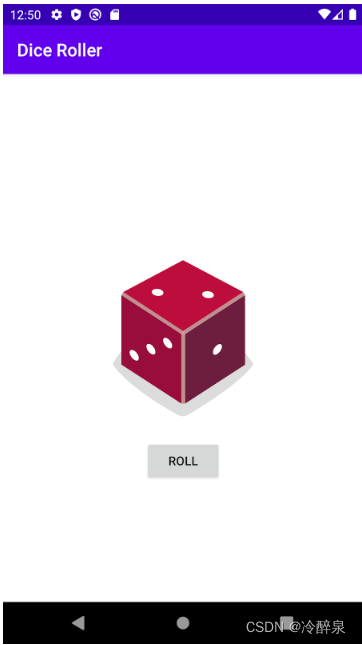
ButtonDice Roller Android app with , which can be used to roll the dice and update the picture on the screen.
required tools
- A computer with Android Studio installed.
- Internet connection in order to download dice pictures.
2. Update the layout of the application
In this task, you'll TextViewreplace with one that displays a picture of the result of the dice roll ImageView.
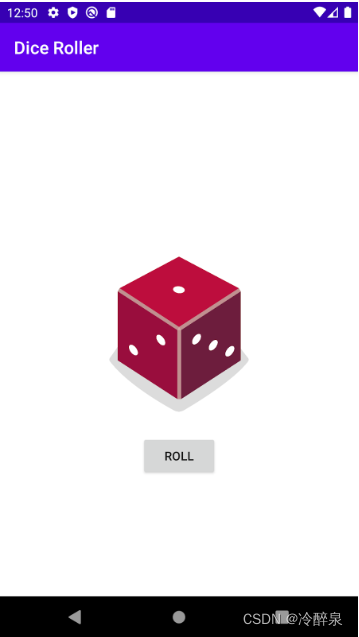
Open the Dice Roller app
- Open the Dice Roller application created in the previous article in Android Studio and run the application. You can use solution codes or codes that you create.
The application should look like this.
- Open
activity_main.xml( app > res > layout > activity_main.xml ). The Layout Editor opens .
removeTextView
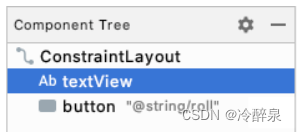
- In the layout editor , select the Component Tree
TextView.
Tip: As you add more UI components and add and remove constraints, you may sometimes find that the overlap
Vieweach other , making it difficult to select the view below. In this case you can choose in Component TreeView.
- Right-click and select Delete , or press
Deletethe key . - Please ignore the warning
Buttonon . You'll fix that in the next steps.
Add ImageView to layout
- Drag
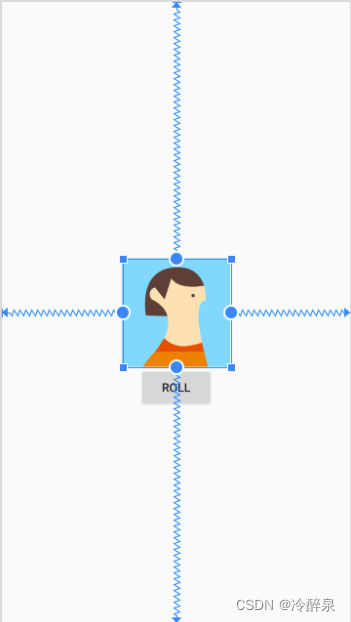
ImageViewfrom the Palette onto the Design view and place itButtonabove the .
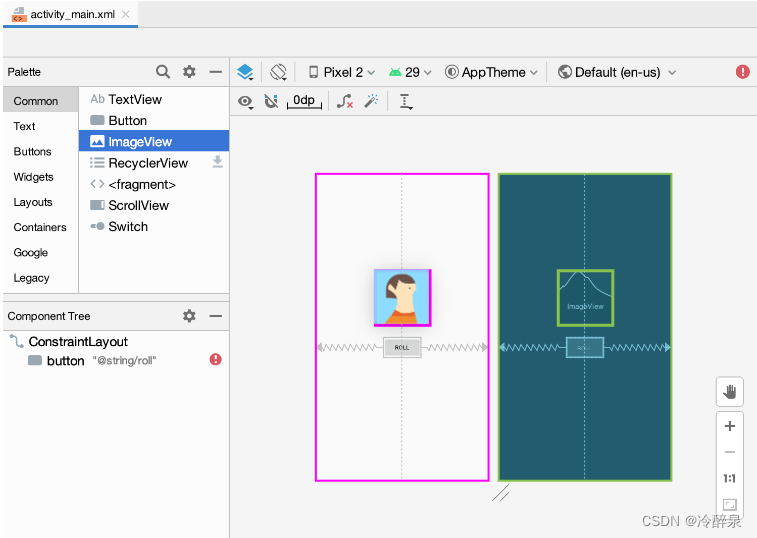
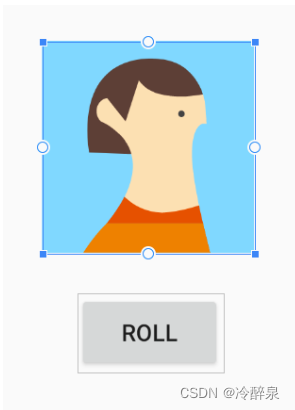
- In the Pick a Resource dialog, select the avatars in Sample data . This temporary image will be used until the dice image is added in the next task.

- Click OK . The App's Design view should look like this.
- In Component Tree you will find two errors.
ButtonNot vertically constrained,ImageViewneither vertically nor horizontally constrained.
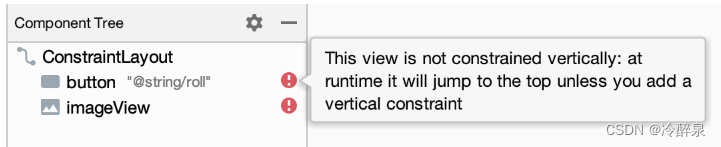
Buttonis not vertically constrained because you removed what was above it TextView. Now you need ImageViewto Buttonplace and below it.
Determine the position of ImageView and Button
No Buttonmatter where it is, you need to ImageViewcenter it vertically on the screen.
ImageViewAdd horizontal constraints for .ImageViewJoins the left edge of the toConstraintLayoutthe left edge of the parent .ImageViewJoins the right side of the with the parent's right edge. ThisImageViewwill center horizontally within the parent.
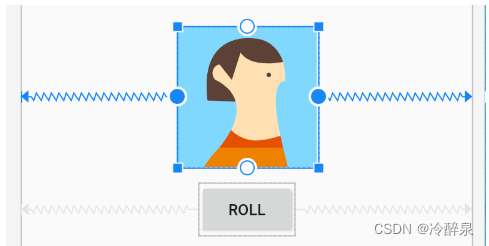
- To
ImageViewadd a vertical constraint,ImageViewconnect the top of the to the top of the parent.ImageViewwill slide up to the topConstraintLayoutof the .

- To
Buttonadd a vertical constraint, connectButtonthe top ofImageViewto the bottom of .Buttonwill slideImageViewup the .
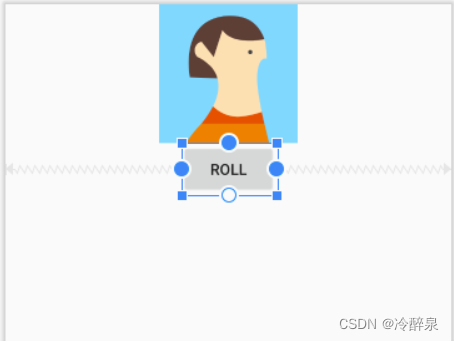
- Now, select again
ImageView, and add a verticalImageViewconstraint connecting the bottom of the to the bottom of the parent. ThisImageViewwillConstraintLayoutcenter vertically within the .
All warnings about constraints will now disappear.
After doing all of the above, the Design view should look like this, ImageViewcentered and Buttondirectly below it.
You may see a warning on in the Component Tree prompting you to add a content description to the . Don't worry about this warning for now, because later in the article you'll explain what to . You will make this change in Kotlin code.ImageViewImageViewImageView
3. Add dice pictures
In this task, you will download some dice images and add them to the application.
download dice image
- Open this URL to download the ZIP file containing the dice picture to your computer. Wait for the download to complete.
- Locate the file on your computer (probably in the Downloads folder).
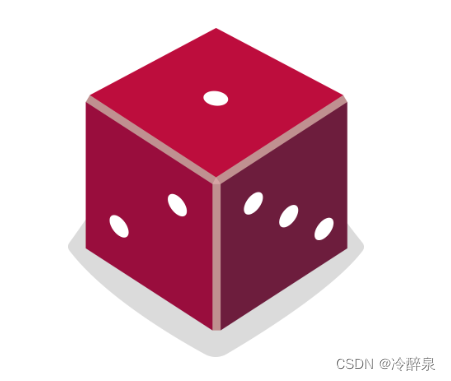
- Double-click the ZIP file to extract it. This will create a new
dice_imagesfolder containing 6 dice image files showing dice values from 1 to 6.
Add a dice image to your app
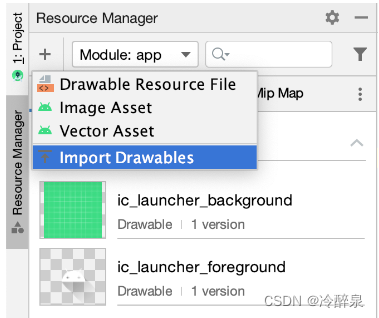
- In Android Studio, click View > Tool Windows > Resource Manager in the menu , or click the Resource Manager tab on the left side of the Project window .
- Click the + in the upper left corner in the Resource Manager , then select Import Drawables . A file browser will open.
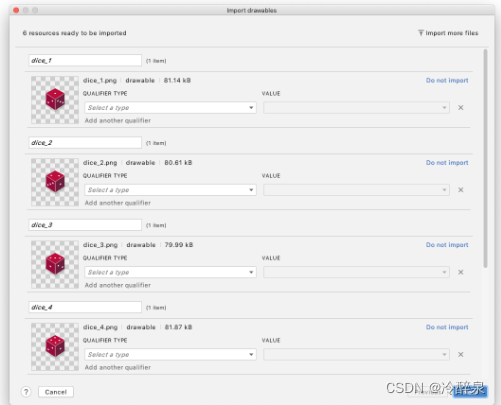
- Find and select the 6 dice image files above. You can select the first dice image first, then select other images while holding down
Shiftthe key . - Click Open .
- Click Next and then Import to confirm that you want to import these 6 resources.
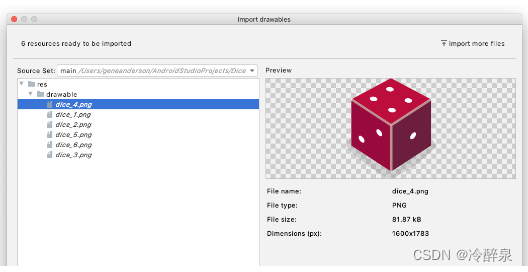
- If the file was imported successfully, the 6 images will be displayed in the app's Resource Manager ( app>res>drawable ).
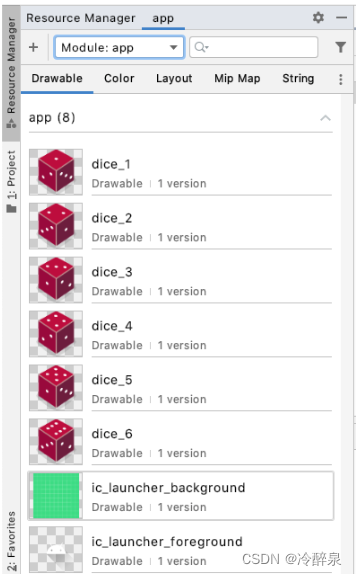
Great! You'll use these images in your app in the next task.
important hint! - You will be able to view these images by their resource IDs in Kotlin code:
R.drawable.dice_1R.drawable.dice_2R.drawable.dice_3R.drawable.dice_4R.drawable.dice_5R.drawable.dice_6
4. Use dice pictures
Replace example avatar
- In the Design Editor , select
ImageView. - In the Attributes of the Declared Attributes section , find the tool srcCompat attribute set to the avatar image .
Note that the tool srcCompat attribute only uses the provided image in Android Studio's Design view. The image is only shown to developers when you build the app, not when you actually run the app on an emulator or device.
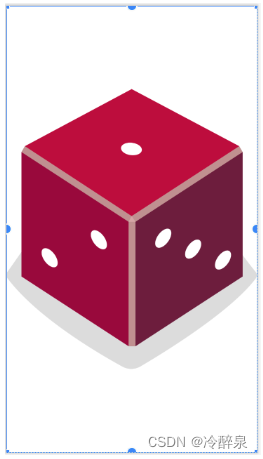
- Click on the small preview image of the avatar. A dialog box opens allowing you to select a new resource to use for
ImageViewthis .

dice_1Select Drawable and click OK .
Wow! ImageViewtakes up the entire screen.
Next, you'll ImageViewadjust the width and height of the to make sure it doesn't obscure it Button.
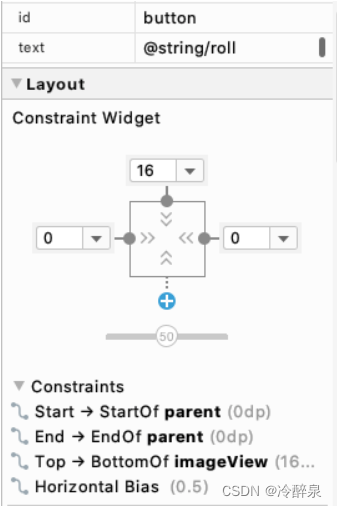
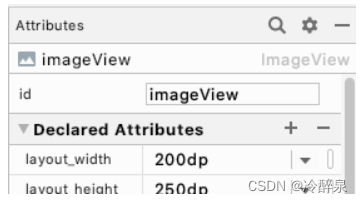
- In the Attributes window under the Constraints Widget , find the layout_width and layout_height attributes. They are currently set to wrap_content , which means the height and width of the will match the content (source image) within it.
ImageView ImageViewSet a fixed width of 160dp and a fixed height of 200dp for . Press Enter .
ImageViewNow the size is much smaller.
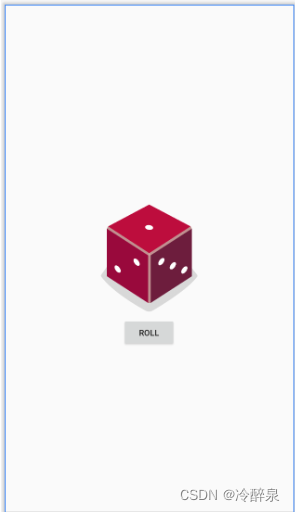
You may find that the Button is too close to the image.
- Set the button's top margin to 16dp in the Constraint Widget .
The app looks even better now that the Design view has been updated!

Note: Use density-independent pixels (dp) as units for these dimensions so that images scale properly on devices with different pixel resolutions.
Change dice image when button is clicked
While the layout has been corrected, MainActivitythe class to use dice images.
MainActivity.ktThere is currently an application error in the file. If you try to run the app, you'll see the following build errors:
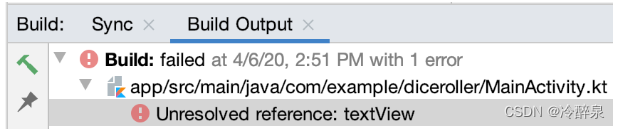
This is because your code is still referencing the one you have removed from the layout TextView.
- Open
MainActivity.kt( app > java > com.example.diceroller > MainActivity.kt )
The code references it R.id.textView, but Android Studio doesn't recognize it.

- In
rollDice()the method , select anyTextViewcode that references and delete it.
// Update the TextView with the dice roll
val resultTextView: TextView = findViewById(R.id.textView)
resultTextView.text = dice.roll().toString()
- Still
rollDice()in , create aImageViewnew variable of typediceImage. Set it toImageViewbe the same . UsefindViewById()the method , passing inImageViewthe resource ofID R.id.imageViewas an input parameter.
val diceImage: ImageView = findViewById(R.id.imageView)
If you want to know how to determine ImageViewthe exact resource ID of the , look at Attributesthe top of the window id.
When referencing this resource ID in Kotlin code, make sure to type it exactly (lowercase i, uppercase V, no spaces). Otherwise, Android Studio will display an error.
- Add the following line of code to test that the button updates correctly when clicked
ImageView. The dice are not always rolled with "2", we just usedice_2the picture for testing.
diceImage.setImageResource(R.drawable.dice_2)
This code ImageViewcalls setImageResource()the method on the , passing dice_2the image 's resource ID. This will update the on-screen ImageViewto display dice_2the picture.
The rollDice() method should now look like this:
private fun rollDice() {


    val dice = Dice(6)
    val diceRoll = dice.roll()
    val diceImage: ImageView = findViewById(R.id.imageView)
    diceImage.setImageResource(R.drawable.dice_2)
}
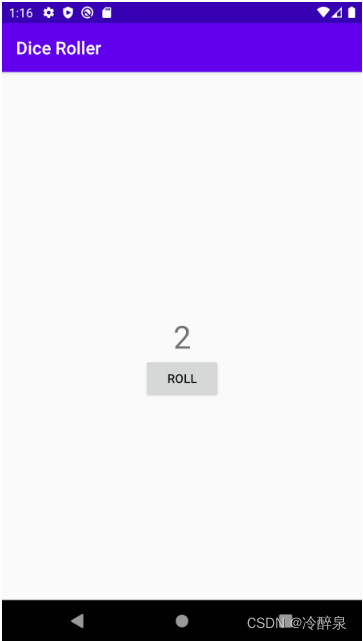
- Run the app to verify that it works without errors. The app should show a blank screen (only the Roll button) when launching the app.
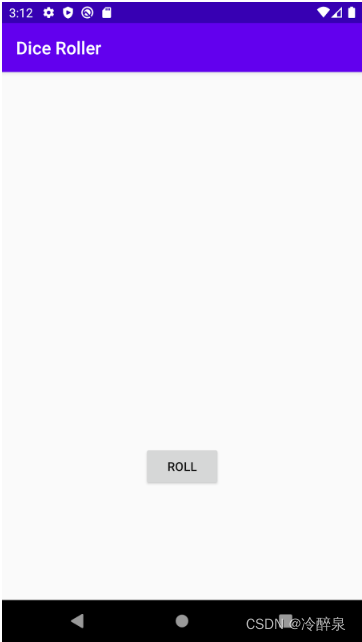
When the button is tapped, a picture of a dice showing a value of 2 appears. Very good! !
Now you can change pictures with button taps! You are getting closer to your goal!
5. Display the correct dice picture according to the result of the dice roll
Obviously, the dice result is not always 2. Use the control flow logic you learned in Adding Conditional Behaviors for Different Dice Rolls to display the appropriate dice image on the screen based on the random outcome of the dice roll.
Before you start typing code, think conceptually about how your app should behave by writing some pseudocode to describe what should happen. For example:
If the user rolls a 1, the dice_1 picture is displayed.
If the user rolls a 2, the dice_2 picture is displayed.
etc…
Note: Pseudocode is an informal illustration of how some code works. It uses some computer language elements, for example
if / else, but describes it in a way that humans can understand. Pseudocode is useful if you want to plan the correct approach before all the details are fixed.
In Kotlin, the above pseudocode can be written using if / elsethe statement .
if (diceRoll == 1) {


   diceImage.setImageResource(R.drawable.dice_1)
} else if (diceRoll == 2) {


   diceImage.setImageResource(R.drawable.dice_2)
}
 ...
But writing for each case if / elsewould be a lot of repetitive work. The same logic can be expressed simply using whenthe statement . It's more concise (uses less code)! Please use this method in your application.
when (diceRoll) {


   1 -> diceImage.setImageResource(R.drawable.dice_1)
   2 -> diceImage.setImageResource(R.drawable.dice_2)
   ...
Update rollDice() method
- In
rollDice()the method , removedice_2the line of code that sets the image resource ID to an image each time.
diceImage.setImageResource(R.drawable.dice_2)
- Replace it with
whena statement thatImageViewupdates based on the valuediceRoll.
  when (diceRoll) {


       1 -> diceImage.setImageResource(R.drawable.dice_1)
       2 -> diceImage.setImageResource(R.drawable.dice_2)
       3 -> diceImage.setImageResource(R.drawable.dice_3)
       4 -> diceImage.setImageResource(R.drawable.dice_4)
       5 -> diceImage.setImageResource(R.drawable.dice_5)
       6 -> diceImage.setImageResource(R.drawable.dice_6)
   }
After making the changes, rollDice()the method should look like this.
private fun rollDice() {


   val dice = Dice(6)
   val diceRoll = dice.roll()

   val diceImage: ImageView = findViewById(R.id.imageView)

   when (diceRoll) {


       1 -> diceImage.setImageResource(R.drawable.dice_1)
       2 -> diceImage.setImageResource(R.drawable.dice_2)
       3 -> diceImage.setImageResource(R.drawable.dice_3)
       4 -> diceImage.setImageResource(R.drawable.dice_4)
       5 -> diceImage.setImageResource(R.drawable.dice_5)
       6 -> diceImage.setImageResource(R.drawable.dice_6)
   }
}
- Run the application. Clicking the Roll button will change the dice picture to a value other than 2. Success!

optimize your code
If you want to write more concise code, you can make the following code changes. This won't have any noticeable impact on your app's users, but will shorten your code and reduce duplication.
You may have noticed that there are 6 calls to diceImage.setImageResource() in the when statement.
when (diceRoll) {


    1 -> diceImage.setImageResource(R.drawable.dice_1)
    2 -> diceImage.setImageResource(R.drawable.dice_2)
    3 -> diceImage.setImageResource(R.drawable.dice_3)
    4 -> diceImage.setImageResource(R.drawable.dice_4)
    5 -> diceImage.setImageResource(R.drawable.dice_5)
    6 -> diceImage.setImageResource(R.drawable.dice_6)
}
The only thing that changes between each case is the resource ID used. This means you can create a variable that stores the ID of the resource you want to use. Then, just call diceImage.setImageResource()once and pass the correct resource ID.
- Replace the above code with the following code.
val drawableResource = when (diceRoll) {


   1 -> R.drawable.dice_1
   2 -> R.drawable.dice_2
   3 -> R.drawable.dice_3
   4 -> R.drawable.dice_4
   5 -> R.drawable.dice_5
   6 -> R.drawable.dice_6
}

diceImage.setImageResource(drawableResource)
The new concept used here is that whenexpressions can actually return a value. With this new snippet, whenthe expression returns the correct resource ID, which is stored in drawableResourcethe variable . You can then use this variable to update the displayed image resource.
- Note that
whenit is now underlined in red. If you hover your pointer over it, you'll see an error message: 'when' expression must be exhaustive, add necessary 'else' branch .
The reason for the error is that the value of whenthe expression is assigned to drawableResource, so whenmust cover all cases, it must handle all possible cases, so even if you change to a 12-sided die, the value will always be returned. Android Studio suggests adding a elsebranch . You 6can elsefix this by changing the case of to . Cases from 1to 5are unchanged, but all other cases 6including are elsehandled by .
val drawableResource = when (diceRoll) {


   1 -> R.drawable.dice_1
   2 -> R.drawable.dice_2
   3 -> R.drawable.dice_3
   4 -> R.drawable.dice_4
   5 -> R.drawable.dice_5
   else -> R.drawable.dice_6
}

diceImage.setImageResource(drawableResource)
- Run the app to make sure it's still working. Be sure to test enough to make sure you see all the numbers 1 through 6 with the dice pictures.
Set an appropriate content description on the ImageView
Now that you've replaced the number thrown with an image, the screen reader can no longer tell which number was thrown. To fix this, after updating the image resource, update the content description ImageViewof the . The content description should be the text description displayed ImageViewin so that screen readers can describe it.
diceImage.contentDescription = diceRoll.toString()
Screen readers can read this caption, so if you see a picture of a dice rolling a "6" on the screen, the screen reader can read the caption for "6."
Note: In general, content descriptions should use string resources that can be translated into other languages, which we will cover in detail in later lessons.
6. Adopt standardized coding practices
Create a more usable startup experience
When the user opens the app for the first time, the app is empty (only the Roll button is displayed), which seems odd. Users may not know what to expect, so Activitywhen , change the UI to display random dice. This way the user is more likely to know that tapping Rollthe button rolls the dice.
override fun onCreate(savedInstanceState: Bundle?) {


    super.onCreate(savedInstanceState)
    setContentView(R.layout.activity_main)

    val rollButton: Button = findViewById(R.id.button)
    rollButton.setOnClickListener {

     rollDice() }

    // Do a dice roll when the app starts
    rollDice()
}

Add code comments
Add some comments to your code to describe what the code you wrote does.
After making all these changes, your rollDice()method might look like this.
/**
* 掷骰子并用结果更新屏幕。
*/
private fun rollDice() {


    // 创建一个新的骰子对象,有6个面,然后掷骰子
    val dice = Dice(6)
    val diceRoll = dice.roll()

    // 在布局中查找 ImageView
    val diceImage: ImageView = findViewById(R.id.imageView)

    // 根据掷骰子决定使用哪个可绘制资源 ID
    val drawableResource = when (diceRoll) {


        1 -> R.drawable.dice_1
        2 -> R.drawable.dice_2
        3 -> R.drawable.dice_3
        4 -> R.drawable.dice_4
        5 -> R.drawable.dice_5
        else -> R.drawable.dice_6
    }

    // 使用正确的可绘制资源 ID 更新 ImageView
    diceImage.setImageResource(drawableResource)

    // 更新内容描述
    diceImage.contentDescription = diceRoll.toString()
}
For the complete MainActivity.ktfile , see the solution code on GitHub linked in the next step.
Congratulations on completing the creation of your Dice Roller application! Now you can play this game with your friends for your next game night!
Seven, solution code
The solution code for this article is in the projects and modules shown below.
Solution code URL: https://github.com/google-developer-training/android-basics-kotlin-dice-roller-with-images-app-solution
To get the code for this article and open it in Android Studio, do the following.
get code
- Click on the URL provided. At this point, the project's GitHub page opens in your browser.
- On the project's GitHub page, click the Code button to open a dialog.
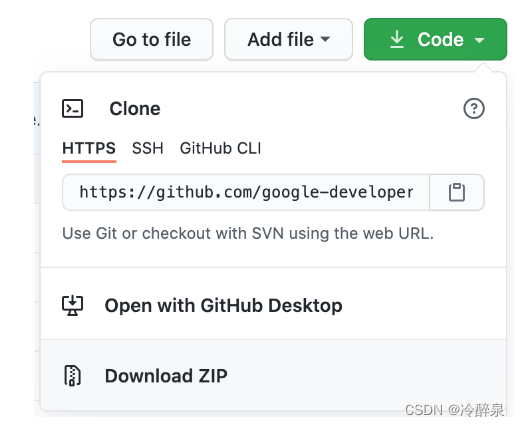
- In the dialog, click the Download ZIP button to save the project to your computer. Wait for the download to complete.
- Locate the file on your computer (probably in the Downloads folder).
- Double-click the ZIP file to extract it. A new folder will be created containing the project files.
Open the project in Android Studio
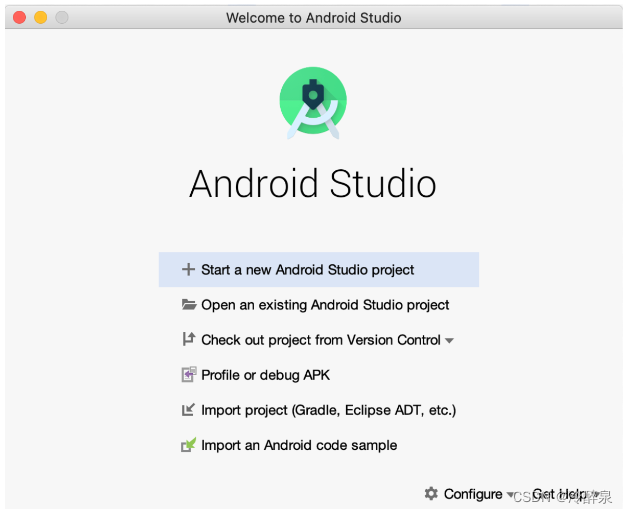
- Start Android Studio.
- In the Welcome to Android Studio window, click Open an existing Android Studio project .
Note: If Android Studio is already open, select the File > New > Import Project menu option.

- In the Import Project dialog, go to where the unzipped project folder is located (probably in the Downloads folder).
- Double-click the project folder.
- Wait for Android Studio to open the project.
- Click the Run button to build and run the application. Make sure the app builds as expected.
- Browse the project file in the Project tool window to see how your app is set up.
8. Summary
- Use
setImageResource()to change the picture displayed in the ImageView - Use control flow statements such as
if / elseexpression orwhenexpression to handle different situations in your application, for example, to display different images in different situations.
9. Learn more
- Android Kotlin Glossary
- if expressions in Kotlin
- when expressions in Kotlin
ImageView.setImageResource()- Accessibility
10. Practice by yourself
Note: Practice as needed. You can take this opportunity to practice what you have learned in this article.
Please do the following exercises:
- Add another dice to the application so that a Roll button provides 2 dice rolls. How many do you need in your layout
ImageViews? How does this affectMainActivity.ktthe code ?
Check your works:
The created app should run without errors and display two dice.