Article directory
- 1. Introduction to JS
- 2. Use of JS
- 3. Basic syntax of JS
- 4. JS DOM
- 5. JS GOOD
1. Introduction to JS
1. Concept: JavaScript, referred to as JS, is a lightweight programming language used as a scripting language for developing Web pages.
2. Composition: JS consists of three parts.
ECMAScript: is a standard that describes the syntax and basic objects of JS.DOM: Document Object Model (Document Object Model), which describes the methods and interfaces for processing web content.BOM: Browser Object Model (Browser Object Model), which describes the methods and interfaces for interacting with the browser.
2. Use of JS
2.1 Inline
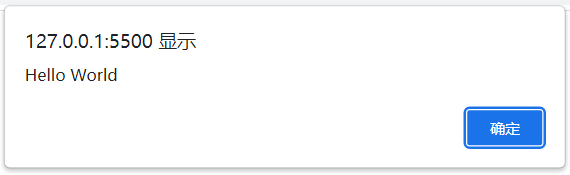
Inline js: used directly in the tag.
<button type="button" onclick="alert('Hello World')">点击一下</button>
Full code:
<!DOCTYPE html>
<html>
  <head>
    <meta charset="UTF-8" />
    <title>Document</title>
  </head>
  <body>
    <button type="button" onclick="alert('Hello World')">点击一下</button>
  </body>
</html>
After running, click the button, the result is as follows:

2.2 Embedded
Embedded js: written in <script>the tag .
<script>Can be placed in the<head>or<body>section of an HTML page, or both
<script>
  alert("Hello World");
</script>
Full code:
<!DOCTYPE html>
<html>
  <head>
    <meta charset="UTF-8" />
    <title>Document</title>
    <script>
      alert("Hello World");
    </script>
  </head>
  <body></body>
</html>
Refresh the page, the result is as follows:
2.3 External expressions
External js: by referencing an external js file.
<script src="myScript.js"></script>
Full code:
1. Create the html file in the same directory myScript.jsas the following content:
alert("Hello World");
2. The content of the html file is as follows:
<!DOCTYPE html>
<html>
  <head>
    <meta charset="UTF-8" />
    <title>Document</title>
    <script src="myScript.js"></script>
  </head>
  <body></body>
</html>
Refresh the page, the result is as follows:
3. Basic syntax of JS
3.1 Notes
Comments: Divided into single-line and multi-line comments.
// 单行注释
/* 多行注释 */
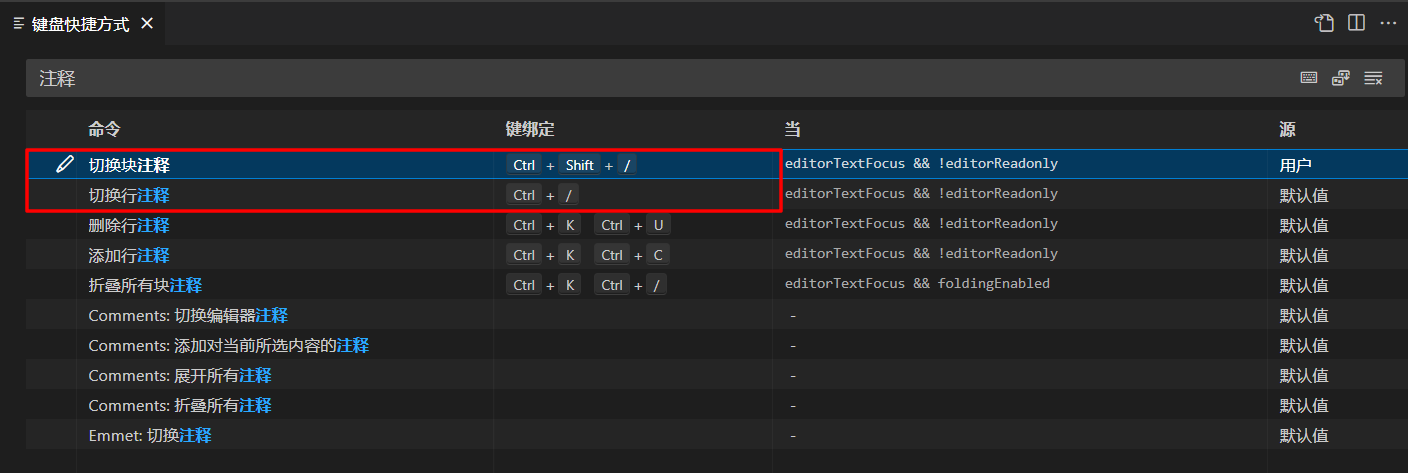
It is recommended to customize the shortcut keys in VSCode: the shortcut keys for single-line comments are
Ctrl + /, and the shortcut keys for multi-line comments areCtrl + Shift + /
3.2 Variables
Variables: A "container" for storing information.
1. Variable naming rules:
- must start with a letter
- Case Sensitive
Both js statements and js variables are case sensitive.
2. Declaration of variables and variable assignment: use the var keyword to declare variables
// 1.先声明变量,再对变量赋值
var a;
a = 10;

// 2.声明变量时对其赋值
var a = 10;

// 3.一条语句中,同时声明多个变量
var a = 10, b = 20, c = 30;

var a = 10, // 声明可以横跨多行
  b = 20,
  c = 30;
1. Only declare and not assign a value to the variable. At this time, the value of the variable is
undefined
2. Multiple variables declared in a statement cannot be assigned the same value at the same time: for examplevar a,b,c=1;, at this time, a and b are undefined, and c is 1
3.3 Input and output
1. Input box: Use the function prompt()to pop up the input box every time the page is refreshed.
prompt("请输入你的年龄");
2. Alert box: Use the function alert()to pop up the alert box every time the page is refreshed.
alert("你的年龄是18");
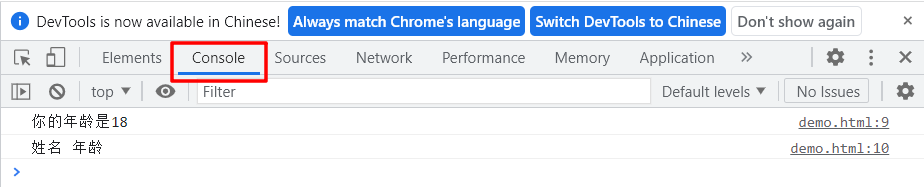
3. Console output: use function console.log().
console.log("你的年龄是18"); // 输出单个数据
console.log("姓名", "年龄"); // 输出多个数据
Press F12to enter the developer mode, click Consoleto open the console to view the output:
Example: Refresh the page, enter your age in the input box, and then the alert box pops up your age
var age = prompt("请输入你的年龄");
alert("你的年龄是" + age);
console.log("你的年龄是" + age);
3.4 Data Types
Data types: including basic types and object types.
- Basic types: string (String), number (Number), Boolean (Boolean), empty (Null), undefined (Undefined), Symbol
- Object type: object (Object), array (Array), function (Function), regular expression (RegExp), date (Date), etc.
The basic data types are discussed here first, and the object types are described in chapters 3.12 and 3.13.
Note: Symbol is a new primitive data type introduced by ES6, which represents a unique value.
3.4.1 String type
Strings: Used to store and manipulate text, a string is any character inserted into quotes.
1. You can use double quotes or single quotes
var str = "Hello World";
var str = "Hello World";
2. Quotes can be used in the string, and the quotes in the string should not be the same as the quotes in the string
var str = "My name is 'Johnson'";
3. Get the string length
var str = "Hello World";
console.log(str.length); // 11
4. Access String
var str = "Hello World";
console.log(str); // Hello World
console.log(str[6]); // W
5. String concatenation
var str = "abcd";
console.log(str + "efg"); // abcdefg
console.log(str + "efg" + "hijkl"); // abcdefg
6. Special characters: Use escape characters \to convert special characters into string characters
| Special characters | describe |
|---|---|
\' |
apostrophe |
\" |
Double quotes |
\\ |
backslash |
\n |
new line |
\r |
carriage return |
\t |
Tabs |
\b |
backspace |
\f |
Form feed |
3.4.2 Numeric types
JavaScript has only one numeric type, and numeric values are always 64-bit floating point numbers.
1. Values can either have a decimal point or not
var num = 3;
var num = 3.14;
2. Super large or small numbers can be written in scientific notation
var num = 123e5;    // 12300000
var num = 123e-5;   // 0.00123
3. The maximum and minimum values of the values
console.log(Number.MAX_VALUE); // 最大值,1.7976931348623157e+308
console.log(Number.MIN_VALUE); // 最小值,5e-324
4. Three special values of digital types: infinity (Infinity), infinitesimal (-Infinity), non-numeric value (NaN)
NaN: means Not a Number, representing a non-numeric value
console.log(Number.MAX_VALUE * 2); // Infinity
console.log(-Number.MAX_VALUE * 2); // -Infinity
console.log("hello" - 100); // NaN
5. isNaN()Method: Determine whether it is a non-number, return true if it is, otherwise return false
var a = 10;
var b = "hello";
var c = "hello" - 100;

console.log(isNaN(a)); // false
console.log(isNaN(b)); // true
console.log(isNaN(c)); // true
3.4.3 Boolean type
Boolean has only two values: trueor false.
- true is true, false is false
- The value of true is 1, and the value of false is 0
console.log(true); // true
console.log(false); // false
console.log(true + 1); // 2
console.log(false + 1); // 1
3.4.4 Undefined and Null
undefined: A variable with no value, its value is undefined, and its type is also undefined.
null:null is "nothing", which is treated as something that doesn't exist.
1. Only declare the variable, but do not assign a value, then the type and value of the variable are undefined
var a;
console.log(a); // undefined
console.log(typeof a); // undefined
2. Assign undefined to a variable, then the type and value of the variable are undefined
var a = 10;
a = undefined;
console.log(a); // undefined
console.log(typeof a); // undefined
3. The data type of null is an object, and the object is cleared by setting the value to null
var a = new String("hello");
console.log(a); // String {'hello'}
console.log(typeof a); // object

a = null;
console.log(a); // null
console.log(typeof a); // object
The difference between empty value, null and undefined:
- NULL: empty string, value is
"", type isstring- null: value is
null, type isobject- undefined: the value is
undefined, and the type isundefined
3.4.5 Get the type of variable
By using typeofkeywords, you can get the type of the variable.
var a = "hello";
var b = 10;
var c = true;
var d;
var e = null;
var f = ["hello", "world"];

console.log(typeof a); // string
console.log(typeof b); // number
console.log(typeof c); // boolean
console.log(typeof d); // undefined
console.log(typeof e); // object
console.log(typeof f); // object
3.5 Data type conversion
The data obtained by using forms and prompt() is of string type by default. At this time, simple addition cannot be performed, and data type conversion is required.
There are generally three data type conversions:
- Convert to string type
- convert to numeric type
- Convert to Boolean type
3.5.1 Convert to string type
| method | describe |
|---|---|
toString() |
convert to string |
String() |
Convert to string (cast) |
+ |
The result of splicing with strings is all strings |
// 1.toString() 转换为字符串
var num = 10;
var str = num.toString();
console.log(str, typeof str); // 10 string

// 2.String() 转换为字符串(强制类型转换)
var num = 10;
var str = String(num);
console.log(str, typeof str); // 10 string

// 3.+ 字符串拼接
var num = 10;
var str = num + "";
console.log(str, typeof str); // 10 string
3.5.2 Conversion to numeric type
| method | describe |
|---|---|
parseInt() |
Convert String type to integer value type |
parseFloat() |
Convert the String type to a floating-point number value |
Number() |
Convert the String type to a numeric type (mandatory type conversion) |
-、*、/ |
Implicit conversion to numeric |
// 1.parseInt() 将String类型转化为整数数值型
console.log(parseInt("3.14")); // 3
console.log(parseInt("120px")); // 120
console.log(parseInt("rem120px")); // NaN

// 2.parseFloat() 将String类型转化为浮点数数值型
console.log(parseFloat("3.14")); // 3.14
console.log(parseFloat("120px")); // 120
console.log(parseFloat("rem120px")); // NaN

// 3.Number() 将String类型转化为数值型(强制类型转换)
console.log(Number("3.14")); // 3.14
console.log(Number("120px")); // NaN
console.log(Number("rem120px")); // NaN

// 4.减、乘、除算术运算,隐式转换为数值型
var a = "3" - 0;
var b = "3" * 3;
var c = "9" / 3;
console.log(a, typeof a); // 3 'number'
console.log(b, typeof b); // 9 'number'
console.log(c, typeof c); // 3 'number'
parseInt()Parse:
3.14rounded to3120pxRead 120 first, then read px (this px unit will be removed), and only output 120- First read
remas a letter, output NaN
3.5.3 Conversion to Boolean type
| method | describe |
|---|---|
Boolean() |
Convert other types to Boolean |
1. Values representing empty and negative are converted to false, such as '', 0, NaN, null, undefined
2. The rest of the values are converted to true
console.log(Boolean("")); // false
console.log(Boolean(0)); // false
console.log(Boolean(NaN)); // false
console.log(Boolean(null)); // false
console.log(Boolean(undefined)); // false
console.log(Boolean("hello")); // true
console.log(Boolean(123)); // true
3.6 Operators
3.6.1 Arithmetic operators
| operator | describe |
|---|---|
+ |
addition |
- |
subtraction |
* |
multiplication |
/ |
division |
% |
modulo (remainder) |
++ |
self-increment |
-- |
Decrement |
1. Four arithmetic operations and remainder operations
// 1.加减乘除
console.log(1 + 1); // 2
console.log(1 - 1); // 0
console.log(1 * 1); // 1
console.log(1 / 1); // 1

// 2.取余,只有%两边都是整数才能取余
console.log(4 % 2); // 0
console.log(5 % 3); // 2
console.log(3 % 5); // 3

// 3.浮点数算数运算会有问题,所以尽量避免浮点数运算
console.log(0.1 + 0.2); // 0.30000000000000004
2. Increment and decrement operation
- Pre-operation: increase and decrease first, then operation
- Post operation: operation first, then increase or decrease
// 1.前置自增
var num = 10;
console.log(++num); // 11

// 2.后置自增
var num = 10;
console.log(num++); // 10

// 1.前置自减
var num = 10;
console.log(--num); // 9

// 2.后置自减
var num = 10;
console.log(num--); // 10
3.6.2 Assignment Operators
| operator | example | Equivalent to |
|---|---|---|
= |
x = y | x = y |
+= |
x += y | x = x + y |
-= |
x -= y | x = x - y |
*= |
x *= y | x = x * y |
/= |
x /= y | x = x / y |
%= |
x %= y | x = x % y |
var a = 5;
a *= 1 + 1; // 等价于 a=a*(1+1),而不是 a=a*1+1
console.log(a); // 10
3.6.3 Comparison operators
| operator | describe |
|---|---|
== |
equal |
=== |
Equivalence |
!= |
not equal |
!== |
unequal value or type |
> |
more than the |
< |
less than |
>= |
greater than or equal to |
<= |
less than or equal to |
? |
ternary operator |
// 1.== 和 === 的区别
console.log(18 == 18); // true
console.log(18 == "18"); // true
console.log(18 === "18"); // false

// 2.三元运算符
var age = 17;
var result = age >= 18 ? "已成年" : "未成年";
console.log(result); // 未成年
Note:
18 == '18'When comparing, the character data is automatically converted into a number, and then compared.
3.6.4 Logical operators
| operator | describe |
|---|---|
&& |
logic and |
|| |
logical or |
! |
logical NOT |
1. Logical interruption (short-circuit operation): When there are multiple expressions (values), and the expression on the left can determine the result, the value of the expression on the right will not continue to be calculated
2. Logical AND: Expression 1 && Expression 2
- Returns expression 2 if the first expression is true
- If the first expression is false, return expression1
console.log(3 && 5); // 5
console.log(0 && 5); // 0
console.log(0 && 1 + 2 && 2 * 5); // 0,等同于 0 && (1 + 2) && (2 * 5)
3. Logical or: expression 1 && expression 2
- Returns expression1 if the first expression is true
- If the first expression is false, return expression2
console.log(3 || 5); // 3
console.log(0 || 5); // 5
console.log(0 || 1 + 2 || 2 * 5); // 3,等同于 0 || (1 + 2) || (2 * 5)
- logical NOT: !expression
- Returns true if the expression is 0
- If the expression is non-zero, return false
console.log(!0); // true
console.log(!3); // false
3.6.5 Type operators
| operator | describe |
|---|---|
typeof |
return variable type |
instanceof |
Returns true if the object is an instance of the object type |
var num = 5;
var arr = [1, 3, 5, 7, 9];

console.log(typeof num); // number
console.log(typeof arr); // object
console.log(num instanceof Array); // false
console.log(arr instanceof Array); // true
3.6.6 Bitwise operators
| operator | describe |
|---|---|
& |
and |
| |
or |
~ |
No |
^ |
XOR |
<< |
Zero pad left shift |
>> |
signed right shift |
>>> |
zero pad right shift |
example:
| operate | result | Equivalent to | result |
|---|---|---|---|
| 5 & 1 | 1 | 0101 & 0001 | 0001 |
| 5 | 1 | 5 | 0101 | 0001 | 0101 |
| 5 ^ 1 | 4 | 0101 ^ 0001 | 0100 |
| ~ 5 | 10 | ~0101 | 1010 |
| 5 << 1 | 10 | 0101 << 1 | 1010 |
| 5 >> 1 | 2 | 0101 >> 1 | 0010 |
| 5 >>> 1 | 2 | 0101 >>> 1 | 0010 |
3.6.7 Operator precedence
| priority | operator | order |
|---|---|---|
| 1 | Parentheses | () |
| 2 | unary operator | ++ – ! |
| 3 | arithmetic operator | First * / % followed by + - |
| 4 | relational operator | > >= < <= |
| 5 | equality operator | == != === !== |
| 6 | Logical Operators | first && after || |
| 7 | assignment operator | = |
| 8 | comma operator | , |
3.7 Process Control
3.7.1 顺序结构
顺序结构:程序中最简单、最基本的流程控制,程序按照代码的先后顺序,依次执行。
3.7.2 选择结构
选择结构:顺序执行代码的过程中,根据不同的条件,执行不同路径的代码,从而得到不同的结果。
1.if 语句
// 1.if 语句
if (score < 60) {


  console.log("未及格");
}

// 2.if else 语句
if (score < 60) {


  console.log("未及格");
} else {


  console.log("及格");
}

// 3.if else if 语句
if (score < 60) {


  console.log("未及格");
} else if (score < 80) {


  console.log("良好");
} else {


  console.log("优秀");
}
2.switch语句
switch (day) {


  case 1:
    console.log("周一");
    break;
  case 2:
    console.log("周二");
    break;
  case 3:
    console.log("周三");
    break;
  case 4:
    console.log("周四");
    break;
  case 5:
    console.log("周五");
    break;
  default:
    console.log("周末");
}
注:switch语句使用严格比较 (===),也就是值和类型都要相同才行。
3.三元表达式
age >= 18 ? "已成年" : "未成年";
3.7.3 循环结构
循环结构:重复执行的语句称之为循环体,能否重复执行取决于循环的终止条件,由循环体和循环终止条件组成的语句称之为循环语句。
1.for循环
// for 语句
for (var i = 0; i < 5; i++) {


  console.log(i);
}

// for in 语句
var person = {

     fname: "Bill", lname: "Gates", age: 56 };
for (var i in person) {


  console.log(i, person[i]);
}
for in语句,用于循环遍历对象的属性。
2.while循环
var i = 0;
while (i < 5) {


  console.log(i);
  i++;
}
3.do while循环
var i = 0;
do {


  console.log(i);
  i++;
} while (i < 5);
4.break 和 continue
- break:跳出本层循环
- continue:跳出本次循环,执行下一次循环
// 1.continue 跳出本次循环
for (var i = 0; i < 3; i++) {


  if (i == 1) continue;
  for (var j = 0; j < 3; j++) {


    console.log("i = " + i, "j = " + j);
  }
}

// 2.break 跳出本层循环
for (var i = 0; i < 3; i++) {


  if (i == 1) break;
  for (var j = 0; j < 3; j++) {


    console.log("i = " + i, "j = " + j);
  }
}
3.8 数组
数组:是指一组数据的集合,其中的每个数据被称作元素,在数组中可以存放任意类型的元素。
1.创建数组
// 1.创建空数组
var arr = []; // 使用数组字面量创建数组
var arr = new Array(); // 使用new关键字创建数组

// 2.创建带初始值的数组
var arr = [1, 2, "hello", true];
var arr = new Array(1, 2, "hello", true);
注:出于简洁、可读性和执行速度的考虑,建议使用第一种方法(使用数组字面量创建数组)
2.获取数组长度
var arr = [1, 2, "hello", true];
console.log(arr.length); // 4
3.访问数组元素
var arr = [1, 2, "hello", true];
console.log(arr); // [1, 2, 'hello', true]
console.log(arr[0]); // 1
console.log(arr[arr.length - 1]); // true
4.修改数组元素
var arr = [1, 2, "hello", true];
arr[0] = 100;
arr[arr.length - 1] = "world";
console.log(arr); // [100, 2, 'hello', 'world']
5.遍历数组
var arr = [1, 2, "hello", true];
for (var i = 0; i < arr.length; i++) {


  console.log(arr[i]);
}
3.9 函数
函数:封装了一段可以重复调用执行的代码块,使代码可以重复使用,去除代码冗余。
1.函数的定义和使用
- 声明函数(定义函数)
- 调用函数(使用函数)
// 声明函数
function getSum() {


  sum = 0;
  for (var i = 1; i <= 100; i++) {


    sum += i;
  }
  console.log(sum);
}

// 调用函数
getSum();
2.函数的参数
- 形参:形式上的参数,函数定义的时候传递的参数,当前并不知道是什么。
- 实参:实际上的参数,函数调用的时候传递的参数,实参是传递给形参的。
// 形参 x 和 y
function getSum(x, y) {


  console.log(x + y);
}

// 实参 1 和 2
getSum(1, 2);
js中的形参和实参个数可以不一样:
- 当实参个数与形参个数一致,正常输出结果。
如getSum(1, 2),结果是3 (1 + 2)- 当实参个数多于形参个数,取形参个数。
如getSum(1, 2, 3),结果是3(1 + 2)- 当实参个数小于形参个数,剩下的形参没有接收值,即为undefined
如getSum(1),结果是NaN(1 + undefined)
3.函数的返回值
- 函数有return则返回return后面的值,没有return则返回undefined
- return只能返回一个值
- return语句之后的代码不会执行
function getSum(x, y) {


  return x + y;
}

var sum = getSum(1, 2);
console.log(sum);
4.匿名函数
匿名函数就是没有名称的函数,使用变量来接收和调用该函数。
var fun = function () {


 console.log(100);
};

fun();
5.arguments的使用
所有的函数都内置了一个arguments对象,arguments对象中存储了传递的所有实参。
function getResult() {


  console.log(arguments); // [1, 3, 5, 7, 9]
  console.log(arguments.length); // 5
  console.log(arguments[0]); // 1
  console.log(arguments[arguments.length - 1]); // 9
}

getResult(1, 3, 5, 7, 9);
3.10 断点调试
断点调试:又叫debug,指在程序的某一行设置一个断点后,程序会停止在这一行,这时你可以一步一步往下调试,并观察变量值的变化,从而判断程序在哪一步出错。
例:源文件名为 demo.html,内容如下:
<!DOCTYPE html>
<html lang="en">
  <head>
    <meta charset="UTF-8" />
    <meta http-equiv="X-UA-Compatible" content="IE=edge" />
    <meta name="viewport" content="width=device-width, initial-scale=1.0" />
    <title>Document</title>
  </head>
  <body>
    <script>
      function getResult() {


        console.log("number is 10");
        return 10;
      }

      var result = getResult();
      console.log(result);

      console.log("Hello World");
    </script>
  </body>
</html>
1.进入debug模式:按F12 - > Sources - > 找到需要调试的文件 -> 点击行号打断点 -> 刷新浏览器,进入debug模式

退出debug模式:点击一次行号打断点,再点击一次行号取消断点
2.点击右上角第一个按钮(go),程序会向下运行,当碰到断点时停下,如果没有碰到断点,则会一直运行到程序结束。
例:在第16行和第19行,各打一个断点,然后刷新浏览器,程序先断在第16行,再点击 go 按钮,程序又断在了第19行。

3.点击右上角第二个按钮(step over),程序执行到下一步,且碰到函数调用时,不会进入函数内部。
例:在16行打个断点,点击 step over 按钮,程序运行到了第17行,没有跳转到函数内部。

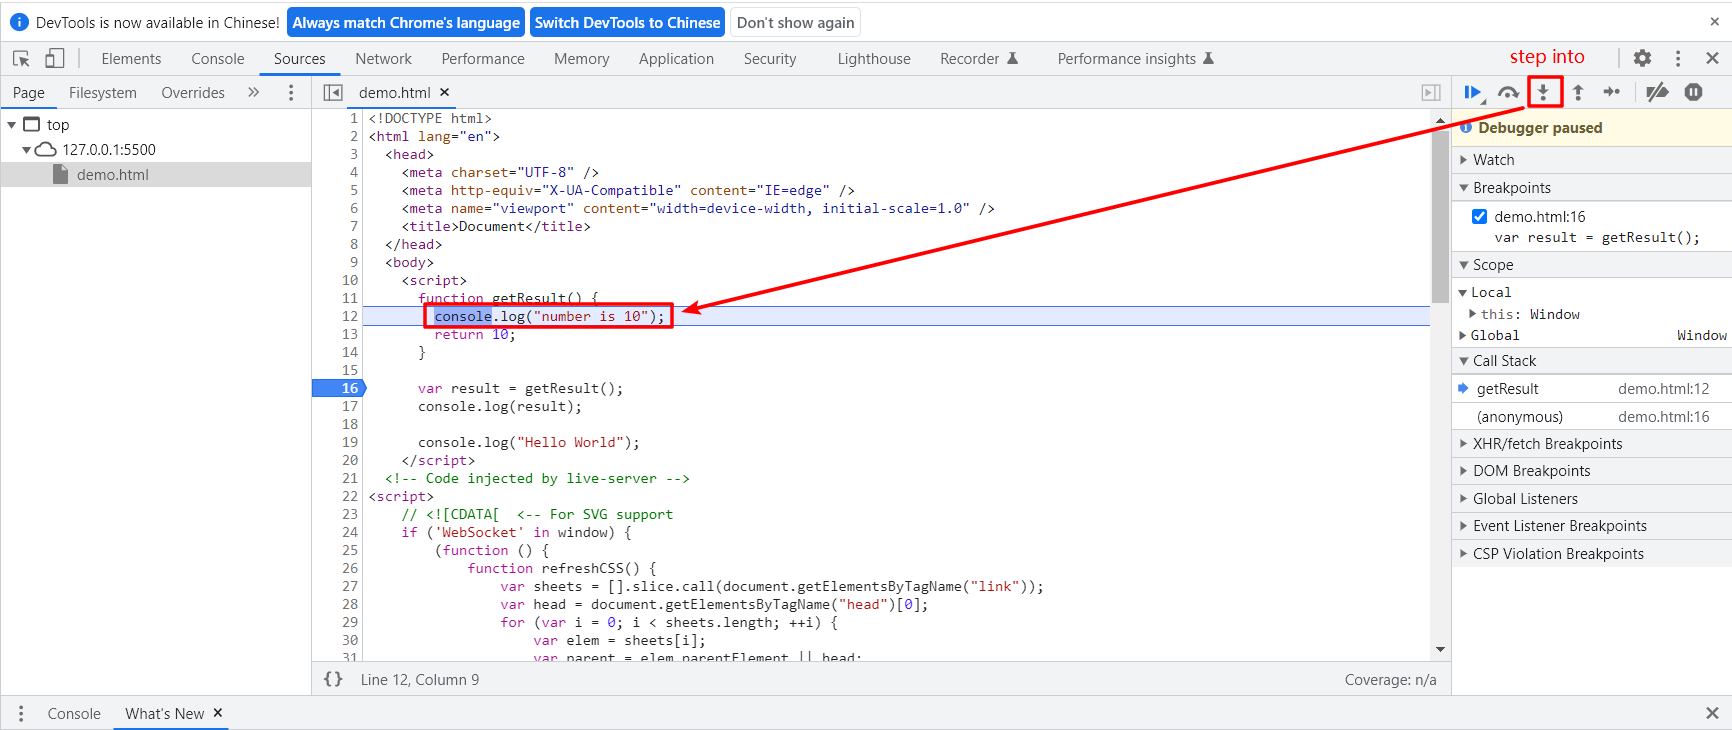
4.点击右上角第三个按钮(step into),程序执行到下一步,且碰到函数调用时,会跳转到函数内部。
例:在16行打个断点,点击 step into 按钮,程序运行到了第12行,跳转到了函数内部。
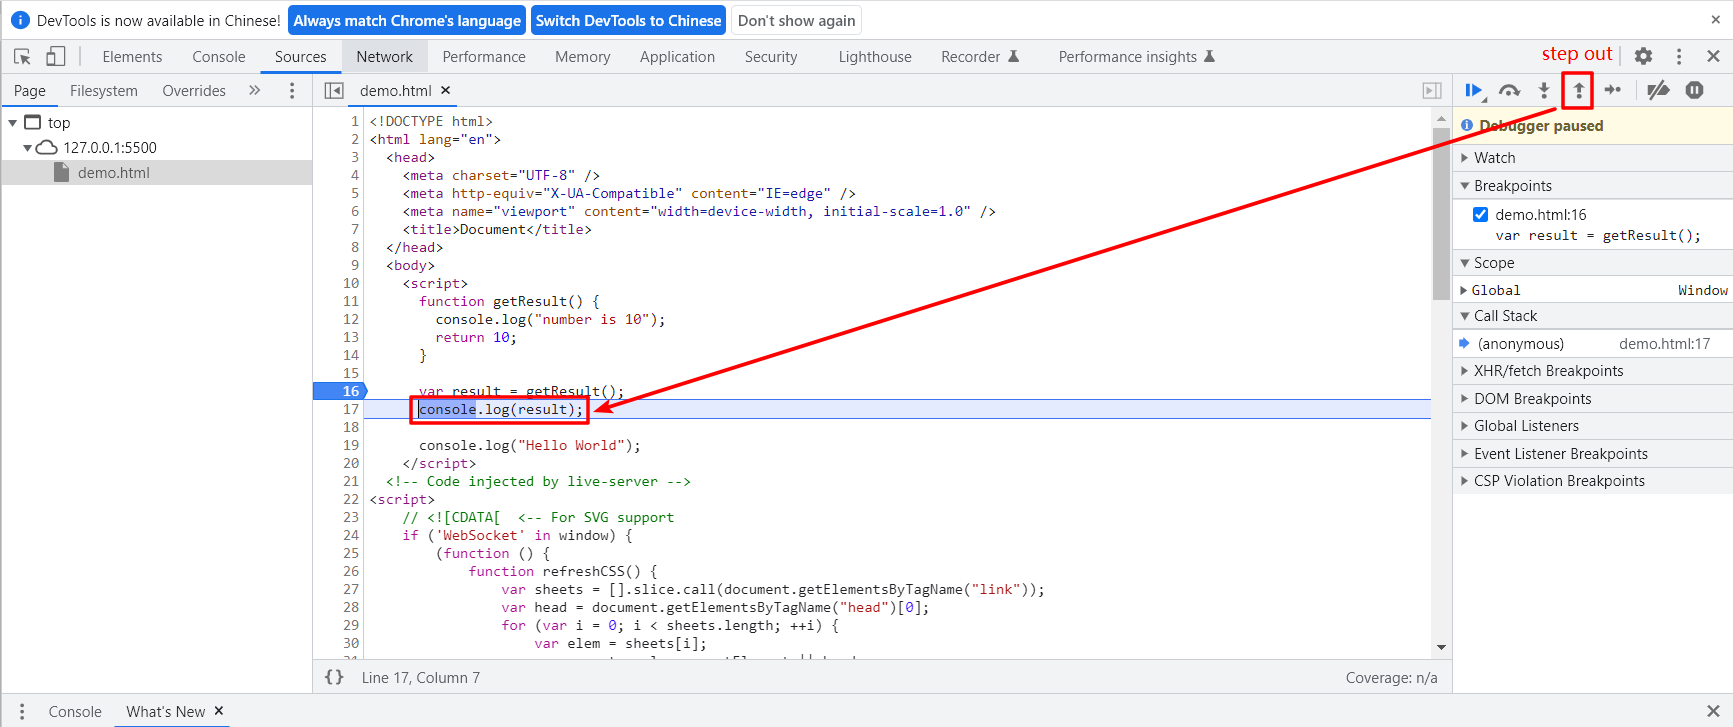
5.点击右上角第四个按钮(step out),程序会从函数内部跳出。
例:在16行打个断点,点击 step into 按钮,进入函数内部第12行,再点击 step out 按钮,从函数内部跳出到了第17行。
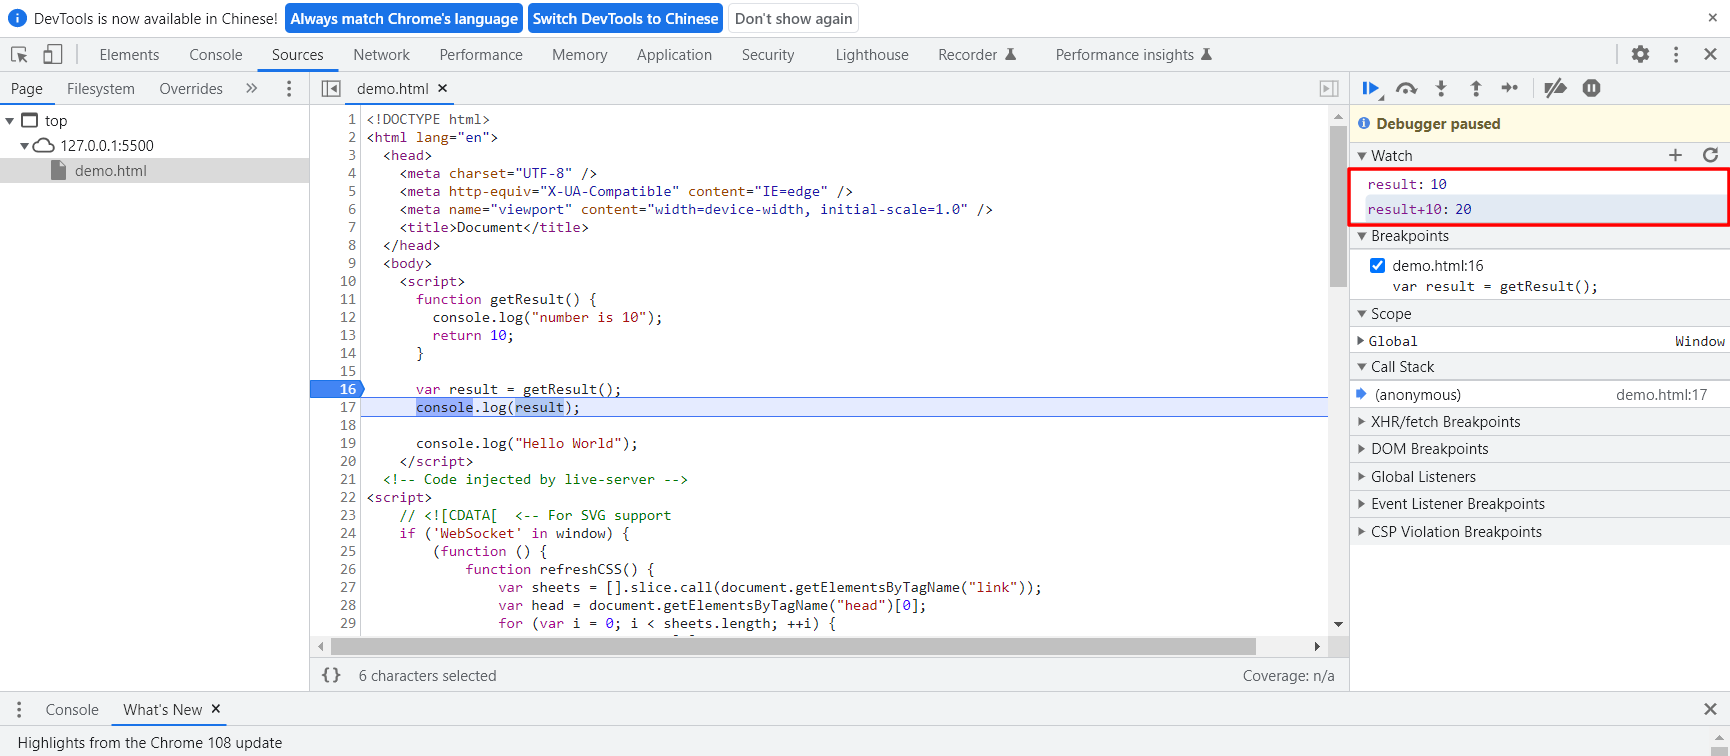
6.右上角Watch框,可以添加变量和表达式进去,方便实时观测变量和表达式的值。
例:点击Watch框右侧的加号,输入变量 result 和表达式 result + 10,就可以观测这两个值的实时变化了。
3.11 作用域
1.作用域:分为全局作用域和局部作用域
- 全局作用域:整个script标签,或者是一个单独的js文件。
- 局部作用域:在函数内部就是局部作用域,局部作用域也称为函数作用域。
2.变量的作用域:根据作用域的不同,变量分为全局变量和局部变量
- 全局变量:作用域是全局的,网页的所有脚本和函数都能够访问它。
- 局部变量:作用域是局部的,只能在函数内部访问它。
3.作用域链:内部函数访问外部函数的变量,采取的是链式查找的方式决定取哪个值,这种结构称之为作用域链。
// 作用域链(就近原则)
var num = 10;

function fn() {

     // 外部函数
  var num = 20;

  function fun() {

     // 内部函数
    console.log(num); // 20
  }
  fun();
}
fn();
3.12 对象
概念:对象是一个具体事物,例如一本书、一辆车可以是对象,一个数据库、一个远程服务器的连接也可以是对象。
在js中,对象是一组无序的相关属性和方法的集合,所有的事物都是对象,例如字符串、数值、数组、函数等。
对象的组成:
- 属性:事物的特征,在对象中用属性来表示(常用名词)
- 方法:事物的行为,在对象中用方法来表示(常用动词)
3.12.1 对象定义
创建对象的方式有三种
- 使用字面量创建对象
- 使用new关键字创建对象
- 使用构造函数创建对象
1.使用字面量创建对象
// 1.创建空对象
var obj = {

    };

// 2.创建带初始值的对象
var obj = {


  name: "Bill",
  age: 18,
  sex: "男",
  sayHi: function () {


    console.log("hi");
  }
};
2.使用new关键字创建对象
// 1.创建空对象
var obj = new Object();

// 2.设置对象的属性和方法
obj.name = "Bill";
obj.age = 18;
obj.sex = "男";
obj.sayHi = function () {


  console.log("hi");
};
注:不建议使用new关键字创建对象的方式
3.使用构造函数创建对象
- 构造函数名首字母大写
- 构造函数不需要return就可以返回结果
- 调用构造函数,必须使用new
- 属性和方法前面必须添加this
// 1.定义构造函数
function Person(name, age, sex) {


  this.name = name;
  this.age = age;
  this.sex = sex;
  this.sayHi = function () {


    console.log("hi");
  };
}

// 2.调用构造函数来创建对象
var obj = new Person("Bill", 18, "男");
new关键字执行过程:
1.new 构造函数在内存中创建了一个空的对象
2.this指向刚才创建的空对象
3.执行构造函数里的代码,给这个空对象添加属性和方法
4.返回这个对象
3.12.2 对象属性
1.访问对象属性
var person = {


  name: "Bill",
  age: 18,
  sex: "男",
  sayHi: function () {


    console.log("hi");
  }
};

// 访问对象属性的三种方式
console.log(person.name); // Bill
console.log(person["name"]); // Bill
var x = "name";
console.log(person[x]); // Bill
2.向对象添加新属性
var person = {


  name: "Bill",
  age: 18,
  sex: "男",
  sayHi: function () {


    console.log("hi");
  }
};

person.nationality = "English"; // 向person对象添加新属性nationality
console.log(person);
3.删除对象属性
var person = {


  name: "Bill",
  age: 18,
  sex: "男",
  sayHi: function () {


    console.log("hi");
  }
};

delete person.age; // 删除person对象的age属性
console.log(person);
4.遍历对象属性
var person = {


  name: "Bill",
  age: 18,
  sex: "男",
  sayHi: function () {


    console.log("hi");
  }
};

// 遍历对象属性
for (var i in person) {


  console.log(i + ", " + person[i]); // 输出对象的属性名和属性值
}
3.12.3 对象方法
1.调用对象的方法
var person = {


  name: "Bill",
  age: 18,
  sex: "男",
  sayHi: function () {


    console.log("hi");
  }
};

// 调用对象的方法
person.sayHi(); // hi
2.向对象添加新的方法
var person = {


  name: "Bill",
  age: 18,
  sex: "男",
  sayHi: function () {


    console.log("hi");
  }
};

// 向person对象添加sayHello方法
person.sayHello = function () {


  console.log("hello");
};

person.sayHello(); // hello
3.13 内置对象
内置对象:js自带的一些对象,这些对象供开发者使用,并提供了一些常用的或是最基本而必要的功能(属性和方法)。
3.13.1 查阅文档
Mozilla开发者网络(MDN)提供了有关开放网络的信息,包括HTML、CSS、和万维网以及HTML5应用的API。
MDN网址:https://developer.mozilla.org/zh-CN/
如何学习对象中的方法:
- 查看该方法的功能
- 查看里面参数的意义和类型
- 查看返回值的意义和类型
- 通过demo进行测试
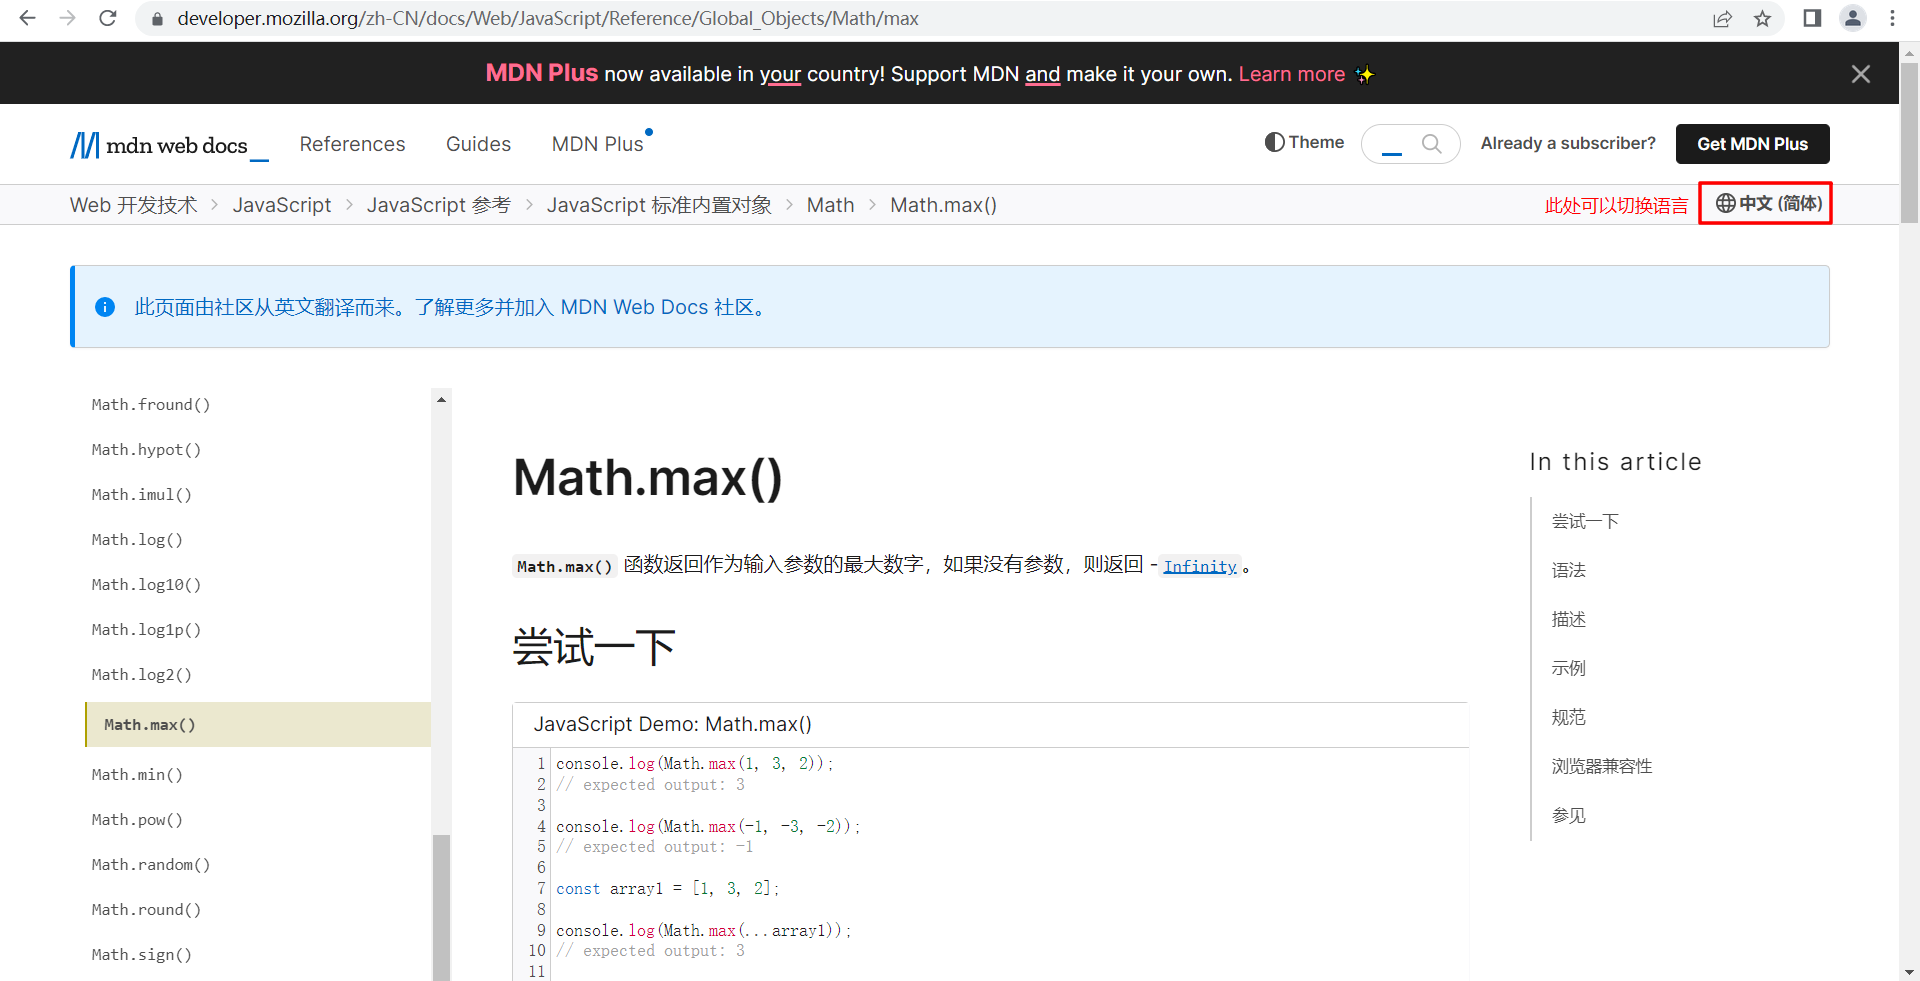
以查阅 Math对象的max()方法为例:
1.打开MDN网址,在搜索框中输入max(),回车查找
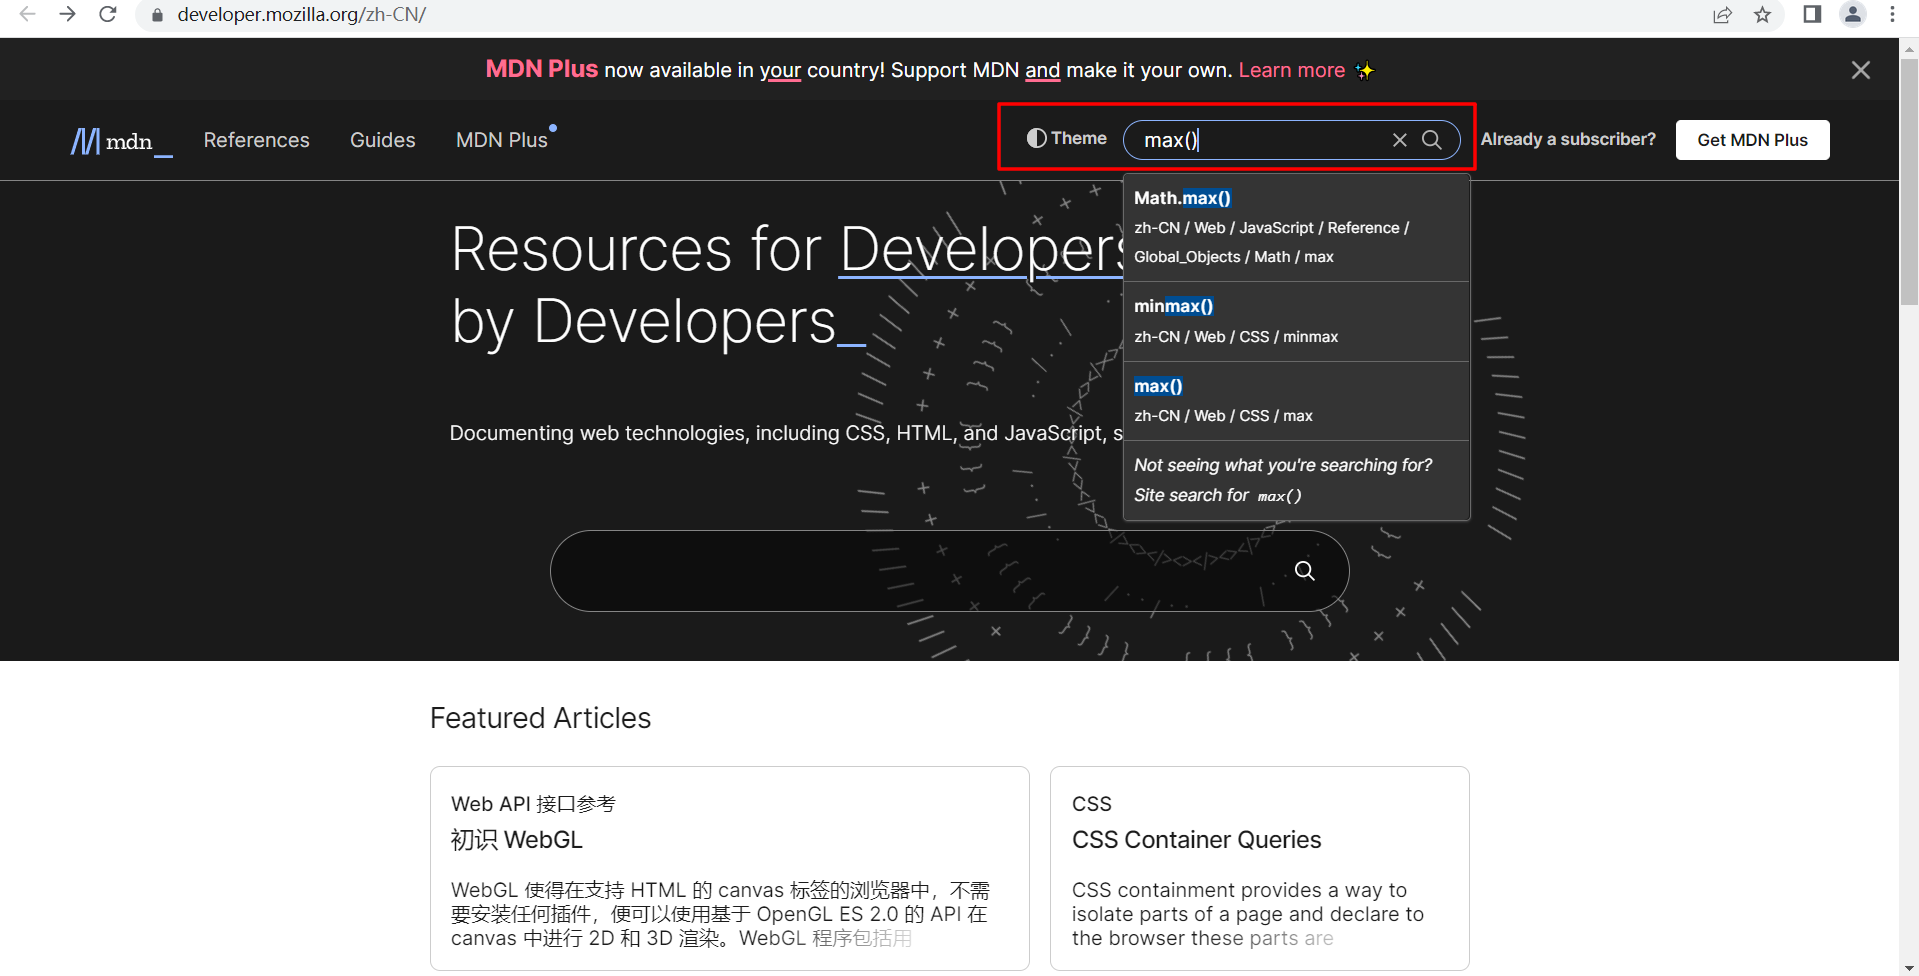
2.下拉找到自己想要查找的方法,点击进入
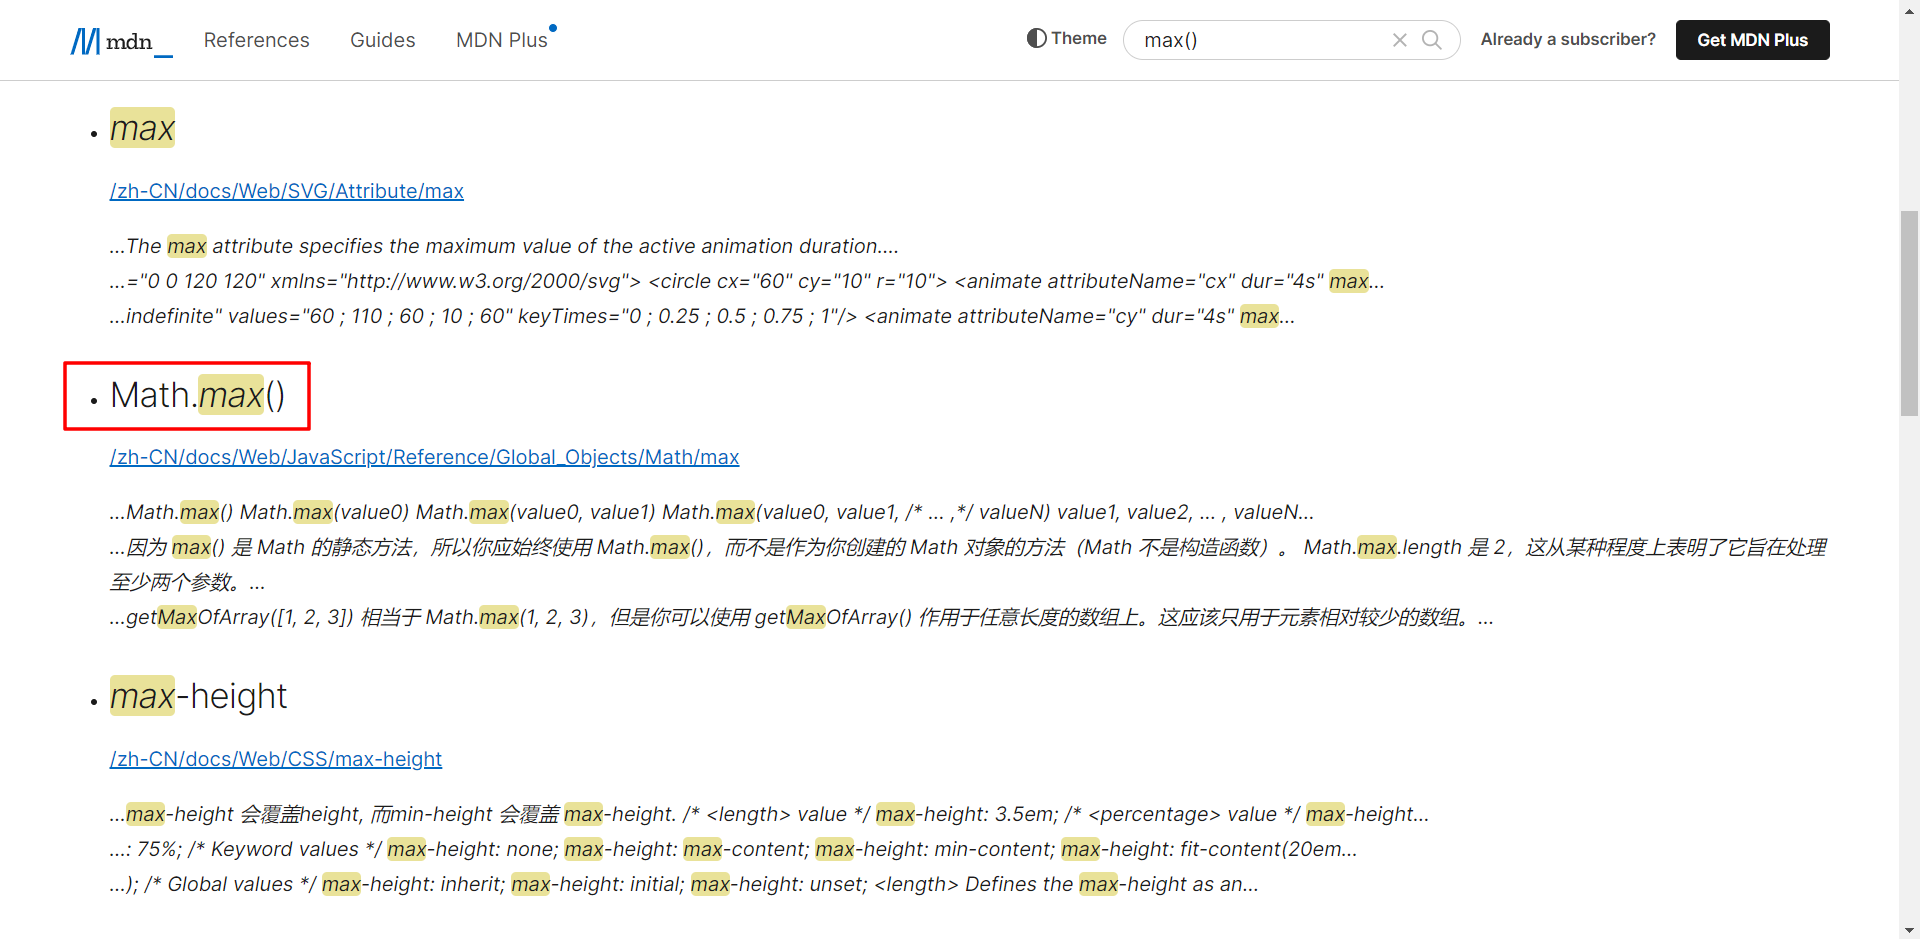
3.学习如何使用该方法
3.13.2 Math对象
Math对象:是一个内置对象,它拥有一些数学常数属性和数学函数方法。
注:Math用于 Number 类型,不支持 BigInt。
1.圆周率
| 属性 | 描述 |
|---|---|
Math.PI |
圆周率 |
console.log(Math.PI); // 3.141592653589793
2.最大值和最小值
| 方法 | 描述 |
|---|---|
max() |
最大值 |
min() |
最小值 |
// 1.最大值
console.log(Math.max(1, 3, 2)); // 3
console.log(Math.max(-1, -3, -2)); // -1

// 2.最小值
console.log(Math.min(1, 3, 2)); // 1
console.log(Math.min(-1, -3, -2)); // -3
3.绝对值
| 方法 | 描述 |
|---|---|
abs() |
绝对值 |
console.log(Math.abs(-1)); // 1
console.log(Math.abs(1)); // 1
3.取整
| 方法 | 描述 |
|---|---|
floor() |
向下取整 |
ceil() |
向上取整 |
round() |
四舍五入取整 |
// 1.向下取整(往小了取值)
console.log(Math.floor(1.1)); // 1
console.log(Math.floor(1.9)); // 1

// 2.向上取整(往大了取值)
console.log(Math.ceil(1.1)); // 2
console.log(Math.ceil(1.9)); // 2

// 3.四舍五入取整
console.log(Math.round(1.1)); //1
console.log(Math.round(1.5)); //2
console.log(Math.round(1.9)); //2
console.log(Math.round(-1.1)); //-1
console.log(Math.round(-1.5)); //-1
console.log(Math.round(-1.9)); //-2
4.平方根和幂次方
| 方法 | 描述 |
|---|---|
sqrt() |
平方根 |
pow() |
幂次方 |
// 1.求平方根
console.log(Math.sqrt(4)); // 2
console.log(Math.sqrt(-4)); // NaN

// 2.求幂次方
console.log(Math.pow(2, 3)); // 8
console.log(Math.pow(2, -3)); // 0.125
5.随机数
| 方法 | 描述 |
|---|---|
random() |
随机数 |
随机数的范围为
[0,1)
console.log(Math.random()); // 0.7208312390552221
3.13.3 Date对象
Date对象:基于 Unix Time Stamp,即自 1970 年 1 月 1 日(UTC时间)起经过的毫秒数。
1.创建Date对象
- 创建对象时不带参数
- 创建对象时传入的参数为数字型
- 创建对象时传入的参数为字符串型
// 1.如果没有参数,返回当前系统的当前时间
var date = new Date();
console.log(date); // Sat Dec 31 2022 15:30:00 GMT+0800 (中国标准时间)

// 2.传参为数字型日期
var date = new Date(2022, 11, 31, 08, 30, 00);
console.log(date); // Sat Dec 31 2022 08:30:00 GMT+0800 (中国标准时间)

// 3.传参为字符串型日期
var date = new Date("2022-12-31 08:30:00");
console.log(date); // Sat Dec 31 2022 08:30:00 GMT+0800 (中国标准时间)
注:传参为数字型日期时,月份是从0开始计算的(一月份为 0,十二月份为 11)
2.获取日期时间
| 方法 | 描述 |
|---|---|
getFullYear() |
获取当年 |
getMonth() |
获取当月(0-11) |
getDate() |
获取当天日期(1-31) |
getDay() |
获取当前星期几(0-6) |
getHours() |
获取当前小时 |
getMinutes() |
获取当前分钟 |
getSeconds() |
获取当前秒钟 |
var date = new Date("2022-12-31 08:30:00");

console.log(date); // Sat Dec 31 2022 08:30:00 GMT+0800 (中国标准时间)
console.log(date.getFullYear()); // 2022
console.log(date.getMonth()); // 11(月份加1,为12月)
console.log(date.getDate()); // 31
console.log(date.getDay()); // 6(星期六)
console.log(date.getHours()); // 8
console.log(date.getMinutes()); // 30
console.log(date.getSeconds()); // 0
1.
getMonth()返回的月份为0-11,代表从1月份到12月份
2.getDay()返回的星期为0-6,代表从星期天到星期六
3.设置日期时间
| 方法 | 描述 |
|---|---|
setFullYear() |
设置当年 |
setMonth() |
设置当月(0-11) |
setDate() |
设置当天日期(1-31) |
setHours() |
设置当前小时 |
setMinutes() |
设置当前分钟 |
setSeconds() |
设置当前秒钟 |
var date = new Date("2022-12-31 08:30:00");
console.log(date); // Sat Dec 31 2022 08:30:00 GMT+0800 (中国标准时间)

date.setFullYear(2023);
date.setMonth(0);
date.setDate(1);
date.setHours(21);
date.setMinutes(30);
date.setSeconds(0);

console.log(date); // Sun Jan 01 2023 21:30:00 GMT+0800 (中国标准时间)
4.获取时间戳
| 方法 | 描述 |
|---|---|
getTime() |
获取当前时间戳 |
valueOf() |
获取当前时间戳 |
now() |
获取到当前的总毫秒数 |
var date = new Date("2022-12-31 08:30:00");

console.log(date.valueOf()); // 1672446600000
console.log(date.getTime()); // 1672446600000

console.log(Date.now()); // 1672627078608
Date.now()为1970年到系统当前时间,所经历的毫秒数
5.日期转换为字符串
| 方法 | 描述 |
|---|---|
toString() |
返回完整字符串 |
toDateString() |
返回字符串的日期部分 |
toTimeString() |
返回字符串的时间部分 |
toLocaleString() |
返回完整字符串(字符串格式因语言而异) |
toLocaleDateString() |
返回字符串的日期部分(字符串格式因语言而异) |
toLocaleTimeString() |
返回字符串的时间部分(字符串格式因语言而异) |
var date = new Date("2022-12-31 08:30:00");
console.log(date); // Sat Dec 31 2022 08:30:00 GMT+0800 (中国标准时间)
console.log(typeof date); // object

// 1.toString() 返回完整字符串
console.log(date.toString()); // Sat Dec 31 2022 08:30:00 GMT+0800 (中国标准时间)
console.log(typeof date.toString()); // string

// 2.toDateString() 返回字符串的日期部分
console.log(date.toDateString()); // Sat Dec 31 2022

// 3.toTimeString() 返回字符串的时间部分
console.log(date.toTimeString()); // 08:30:00 GMT+0800 (中国标准时间)

// 4.toLocaleString() 返回完整字符串
console.log(date.toLocaleString()); // 2022/12/31 08:30:00
console.log(date.toLocaleString("zh-CN", {

     timeZone: "Asia/Shanghai" })); // 2022/12/31 08:30:00
console.log(date.toLocaleString("zh-CN", {

     timeZone: "UTC" })); // 2022/12/31 00:30:00
console.log(date.toLocaleString("en-US")); // 12/31/2022, 8:30:00 AM
console.log(date.toLocaleString("en-US", {

     timeZone: "UTC" })); // 12/31/2022, 12:30:00 AM

// 5.toLocaleDateString() 返回字符串的日期部分
console.log(date.toLocaleDateString()); // 2022/12/31

// 6.toLocaleTimeString()  返回字符串的时间部分
console.log(date.toLocaleTimeString()); // 08:30:00
1.方法名含
Date,则返回的是日期(年月日);方法名含Time,则返回的是时间(时分秒)
2.toLocaleString(locales, options)方法
- 第一个参数locales,代表语言
- 第二个参数options,代表时区
3.13.4 Array对象
Array对象:即数组对象,js中的数组是可调整大小的,并且可以包含不同的数据类型。
1.添加和删除数组元素
| 方法 | 描述 | 返回值 |
|---|---|---|
push() |
向数组末尾添加一个或多个元素 | 新数组的长度 |
pop() |
删除数组最后一个元素 | 删除的元素 |
unshift() |
向数组的开头添加一个或多个元素 | 新数组的长度 |
shift() |
删除数组的第一个元素 | 删除的元素 |
// 1.push() 向数组末尾添加元素
var arr = [1, 3, 5, 7, 9];
console.log(arr.push(2)); // 6
console.log(arr.push(4, 6)); // 8
console.log(arr); // [1, 3, 5, 7, 9, 2, 4, 6]

// 2.pop() 删除数组最后一个元素
var arr = [1, 3, 5, 7, 9];
console.log(arr.pop()); // 9
console.log(arr.pop()); // 7
console.log(arr); // [1, 3, 5]

// 3.unshift() 向数组的开头添加元素
var arr = [1, 3, 5, 7, 9];
console.log(arr.unshift(2)); // 6
console.log(arr.unshift(4, 6)); // 8
console.log(arr); // [4, 6, 2, 1, 3, 5, 7, 9]

// 4.shift() 删除数组的第一个元素
var arr = [1, 3, 5, 7, 9];
console.log(arr.shift()); // 1
console.log(arr.shift()); // 3
console.log(arr); // [5, 7, 9]
2.获取数组元素索引
| 方法 | 描述 | 返回值 |
|---|---|---|
indexOf() |
查找数组中给定元素的第一个索引 | 存在返回索引号,否则返回-1 |
lastIndexOf() |
查找数组中给定元素的最后一个索引 | 存在返回索引号,否则返回-1 |
var arr = ["Banana", "Orange", "Apple", "Watermelon", "Mango", "Orange"];

// 1.查找第一个匹配值的索引
console.log(arr.indexOf("Orange")); // 1
console.log(arr.indexOf("Strawberry")); // -1

// 2.查找最后一个匹配值的索引
console.log(arr.lastIndexOf("Orange")); // 5
console.log(arr.lastIndexOf("Strawberry")); // -1
3.数组转换为字符串
| 方法 | 描述 | 返回值 |
|---|---|---|
toString() |
转换为字符串 | 字符串 |
join() |
以分隔符连接数组元素,转换为字符串 | 字符串 |
var arr = [1, 3, 5, 7, 9];

console.log(arr.toString()); // 1,3,5,7,9

console.log(arr.join()); // 1,3,5,7,9 (不写分隔符,默认为逗号)
console.log(arr.join("")); // 13579
console.log(arr.join("*")); // 1*3*5*7*9
4.数组翻转和排序
| 方法 | 描述 | 返回值 |
|---|---|---|
reverse() |
对数组中的元素进行翻转 | 翻转后的数组 |
sort() |
对数组中的元素进行排序 | 排序后的数组 |
// 1.数组翻转(会改变原数组)
var arr = [1, 2, 3, 4, 5, 6, 7, 8, 9, 10];
console.log(arr.reverse()); // [10, 9, 8, 7, 6, 5, 4, 3, 2, 1]
console.log(arr); // [10, 9, 8, 7, 6, 5, 4, 3, 2, 1]

// 2.数组排序(会改变原数组),默认按照字符串顺序对值进行排序
var arr = [1, 3, 5, 7, 9, 2, 4, 6, 8, 10];
console.log(arr.sort()); // [1, 10, 2, 3, 4, 5, 6, 7, 8, 9]
console.log(arr); // [1, 10, 2, 3, 4, 5, 6, 7, 8, 9]

// 3.排序解决方案如下
// 升序排序
arr.sort(function (a, b) {


  return a - b;
});
console.log(arr); // [1, 2, 3, 4, 5, 6, 7, 8, 9, 10]

// 降序排序
arr.sort(function (a, b) {


  return b - a;
});
console.log(arr); // [10, 9, 8, 7, 6, 5, 4, 3, 2, 1]
注:
reverse()和sort()方法,会改变原数组
5.合并数组
| 方法 | 描述 | 返回值 |
|---|---|---|
concat() |
合并两个或多个数组 | 合并后的数组 |
var arr1 = [1, 2, 3];
var arr2 = [4, 5, 6];
var arr3 = [7, 8, 9];

console.log(arr1.concat(arr2)); // [1, 2, 3, 4, 5, 6]
console.log(arr1.concat(arr2, arr3)); //  [1, 2, 3, 4, 5, 6, 7, 8, 9]
console.log(arr1); // [1, 2, 3]
注:
concat()方法,不改变原数组
6.截取和修改数组元素
| 方法 | 描述 | 返回值 |
|---|---|---|
slice() |
截取原数组的元素,形成新数组 | 新数组 |
splice() |
删除或添加元素来修改数组 | 被删除的元素组成的数组 |
slice(start, end):
- 截取数组的范围为
[start, end),即截取的数组元素,从arr[start]到arr[end-1] - 如果没有任何参数,则复制了整个数组
- 如果只有参数
start,没有end,那么截取的数组元素,从arr[start]到arr[arr.length-1] - 如果参数的值为负数,则从后往前数,如
-2为倒数第二个数,-1为最后一个数
splice(start, deleteCount, item1, item2, itemN):
start为修改的起始位置deleteCount为需要删除的元素个数,如果不指定该参数,则删除后续所有元素item为添加进数组的元素,如果不指定,则只删除数组元素
// 1.slice() 截取数组
var arr = ["Banana", "Orange", "Apple", "Watermelon", "Mango"];

console.log(arr.slice()); // ['Banana', 'Orange', 'Apple', 'Watermelon', 'Mango']
console.log(arr.slice(2)); // ['Apple', 'Watermelon', 'Mango']
console.log(arr.slice(2, 4)); // ['Apple', 'Watermelon']
console.log(arr.slice(-2)); // ['Watermelon', 'Mango']
console.log(arr.slice(-2, -1)); // ['Watermelon']

// 2.splice() 通过删除或添加元素来修改数组
var arr = ["Banana", "Orange", "Apple", "Watermelon", "Mango"];

arr.splice(1, 0, "Strawberry", "Peach");
console.log(arr); // ['Banana', 'Strawberry', 'Peach', 'Orange', 'Apple', 'Watermelon', 'Mango']

arr.splice(2, 3, "pear");
console.log(arr); // ['Banana', 'Strawberry', 'pear', 'Watermelon', 'Mango']

arr.splice(2, 1);
console.log(arr); // ['Banana', 'Strawberry', 'Watermelon', 'Mango']

arr.splice(2);
console.log(arr); //  ['Banana', 'Strawberry']
注:
slice()方法不改变原数组,splice()方法改变原数组
3.13.5 String对象
String对象:即字符串对象,用于表示和操作字符串。
1.获取字符串中的字符
| 方法 | 描述 |
|---|---|
charAt() |
返回指定位置的字符 |
charCodeAt() |
返回指定位置的字符的ASCII码 |
str[index]的形式,也可获取字符
// 1.charAt() 获取字符
var str = "Hello World";
console.log(str.charAt(6)); // W

// 2.charCodeAt() 获取字符的 ASCII码
var str = "Hello World";
console.log(str.charCodeAt(6)); // 87

// 3.str[index] 获取字符
var str = "Hello World";
console.log(str[6]); // W
2.截取字符串
| 方法 | 描述 |
|---|---|
slice() |
截取[start, end)范围的字符串 |
substring() |
截取[start, end)范围的字符串,不接受负值 |
slice(start, end):
- 截取字符串的范围为
[start, end),即截取的子字符串,从str[start]到str[end-1] - 如果没有任何参数,则复制了整个字符串
- 如果只有参数
start,没有end,那么截取的子字符串,从str[start]到str[str.length-1] - 如果参数的值为负数,则从后往前数,如
-2为倒数第二个数,-1为最后一个数
substring(start, end):类似于 slice(),不同之处在于 substring() 无法接受负的索引
// 1.slice() 截取字符串
var str = "Hello World";
console.log(str.slice()); // Hello World
console.log(str.slice(6)); // World
console.log(str.slice(0, 5)); // Hello
console.log(str.slice(-5)); // World
console.log(str.slice(-5, -1)); // Worl

// 2.substring() 截取字符串(不接受负值)
var str = "Hello World";
console.log(str.substring()); // Hello World
console.log(str.substring(6)); // World
console.log(str.substring(0, 5)); // Hello
3.字符串的替换和拼接
| 方法 | 描述 |
|---|---|
replace() |
替换字符串 |
concat() |
连接两个或多个字符串 |
replace(regexp|substr, newSubStr|function):
regexp:正则表达式,如果没使用正则表达式,则仅替换第一个匹配项substr:原字符串,将要被替换的字符串newSubStr:新字符串,用于替换原字符串function:一个用来创建新子字符串的函数,该函数的返回值将替换掉第一个参数匹配到的结果
concat(str2, [, ...strN]):连接两个或多个字符串
注:也可通过运算符
+来拼接字符串
// 1.replace() 替换字符串
var str = "Hello World";
console.log(str.replace("o", "a")); // Hella World
console.log(str.replace(/o/g, "a")); // Hella Warld

// 2.concat() 拼接字符串
var str = "abcd";
console.log(str.concat("efg")); // abcdefg
console.log(str.concat("efg", "hijkl")); // abcdefghijkl

// 3. + 拼接字符串
var str = "abcd";
console.log(str + "efg"); // abcdefg
console.log(str + "efg" + "hijkl"); // abcdefg
4.字符串的大小写转换
| 方法 | 描述 |
|---|---|
toUpperCase() |
将字符串转换为大写 |
toLowerCase() |
将字符串转换为小写 |
var str = "Hello World";
console.log(str.toUpperCase()); // HELLO WORLD
console.log(str.toLowerCase()); // hello world
5.去除字符串的空白字符
| 方法 | 描述 |
|---|---|
trim() |
去除字符串首尾的空白字符 |
trimStart() |
去除字符串开头的空白字符 |
trimEnd() |
去除字符串末尾的空白字符 |
var str = " Hello World ";
console.log(str.trim()); // "Hello World"
console.log(str.trimStart()); // "Hello World "
console.log(str.trimEnd()); // " Hello World"
6.字符串转换为数组
| 方法 | 描述 |
|---|---|
split() |
以分隔符将字符串切割为数组 |
var str = "Monday,Tuesday,Wednesday,Thursday,Friday";
console.log(str.split(",")); // ['Monday', 'Tuesday', 'Wednesday', 'Thursday', 'Friday']
console.log(str.split(",Wednesday,")); // ['Monday,Tuesday', 'Thursday,Friday']
7.字符串搜索
| 方法 | 描述 | 返回值 |
|---|---|---|
indexOf() |
查找字符串中指定值首次出现的索引 | 存在返回索引号,否则返回-1 |
lastIndexOf() |
查找字符串中指定值最后出现的索引 | 存在返回索引号,否则返回-1 |
search() |
根据正则表达式查找在字符串中首次匹配项的索引 | 存在返回索引号,否则返回-1 |
match() |
根据正则表达式在字符串中搜索匹配项 | 匹配的所有结果,以数组对象返回 |
includes() |
查找字符串是否包含指定值 | 包含则返回true,否则返回false |
startsWith() |
查找字符串是否以指定值开头 | 以指定值开头则返回true,否则返回false |
endsWith() |
查找字符串是否以指定值结尾 | 以指定值结尾则返回true,否则返回false |
var str = "Hello World";

// 1.indexOf() 返回字符串中指定值首次出现的索引
console.log(str.indexOf("o")); // 4
console.log(str.indexOf("a")); // -1

// 2.lastIndexOf() 返回字符串中指定值最后出现的索引
console.log(str.lastIndexOf("o")); // 7
console.log(str.lastIndexOf("a")); // -1

// 3.search() 返回正则表达式在字符串中首次匹配项的索引
console.log(str.search(/o/g)); // 4
console.log(str.search(/[a-z]/g)); // 1
console.log(str.search(/a/g)); // -1

// 4.match() 返回正则表达式在字符串中匹配的结果
console.log(str.match(/o/g)); // ['o', 'o']
console.log(str.match(/[a-z]/g)); // ['e', 'l', 'l', 'o', 'o', 'r', 'l', 'd']
console.log(str.match(/a/g)); // null

// 5.includes() 返回字符串是否包含指定值
console.log(str.includes("Hello")); // true
console.log(str.includes("abc")); // false

// 6.startsWith() 返回字符串是否以指定值开头
console.log(str.startsWith("Hello")); // true
console.log(str.startsWith("abc")); // false

// 7.endsWith() 返回字符串是否以指定值结尾
console.log(str.endsWith("World")); // true
console.log(str.endsWith("abc")); // false
3.13.6 Map对象
Map对象:是键值对的集合,Map中的一个键只能出现一次,其中的键可以是任何数据类型。
1.创建Map对象
// 1.创建空Map对象
var map = new Map();

// 2.创建带初始值的Map对象
var map = new Map([
  [1, "one"],
  [2, "two"],
  [3, "three"]
]);
2.为Map对象添加或更新一个键值对
| 方法 | 描述 |
|---|---|
set() |
添加或更新一个键值对 |
var map = new Map();

// 1.添加新的键值对
map.set(1, "one");
map.set(2, "two");
map.set(3, "three");
console.log(map); // {1 => 'one', 2 => 'two', 3 => 'three'}

// 2.更新指定的键值对
map.set(3, "3");
console.log(map); // {1 => 'one', 2 => 'two', 3 => '3'}
3.获取Map对象的值
| 方法 | 描述 |
|---|---|
get() |
获取键相对应的值 |
entries() |
返回键值对的数组 |
keys() |
返回键的数组 |
values() |
返回值的数组 |
forEach() |
为每个键值对调用回调函数 |
forEach()方法会对 map 中每个真实存在的键执行一次给定的回调函数。
回调函数接收三个参数:
- 当前的 value
- 当前的 key
- 正在被遍历的 Map 对象
var map = new Map();
map.set(1, "one");
map.set(2, "two");
map.set(3, "three");

// 1.获取键相对应的值
console.log(map.get(2)); // two

// 2.获取键值对的数组
console.log(map.entries()); // {1 => 'one', 2 => 'two', 3 => 'three'}
console.log(map.keys()); // {1, 2, 3}
console.log(map.values()); // {'one', 'two', 'three'}

// 3.为每个键值对调用回调函数,遍历Map对象
function getMapElements(value, key, map) {


  console.log(`[${

      key}] = ${

      value}`);
}

map.forEach(getMapElements);
4.删除Map元素
| 方法 | 描述 |
|---|---|
delete() |
删除由键指定的元素 |
clear() |
清空所有元素 |
var map = new Map();
map.set(1, "one");
map.set(2, "two");
map.set(3, "three");

// 1.删除由键指定的元素
map.delete(3);
console.log(map.entries()); // {1 => 'one', 2 => 'two'}

// 2.清空所有元素
map.clear();
console.log(map.entries()); // {}
5.判断Map元素是否存在
| 方法 | 描述 |
|---|---|
has() |
判断指定键的元素是否存在 |
var map = new Map();
map.set(1, "one");
map.set(2, "two");
map.set(3, "three");

console.log(map.has(2)); // true
console.log(map.has(4)); // false
6.获取Map对象的大小
size属性,表示 Map 对象有多少个键值对
var map = new Map();
map.set(1, "one");
map.set(2, "two");
map.set(3, "three");

console.log(map.size); // 3
3.13.7 Set对象
Set对象:是唯一值的集合,每个值在 Set 中只能出现一次,一个 Set 可以容纳任何数据类型的任何值。
1.创建Set对象
// 1.创建空Set对象
var set = new Set();

// 2.创建带初始值的Set对象
var set = new Set([1, 2, 3]);
2.为Set对象添加元素
| 方法 | 描述 |
|---|---|
add() |
添加一个新的元素 |
注:如果添加的是相同的元素,则只会保存第一个元素
var set = new Set();

set.add(1);
set.add(2);
set.add(2);
set.add(3);
console.log(set); // {1, 2, 3}
3.获取Set对象的值
| 方法 | 描述 |
|---|---|
entries() |
返回Set对象中值的数组 |
keys() |
返回Set对象中值的数组 |
values() |
与 keys() 相同 |
forEach() |
为每个元素调用回调函数 |
注:此处的方法与Map对象中的方法基本是一致的,不同的是set没有键,所以这些方法得到的都是值。
var set = new Set();
set.add(1);
set.add(2);
set.add(3);

// 1.获取Set中所有元素
console.log(set.entries()); // {1 => 1, 2 => 2, 3 => 3}
console.log(set.keys()); // {1, 2, 3}
console.log(set.values()); // {1, 2, 3}

// 2.为每个键值对调用回调函数,遍历set对象
function getsetElements(value, key, set) {


  console.log(value);
}

set.forEach(getsetElements);
4.删除Set元素
| 方法 | 描述 |
|---|---|
delete() |
删除指定的元素 |
clear() |
清空所有元素 |
var set = new Set();
set.add(1);
set.add(2);
set.add(3);

// 1.删除指定的元素
set.delete(2);
console.log(set.values()); // {1, 3}

// 2.清空所有元素
set.clear();
console.log(set.values()); // {}
5.判断Set元素是否存在
var set = new Set();
set.add(1);
set.add(2);
set.add(3);

console.log(set.has(2)); // true
console.log(set.has(4)); // false
6.获取Set对象的大小
size属性,表示 Set对象中元素的个数
var set = new Set();
set.add(1);
set.add(2);
set.add(3);

console.log(set.size); // 3
4. JS DOM
4.1 DOM简介
DOM 概念:文档对象模型(Document Object Model),是W3C组织推荐的处理可扩展标记语言(HTML或XML)的标准编程接口。
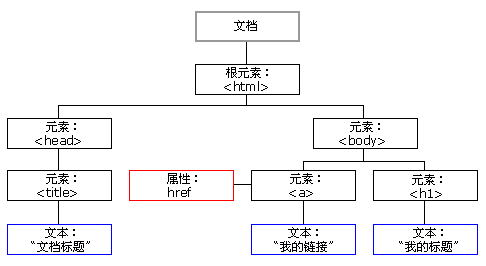
DOM 树:当网页被加载时,浏览器会创建页面的文档对象模型,HTML DOM 模型被结构化为对象树。
- 文档:一个页面就是一个文档,DOM 中使用 document 表示
- 元素:页面中所有的标签都是元素,DOM 中使用 element 表示
- 节点:页面中所有的内容都是节点(标签、属性、文本、、注释等),DOM 中使用 node 表示
DOM 树如图所示:
通过操作 DOM 树,可以做以下事情:
- 改变页面中的所有 HTML 元素
- 改变页面中的所有 HTML 属性
- 改变页面中的所有 CSS 样式
- 删除已有的 HTML 元素和属性
- 添加新的 HTML 元素和属性
- 对页面中所有已有的 HTML 事件作出反应
- 在页面中创建新的 HTML 事件
4.2 Web API
API概念 :应用程序编程接口(Application Programming Interface),简单来说就是提供给程序员的一种工具,以便能更轻松的实现想要完成的功能。如String对象的 charAt()、slice()、substring()等方法就是 API。
Web API:是浏览器提供的一套操作浏览器功能和页面元素的 API( BOM 和 DOM)。
Web API 文档:https://developer.mozilla.org/zh-CN/docs/Web/API
4.3 元素操作
4.3.1 获取元素
1.获取一般元素
| 方法 | 描述 |
|---|---|
getElementById() |
通过元素 id 来查找元素 |
getElementsByTagName() |
通过标签名来查找元素 |
getElementsByClassName() |
通过类名来查找元素 |
querySelector() |
返回指定选择器匹配的第一个元素对象 |
querySelectorAll() |
返回指定选择器匹配的所有元素对象 |
注:
1.因为文档页面从上往下加载,得先有标签,才能获取到它,所以把<script>标签写在其他标签后面
2.getElementById()以HTML元素形式返回,getElementsByTagName()、getElementsByClassName()以伪数组的形式返回
3.querySelector()以HTML元素形式返回,querySelectorAll()以伪数组的形式返回
4.以上五个方法返回的都是元素对象
<!DOCTYPE html>
<html lang="en">
<head>
<meta charset="UTF-8" />
<meta http-equiv="X-UA-Compatible" content="IE=edge" />
<meta name="viewport" content="width=device-width, initial-scale=1.0" />
<title>Document</title>
</head>
<body>
<div class="box">盒子1</div>
<div class="box">盒子2</div>
<div id="nav">
<ul>
<li>新闻</li>
<li>视频</li>
<li>文库</li>
<li>地图</li>
</ul>
</div>
<script>
// 1.getElementById() 通过元素 id 来查找元素
var boxes = document.getElementById("nav");
console.log(boxes); // 输出了id为nav的整个元素(包含子元素)
console.dir(boxes); // div#nav 通过树的形式,显示对象属性
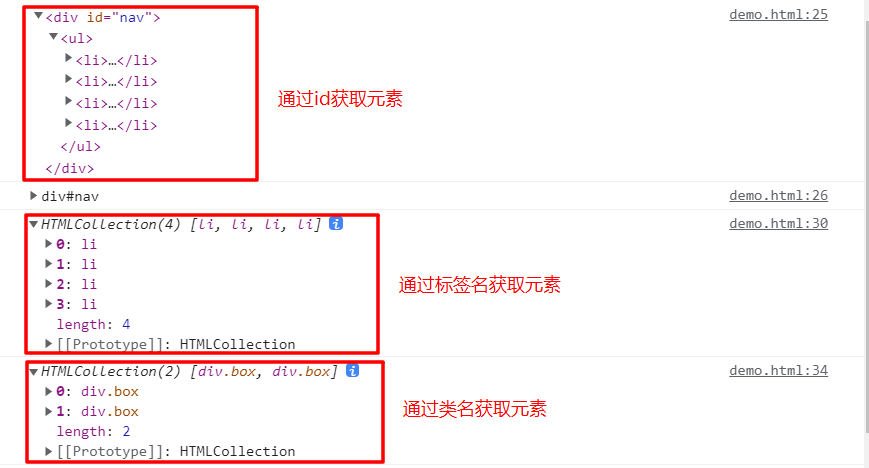
// 2.getElementsByTagName() 通过标签名来查找元素
var boxes = document.getElementsByTagName("li");
console.log(boxes);
// 3.getElementsByClassName() 通过类名来查找元素
var boxes = document.getElementsByClassName("box");
console.log(boxes);
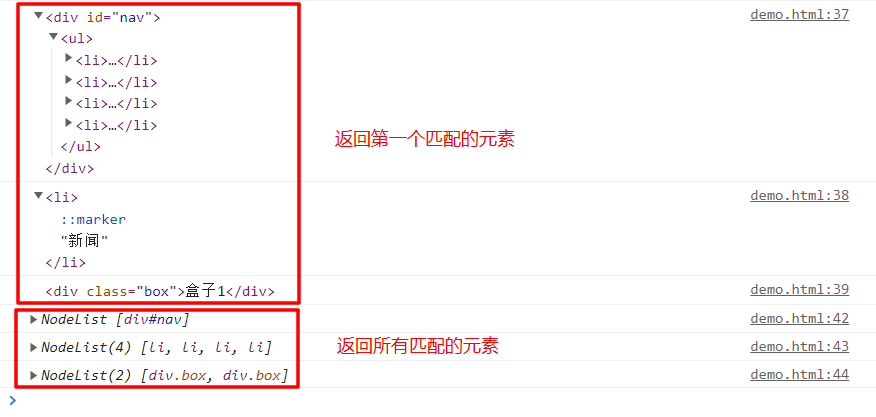
// 4.querySelector() 返回指定选择器匹配的第一个元素对象
console.log(document.querySelector("#nav"));
console.log(document.querySelector("li"));
console.log(document.querySelector(".box"));
// 5.querySelectorAll() 返回指定选择器匹配的所有元素对象
console.log(document.querySelectorAll("#nav"));
console.log(document.querySelectorAll("li"));
console.log(document.querySelectorAll(".box"));
</script>
</body>
</html>
前三个方法的运行结果:
后两个方法的运行结果:
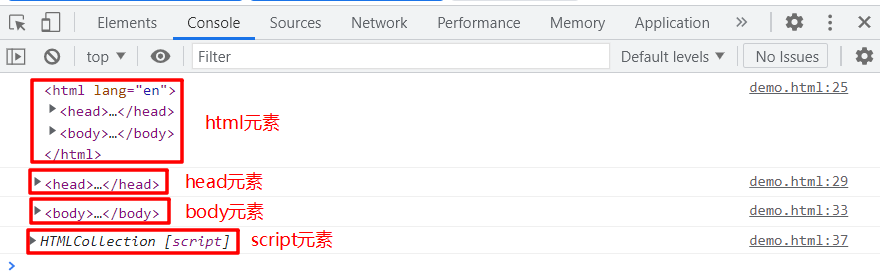
2.获取特殊元素
| 属性 | 描述 |
|---|---|
document.documentElement |
获取html元素 |
document.head |
获取head元素 |
document.body |
获取body元素 |
document.scripts |
获取script元素 |
<!DOCTYPE html>
<html lang="en">
  <head>
    <meta charset="UTF-8" />
    <meta http-equiv="X-UA-Compatible" content="IE=edge" />
    <meta name="viewport" content="width=device-width, initial-scale=1.0" />
    <title>Document</title>
  </head>
  <body>
    <div class="box">盒子1</div>
    <div class="box">盒子2</div>

    <div id="nav">
      <ul>
        <li>新闻</li>
        <li>视频</li>
        <li>文库</li>
        <li>地图</li>
      </ul>
    </div>

    <script>
      // 1.获取 html元素
      var htmlElement = document.documentElement;
      console.log(htmlElement);

      // 2.获取 head元素
      var headElement = document.head;
      console.log(headElement);

      // 3.获取 body元素
      var bodyElement = document.body;
      console.log(bodyElement);

      // 4.获取 script元素
      var scriptElement = document.scripts;
      console.log(scriptElement);
    </script>
  </body>
</html>
运行结果:
4.3.2 修改元素
| 方法 | 描述 |
|---|---|
element.innerHTML = new content |
改变 HTML 内容 |
element.attribute = new value |
改变 HTML 元素的属性值 |
element.style.property = new style |
改变 HTML 元素的样式 |
element.className = new className |
改变 HTML 元素的样式 |
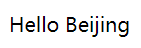
1.修改元素的内容
<!DOCTYPE html>
<html lang="en">
  <head>
    <meta charset="UTF-8" />
    <meta http-equiv="X-UA-Compatible" content="IE=edge" />
    <meta name="viewport" content="width=device-width, initial-scale=1.0" />
    <title>Document</title>
  </head>
  <body>
    <p>Hello World</p>

    <script>
      var p = document.querySelector("p");
      p.innerHTML = "Hello Beijing"; // 修改 p标签的内容
    </script>
  </body>
</html>
运行结果:
2.修改元素的属性值
<!DOCTYPE html>
<html lang="en">
  <head>
    <meta charset="UTF-8" />
    <meta http-equiv="X-UA-Compatible" content="IE=edge" />
    <meta name="viewport" content="width=device-width, initial-scale=1.0" />
    <title>Document</title>
  </head>
  <body>
    <img src="https://www.w3school.com.cn/i/logo/w3logo-3.png" />

    <script>
      var image = document.querySelector("img");
      image.src = "https://www.baidu.com/img/bdlogo.png"; // 修改img标签的src属性值
    </script>
  </body>
</html>
运行结果:

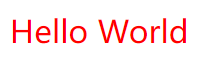
3.修改元素的样式
element.style是行内样式操作,element.className是类名样式操作- 样式修改较多时,建议采取类名样式操作更改元素样式
- js中的样式采取小驼峰命名法,如
fontSize、backgroundColor
行内样式操作:
<!DOCTYPE html>
<html lang="en">
  <head>
    <meta charset="UTF-8" />
    <meta http-equiv="X-UA-Compatible" content="IE=edge" />
    <meta name="viewport" content="width=device-width, initial-scale=1.0" />
    <title>Document</title>
  </head>
  <body>
    <p>Hello World</p>

    <script>
      var p = document.querySelector("p");
      p.style.color = "red"; // 修改 p标签的颜色
      p.style.fontSize = "25px"; // 修改 p标签的字体大小
    </script>
  </body>
</html>
运行结果:
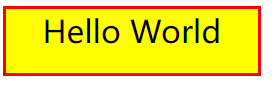
类名样式操作:
<!DOCTYPE html>
<html lang="en">
  <head>
    <meta charset="UTF-8" />
    <meta http-equiv="X-UA-Compatible" content="IE=edge" />
    <meta name="viewport" content="width=device-width, initial-scale=1.0" />
    <title>Document</title>
    <style>
      div {


        color: black;
        background-color: orangered;
        height: 50px;
        width: 200px;
      }

      .change {


        background-color: yellow;
        font-size: 25px;
        text-align: center;
        border: 3px solid red;
      }
    </style>
  </head>
  <body>
    <div>Hello World</div>

    <script>
      var div = document.querySelector("div");
      div.className = "change"; // 修改为 change类名的样式
    </script>
  </body>
</html>
运行结果:
4.3.3 自定义元素属性
命名规范:H5 规定自定义属性名以 data- 开头,如 <div data-index="1"></div>
| 方法 | 描述 |
|---|---|
getAttribute() |
获取属性值 |
setAttribute() |
设置属性值 |
removeAttribute() |
删除属性 |
element.dataset |
获取以data-开头的属性值 |
1.
getAttribute()、setAttribute()、removeAttribute()可以对所有属性进行操作,不局限于自定义属性。
2.getAttribute()与element.attribute的不同之处在于,前者可以获取所有属性(包括自定义属性),后者只能获取内置属性。
3.dataset.属性名或dataset['属性名'],可以获取具体属性值。
属性名采取驼峰命名法,如css 的属性名为data-list-name,那么获取该属性值写法为dataset.listName或dataset["listName"]
1.获取自定义属性
<!DOCTYPE html>
<html lang="en">
  <head>
    <meta charset="UTF-8" />
    <meta http-equiv="X-UA-Compatible" content="IE=edge" />
    <meta name="viewport" content="width=device-width, initial-scale=1.0" />
    <title>Document</title>
  </head>
  <body>
    <div data-index="1" data-list-name="project" time="2023-01-01"></div>

    <script>
      var div = document.querySelector("div");

      // 1.getAttribute() 获取属性值
      console.log(div.time); // undefined
      console.log(div.getAttribute("time")); // 2023-01-01
      console.log(div.getAttribute("data-index")); // 1

      // 2.element.dataset 获取以data-开头的属性值
      console.log(div.dataset); // {index: '1', listName: 'project'}
      console.log(div.dataset.index); // 1
      console.log(div.dataset["index"]); // 1
      console.log(div.dataset.listName); // project
      console.log(div.dataset["listName"]); // project
    </script>
  </body>
</html>
2.设置自定义属性
<!DOCTYPE html>
<html lang="en">
  <head>
    <meta charset="UTF-8" />
    <meta http-equiv="X-UA-Compatible" content="IE=edge" />
    <meta name="viewport" content="width=device-width, initial-scale=1.0" />
    <title>Document</title>
  </head>
  <body>
    <div data-index="1"></div>

    <script>
      var div = document.querySelector("div");
      div.setAttribute("data-time", "2023-01-01");
      console.log(div); // <div data-index="1" data-time="2023-01-01"></div>
    </script>
  </body>
</html>
3.删除自定义属性
<!DOCTYPE html>
<html lang="en">
  <head>
    <meta charset="UTF-8" />
    <meta http-equiv="X-UA-Compatible" content="IE=edge" />
    <meta name="viewport" content="width=device-width, initial-scale=1.0" />
    <title>Document</title>
  </head>
  <body>
    <div data-index="1" data-time="2023-01-01"></div>

    <script>
      var div = document.querySelector("div");
      div.removeAttribute("data-time");
      console.log(div); // <div data-index="1"></div>
    </script>
  </body>
</html>
4.4 节点操作
4.4.1 节点概述
节点概念:页面中所有的内容都是节点(标签、属性、文本、、注释等),DOM 中使用 node 表示。
节点层级:利用DOM树可以把节点划分为不同的层级关系,常见的是父子兄层级关系。
节点的基本属性:
nodeType:节点类型nodeName:节点名称nodeValue:节点值
节点类型:
- 元素节点:nodeType为1
- 属性节点:nodeType为2
- 文本节点:nodeType为3(文本节点包含文字、空格、换行等)
元素操作和节点操作的区别:
- 元素操作利用DOM提供的方法获取元素,逻辑性不强
- 节点操作利用节点层级关系获取元素,逻辑性强
4.4.2 获取节点
1.获取父节点
| 方法 | 描述 |
|---|---|
node.parentNode |
获取父节点 |
<!DOCTYPE html>
<html lang="en">
  <head>
    <meta charset="UTF-8" />
    <meta http-equiv="X-UA-Compatible" content="IE=edge" />
    <meta name="viewport" content="width=device-width, initial-scale=1.0" />
    <title>Document</title>
  </head>
  <body>
    <div>
      <p>Hello World</p>
    </div>

    <script>
      var p = document.querySelector("p");
      console.log(p.parentNode);
    </script>
  </body>
</html>
运行结果:
2.获取子节点
| 方法 | 描述 |
|---|---|
node.childNodes |
获取所有子节点 |
node.children |
获取所有子节点 |
node.firstChild |
获取第一个子节点 |
node.firstElementChild |
获取第一个子节点 |
node.children[0] |
获取第一个子节点 |
node.lastChild |
获取最后一个子节点 |
node.lastElementChild |
获取最后一个子节点 |
node.children[node.children.length - 1] |
获取最后一个子节点 |
注:
1.childNodes、firstChild、lastChild获取的是所有类型的节点(元素节点、属性节点、文本节点),其余的方法仅获取元素节点。
2.实际开发中,节点操作主要操作的是元素节点。
<!DOCTYPE html>
<html lang="en">
  <head>
    <meta charset="UTF-8" />
    <meta http-equiv="X-UA-Compatible" content="IE=edge" />
    <meta name="viewport" content="width=device-width, initial-scale=1.0" />
    <title>Document</title>
  </head>
  <body>
    <ul>
      <li>新闻</li>
      <li>视频</li>
      <li>文库</li>
      <li>地图</li>
    </ul>

    <script>
      var ul = document.querySelector("ul");

      // 1.获取所有子节点
      console.log(ul.childNodes);
      console.log(ul.childNodes[0].nodeType); // 3
      console.log(ul.children);
      console.log(ul.children[0].nodeType); // 1

      // 2.获取第一个子节点
      console.log(ul.firstChild);
      console.log(ul.firstElementChild);
      console.log(ul.children[0]);

      // 3.获取最后一个子节点
      console.log(ul.lastChild);
      console.log(ul.lastElementChild);
      console.log(ul.children[ul.children.length - 1]);
    </script>
  </body>
</html>
运行结果:

3.获取兄弟节点
| 方法 | 描述 |
|---|---|
node.nextSibling |
获取下一个兄弟节点 |
node.nextElementSibling |
获取下一个兄弟节点 |
node.previousSibling |
获取上一个兄弟节点 |
node.previousElementSibling |
获取上一个兄弟节点 |
注:
nextSibling、previousSibling获取的是所有类型的节点(元素节点、属性节点、文本节点),nextElementSibling、previousElementSibling仅获取元素节点。
<!DOCTYPE html>
<html lang="en">
  <head>
    <meta charset="UTF-8" />
    <meta http-equiv="X-UA-Compatible" content="IE=edge" />
    <meta name="viewport" content="width=device-width, initial-scale=1.0" />
    <title>Document</title>
  </head>
  <body>
    <div></div>
    <p>Hello</p>
    <span>World</span>

    <script>
      var p = document.querySelector("p");

      console.log(p.nextSibling);
      console.log(p.nextElementSibling);
      console.log(p.previousSibling);
      console.log(p.previousElementSibling);
    </script>
  </body>
</html>
运行结果:

4.4.3 修改节点
| 方法 | 描述 |
|---|---|
node.innerHTML = new content |
改变 HTML 内容 |
node.attribute = new value |
改变 HTML 元素的属性值 |
node.style.property = new style |
改变 HTML 元素的样式 |
node.className = new className |
改变 HTML 元素的样式 |
注:修改节点的方法与修改元素的一致,详情可参考章节
4.3.2
<!DOCTYPE html>
<html lang="en">
<head>
<meta charset="UTF-8" />
<meta http-equiv="X-UA-Compatible" content="IE=edge" />
<meta name="viewport" content="width=device-width, initial-scale=1.0" />
<title>Document</title>
</head>
<body>
<ul>
<li>新闻</li>
<li>视频</li>
<li>文库</li>
<li>地图</li>
</ul>
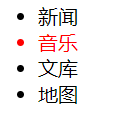
<script>
var ul = document.querySelector("ul");
ul.children[1].innerHTML = "音乐";
ul.children[1].style.color = "red";
console.log(ul);
</script>
</body>
</html>
运行结果:
4.4.4 添加节点
| 方法 | 描述 |
|---|---|
document.createElement() |
创建元素节点 |
node.appendChild() |
将一个节点追加到指定父节点的子节点列表的末尾 |
node.insertBefore() |
将一个节点插入到指定父节点的子节点前面 |
parentNode.appendChild(newNode):
- parentNode:指定的父节点
- newNode:用于追加的节点,将该节点追加到指定父节点的子节点列表的末尾
parentNode.insertBefore(newNode, referenceNode):
parentNode:指定的父节点newNode:用于插入的节点referenceNode:指定的父节点的子节点,将要插入在这个子节点之前
<!DOCTYPE html>
<html lang="en">
<head>
<meta charset="UTF-8" />
<meta http-equiv="X-UA-Compatible" content="IE=edge" />
<meta name="viewport" content="width=device-width, initial-scale=1.0" />
<title>Document</title>
</head>
<body>
<ul>
<li>视频</li>
</ul>
<script>
var ul = document.querySelector("ul"); // 父节点
var appendLi = document.createElement("li"); // 创建元素
appendLi.innerHTML = "文库";
ul.appendChild(appendLi); // 追加元素
var insertLi = document.createElement("li");
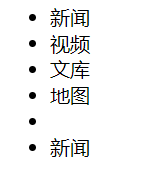
insertLi.innerHTML = "新闻";
ul.insertBefore(insertLi, ul.children[0]); // 插入元素
</script>
</body>
</html>
运行结果:
4.4.5 删除节点
| 方法 | 描述 |
|---|---|
node.remove() |
删除元素节点 |
node.removeChild() |
删除父节点中的一个子节点 |
<!DOCTYPE html>
<html lang="en">
  <head>
    <meta charset="UTF-8" />
    <meta http-equiv="X-UA-Compatible" content="IE=edge" />
    <meta name="viewport" content="width=device-width, initial-scale=1.0" />
    <title>Document</title>
  </head>
  <body>
    <div>
      <p>Hello World</p>
    </div>

    <ul>
      <li>新闻</li>
      <li>视频</li>
      <li>文库</li>
      <li>地图</li>
    </ul>

    <script>
      // 1.remove() 删除元素节点
      var div = document.querySelector("div");
      div.remove();

      // 2.removeChild() 删除父节点中的一个子节点
      var ul = document.querySelector("ul");
      ul.removeChild(ul.children[1]);
    </script>
  </body>
</html>
运行结果:
4.4.6 复制节点
| 方法 | 描述 |
|---|---|
node.cloneNode() |
复制节点 |
node.cloneNode(deep):
- 不设置deep或deep设置为
false,采用浅拷贝,则只克隆该节点本身(只复制标签,不复制里面的内容)。 - deep设置为
true,采用深拷贝,则该节点的所有后代节点也都会被克隆。
<!DOCTYPE html>
<html lang="en">
  <head>
    <meta charset="UTF-8" />
    <meta http-equiv="X-UA-Compatible" content="IE=edge" />
    <meta name="viewport" content="width=device-width, initial-scale=1.0" />
    <title>Document</title>
  </head>
  <body>
    <ul>
      <li>新闻</li>
      <li>视频</li>
      <li>文库</li>
      <li>地图</li>
    </ul>

    <script>
      var ul = document.querySelector("ul");

      shallowCopyLi = ul.children[0].cloneNode(); // 浅拷贝
      ul.appendChild(shallowCopyLi);

      deepCopyLi = ul.children[0].cloneNode(true); // 深拷贝
      ul.appendChild(deepCopyLi);
    </script>
  </body>
</html>
运行结果:
4.5 事件操作
4.5.1 事件概述
事件概念:js 使我们有能力创建动态页面,而事件是可以被 js 监测到的行为。
页面中的每个元素都可以产生某些触发js的事件,例如,用户点击某个按钮时产生一个事件,触发执行某些操作。
事件的组成:
- 事件源:被触发的事件对象(谁被触发了)
- 事件类型:如何触发了该事件(鼠标点击等)
- 事件处理程序:触发事件后执行的操作(通过函数来执行操作)
执行事件的步骤:
- 获取事件源
- 注册事件(绑定事件)
- 添加事件处理程序(采取函数赋值的形式)
<!DOCTYPE html>
<html lang="en">
  <head>
    <meta charset="UTF-8" />
    <meta http-equiv="X-UA-Compatible" content="IE=edge" />
    <meta name="viewport" content="width=device-width, initial-scale=1.0" />
    <title>Document</title>
  </head>
  <body>
    <button id="btn">点击一下</button>

    <script>
      /* 1.btn为事件源
      2.onclick为事件类型
      3.function函数的内容为事件处理程序  */
      var btn = document.getElementById("btn");
      btn.onclick = function () {


        alert("Hello World");
      };
    </script>
  </body>
</html>
本事件的执行步骤:
document.getElementById("btn")获取事件源btn.onclick绑定事件alert("Hello World")添加事件处理程序
4.5.2 注册事件
注册事件:给元素添加事件,称为注册事件或绑定事件。
注册事件的方式:
- 传统注册方式
- 利用on开头的事件名注册事件,如
onclick、onmouseover等 - 特点:注册事件的唯一性,同一个元素的同一个事件只能设置一个处理函数,最后注册的处理函数会覆盖前面注册的
- 利用on开头的事件名注册事件,如
- 方法监听注册方式
- 利用
addEventListener()方法注册事件 - 特点:同一个元素的同一个事件可以注册多个监听器
- 利用
1.传统注册事件
<!DOCTYPE html>
<html lang="en">
  <head>
    <meta charset="UTF-8" />
    <meta http-equiv="X-UA-Compatible" content="IE=edge" />
    <meta name="viewport" content="width=device-width, initial-scale=1.0" />
    <title>Document</title>
  </head>
  <body>
    <button>点击一下</button>

    <script>
      var btn = document.querySelector("button");

      // 1.第一次注册事件
      btn.onclick = function () {


        alert("Hi");
      };

      // 2.第二次注册事件
      btn.onclick = function () {


        alert("Hello");
      };
    </script>
  </body>
</html>
点击按钮后,运行结果如下:

2.方法监听注册事件
addEventListener(type, listener, useCapture):
type:监听事件的类型,如click、mouseover(注意这里不要带on)listener:事件处理函数,事件发生时,会调用该事件监听器函数useCapture:默认值为false,表示在事件冒泡阶段调用事件处理程序;如果值是true,表示在事件捕获阶段调用事件处理程序
<!DOCTYPE html>
<html lang="en">
  <head>
    <meta charset="UTF-8" />
    <meta http-equiv="X-UA-Compatible" content="IE=edge" />
    <meta name="viewport" content="width=device-width, initial-scale=1.0" />
    <title>Document</title>
  </head>
  <body>
    <button>点击一下</button>

    <script>
      var btn = document.querySelector("button");

      // 1.第一次注册事件
      btn.addEventListener("click", function () {


        alert("Hi");
      });

      // 2.第二次注册事件
      btn.addEventListener("click", function () {


        alert("Hello");
      });
    </script>
  </body>
</html>
点击按钮后,运行结果如下:先弹出警示框“Hi”,然后弹出警示框“Hello”

4.5.3 删除事件
删除事件:给元素删除事件,也称为解绑事件。
删除事件的方式,也根据注册时的方式,分为两种:
- 传统注册事件的删除方式:
eventTarget.onclick = null - 方法监听注册事件的删除方式:
removeEventListener()
removeEventListener(type, listener, useCapture):
type:监听事件的类型listener:需要删除的事件监听器函数useCapture:默认值为false,指定需要移除的事件监听器函数是否为捕获监听器还是冒泡监听器
<!DOCTYPE html>
<html lang="en">
  <head>
    <meta charset="UTF-8" />
    <meta http-equiv="X-UA-Compatible" content="IE=edge" />
    <meta name="viewport" content="width=device-width, initial-scale=1.0" />
    <title>Document</title>
  </head>
  <body>
    <button>传统注册事件</button>
    <button>方法监听注册事件</button>

    <script>
      var btn = document.querySelectorAll("button");

      // 1.传统注册事件
      btn[0].onclick = function () {


        alert("Hello");
        btn[0].onclick = null;
      };

      // 2.方法监听注册事件
      btn[1].addEventListener("click", fn);

      // addEventListener方法需要指定函数名,因此不能使用匿名函数
      function fn() {


        alert("Hello");
        btn[1].removeEventListener("click", fn);
      }
    </script>
  </body>
</html>
运行结果如下:两个按钮都是第一次点击时,弹出警示框“Hello”,后面再点击就不弹出警示框了

4.5.4 事件传播
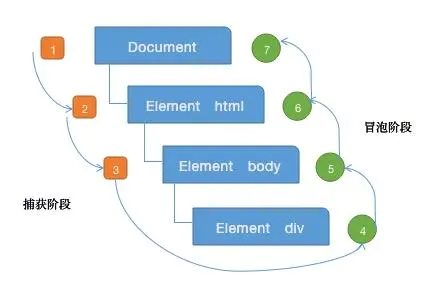
事件流:事件流描述的是从页面中接收事件的顺序,事件发生时会在元素节点之间按照特定的顺序传播,这个传播过程即DOM事件流。
事件冒泡:事件开始时由具体的元素接收,然后逐级向上传播到DOM最顶层节点的过程。
事件捕获:由DOM最顶层节点开始,然后逐级向下传播到最具体的元素接收的过程。
事件流分为三个阶段:
- 捕获阶段
- 当前目标阶段
- 冒泡阶段
DOM 事件流图解:
注:
1.js代码中只能执行捕获或冒泡阶段的其中一个
2.实际开发中,很少使用事件捕获,更关注事件冒泡
3.有些事件是没有冒泡的:如onblur、onfocus等
4.addEventListener(type, listener, useCapture):useCapture 为false或者忽略时,事件处于冒泡阶段;为true时,事件处于捕获阶段
1.冒泡阶段
<!DOCTYPE html>
<html lang="en">
  <head>
    <meta charset="UTF-8" />
    <meta http-equiv="X-UA-Compatible" content="IE=edge" />
    <meta name="viewport" content="width=device-width, initial-scale=1.0" />
    <title>Document</title>
    <style>
      .father {


        position: relative;
        width: 200px;
        height: 200px;
        background-color: #666;
        margin: 30px;
      }

      .son {


        position: absolute;
        width: 100px;
        height: 100px;
        background-color: orange;
        margin: auto;
        top: 0;
        left: 0;
        right: 0;
        bottom: 0;
      }
    </style>
  </head>
  <body>
    <div class="father">
      <div class="son"></div>
    </div>

    <script>
      // 1.绑定事件到子元素son,为冒泡阶段
      var son = document.querySelector(".son");
      son.addEventListener("click", function () {


        alert("son");
      });

      // 2.绑定事件到父元素father,为冒泡阶段
      var father = document.querySelector(".father");
      father.addEventListener("click", function () {


        alert("father");
      });
    </script>
  </body>
</html>
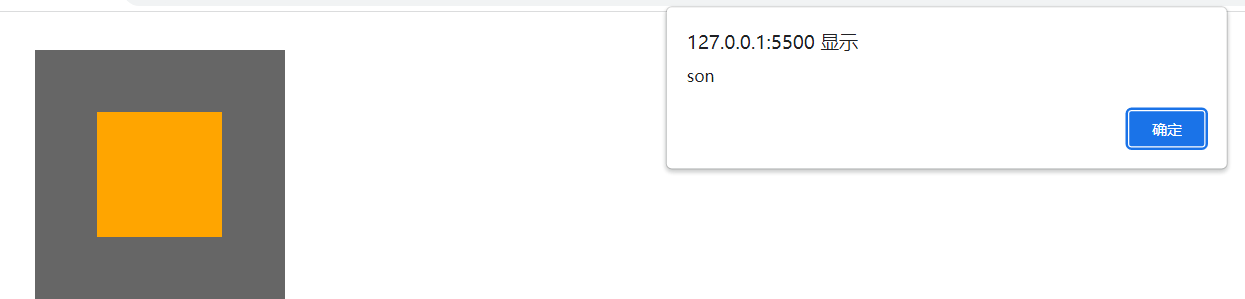
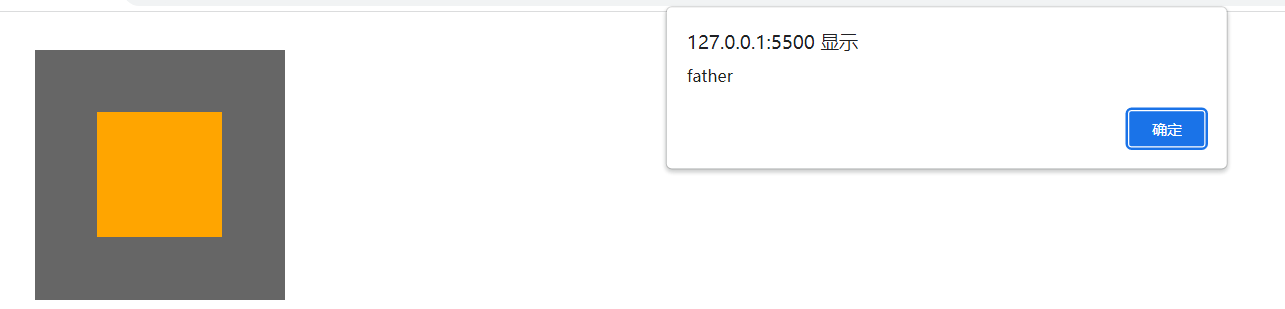
运行结果:点击橘色的子元素div,先弹出警示框 “son”,后弹出警示框 “father”
(释义:冒泡从下往上传递,点击子元素son以后,会先找到子元素并执行它的事件,再往上找到父元素后,执行父元素的事件)
2.捕获阶段
<!DOCTYPE html>
<html lang="en">
  <head>
    <meta charset="UTF-8" />
    <meta http-equiv="X-UA-Compatible" content="IE=edge" />
    <meta name="viewport" content="width=device-width, initial-scale=1.0" />
    <title>Document</title>
    <style>
      .father {


        position: relative;
        width: 200px;
        height: 200px;
        background-color: #666;
        margin: 30px;
      }

      .son {


        position: absolute;
        width: 100px;
        height: 100px;
        background-color: orange;
        margin: auto;
        top: 0;
        left: 0;
        right: 0;
        bottom: 0;
      }
    </style>
  </head>
  <body>
    <div class="father">
      <div class="son"></div>
    </div>

    <script>
      // 1.绑定事件到子元素son,为捕获阶段
      var son = document.querySelector(".son");
      son.addEventListener(
        "click",
        function () {


          alert("son");
        },
        true
      );

      // 2.绑定事件到父元素father,为捕获阶段
      var father = document.querySelector(".father");
      father.addEventListener(
        "click",
        function () {


          alert("father");
        },
        true
      );
    </script>
  </body>
</html>
运行结果:点击橘色的子元素div,先弹出警示框 “father”,后弹出警示框 “son”
(释义:捕获从上往下传递,点击子元素son以后,会先找到父元素并执行它的事件,再往下找到子元素后,执行子元素的事件)
4.5.5 事件对象
事件对象:事件对象代表事件的状态。事件发生后,跟事件相关的一系列信息数据的集合都放到这个对象里面,这个对象就是事件对象event,它包含很多属性和方法。
事件对象的常见属性和方法:
| 属性和方法 | 描述 |
|---|---|
e.target |
返回触发事件的对象 |
e.type |
返回事件的类型 |
e.preventDefault() |
阻止默认行为 |
e.stopPropagation() |
阻止冒泡 |
e.target和this的区别:
e.target:返回的是触发事件的对象this:返回的是绑定事件的对象
1.this 、e.target 和 e.type
<!DOCTYPE html>
<html lang="en">
  <head>
    <meta charset="UTF-8" />
    <meta http-equiv="X-UA-Compatible" content="IE=edge" />
    <meta name="viewport" content="width=device-width, initial-scale=1.0" />
    <title>Document</title>
  </head>
  <body>
    <ul>
      <li>新闻</li>
      <li>视频</li>
      <li>文库</li>
    </ul>

    <script>
      var ul = document.querySelector("ul");
      ul.addEventListener("click", function (e) {


        console.log(this); // 绑定事件的对象
        console.log(e.target); // 触发事件的对象
        console.log(e.type); // 事件的类型
      });
    </script>
  </body>
</html>
点击 “新闻”,运行结果如下:
2.阻止默认行为(事件):让链接不跳转,或者让提交按钮不提交
注:如果想让一个链接点击后不跳转,还可使用以下方法
href="javaScript:void(0);"href="javaScript:;"
<!DOCTYPE html>
<html lang="en">
  <head>
    <meta charset="UTF-8" />
    <meta http-equiv="X-UA-Compatible" content="IE=edge" />
    <meta name="viewport" content="width=device-width, initial-scale=1.0" />
    <title>Document</title>
  </head>
  <body>
    <a href="https://www.baidu.com/" target="_blank">百度链接</a>
    <form action="https://www.baidu.com/" target="_blank">
      <input type="submit" value="提交" />
    </form>

    <script>
      // 1.阻止链接跳转
      var a = document.querySelector("a");
      a.addEventListener("click", function (e) {


        e.preventDefault();
      });

      // 2.阻止表单提交
      var submit = document.querySelector("input");
      submit.addEventListener("click", function (e) {


        e.preventDefault();
      });
    </script>
  </body>
</html>
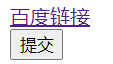
运行结果:点击 “百度链接” 和 “提交”都没有跳转
3.阻止冒泡
<!DOCTYPE html>
<html lang="en">
  <head>
    <meta charset="UTF-8" />
    <meta http-equiv="X-UA-Compatible" content="IE=edge" />
    <meta name="viewport" content="width=device-width, initial-scale=1.0" />
    <title>Document</title>
    <style>
      .father {


        position: relative;
        width: 200px;
        height: 200px;
        background-color: #666;
        margin: 30px;
      }

      .son {


        position: absolute;
        width: 100px;
        height: 100px;
        background-color: orange;
        margin: auto;
        top: 0;
        left: 0;
        right: 0;
        bottom: 0;
      }
    </style>
  </head>
  <body>
    <div class="father">
      <div class="son"></div>
    </div>

    <script>
      // 1.绑定事件到子元素son,为冒泡阶段
      var son = document.querySelector(".son");
      son.addEventListener("click", function (e) {


        alert("son");
        e.stopPropagation(); // 阻止事件冒泡
      });

      // 2.绑定事件到父元素father,为冒泡阶段
      var father = document.querySelector(".father");
      father.addEventListener("click", function (e) {


        alert("father");
      });
    </script>
  </body>
</html>
运行结果:点击子元素 ,只弹出警示框“son”,没有后续弹出“father”
(释义:点击子元素son以后,阻止冒泡,因此没有冒泡到父元素,父元素的事件行为不执行)

4.5.6 事件委托
事件委托:也称为事件代理或事件委派。
事件委托的原理:不是每个子节点单独设置事件监听器,而是将事件监听器设置在父节点上,然后利用冒泡原理影响设置每个子节点。
事件委托的作用:只操作了一次DOM,提高了程序的性能。
<!DOCTYPE html>
<html lang="en">
  <head>
    <meta charset="UTF-8" />
    <meta http-equiv="X-UA-Compatible" content="IE=edge" />
    <meta name="viewport" content="width=device-width, initial-scale=1.0" />
    <title>Document</title>
  </head>
  <body>
    <ul>
      <li>新闻</li>
      <li>视频</li>
      <li>文库</li>
    </ul>

    <script>
      var ul = document.querySelector("ul");

      // 将事件监听器设置在父节点上
      ul.addEventListener("click", function (e) {


        str = "当前触发的元素是" + '"' + e.target.innerText + '"';
        alert(str);
        e.target.style.backgroundColor = "orange";
      });
    </script>
  </body>
</html>
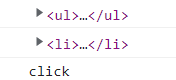
运行结果:点击 “新闻”,先弹出警示框,随后 “新闻” 的背景颜色变为橘色


4.5.7 鼠标事件
| 鼠标事件 | 描述 |
|---|---|
onclick |
鼠标点击左键触发 |
onmouseover |
鼠标经过触发 |
onmouseout |
鼠标离开触发 |
onfocus |
获得鼠标焦点触发 |
onblur |
失去鼠标焦点触发 |
onmousemove |
鼠标移动触发 |
onmouseup |
鼠标弹起触发 |
onmousedown |
鼠标按下触发 |
获得和失去焦点:
- 获得焦点:当鼠标点击输入框使其处于编辑状态,就获得了焦点。
- 失去焦点:当鼠标点击其他输入框或其他区域时,刚开始的那个输入框就属于失去焦点状态。
4.5.8 键盘事件
| 键盘事件 | 描述 |
|---|---|
onkeyup |
键盘按键松开时触发 |
onkeydown |
键盘按键按下时触发 |
onkeypress |
键盘按键按下时触发(不识别功能键) |
注:
onkeypress不识别功能键,如Ctrl、Shift、箭头等
5. JS BOM
5.1 BOM简介
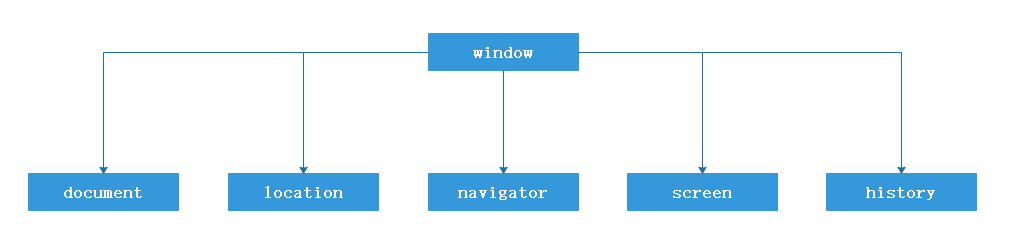
BOM概念:浏览器对象模型(Browser Object Model),它提供了独立于内容而与浏览器窗口进行交互的对象,其核心对象是 window。
BOM缺乏标准,兼容性较差,JavaScript语法的标准化组织是ECMA,DOM的标准化组织W3C,BOM最初是Netscape浏览器标准的一部分。
BOM的构成:
5.2 Window对象
Window对象是浏览器的顶级对象:
- 是 js访问浏览器窗口的一个接口
- 是一个全局对象,定义在全局作用域中的变量、函数都会window对象的属性和方法
注:在调用的时候可以忽略 window,如 alert()、prompt()等。
window对象的常见事件:
| 事件 | 描述 |
|---|---|
onload |
整个页面资源都加载完成时触发 |
onDOMContentLoaded |
DOM加载完成时触发 |
onresize |
浏览器窗口大小变化时触发 |
1.窗口加载事件
- 加载事件的作用:以前
script标签必须放在元素标签后面才生效,现在利用窗口加载事件,可以随意更改script标签所在的位置 onload:等待页面所有资源加载完成时触发onDOMContentLoaded:DOM加载完成时即可触发(不包括样式表、图片、flash等)
<!DOCTYPE html>
<html lang="en">
<head>
<meta charset="UTF-8" />
<meta http-equiv="X-UA-Compatible" content="IE=edge" />
<meta name="viewport" content="width=device-width, initial-scale=1.0" />
<title>Document</title>
</head>
<body>
<script>
// 1.onload 加载所有资源
window.addEventListener("load", function () {
var btn = document.querySelector("button");
btn.addEventListener("click", function () {
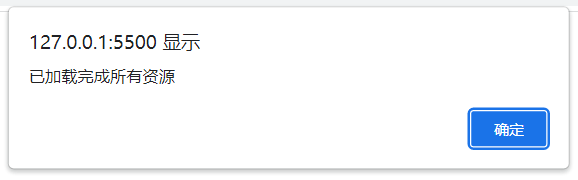
alert("已加载完成所有资源");
});
});
// 2.onDOMContentLoaded 仅加载DOM
window.addEventListener("DOMContentLoaded", function () {
var btn = document.querySelector("button");
btn.addEventListener("click", function () {
alert("已加载完成DOM资源");
});
});
</script>
<button>点击一下</button>
</body>
</html>
运行结果:点击按钮,先弹出警示框 “已加载完成DOM资源”,后弹出警示框 “已加载完成所有资源”
(释义:仅加载DOM资源的话速度更快,所以先执行onDOMContentLoaded事件,后执行onload事件)

2.调整窗口大小事件
<!DOCTYPE html>
<html lang="en">
<head>
<meta charset="UTF-8" />
<meta http-equiv="X-UA-Compatible" content="IE=edge" />
<meta name="viewport" content="width=device-width, initial-scale=1.0" />
<title>Document</title>
</head>
<body>
<script>
// onresize 浏览器窗口大小变化时触发
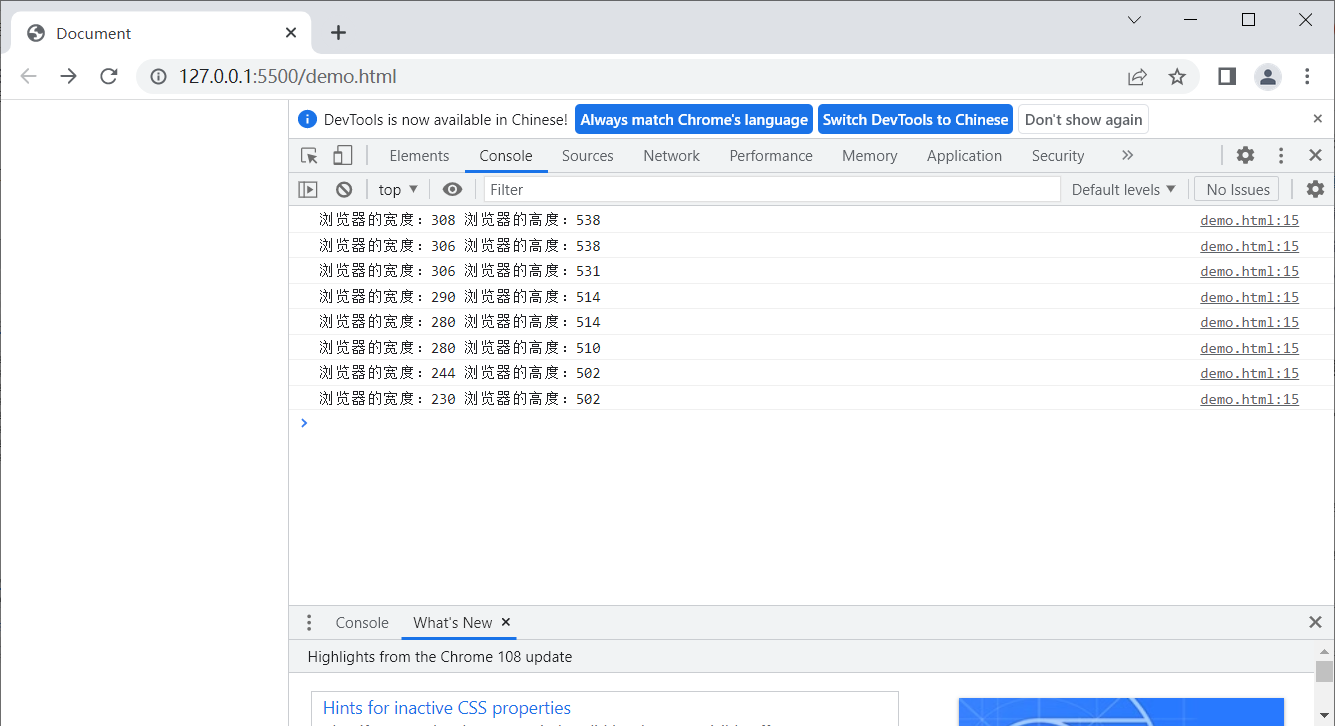
window.addEventListener("resize", function () {
browserWidth = "浏览器的宽度:" + window.innerWidth;
browserHeight = "浏览器的高度:" + window.innerHeight;
console.log(browserWidth, browserHeight);
});
</script>
</body>
</html>
运行结果:当调整浏览器窗口时,打印了浏览器的大小
5.3 Location对象
Location对象:可用于获取当前页面地址(URL),并且可以把浏览器重定向到新页面。
URL:统一资源定位器(Uniform Resource Locator),是互联网标准资源的地址。互联网上的每个文件都有一个唯一的URL,它包含的信息指出文件的位置以及浏览器应该怎么处理它。
URL的语法:
protocol :// hostname[:port] / path / [:parameters][?query]#fragment
URL的组成:
| 组成 | 描述 |
|---|---|
protocol |
通信协议,常见的有HTTP、FTP等 |
hostname |
域名,可以是主机名或IP地址 |
port |
端口号,省略则使用默认端口号 |
path |
路径,由 / 符号隔开的字符串, |
query |
参数,以键值对的形式通过 & 符号隔开 |
fragment |
片段,# 后面内容,常见于链接 |
location对象的属性:
| 属性 | 描述 |
|---|---|
location.href |
获取或设置整个URL |
location.protocol |
返回协议名 |
location.host |
返回主机名加端口号 |
location.hostname |
返回主机名 |
location.port |
返回端口号 |
location.pathname |
返回路径 |
location.search |
返回参数 |
location.hash |
返回片段 |
location对象的方法:
| 方法 | 描述 |
|---|---|
location.assign() |
重定向页面 |
location.replace() |
替换当前页面 |
location.reload() |
重新加载页面 |
注:
1.replace():因为不记录历史,所以不能后退页面
2.reload():相当于页面上的刷新按钮或按键F5
<!DOCTYPE html>
<html lang="en">
  <head>
    <meta charset="UTF-8" />
    <meta http-equiv="X-UA-Compatible" content="IE=edge" />
    <meta name="viewport" content="width=device-width, initial-scale=1.0" />
    <title>Document</title>
  </head>
  <body>
    <button>重定向页面</button>
    <button>替换当前页面</button>
    <button>重新加载页面</button>

    <script>
      var btn = document.querySelectorAll("button");

      // 1.重定向页面
      btn[0].addEventListener("click", function () {


        location.assign("https://www.baidu.com/");
      });

      // 2.替换当前页面
      btn[1].addEventListener("click", function () {


        location.replace("https://www.baidu.com/");
      });

      // 3.重新加载页面
      btn[2].addEventListener("click", function () {


        location.reload();
      });
    </script>
  </body>
</html>
5.4 Navigator对象
Navigator对象:包含有关浏览器的信息,它有很多属性,如 userAgent、appVersion等。
navigator对象的常用属性:
| 属性 | 描述 |
|---|---|
navigator.userAgent |
浏览器代理 |
navigator.product |
浏览器引擎 |
navigator.platform |
浏览器平台 |
navigator.language |
浏览器语言 |
navigator.appName |
浏览器应用程序名称 |
navigator.appCodeName |
浏览器应用程序代码名称 |
navigator.appVersion |
浏览器版本 |
navigator.cookieEnabled |
cookie是否启用 |
navigator.onLine |
浏览器是否在线 |
<!DOCTYPE html>
<html lang="en">
  <head>
    <meta charset="UTF-8" />
    <meta http-equiv="X-UA-Compatible" content="IE=edge" />
    <meta name="viewport" content="width=device-width, initial-scale=1.0" />
    <title>Document</title>
  </head>
  <body>
    <script>
      console.log(navigator.userAgent); // Mozilla/5.0 (Windows NT 10.0; Win64; x64) AppleWebKit/537.36 (KHTML, like Gecko) Chrome/108.0.0.0 Safari/537.36
      console.log(navigator.product); // Gecko
      console.log(navigator.platform); // Win32
      console.log(navigator.language); // zh-CN

      console.log(navigator.appName); // Netscape
      console.log(navigator.appCodeName); // Mozilla
      console.log(navigator.appVersion); // 5.0 (Windows NT 10.0; Win64; x64) AppleWebKit/537.36 (KHTML, like Gecko) Chrome/108.0.0.0 Safari/537.36

      console.log(navigator.cookieEnabled); // true
      console.log(navigator.onLine); // true
    </script>
  </body>
</html>
5.5 Screen对象
Screen对象:包含用户屏幕的信息,由浏览器决定提供屏幕对象,此对象一般通过当前浏览器窗口活动状态动态检测来得到。
screen对象的常用属性:
| 属性 | 描述 |
|---|---|
screen.width |
屏幕的宽度 |
screen.height |
屏幕的高度 |
screen.availWidth |
屏幕的可用宽度 |
screen.availHeight |
屏幕的可用高度 |
screen.colorDepth |
屏幕的色彩深度 |
screen.pixelDepth |
屏幕的像素深度 |
注:
1.可用的宽高度,是减去诸如窗口工具条之类的界面特征之后的宽高度
2.对于现代计算机,颜色深度和像素深度是相等的
3.色彩深度:现代计算机都使用 24 位或 32 位硬件的色彩分辨率
- 24 bits =16,777,216 种不同的 “True Colors”
- 32 bits = 4,294,967,296 中不同的 “Deep Colors”
<!DOCTYPE html>
<html lang="en">
  <head>
    <meta charset="UTF-8" />
    <meta http-equiv="X-UA-Compatible" content="IE=edge" />
    <meta name="viewport" content="width=device-width, initial-scale=1.0" />
    <title>Document</title>
  </head>
  <body>
    <script>
      console.log(screen.width); // 1536
      console.log(screen.height); // 864
      console.log(screen.availWidth); // 1536
      console.log(screen.availHeight); // 864
      console.log(screen.colorDepth); // 24
      console.log(screen.pixelDepth); // 24
    </script>
  </body>
</html>
5.6 History对象
History对象:包含浏览器历史,允许操作浏览器的曾经在标签页或者框架里访问的会话历史记录。
history对象的常用方法:
| 方法 | 描述 |
|---|---|
history.forward() |
前进功能 |
history.back() |
后退功能 |
history.go() |
前进后退功能 |
注:
1.forward()和back(),相当于页面上的前进和后退按钮。
2.go()中的参数是正数代表前进,负数代表后退;如go(1)为前进一个页面,go(-1)为后退一个页面
例:
1.新建index.html,内容如下
<!DOCTYPE html>
<html lang="en">
  <head>
    <meta charset="UTF-8" />
    <meta http-equiv="X-UA-Compatible" content="IE=edge" />
    <meta name="viewport" content="width=device-width, initial-scale=1.0" />
    <title>Document</title>
  </head>
  <body>
    <a href="list.html">点击去往列表页</a>
    <button>前进</button>

    <script>
      var btn = document.querySelector("button");
      btn.addEventListener("click", function () {


        history.forward();
      });
    </script>
  </body>
</html>
2.新建list.html,内容如下
<!DOCTYPE html>
<html lang="en">
  <head>
    <meta charset="UTF-8" />
    <meta http-equiv="X-UA-Compatible" content="IE=edge" />
    <meta name="viewport" content="width=device-width, initial-scale=1.0" />
    <title>Document</title>
  </head>
  <body>
    <a href="index.html">点击去往首页</a>
    <button>后退</button>

    <script>
      var btn = document.querySelector("button");
      btn.addEventListener("click", function () {


        history.back();
      });
    </script>
  </body>
</html>
运行结果:打开index.html,点击链接去往列表页,再点击链接回到首页,随后再点击前进和后退按钮,可以观察页面的前进后退情况。
前进:
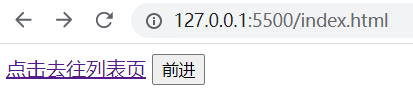
后退:
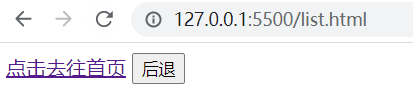
5.7 定时器
| 方法 | 描述 |
|---|---|
setTimeout() |
设置一个定时器,到时间后执行调用函数 |
clearTimeout() |
取消之前 setTimeout() 建立的定时器 |
setInterval() |
设置一个定时器,周期性执行调用函数 |
clearInterval() |
Cancel the timer established by setInterval() before |
1. setTimeout(): After a delay, call the function
var timerID = setTimeout(fn, delay):
timerID: The number of the timerfn: function executed after the expiration timedelay: Delay time, in milliseconds
<!DOCTYPE html>
<html lang="en">
  <head>
    <meta charset="UTF-8" />
    <meta http-equiv="X-UA-Compatible" content="IE=edge" />
    <meta name="viewport" content="width=device-width, initial-scale=1.0" />
    <title>Document</title>
  </head>
  <body>
    <script>
      var timer = setTimeout(callback, 5000); // 5秒后调用callback()函数

      function callback() {


        console.log("Hello World");
      }
    </script>
  </body>
</html>
2. clearTimeout(): Cancel the timer setTimeout()established
clearTimeout(timerID): The number of the timer establishedtimerID beforesetTimeout()
<!DOCTYPE html>
<html lang="en">
  <head>
    <meta charset="UTF-8" />
    <meta http-equiv="X-UA-Compatible" content="IE=edge" />
    <meta name="viewport" content="width=device-width, initial-scale=1.0" />
    <title>Document</title>
  </head>
  <body>
    <button>点击停止定时器</button>
    <script>
      var timer = setTimeout(callback, 5000); // 5秒后调用callback()函数
      function callback() {


        console.log("Hello World");
      }

      var btn = document.querySelector("button");
      btn.addEventListener("click", function () {


        clearTimeout(timer); // 停止定时器timer
        console.log("定时器已停止");
      });
    </script>
  </body>
</html>
3. setInterval(): Periodically call the function
var timerID = setInterval(fn, delay):
timerID: The number of the timerfn: Call the function periodically based on the delayed time as the time intervaldelay: Delay time, in milliseconds
<!DOCTYPE html>
<html lang="en">
  <head>
    <meta charset="UTF-8" />
    <meta http-equiv="X-UA-Compatible" content="IE=edge" />
    <meta name="viewport" content="width=device-width, initial-scale=1.0" />
    <title>Document</title>
  </head>
  <body>
    <script>
      var timer = setInterval(callback, 1000); // 每1秒调用一次callback()函数

      function callback() {


        console.log("Hello World");
      }
    </script>
  </body>
</html>
4. clearInterval(): Cancel the timer setInterval()established
clearInterval(timerID): The number of the timer establishedtimerID beforesetInterval()
<!DOCTYPE html>
<html lang="en">
  <head>
    <meta charset="UTF-8" />
    <meta http-equiv="X-UA-Compatible" content="IE=edge" />
    <meta name="viewport" content="width=device-width, initial-scale=1.0" />
    <title>Document</title>
  </head>
  <body>
    <button>点击停止定时器</button>
    <script>
      var timer = setInterval(callback, 1000); // 每1秒调用一次callback()函数
      function callback() {


        console.log("Hello World");
      }

      var btn = document.querySelector("button");
      btn.addEventListener("click", function () {


        clearInterval(timer); // 停止定时器timer
        console.log("定时器已停止");
      });
    </script>
  </body>
</html>