Table of contents
2. Advantages and disadvantages of blueprint
2. Getting Started with Blueprint
1. Blueprint Preface
1. What is a blueprint?
The editing function of the blueprint was introduced from the Unreal 4 engine. Students who have read my previous blog posts should probably understand that Unreal’s overall strategy has undergone a qualitative change during the Unreal 4 period, turning the engine from an enterprise to a civilian. Therefore , a more friendly and simple blueprint system came into being.
What exactly is the blueprint, here are a few immature summaries, I hope it can be helpful to everyone:
1. Blueprint is a file format in Unreal Engine, which is analogous to script in unity, including various logical contents.
2. The logic of the blueprint is based on nodes, and the pre- and post-relationships are processed in the form of connections
3. Modularize and visualize the code, so that users can complete the logical content without any program foundation
2. Advantages and disadvantages of blueprint
As mentioned earlier, the blueprint, as a strategic weapon for the civilianization of Unreal Engine, has indeed achieved the desired goal with the help of its ultra-low threshold that does not require a program foundation, but there are advantages and disadvantages. Now there are a lot of declarations on the Internet, and there are also many questions about whether to learn the blueprint, so I will give you a rough analysis here.
The advantages of blueprints are obvious. Easy to use, modular management, high development efficiency.
The disadvantages of blueprints are also obvious to all. Unfriendly to code farmers, high maintenance costs, difficult to read.
Therefore, it can be seen that specific problems should be analyzed in detail. For coders who already have a c++ foundation, learning blueprints is indeed unnecessary, but for students who do not have a programming foundation and want to get started quickly, they can bypass the mountain of c++ , Turning to the embrace of the blueprint, not only saves time, but also improves efficiency, and it is also a wise choice.
3. Where to use blueprints
As mentioned earlier, blueprints can be compared to unity scripts, and blueprints can be used wherever logic is used.
As small as a data calculation, as large as the action feedback of a character, and even the material fusion on a plane, all can be realized through blueprints.
The blueprint system prepares a large number of nodes for users, covering almost all the functions that need to be used. If you have mastered the blueprint system proficiently, then you will basically master most of the Unreal Engine.
2. Getting Started with Blueprint
1. How to enter
There are many ways to enter the blueprint. You can directly open the level card blueprint through the interface, or you can create the blueprint yourself and open it separately.
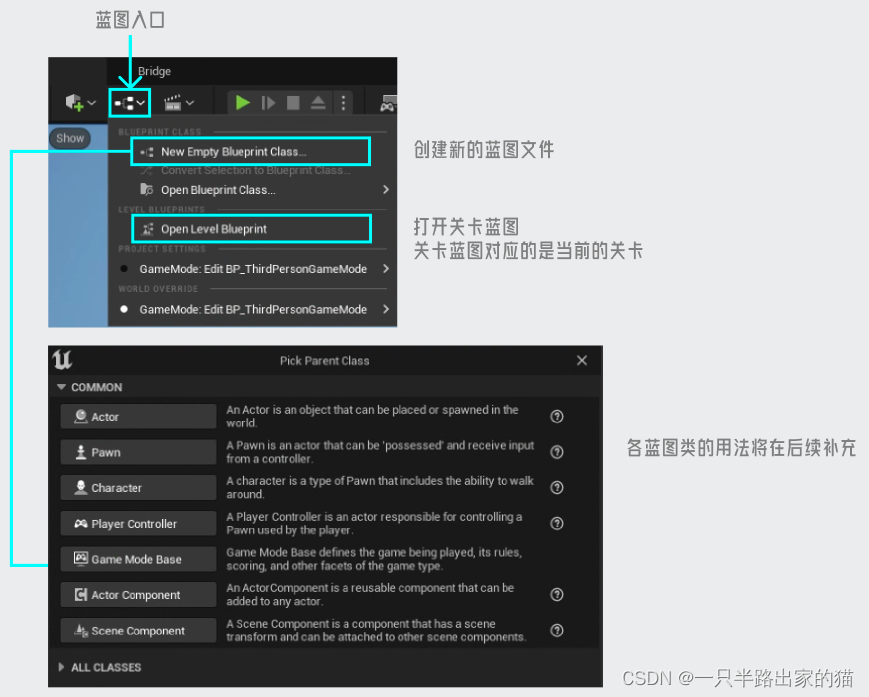
One issue involved here is which blueprint one wishes to enter. To use a more popular metaphor, all objects in Unreal can be regarded as a machine, and the blueprint is their host. Which machine you want to control, you can enter which host to operate.
In Unreal Engine, there is a very commonly used blueprint called level blueprint, which is used to control the current entire level. This blueprint is actually mounted on the level as the default blueprint, so there is no need to actively mount the level.
2. Panel description
toolbar

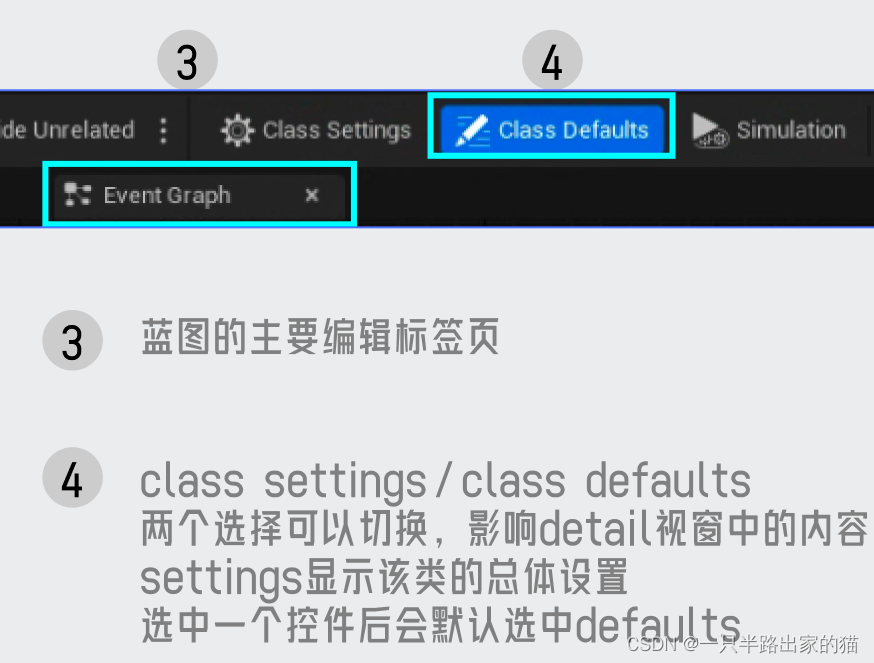
my blueprint

details panel
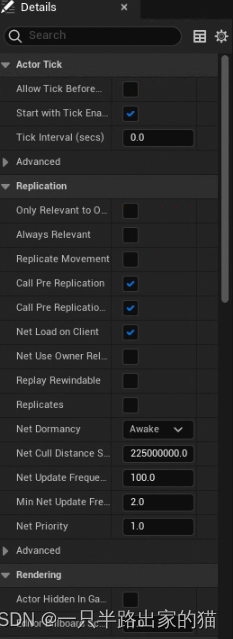
The content in the detail panel will change with the selected object. Due to too much content, I will gradually understand it in future productions.
Chart editor

At the center of the vision is the blueprint's graph editor. Each block is a node, and the desired logic is completed by connecting the nodes.
3. Basic steps
Let's start with hello world first!
1. Start the process

Delete useless nodes, leaving Event BeginPlay.
You can see that this node is red. The color of the node represents some meanings, which will be explained in the next article.
2. Add nodes
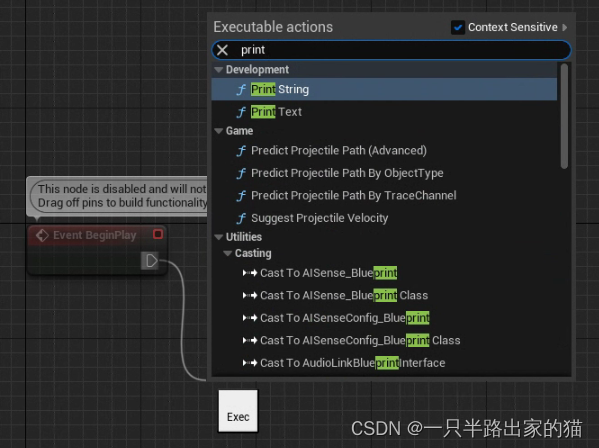
After drawing a line from the arrow, search for the desired node in the search bar.
Here I searched for the simplest print node.
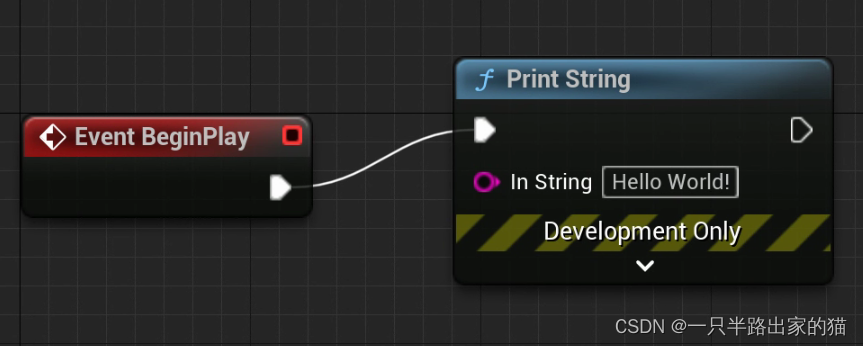
You can see that a new node has been added to the line, and the prompt information on the red node has disappeared.
3. Compile
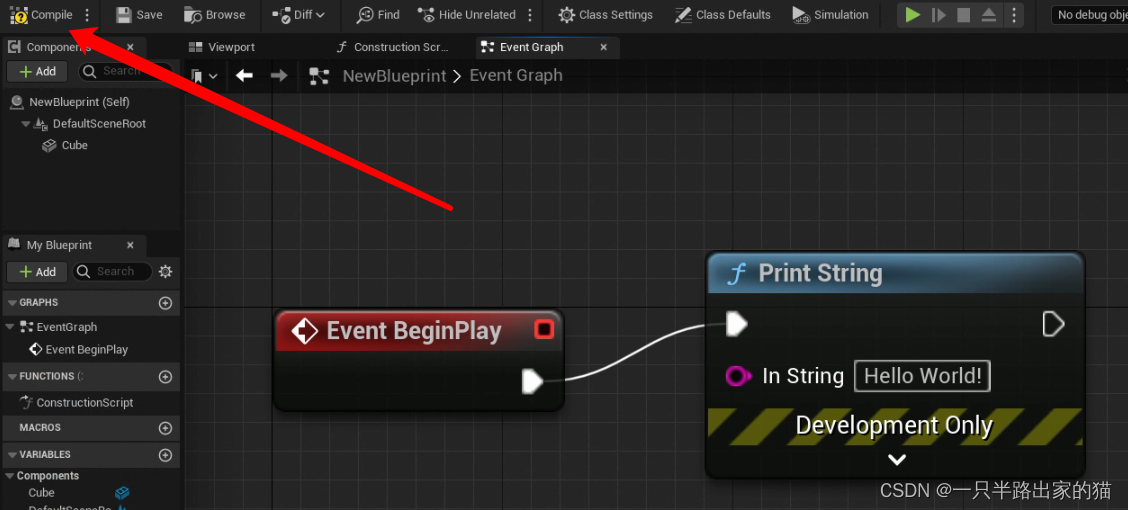
Click on this button with the yellow exclamation point so it turns green.
Get into the good habit of compiling.
4. Run
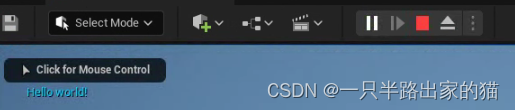
Drag this file into the scene and click Run.
You can see the familiar hello world in the upper left corner.
The above is the most basic runnable blueprint. Is there no difference with the code? ^o^
4. Panel operation
As a visual code panel, visual effects become particularly important, so here are a lot of convenient operations prepared for the visual party, which can make your node blocks arranged elegantly and delicately.
1. Hold down the right mouse button and drag the entire chart panel
2. Press and hold the left mouse button on the node to move the node position
3. The mouse wheel zooms in and out of the chart panel
4. Select multiple nodes with the left mouse button, press and hold one of them, and move the selected node
5. The commonly used shortcut keys cut, copy, paste, and delete are all valid for the selected node
6. Right-click a node, select Node Note, and add note text for a single node
7. Right-click multiple nodes, select node annotation, and an annotation group will be generated, which can be moved as a whole, and the group color can be modified. This behavior is highly recommended and can develop a good tidying habit