Article directory
Introduction to Intranet Penetration
-
It is a technology that exposes intranet services through the public network, allowing intranet services to be accessed by external networks. The following are some applications of intranet penetration:
-
Remote control: Through intranet penetration technology, remote control of intranet computers can be realized, such as remote desktop, remote command line, etc.
-
File sharing: Intranet penetration can expose the file sharing service of the intranet to the public network, which is convenient for users to access and download intranet files on the external network.
-
Online games: Some online games need to be in the same local area network to play online games. Through intranet penetration technology, players can play online games in different places.
-
Server construction: Through the intranet penetration technology, the intranet server can be exposed to the public network, which is convenient for users to access and use the services on the intranet server on the external network.
-
Remote control of IoT devices: Through intranet penetration technology, remote control of IoT devices in the intranet can be realized, such as remote control of smart home devices.
In short, intranet penetration technology can expand the coverage of intranet services and improve the availability and flexibility of services.
A few simple steps to realize Linux SFTP combined with cpolar intranet penetration tool to realize remote connection
1. View address
To check the Linux IP address, we type:
ip address
Then you can see the LAN IP address of the device

2. LAN test connection
We open the connection tool, use winSCP connection test here, select SFTP as the protocol, enter the ip address viewed above, the default port number is 22, enter the user name and password, and click Login

listing directory indicates success

3. Create a tcp tunnel
3.1. Install cpolar
cpolar official website: https://www.cpolar.com/
- Support one-click automatic installation script
curl -L https://www.cpolar.com/static/downloads/install-release-cpolar.sh | sudo bash
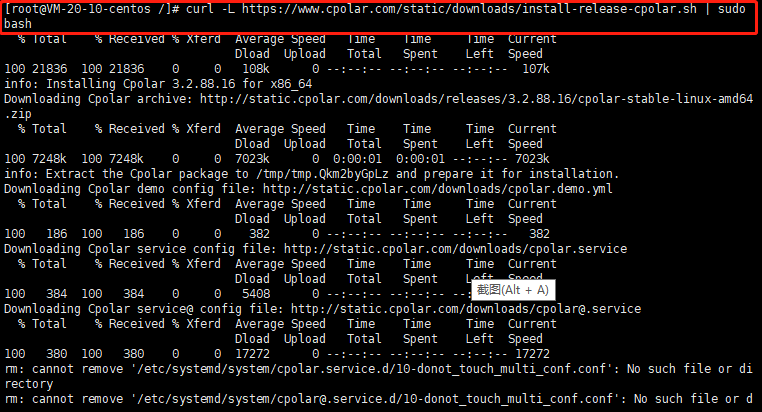
- View version number
cpolar version
The version number appears to indicate that the installation was successful

- token authentication
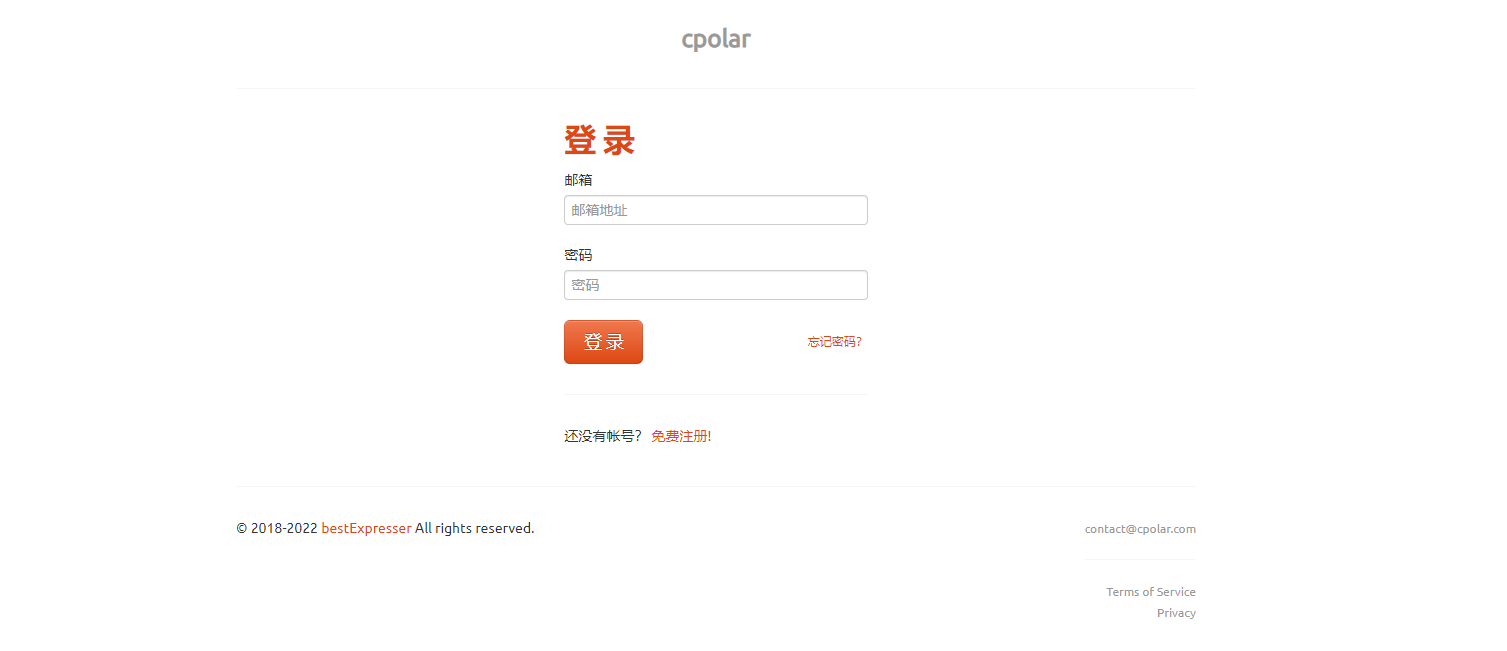
Enter the official website of cpolar, click Free Registration to register an account
After the account is successfully registered and logged in, click the verification on the left to view your authentication token

Then copy the token and execute the following command on the copied token
cpolar authtoken xxxxxx(复制的token)

/usr/local/etc/cpolar/cpolar.yml indicates the path where the cpolar configuration file is located
- Set the cpolar configuration service to start automatically at boot, and add services to the system
sudo systemctl enable cpolar
- Start the cpolar service
sudo systemctl start cpolar
- View service status
sudo systemctl status cpolar
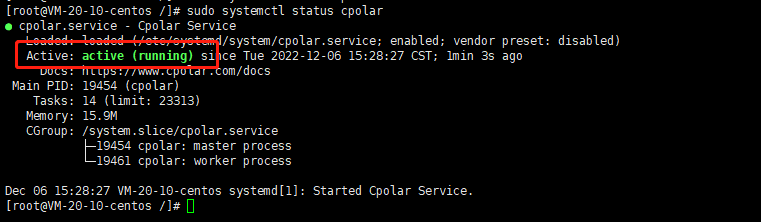
Note: active(running) indicates that the service has been started and is running
- Open the cpolar web ui management interface
After installing cpolar intranet penetration locally in the centOS system, access the local port 9200 of centOS on an external browser, access method: LAN ip+:9200, open the cpolar web ui interface,
After installing cpolar, a tunnel with ssh name will be generated by default. If you have ssh, you can jump directly to view the list of online tunnels, and then connect remotely

If not, we click Tunnel Management on the left dashboard - Create Tunnel. Since the default ssh connection is port 22, we need to create a tcp tunnel pointing to port 22:
- Tunnel name: can be customized, be careful not to repeat
- protocol: tcp
- Local address: 22
- Domain Type: Choose a random domain name
- Region: Select China VIP Top
click创建

After creation, open the online tunnel list and check the random public network tcp address

4. Remote access
Then we continue to use winSCP, enter the ssh connection public network address and port number created above, and then remote FTP transmission

When prompted to save the secret key, click Yes

You can see the directory list, indicating that the connection is successful

5. Fixed TCP address
The temporary TCP data tunnel established above through cpolar successfully connected to the centos system through FTP. However, the TCP data tunnel at this time is still a random temporary TCP tunnel, and the port number will change every 24 hours. If we want the data tunnel between different devices to exist stably for a long time, we need further settings (because the fixed TCP tunnel will occupy cpolar server resources for a long time, so this service has to be included in the VIP project). Now, let us set up a TCP data tunnel that can exist stably for a long time.
To establish a stable TCP data tunnel, we first need to log in to the cpolar official website and enter the "reserved" interface of the dashboard


In the reserved interface, find the "Reserved TCP address" item. Under this item, we fill in some necessary information, such as the tunnel name to identify the data tunnel, the area where the tunnel is used, and so on.

After filling in the information, click the "Reserve" button on the right to fix the tunnel in the background of the cpolar official website. At this time, cpolar will generate a tunnel port, which is the fixed address of our ssh connection to the centos system

Then we go back to the cpolar interface, open the "Tunnel List", find the random temporary TCP tunnel created before, enter the "Edit" page,

Paste the tunnel port we obtained on the cpolar official website into the "Reserved TCP Address" column, and then click the "Update" button below.

Then check the online tunnel list again and find that the public network address corresponding to the ssh tunnel has become a fixed address reserved by our official website

After fixing the address, we again use our fixed tcp address to FTP the connection.

The linux directory is listed to indicate success, and then you can get files from each other
