
Abstract: The fatigue driving detection system based on YOLOv5 uses deep learning technology to detect fatigue behaviors in common driving pictures, videos and real-time videos, and recognizes the results of closing eyes and yawning, and records and saves them to prevent traffic accidents. This paper introduces the implementation principle of the fatigue driving detection system in detail, and gives the implementation code of Python , the training data set and the UI interface of Pyqt . In the interface, various pictures and videos can be selected for detection and recognition, and multiple targets in the image can be recognized and classified. The blog post provides a complete Python code and usage tutorial, which is suitable for beginners to refer to. For the complete code resource file, please go to the download link at the end of the article. The catalog of this blog post is as follows:
Article Directory
Demonstration and introduction of fatigue driving detection system based on YOLOv5 (Python+fresh interface+dataset)
foreword
Fatigue driving refers to the changes in the psychological skills and physiological mechanism of the driver after long-term continuous driving, which is objectively manifested as a decline in driving skills, and shows drowsiness, unresponsiveness, weakness of limbs, and inattention. and reduced ability to judge. According to incomplete statistics, 50% of traffic accidents are caused by driver's unconsciousness, which leads to traffic accidents.
Real-time detection of the driver's fatigue state is a key part of safe driving, so it is necessary to detect the driver's fatigue state in real time and give an early warning when driving a vehicle. The driver fatigue state detection method based on visual features mainly uses the camera to collect the facial features of the driver in the driving state in real time, and then uses the method based on vision and image processing to obtain the driver's eyes, mouth and head. Characteristic information such as internal area information. Finally, a certain discriminant method is used to analyze the extracted driver's blink frequency, yawning and other features to detect the driver's fatigue state. With the in-depth application of current deep learning methods in the direction of target detection, the target detection method based on YOLOv5 has the possibility and application prospect of application.
The fatigue driving detection system based on YOLOv5 applies deep learning technology to detect fatigue driving behaviors that may exist in the common driving process, including common behaviors such as closing eyes and yawning, so as to facilitate the monitoring and analysis of the driver's safe driving; User management; for pictures, videos and real-time pictures captured by the camera, the system can detect fatigue driving behavior in the picture; the system supports the recording, display and saving of results, and the results of each detection are recorded in a table. In this regard, here is the interface designed by the blogger. The simple style of the same style, the function can also meet the recognition and detection of pictures, videos and cameras. I hope you can like it. The initial interface is as follows:

The screenshot of the interface when detecting categories (click on the picture to enlarge) is as shown below, which can identify multiple categories in the screen, and can also enable camera or video detection:
For the detailed function demonstration effect, please refer to the blogger’s B station video or the animation demonstration in the next section. Friends who think it is good, please like, follow and bookmark! The design workload of the system UI interface is relatively large, and the interface beautification needs to be carefully crafted. If you have any suggestions or opinions, you can comment and exchange them below.
1. Effect demonstration
Let’s take a look at the recognition effect through the animation. The main function of the system is to recognize the fatigue driving behavior in pictures, videos and camera images. The recognition results are visually displayed on the interface and images, and multiple face display options are provided. The function and demonstration effect are as follows.
(1) System introduction
After reviewing relevant literature, there are roughly three types of fatigue in human facial expressions: yawning (opening the mouth and maintaining this state for a relatively long time), blinking (or slightly closing the eyes, the number of blinks increases at this time, and the blinking speed slow down), etc. Here, YOLOv5 is used to identify these data features, analyze the driver's fatigue driving behavior in real time, and make timely safety reminders.
(2) Technical features
(1) YOLO v5 algorithm is implemented, and the model can be switched and updated with one key;
(2) Detect fatigue driving behaviors in pictures, videos and other images; (3)
Real-time detection by camera monitoring, portable display, recording and storage;
(4) Support users Login, registration, visualization of detection results;
(5) provide training data sets and codes, and retrain models;
(3) User registration and login interface
For the system login interface as shown in the figure below, you can enter the user name and password to log in and register, and you can enter the main interface after the input is correct.

(4) Select image recognition
The system can select a picture file for recognition. After clicking the picture selection button icon to select a picture, all face recognition results will be displayed. You can check a single result through the drop-down box to specifically judge a certain fatigue driver. The interface display of this function is shown in the figure below:

(5) Video recognition effect display
If you want to identify the fatigue driving situation in the video, you can click the video button to select the video to be detected, the system will automatically analyze the video frame by frame to recognize the face, and record the result of fatigue driving in the lower right corner table, the effect is as shown in the figure below Show:

(6) Camera detection effect display
In a real scene, if you need to use the device camera to obtain real-time images and identify the fatigue driving behavior in the images, you can click the camera button and the system will enter the ready state. The system will display the real-time images and begin to detect the drivers in the images. Show the following picture:

2. Fatigue driving detection
(1) Fatigue driving data set
The fatigue driving data set we use here includes 656 pictures in the training data set, 188 pictures in the verification set, and 94 pictures in the test set, a total of 938 pictures.

Each image provides image tag information, the bounding box of fatigue driving in the image, and the data set is decompressed to obtain the following picture.

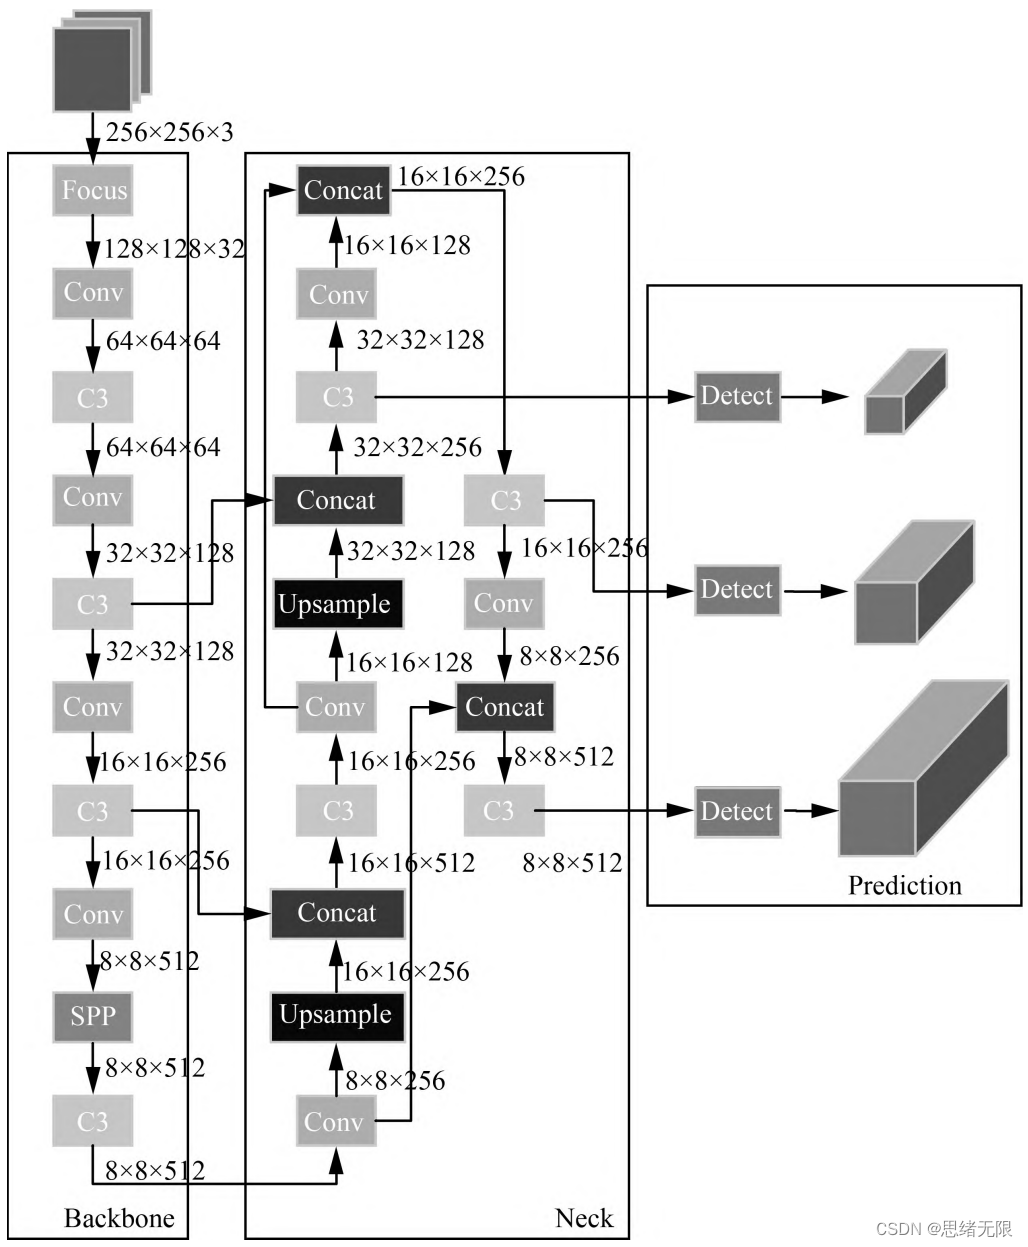
(2) Network structure
The Yolov5 network structure is composed of Input, Backbone, Neck, and Prediction. The input part of Yolov5 is the input end of the network, and the Mosaic data enhancement method is used to randomly crop the input data and then stitch them together. Backbone is the part of the network where Yolov5 extracts features, and the feature extraction capability directly affects the performance of the entire network. Yolov5's Backbone proposed a new Focus structure compared to the previous Yolov4. The Focus structure is to slice the picture, and transfer the W (width) and H (height) information to the channel space, so that a 2-fold downsampling operation is performed without losing any information.
(3) Training process
Network training Due to the large amount of data, the data is divided into multiple batches during the experiment. Each batch contains a certain number of images. After forward and backward propagation, the network parameters are updated to train a network with appropriate errors. During the test, the image is recognized by the network, and the feasibility of the network is verified according to the obtained recognition accuracy.
After processing the data set introduced above, the label files are converted into the label format required for YOLOv5 training. Based on this data set, we set the necessary parameters in train.py and run the script for model training. The training process is in the terminal is displayed as shown in the figure below.

In deep learning, we usually observe the model training situation through the curve of the loss function decline. The YOLOv5 training mainly includes three aspects of loss: rectangular box loss (box_loss), confidence loss (obj_loss) and classification loss (cls_loss). The model training curve is shown in the figure below.

Generally, we will use the recall rate recall and precision precision. The two indicators p and r simply judge the quality of the model from one angle. In order to comprehensively evaluate the performance of target detection, the average average density map is generally used to further evaluate the model. good or bad. By setting different confidence thresholds, we can get the p-value and r-value calculated by the model under different thresholds. In general, the p-value and r-value are negatively correlated. After drawing, we can get the following figure the curve shown.

(4) Prediction process
After the training is completed, the best model is obtained. Next, we input the frame image to the network for prediction, so as to obtain the prediction result. The code of the prediction method (predict.py) part is as follows:
def predict(img):
    img = torch.from_numpy(img).to(device)
    img = img.half() if half else img.float()
    img /= 255.0
    if img.ndimension() == 3:
        img = img.unsqueeze(0)

    t1 = time_synchronized()
    pred = model(img, augment=False)[0]
    pred = non_max_suppression(pred, opt.conf_thres, opt.iou_thres, classes=opt.classes,
                               agnostic=opt.agnostic_nms)
    t2 = time_synchronized()
    InferNms = round((t2 - t1), 2)

    return pred, InferNms
After getting the prediction result, we can frame the target in the frame image. The following is the script to read the video file and detect it. First, the image data is preprocessed and sent to predict for detection, and then the position of the marked frame is calculated and displayed in the figure. Mark it out.
if __name__ == '__main__':
    # video_path = 0
    video_path = "./UI_rec/test_/疲劳驾驶检测.mp4"
    # 初始化视频流
    vs = cv2.VideoCapture(video_path)
    (W, H) = (None, None)
    frameIndex = 0  # 视频帧数

    try:
        prop = cv2.CAP_PROP_FRAME_COUNT
        total = int(vs.get(prop))
        # print("[INFO] 视频总帧数:{}".format(total))
    # 若读取失败,报错退出
    except:
        print("[INFO] could not determine # of frames in video")
        print("[INFO] no approx. completion time can be provided")
        total = -1

    fourcc = cv2.VideoWriter_fourcc(*'XVID')
    ret, frame = vs.read()
    vw = 850
    vh = 500
    print("[INFO] 视频尺寸:{} * {}".format(vw, vh))
    output_video = cv2.VideoWriter("./results.avi", fourcc, 20.0, (vw, vh))  # 处理后的视频对象

    # 遍历视频帧进行检测
    while True:
        # 从视频文件中逐帧读取画面
        (grabbed, image) = vs.read()
        image = cv2.resize(image, (850, 500))
        # 若grabbed为空,表示视频到达最后一帧,退出
        if not grabbed:
            print("[INFO] 运行结束...")
            output_video.release()
            vs.release()
            exit()
        # 获取画面长宽
        if W is None or H is None:
            (H, W) = image.shape[:2]

        img0 = image.copy()
        img = letterbox(img0, new_shape=imgsz)[0]
        img = np.stack(img, 0)
        img = img[:, :, ::-1].transpose(2, 0, 1)  # BGR to RGB, to 3x416x416
        img = np.ascontiguousarray(img)

        pred, useTime = predict(img)

        det = pred[0]
        p, s, im0 = None, '', img0
        if det is not None and len(det):  # 如果有检测信息则进入
            det[:, :4] = scale_coords(img.shape[1:], det[:, :4], im0.shape).round()  # 把图像缩放至im0的尺寸
            number_i = 0  # 类别预编号
            detInfo = []
            for *xyxy, conf, cls in reversed(det):  # 遍历检测信息
                c1, c2 = (int(xyxy[0]), int(xyxy[1])), (int(xyxy[2]), int(xyxy[3]))
                # 将检测信息添加到字典中
                detInfo.append([names[int(cls)], [c1[0], c1[1], c2[0], c2[1]], '%.2f' % conf])
                number_i += 1  # 编号数+1

                label = '%s %.2f' % (names[int(cls)], conf)

                # 画出检测到的目标物
                plot_one_box(image, xyxy, label=label, color=colors[int(cls)])

        # 实时显示检测画面
        cv2.imshow('Stream', image)
        output_video.write(image)  # 保存标记后的视频
        if cv2.waitKey(1) & 0xFF == ord('q'):
            break

        # print("FPS:{}".format(int(0.6/(end-start))))
        frameIndex += 1
The result of the execution is shown in the figure below. The pedestrians and confidence values are marked in the figure, and the prediction speed is faster. Based on this model, we can package it into a system with an interface, select a picture, video or camera on the interface and then call the model for detection.

The blogger conducted a detailed test on the entire system, and finally developed a version with a smooth and refreshing interface, which is the display of the demo part of the blog post, complete UI interface, test picture video, code files, and Python offline dependency package (easy to install and run, but also You can configure the environment by yourself), all of which have been packaged and uploaded, and interested friends can obtain them through the download link.

download link
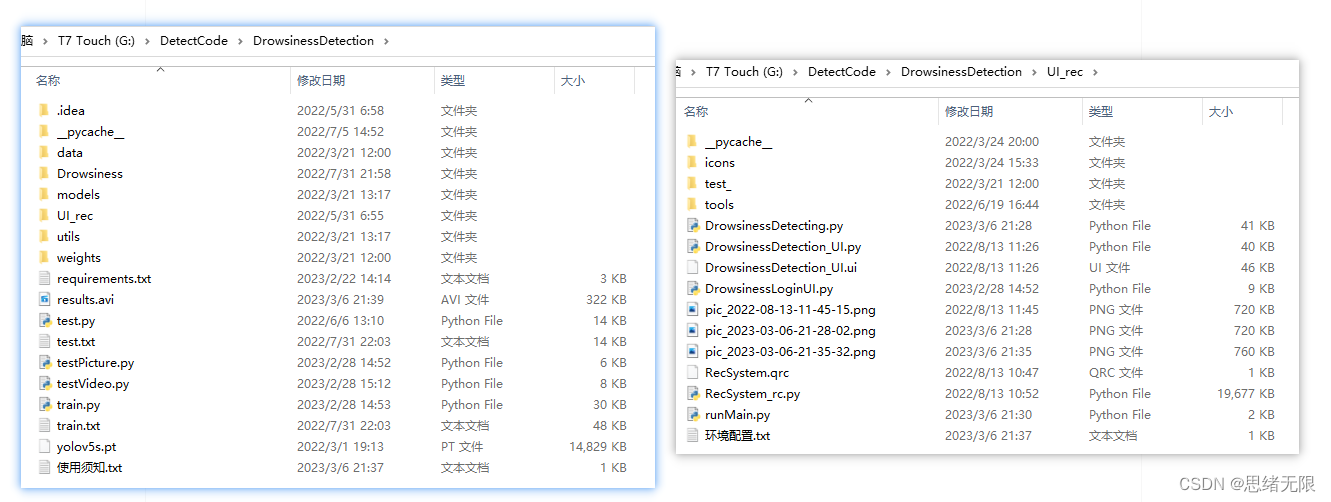
If you want to obtain the complete and complete program files involved in the blog post (including test pictures, videos, py, UI files, etc., as shown in the figure below), they have been packaged and uploaded to the blogger’s Bread Multi-platform. See blogs and videos for reference. Package all the involved files into it at the same time, and click to run. The screenshot of the complete file is as follows:

The resources under the folder are displayed as follows, and the offline dependency package of Python is also given in the link below. Readers can copy the offline dependency package to the project directory for installation after the correct installation of Anaconda and Pycharm software. The use of offline dependencies is detailed The demonstration can also be seen in my B station video: Win11 installs software from scratch and configures the environment to run deep learning projects , and uses pycharm and anaconda in Win10 for python environment configuration tutorials .
Note : This code is developed with Pycharm+Python3.8, and it can run successfully after testing. The main programs of the running interface are runMain.py and LoginUI.py. The test picture script can run testPicture.py, and the test video script can run testVideo.py. To ensure that the program runs smoothly, please configure the version of the Python dependency package according to requirements.txt. Python version: 3.8 , do not use other versions, see requirements.txt file for details;
The complete resource includes data sets and training codes. For environment configuration and how to modify text, pictures, logos, etc. in the interface, please refer to the video. To download the complete file of the project, please refer to the reference blog post, or refer to the introduction of the video : ➷➷ ➷
Reference blog post: https://zhuanlan.zhihu.com/p/615310050
Reference video demonstration: https://www.bilibili.com/video/BV1bL411k7Wj/
Offline dependency library download link : https://pan.baidu.com/s/1hW9z9ofV1FRSezTSj59JSg?pwd=oy4n (extraction code: oy4n)
Methods for modifying text, icons and background images in the interface:
In Qt Designer, you can completely modify the various controls and settings of the interface, and then convert the ui file into a py file to call and display the interface. If you only need to modify the text, icons and background images in the interface, you can modify them directly in the ConfigUI.config file. The steps are as follows:
(1) Open the UI_rec/tools/ConfigUI.config file. If there are garbled characters, please select GBK code to open.
(2) If you need to modify the interface text, just select the character you want to change and replace it with your own.
(3) If you need to modify the background, icons, etc., you only need to modify the path of the picture. For example, the background image in the original file is set as follows:
mainWindow = :/images/icons/back-image.png
It can be modified to your own image named background2.png (located in the UI_rec/icons/ folder), and the background image can be modified by setting this item as follows:
mainWindow = ./icons/background2.png
conclusion
Due to the limited ability of the blogger, even if the method mentioned in the blog post has been tested, it is inevitable that there will be omissions. I hope you can enthusiastically point out the mistakes, so that the next revision can be presented to everyone in a more perfect and rigorous manner. At the same time, if there is a better way to achieve it, please let me know.