What is functional computing?
Function Compute is an event-driven fully managed computing service. With Function Compute, you don't need to procure and manage infrastructure such as servers, you just write and upload code. Function Compute prepares computing resources for you, runs tasks flexibly and reliably, and provides functions such as log query, performance monitoring, and alarming. With Function Compute, you can quickly build any type of applications and services, and only need the actual consumption for tasks payment for resources.
Development steps
1. Open function calculation
Before activation, you need to have registered an Alibaba Cloud account and completed real-name authentication, and then enter Function Compute official website Function Compute https://fcnext.console.aliyun.com If you have not activated Function Compute, you need to check Function Compute on the Function Compute activation page. After the service agreement, click Activate Now. After the activation is completed, it will automatically jump to the Function Compute console.
2. New service
Click "Services and Functions" in the Function Compute console to enter the service list, click Create Service in the service list, fill in the configuration of the service, and click OK to create the service. Note: Enabling the log and link tracking functions can make code debugging more convenient , failure analysis, data analysis, and viewing the consumption of time inside the function (recommended to enable, but some charges may apply).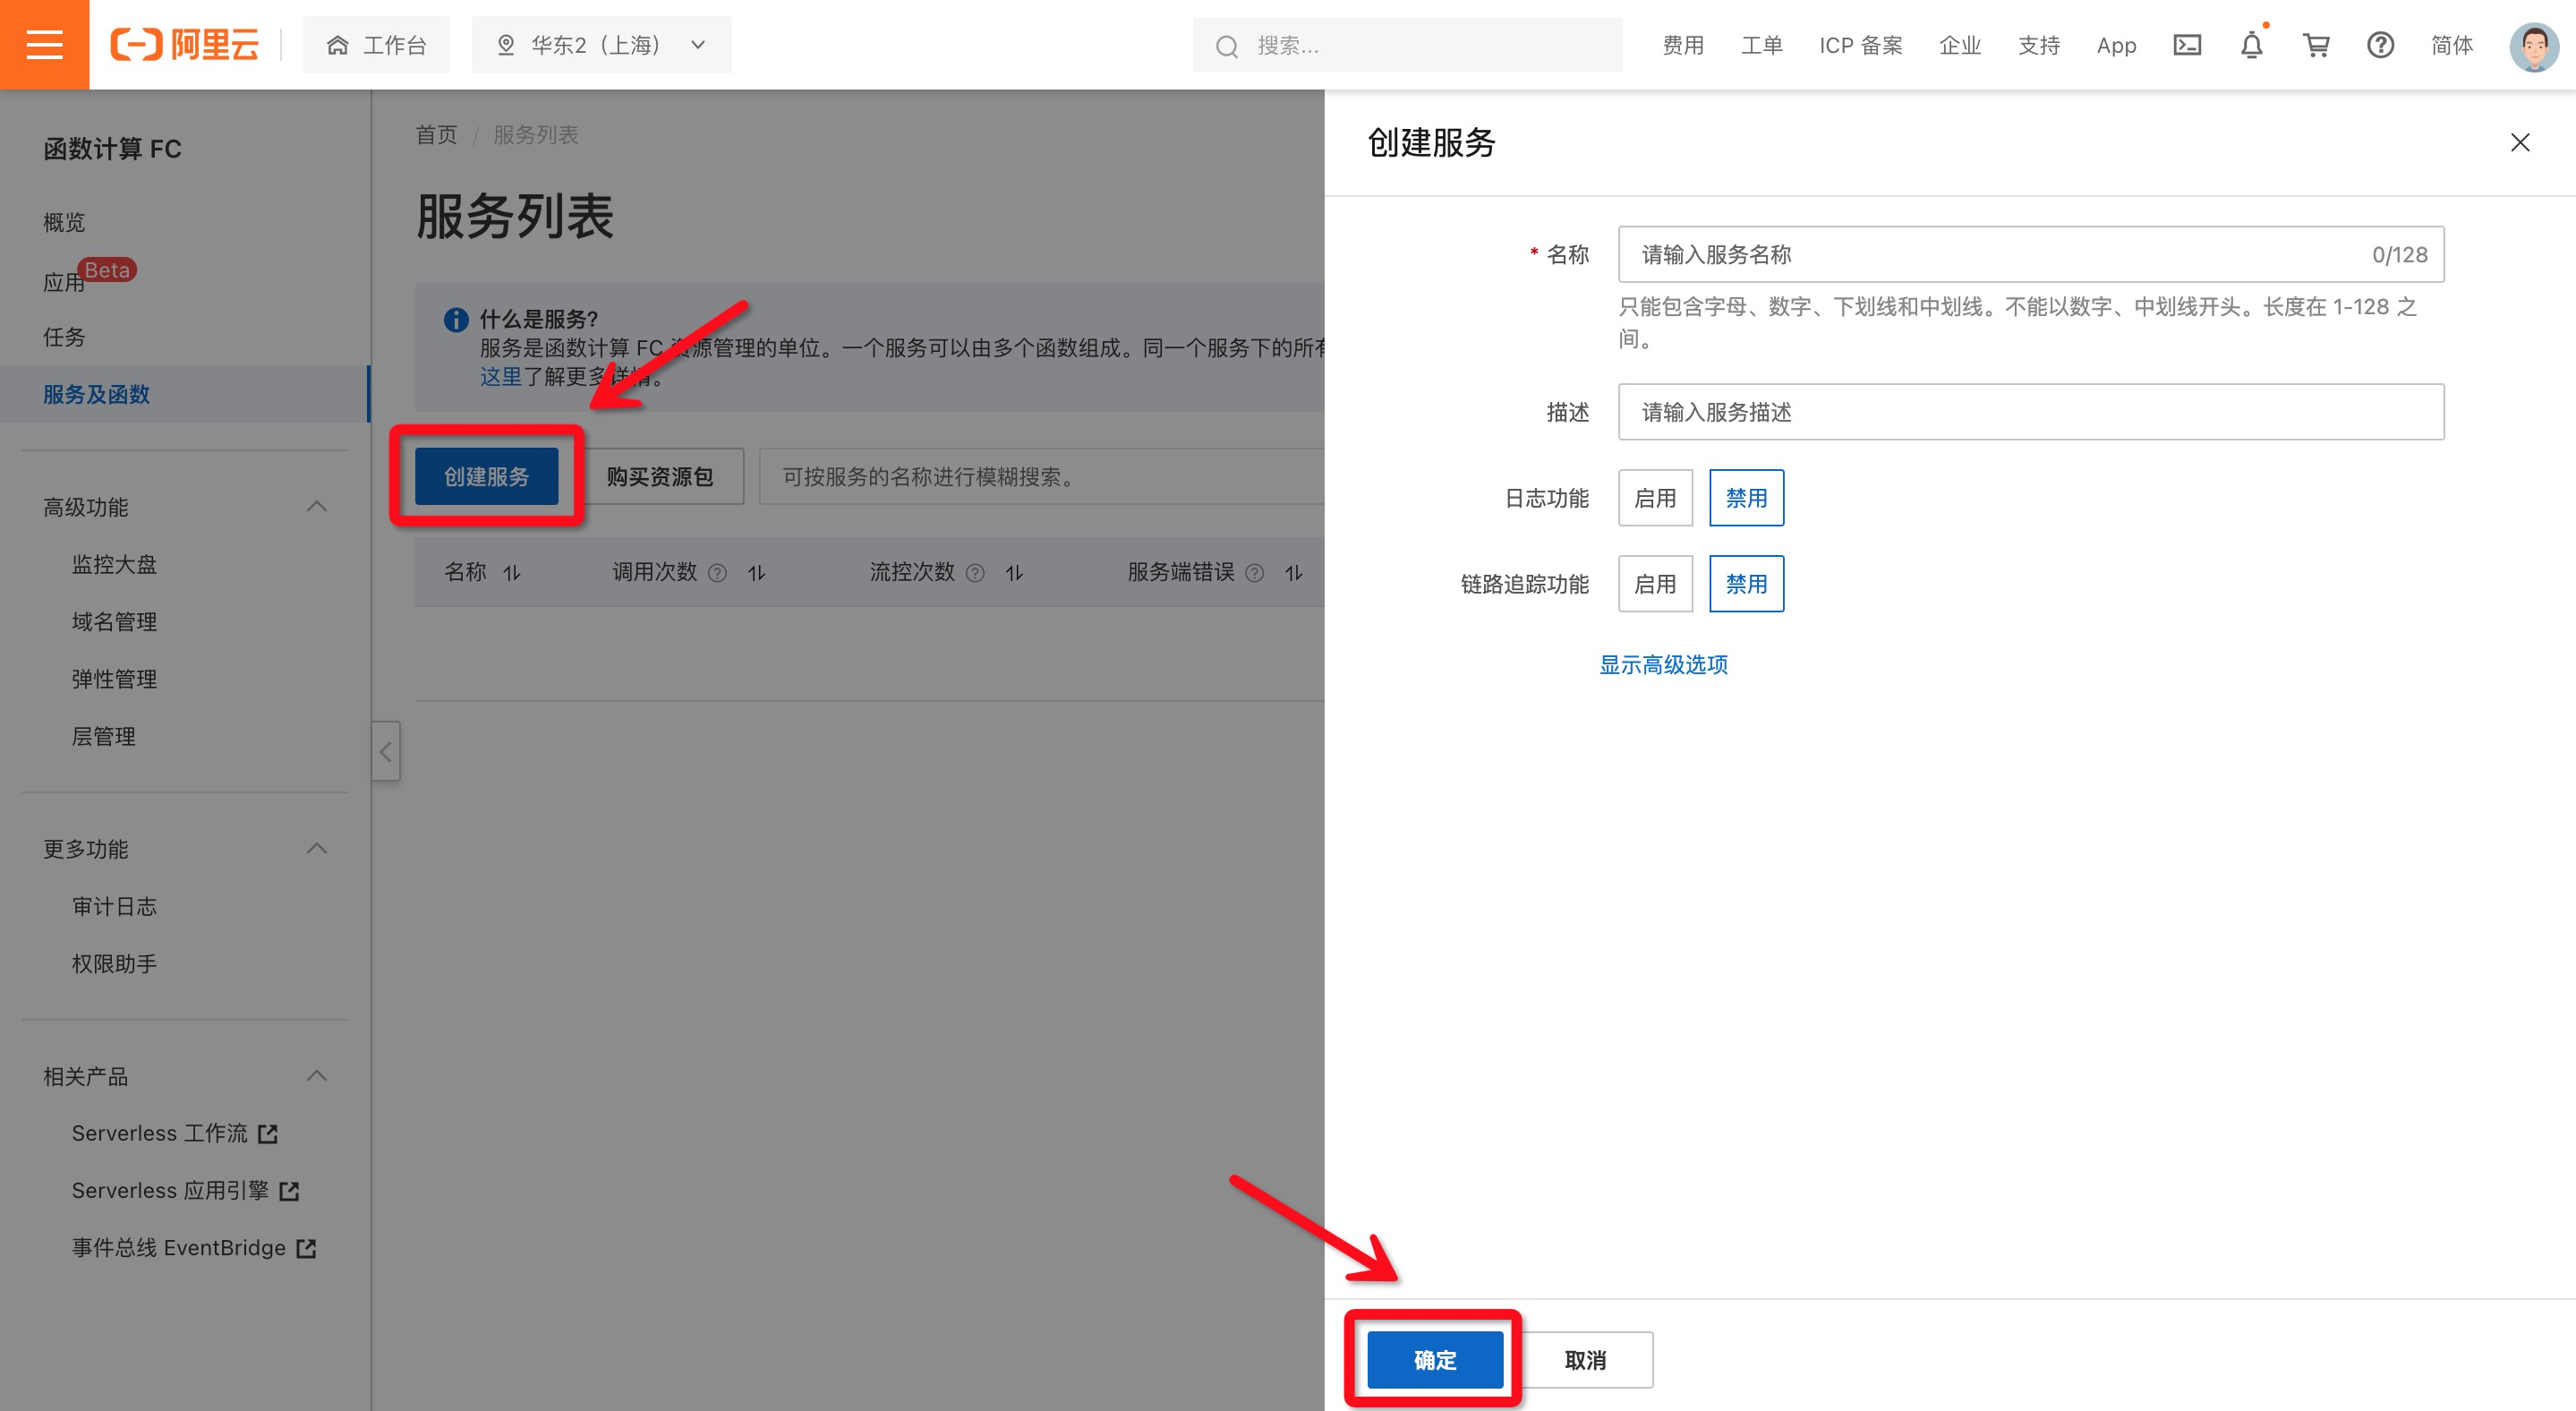
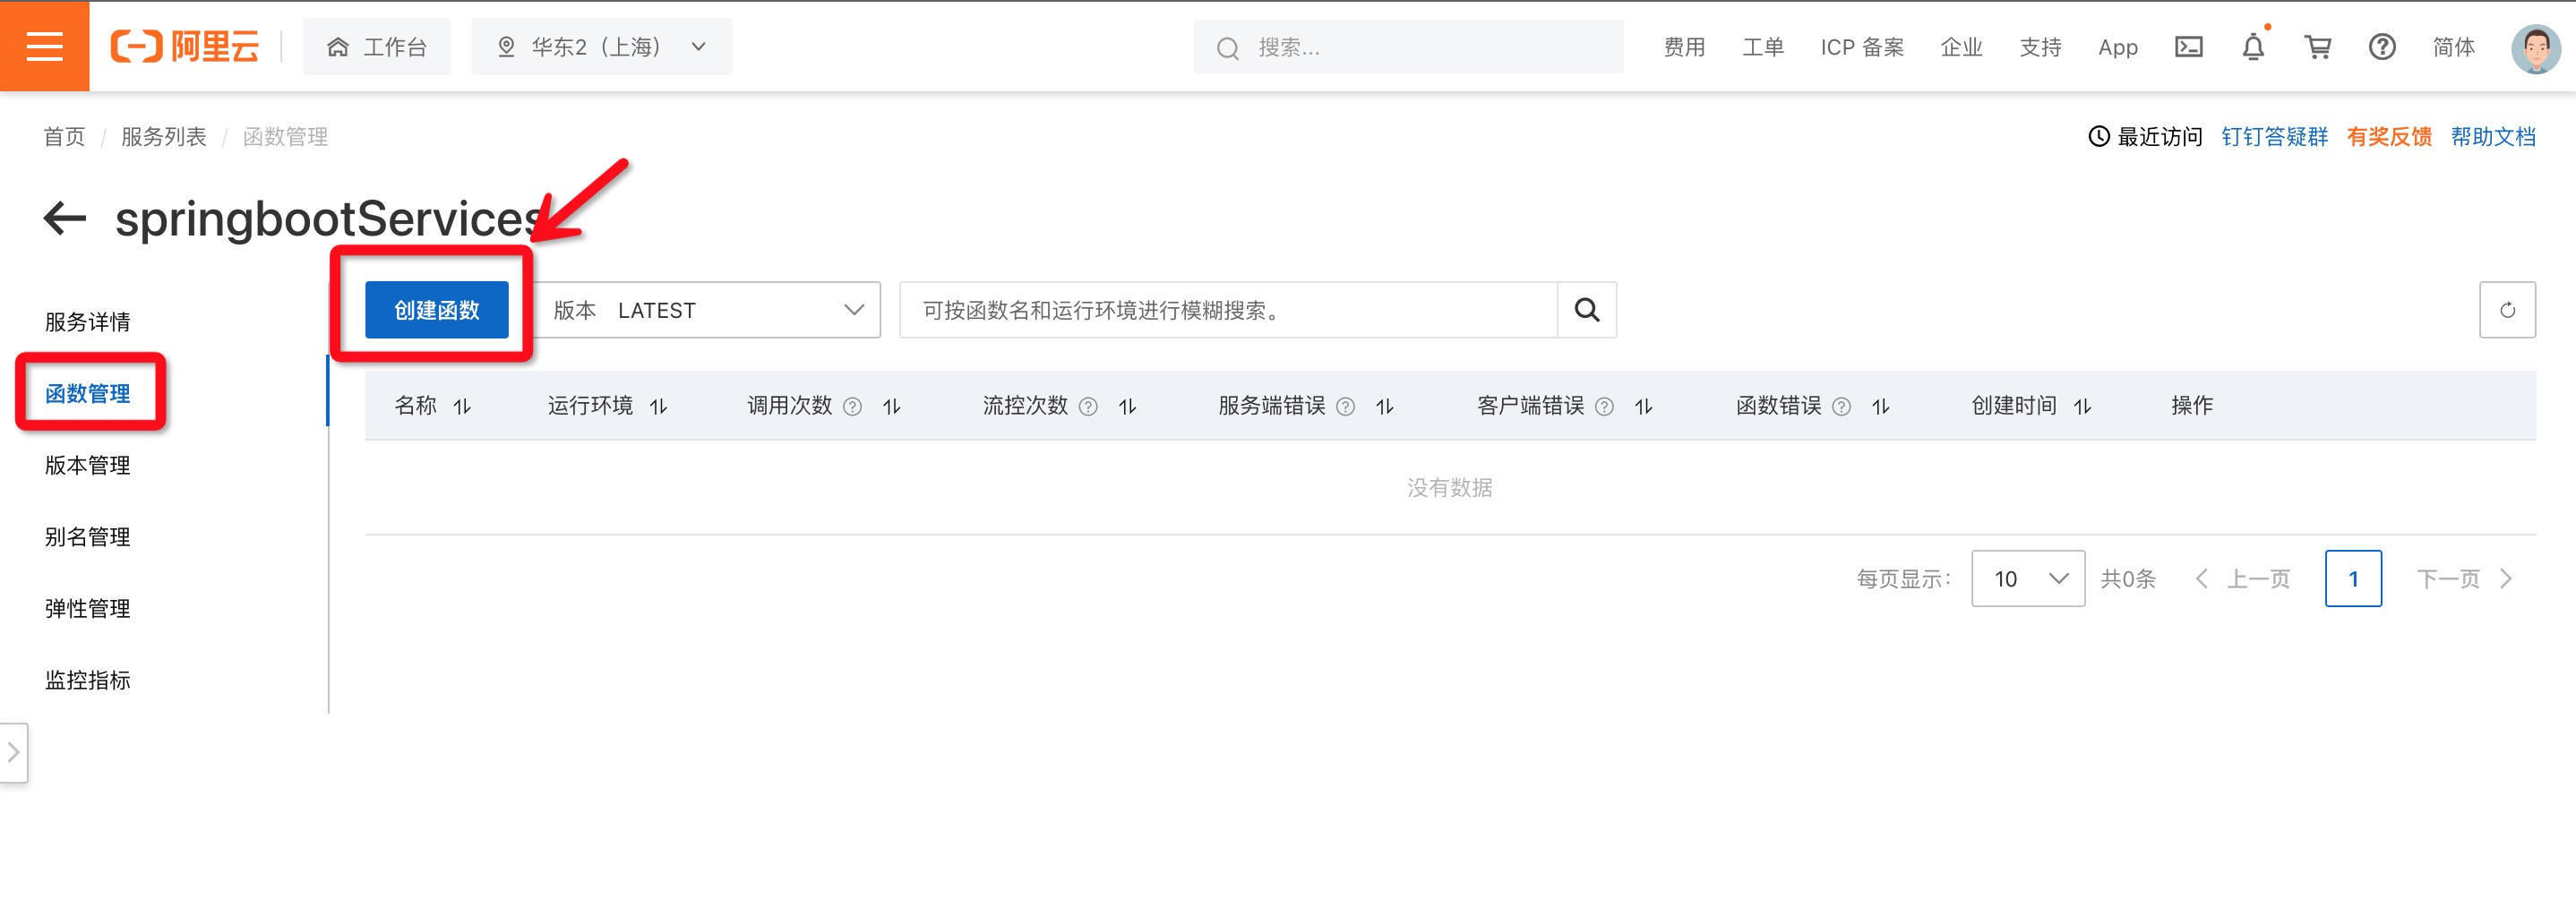
3. New function
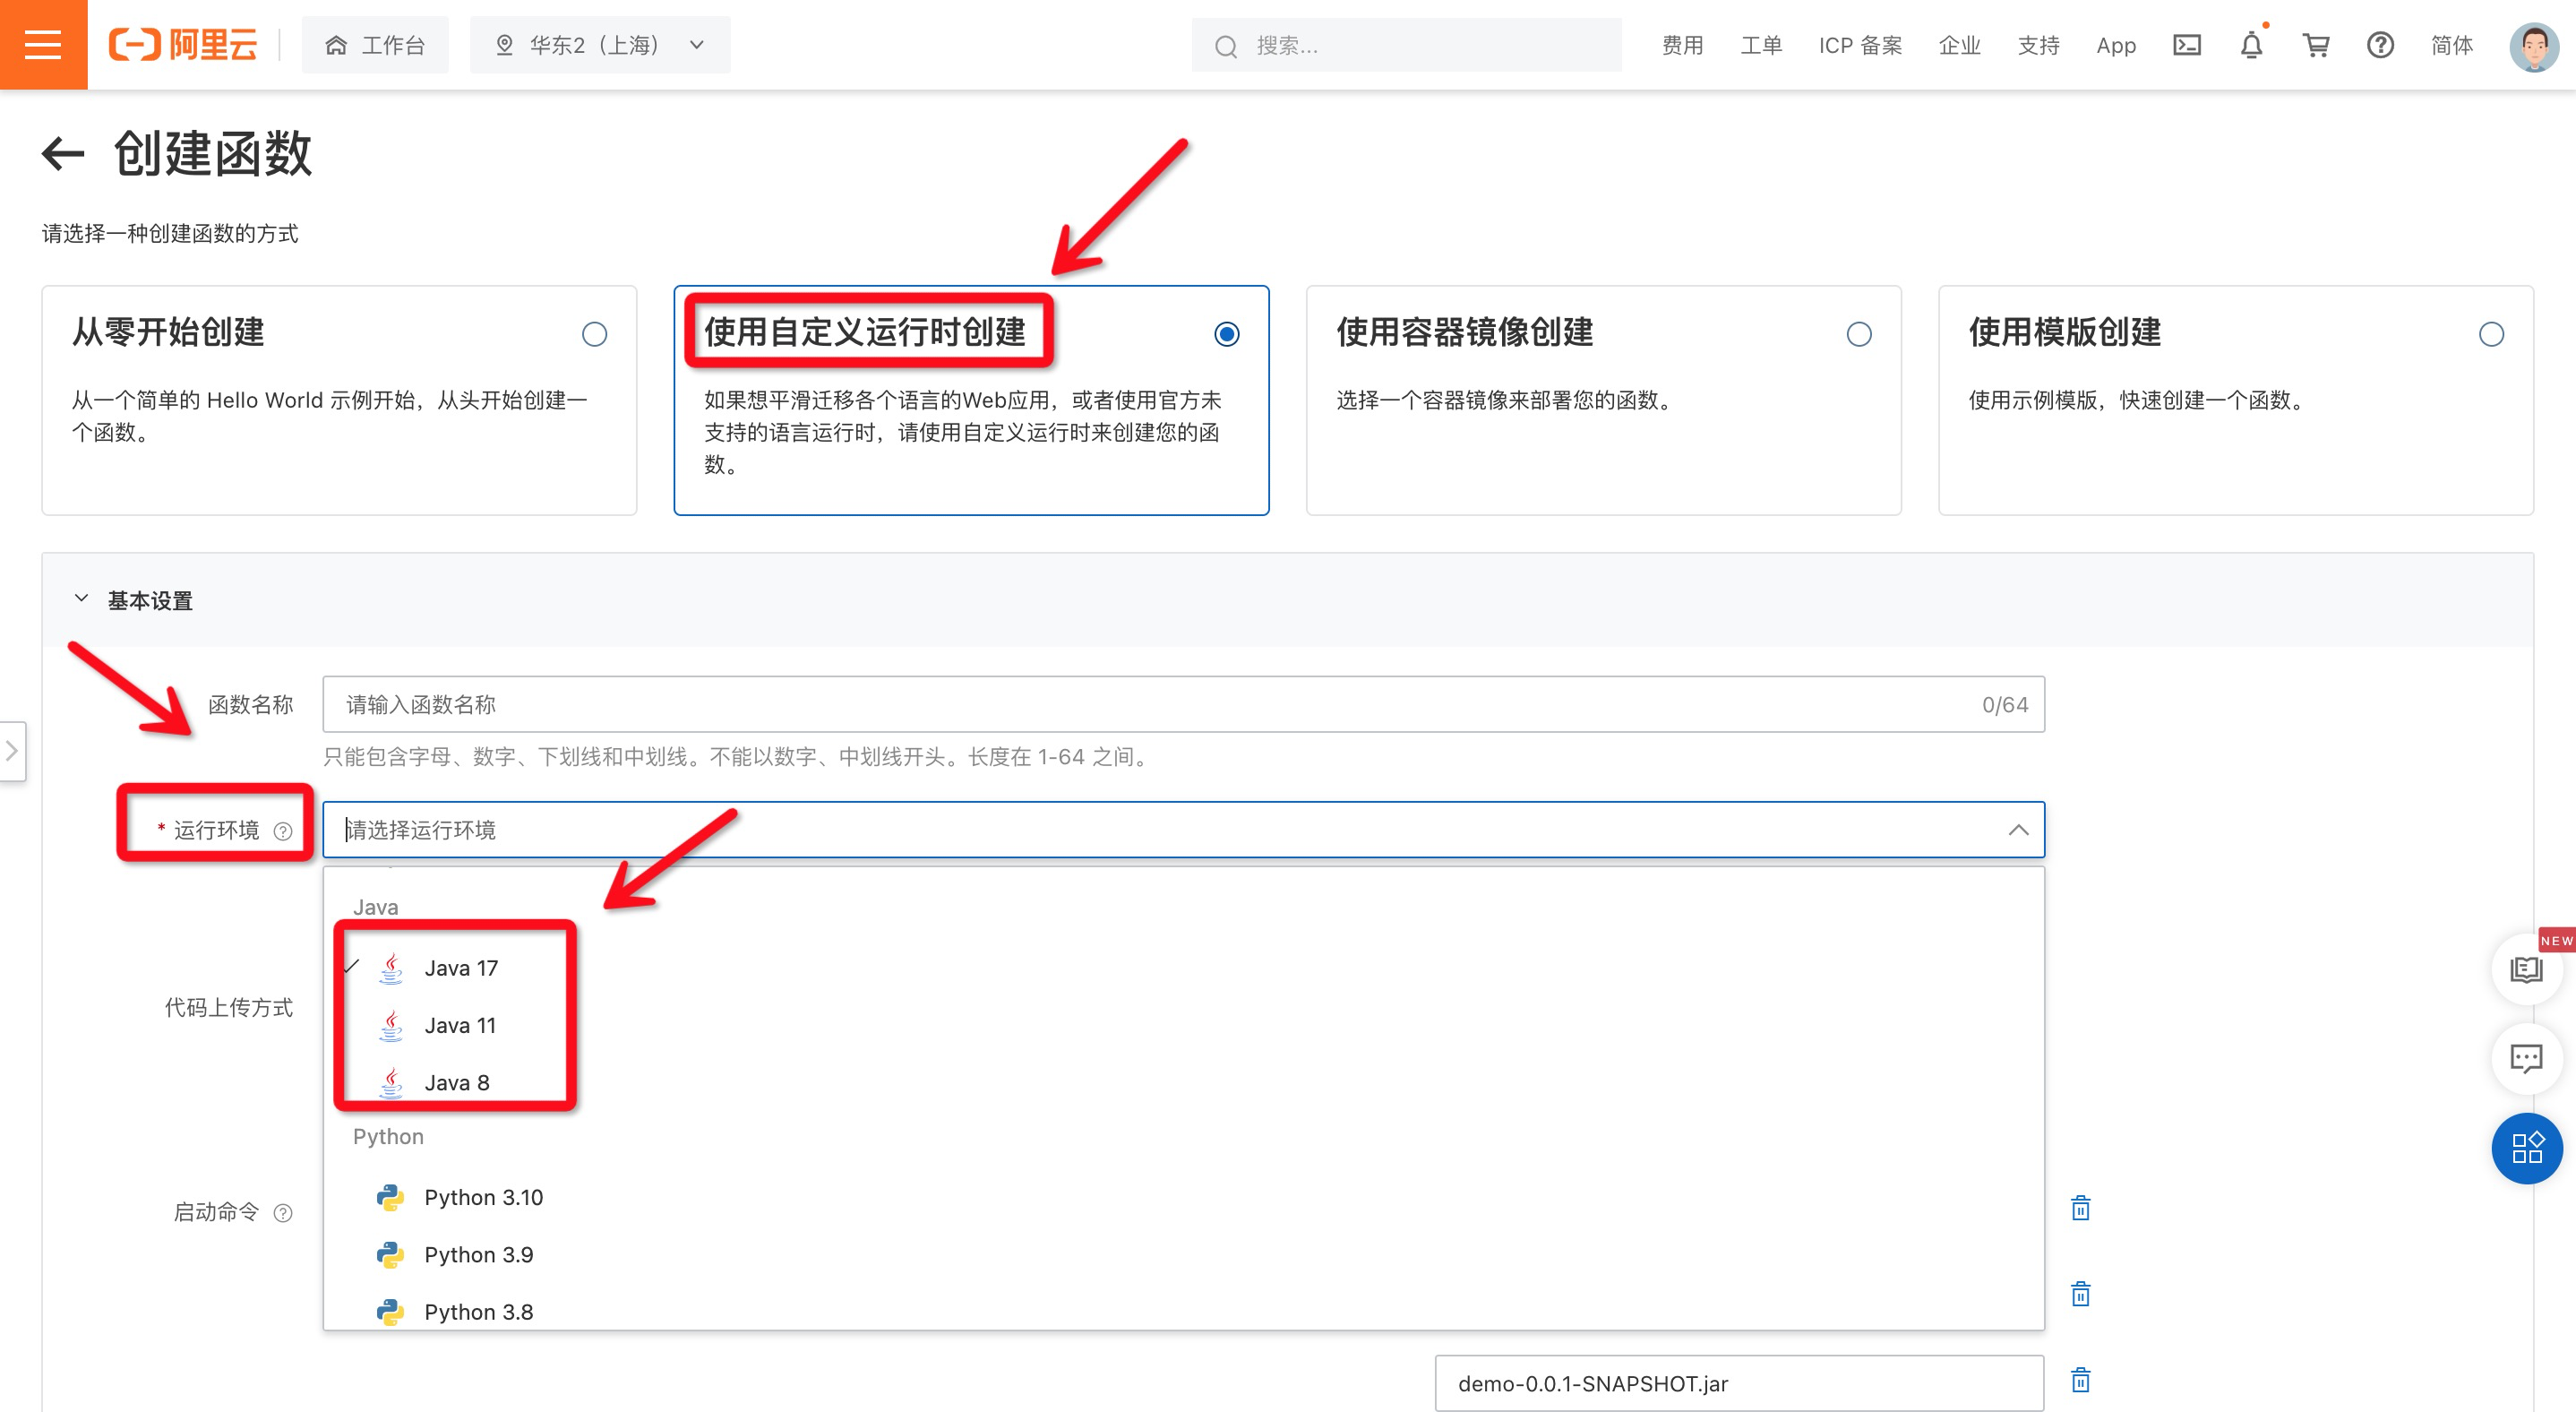
Click the created service name under the service list to enter the function management page, click Create function, select "Create with custom runtime" on the function creation page, fill in the relevant configuration of the function, select the Java 17 sample template function in the runtime environment, configure After completion, pull down the page to the bottom and click Create to deploy a springboot project.
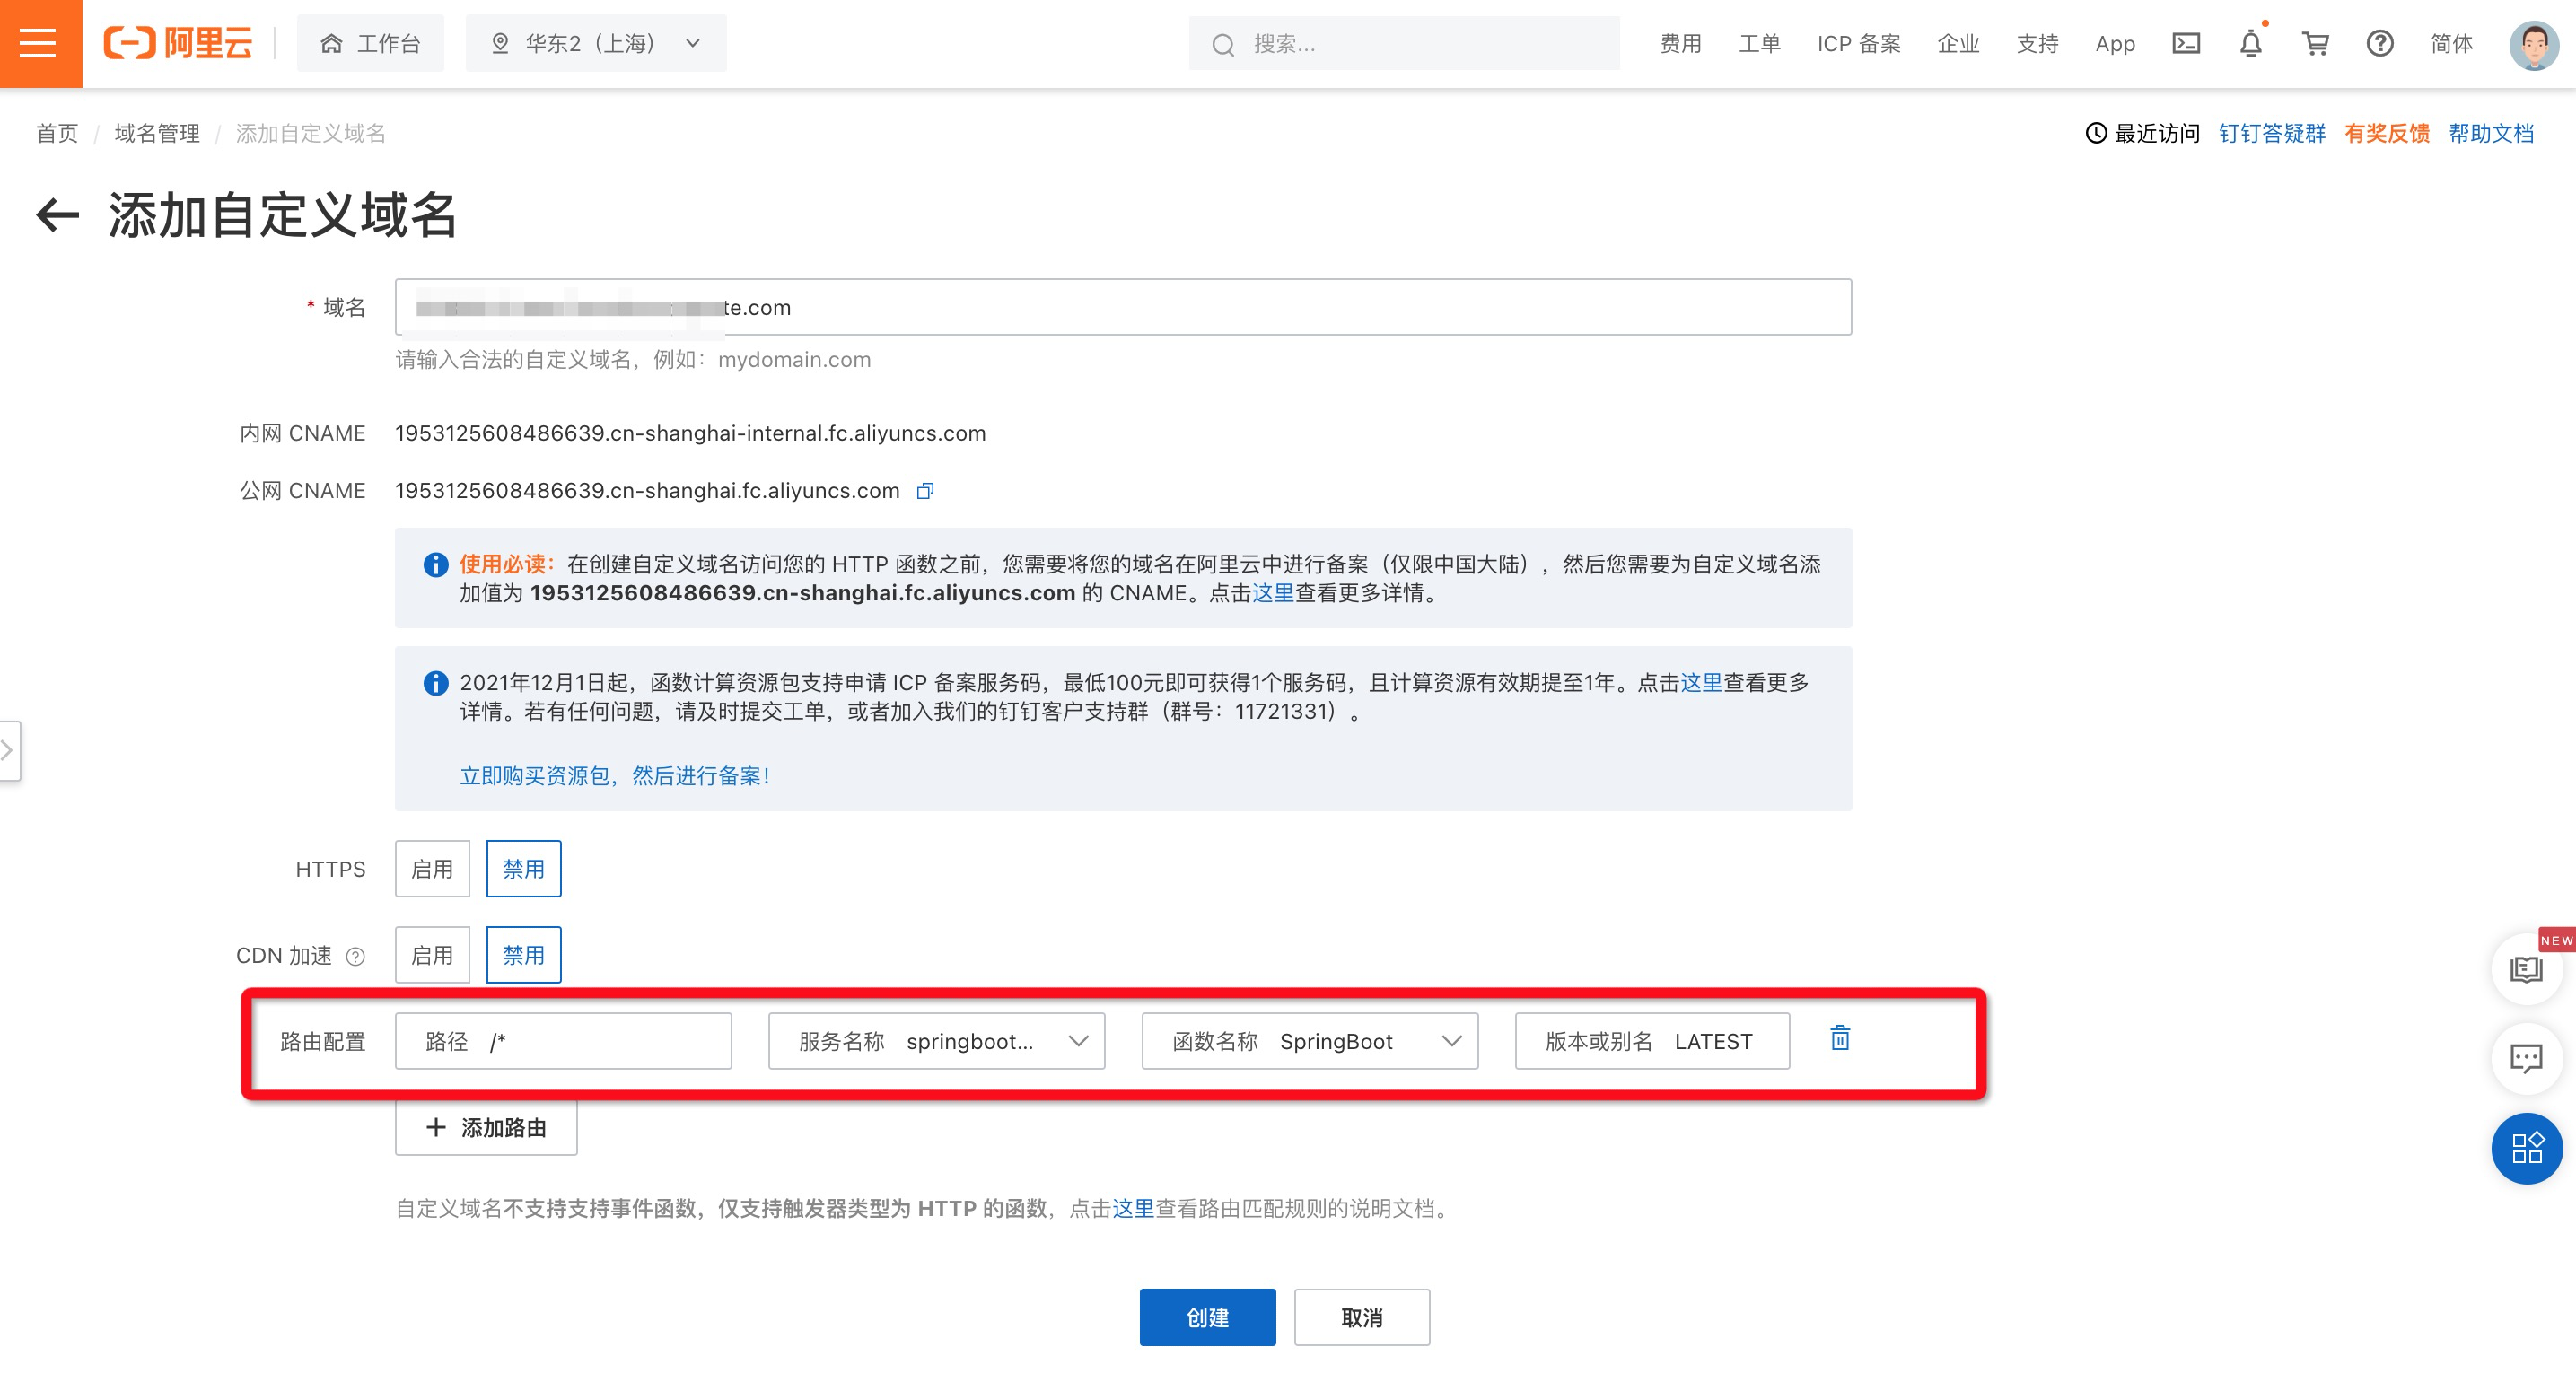
4. Custom domain name configuration
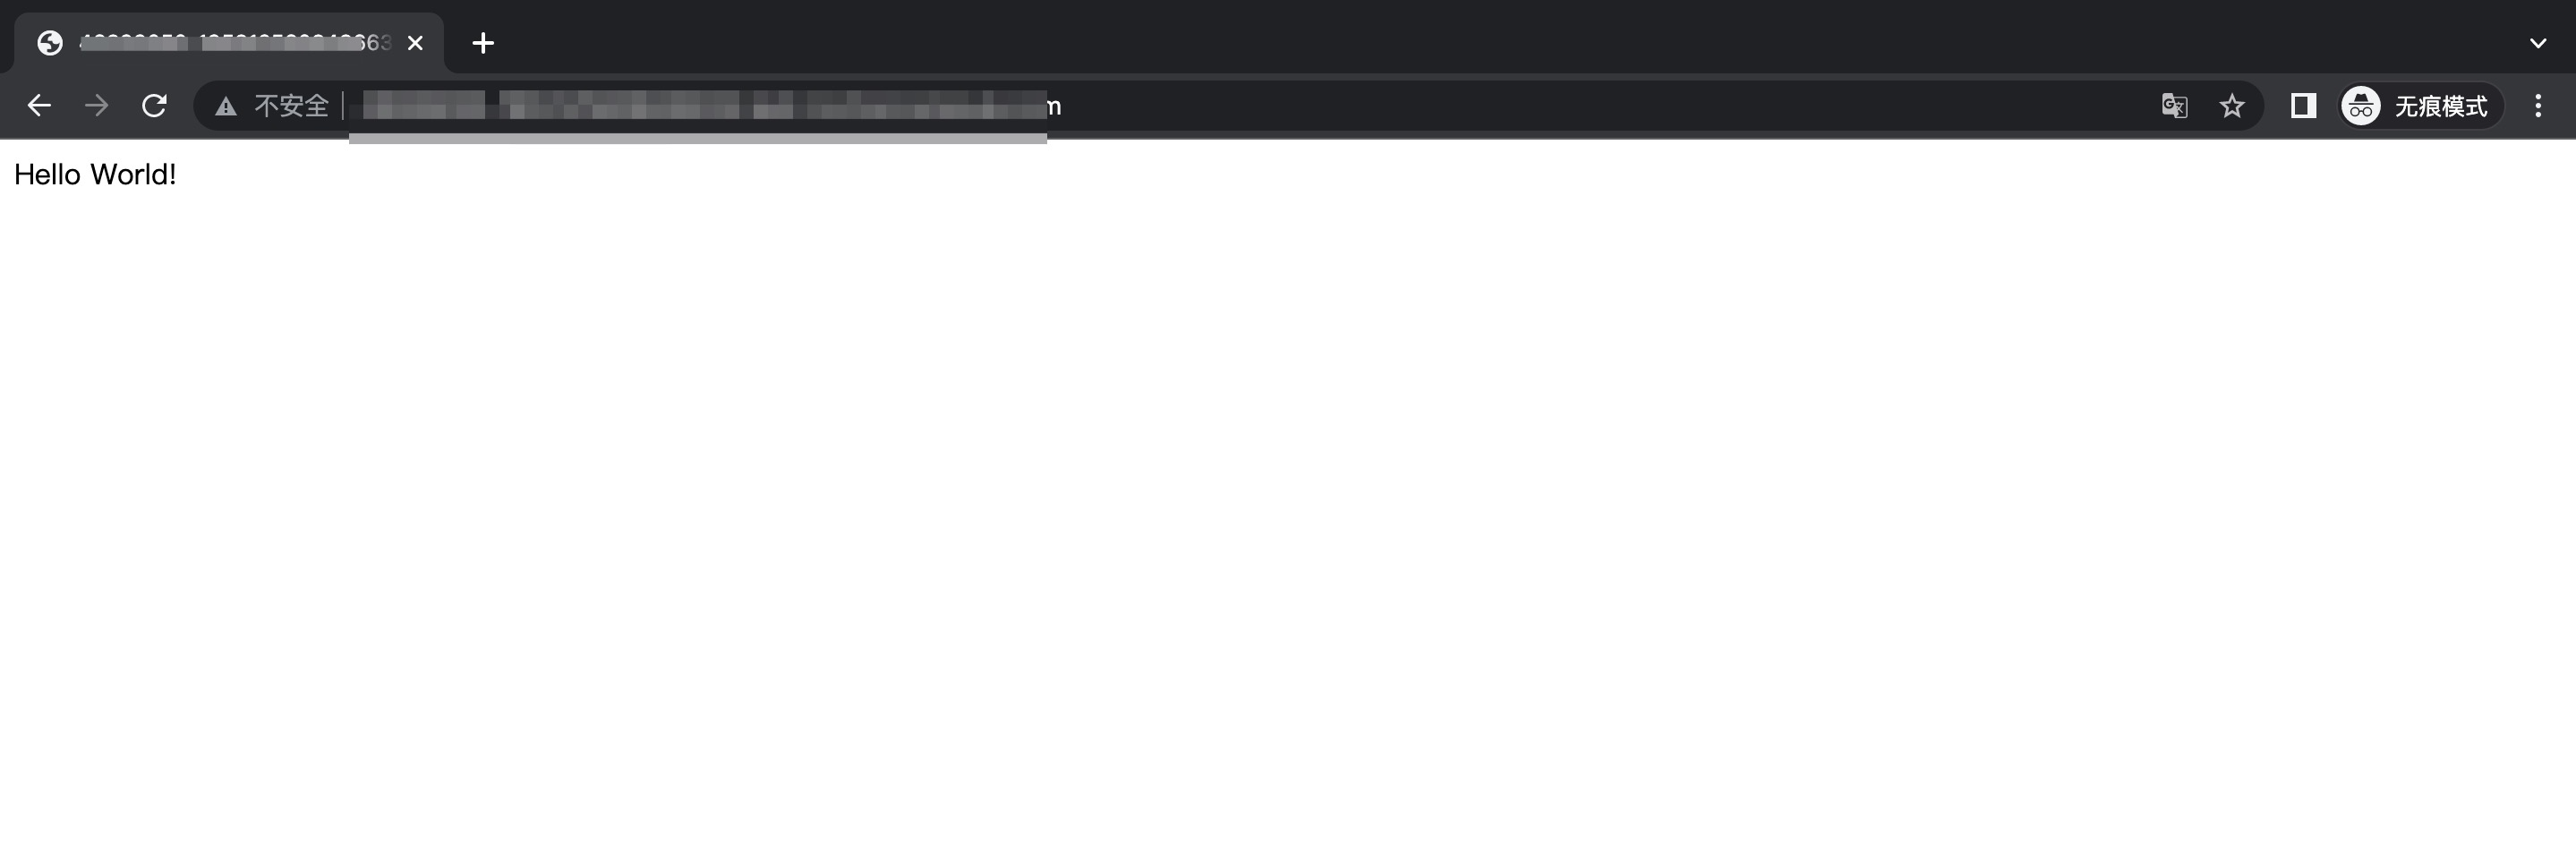
After the function is created, open the request address directly in the browser, and the response will be downloaded as an attachment. This is because the Http trigger will automatically add the Content-Disposition: attachment field to the response header. We can use a custom domain name to avoid this problem. Enter the domain name management page and click Add custom domain name. Select the service and Function, after the configuration is complete, you can enter the configured domain name in the browser, and you can see the Hello World! content displayed on the page. At this point, a simple springboot project is deployed and configured.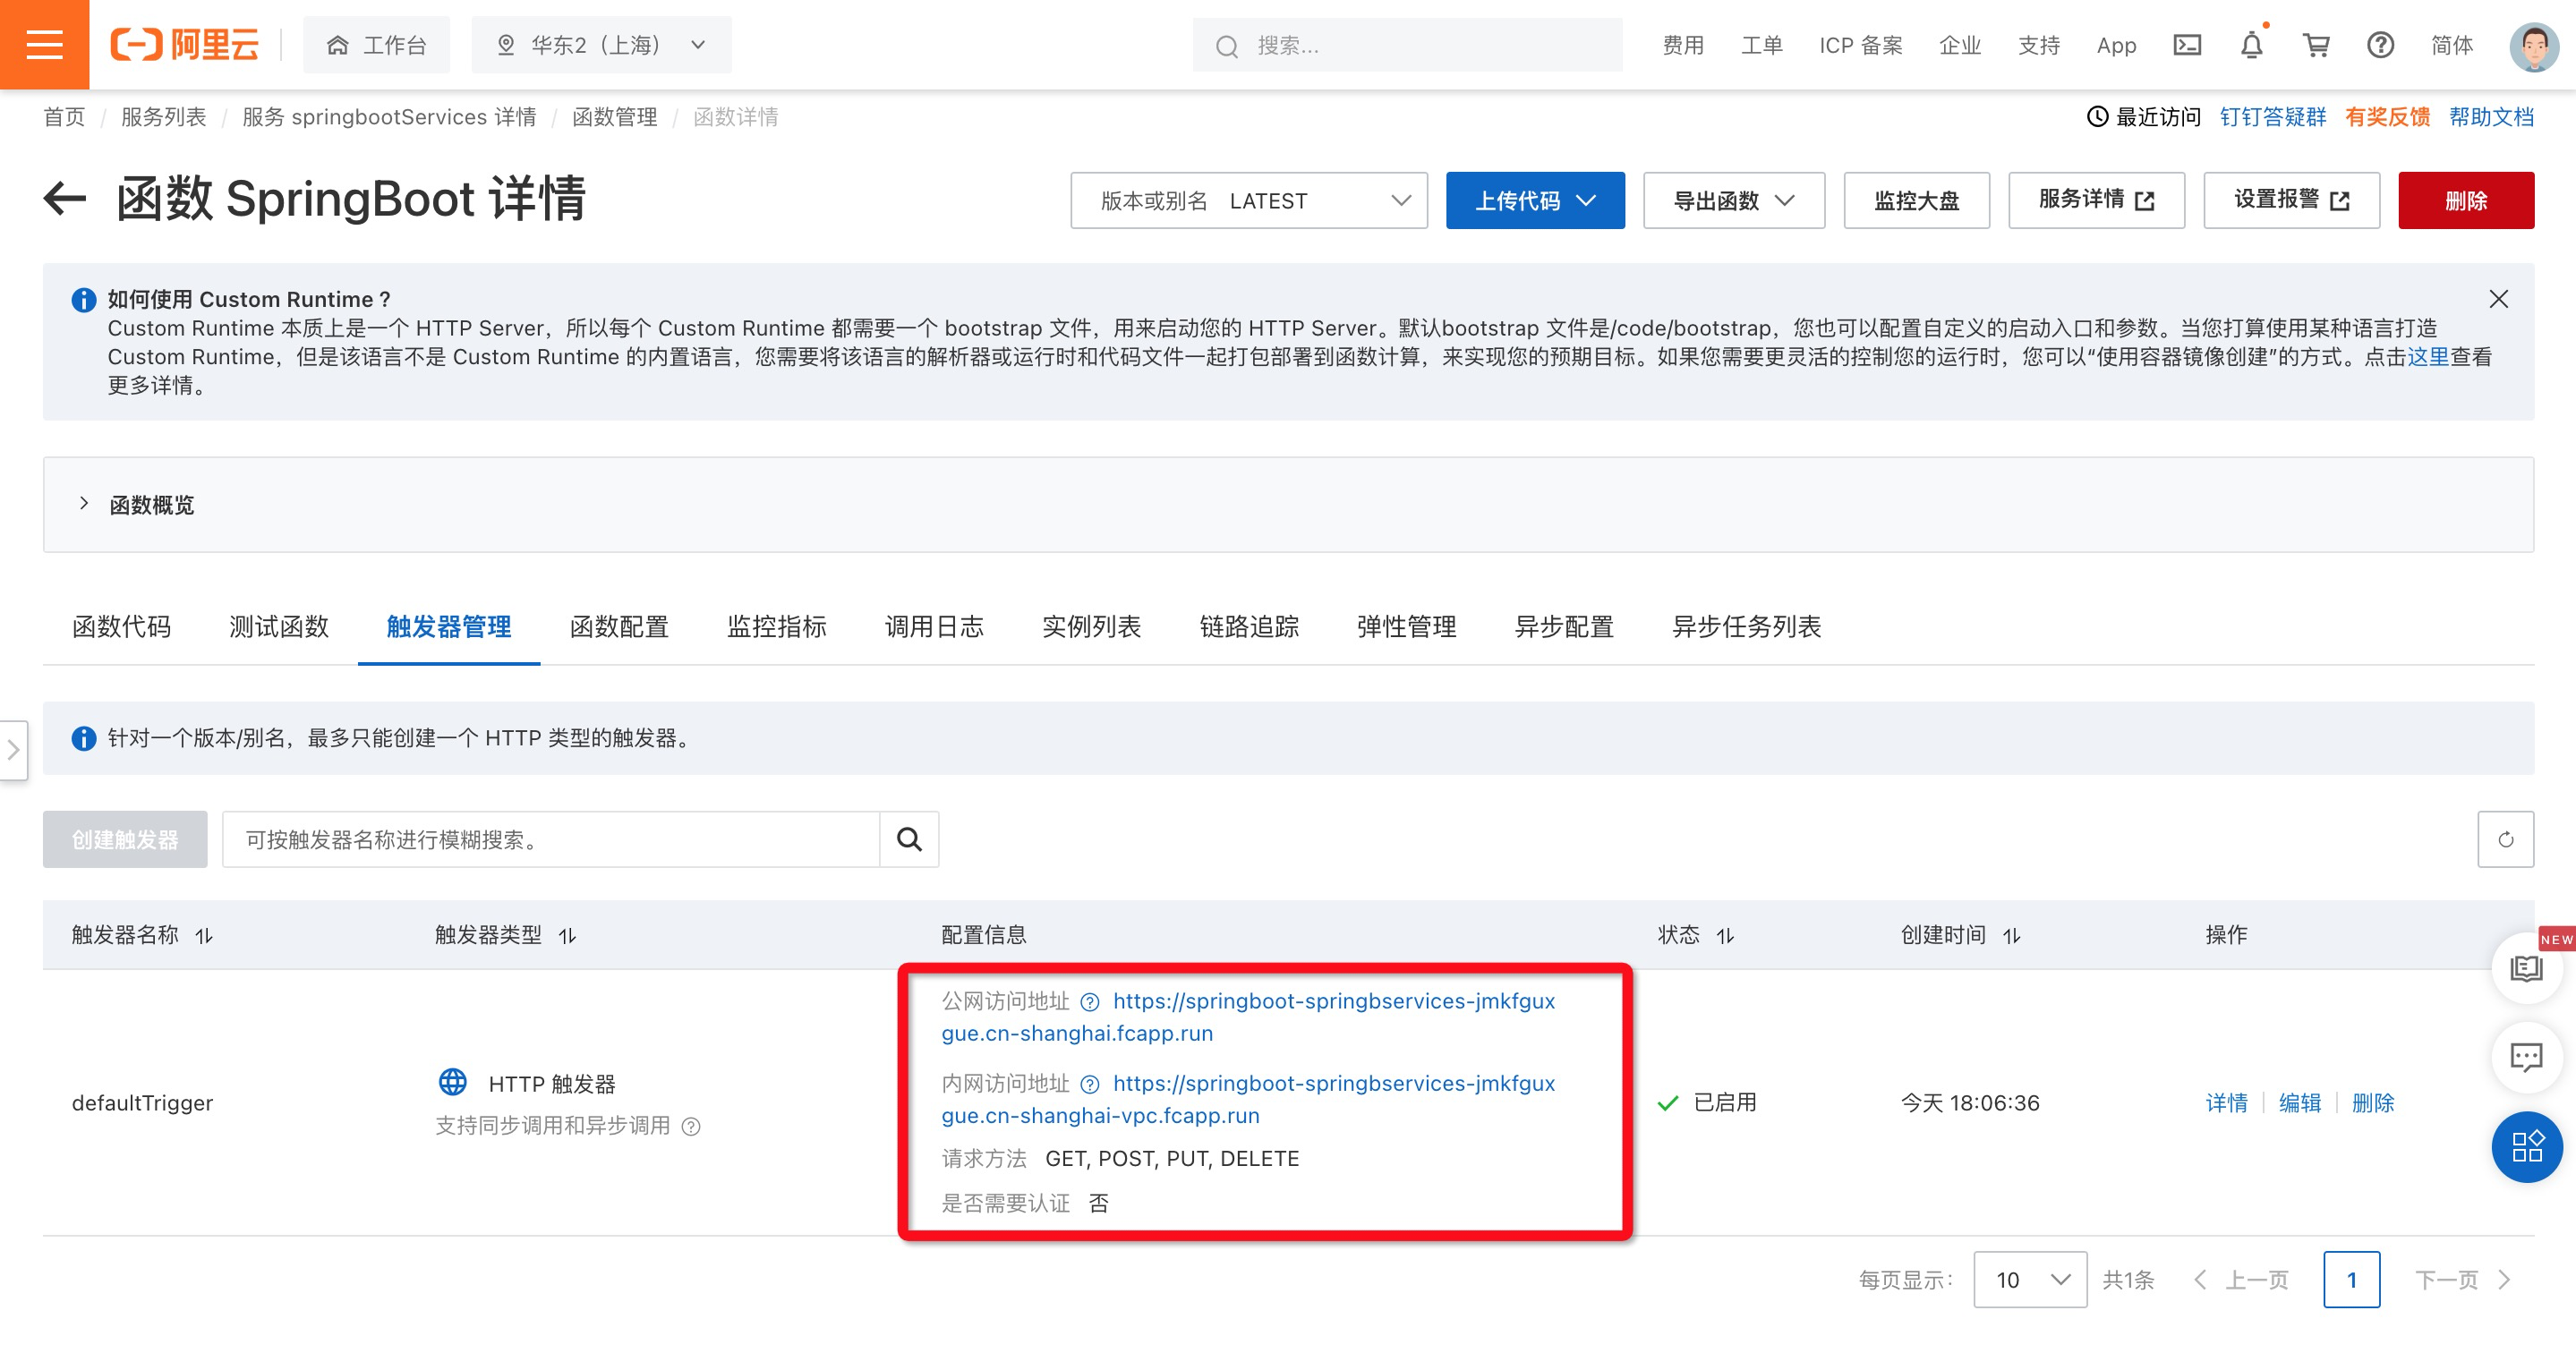

5. Development
- export code
Continue to develop the project. We can enter the function details page in the function computing console and use the online IED to develop and debug the function code page. We can also export the code of the function in "Export function" and use our own code editor. to develop.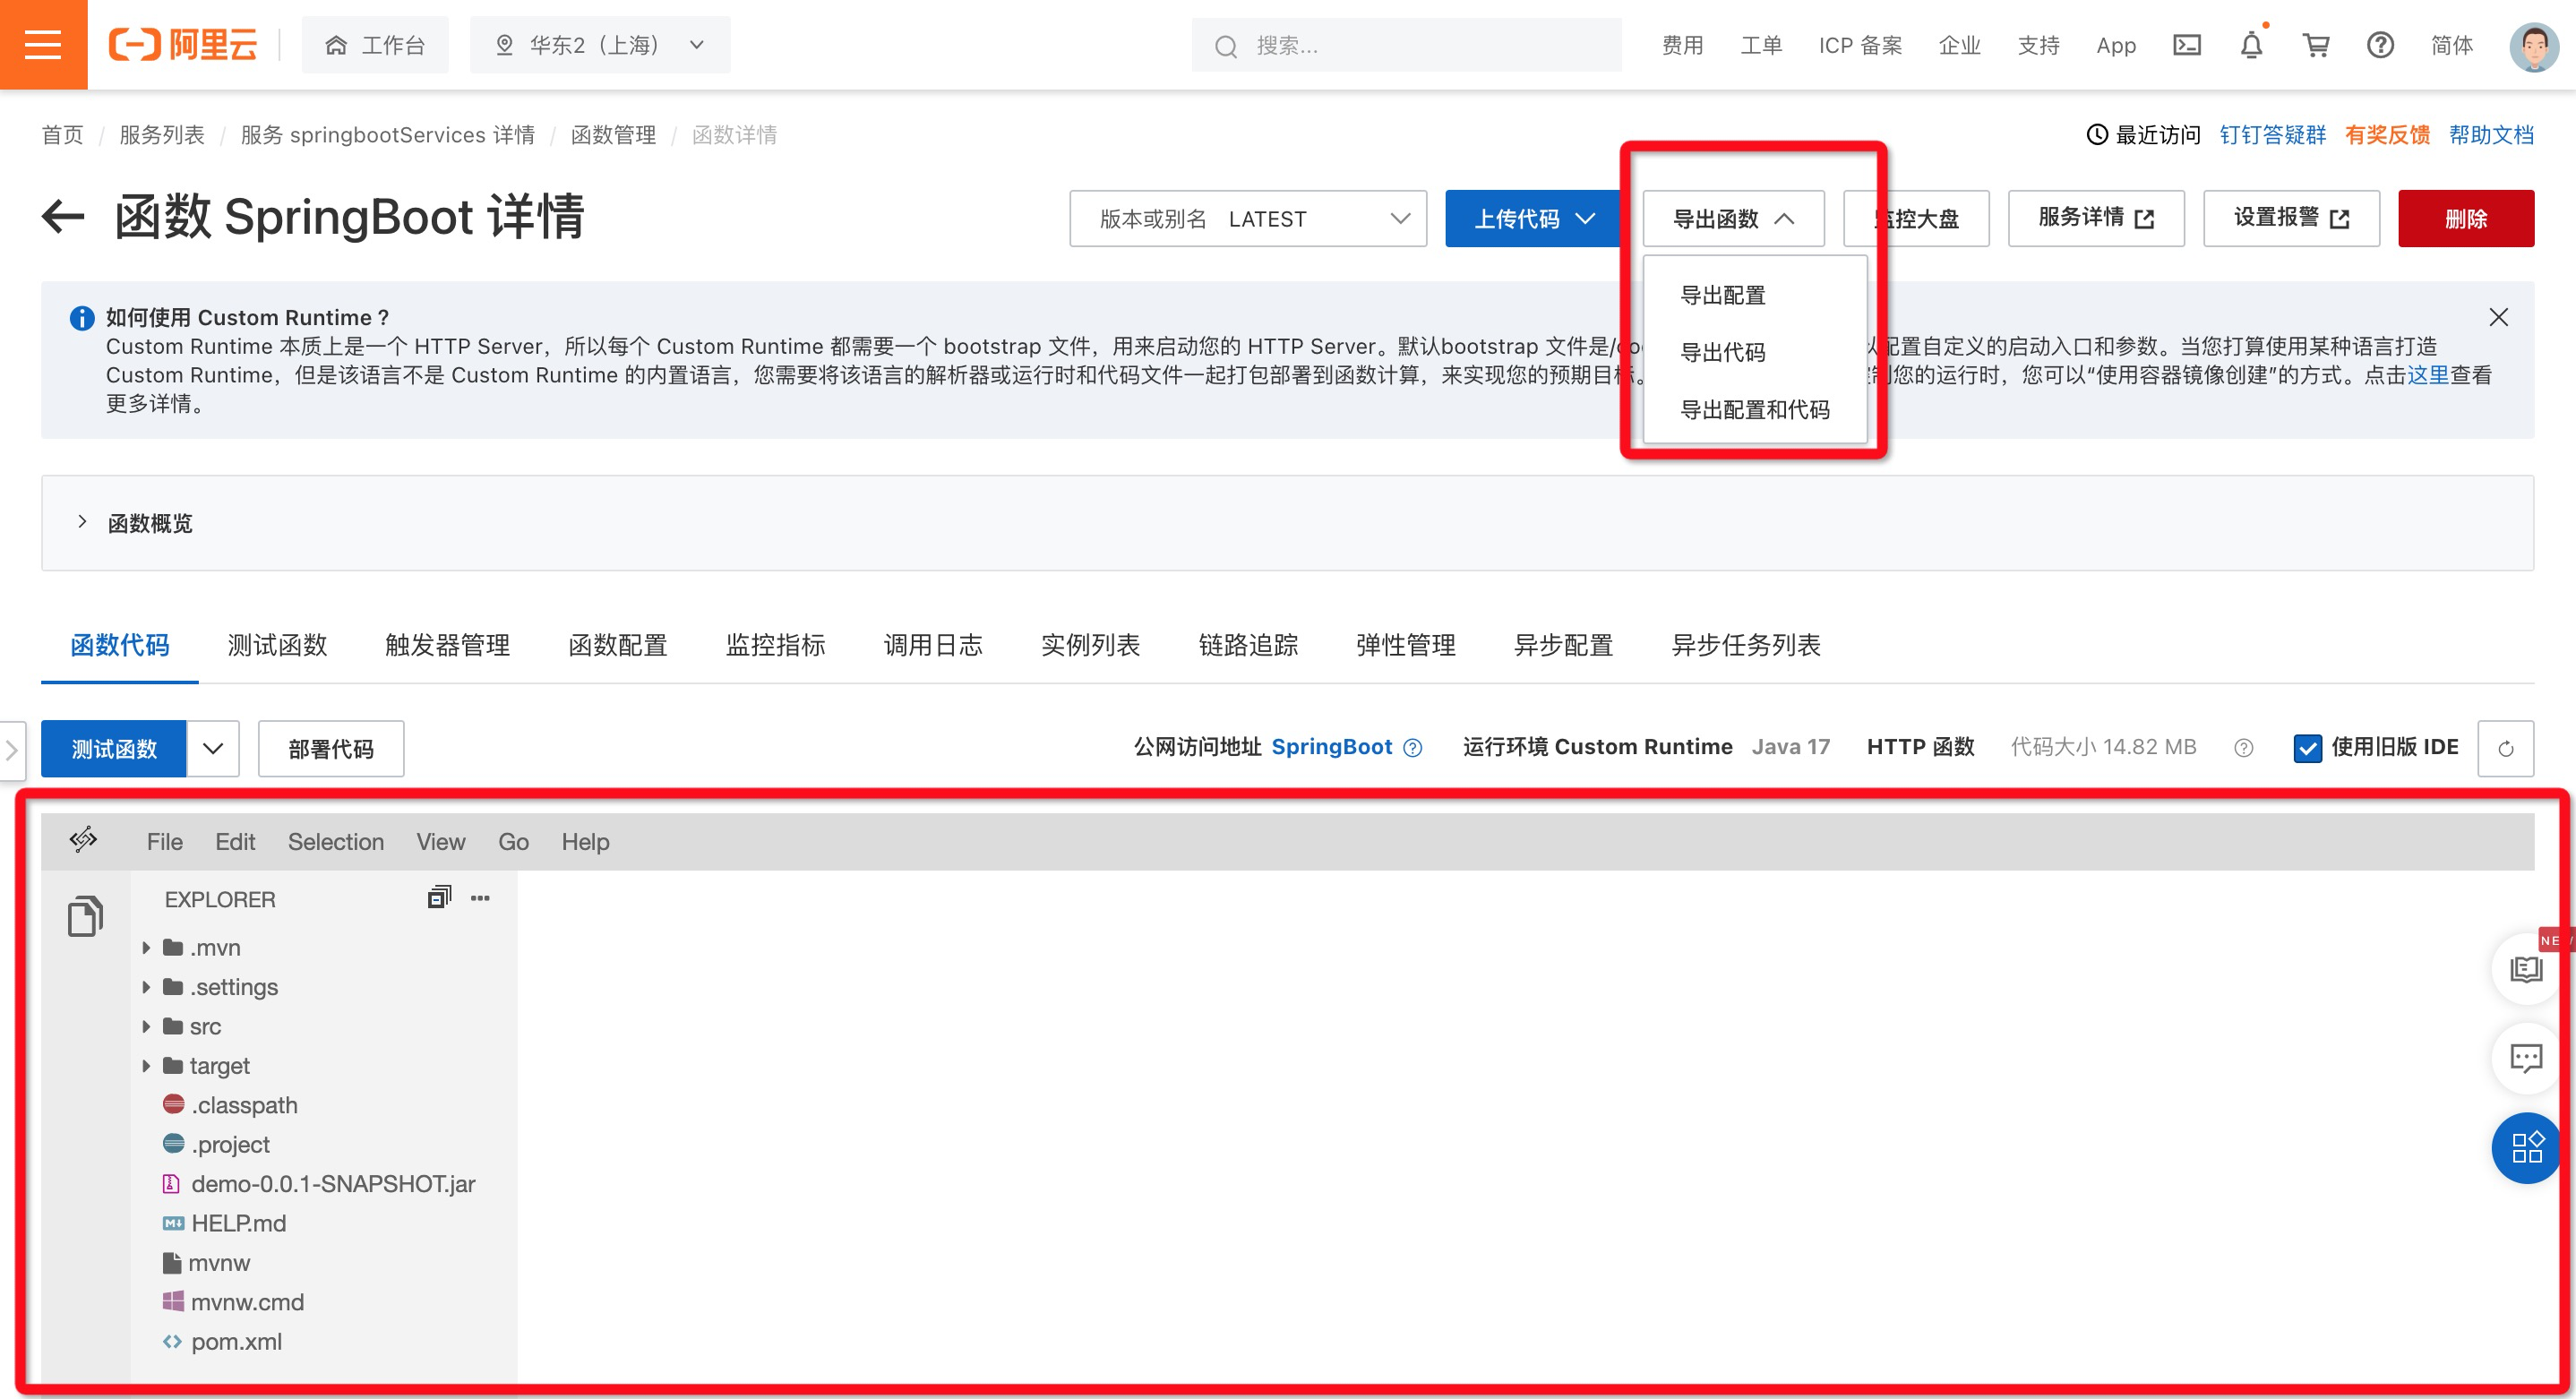
- code structure
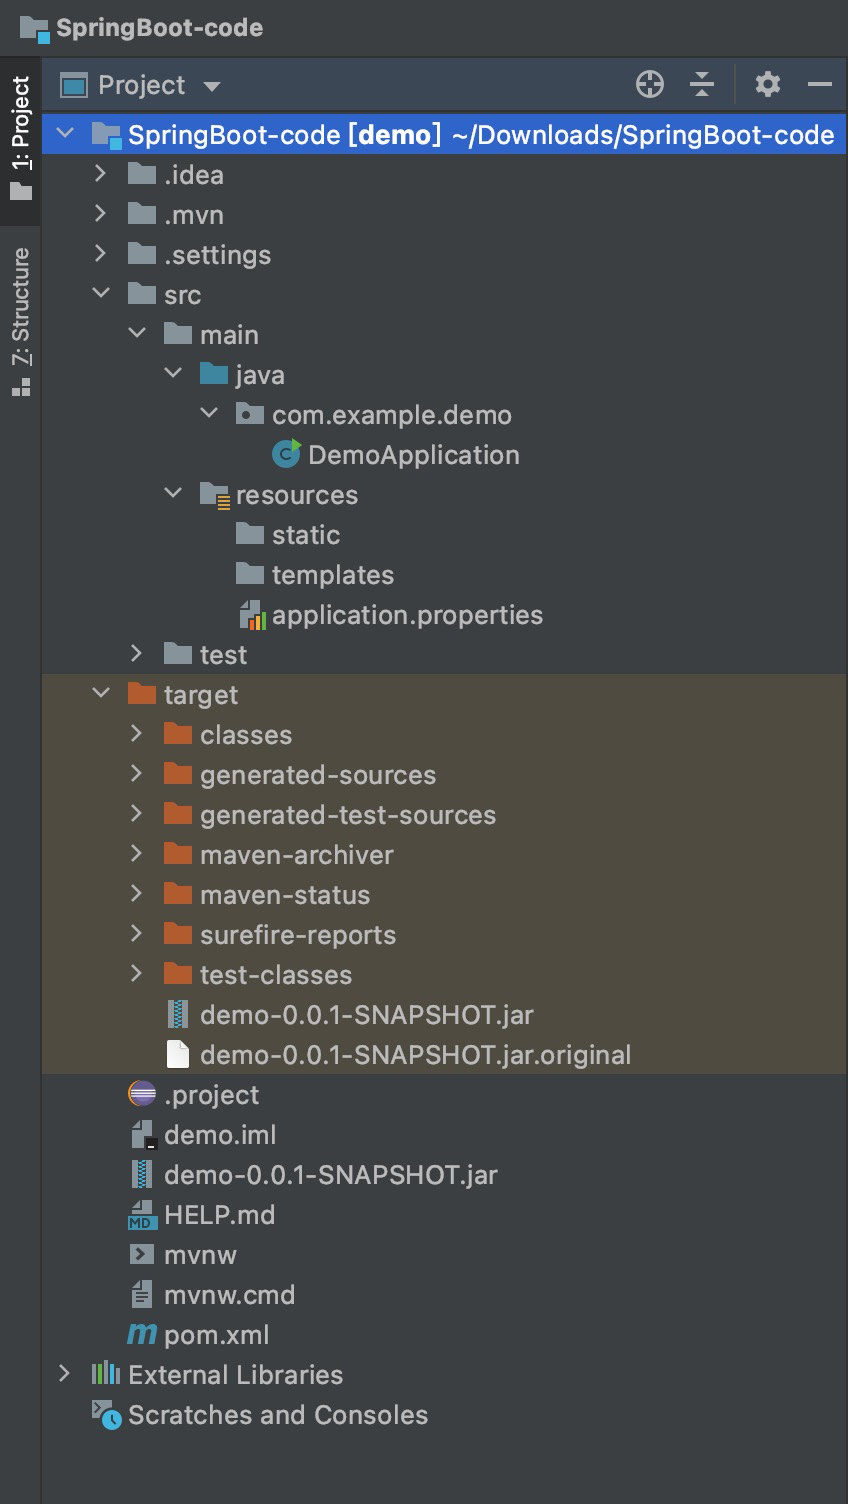
- pom.xml
<?xml version="1.0" encoding="UTF-8"?>
<project xmlns="http://maven.apache.org/POM/4.0.0" xmlns:xsi="http://www.w3.org/2001/XMLSchema-instance"
	xsi:schemaLocation="http://maven.apache.org/POM/4.0.0 https://maven.apache.org/xsd/maven-4.0.0.xsd">
	<modelVersion>4.0.0</modelVersion>
	<parent>
		<groupId>org.springframework.boot</groupId>
		<artifactId>spring-boot-starter-parent</artifactId>
		<version>2.6.6</version>
		<relativePath/> <!-- lookup parent from repository -->
	</parent>
	<groupId>com.example</groupId>
	<artifactId>demo</artifactId>
	<version>0.0.1-SNAPSHOT</version>
	<name>demo</name>
	<description>Demo project for Spring Boot</description>
	<properties>
		<java.version>17</java.version>
	</properties>
	<dependencies>
		<dependency>
			<groupId>org.springframework.boot</groupId>
			<artifactId>spring-boot-starter-web</artifactId>
		</dependency>

		<dependency>
			<groupId>org.springframework.boot</groupId>
			<artifactId>spring-boot-starter-test</artifactId>
			<scope>test</scope>
		</dependency>
	</dependencies>

	<build>
		<plugins>
			<plugin>
				<groupId>org.springframework.boot</groupId>
				<artifactId>spring-boot-maven-plugin</artifactId>
			</plugin>
		</plugins>
	</build>

</project>
- DemoApplication
package com.example.demo;

import org.springframework.boot.SpringApplication;
import org.springframework.boot.autoconfigure.SpringBootApplication;
import org.springframework.web.bind.annotation.GetMapping;
import org.springframework.web.bind.annotation.RequestParam;
import org.springframework.web.bind.annotation.RestController;

@SpringBootApplication
@RestController
public class DemoApplication {

	public static void main(String[] args) {
		SpringApplication.run(DemoApplication.class, args);
	}

	@GetMapping("/")
	public String hello(@RequestParam(value = "name", defaultValue = "World") String name) {
		return String.format("Hello %s!", name);
	}

}
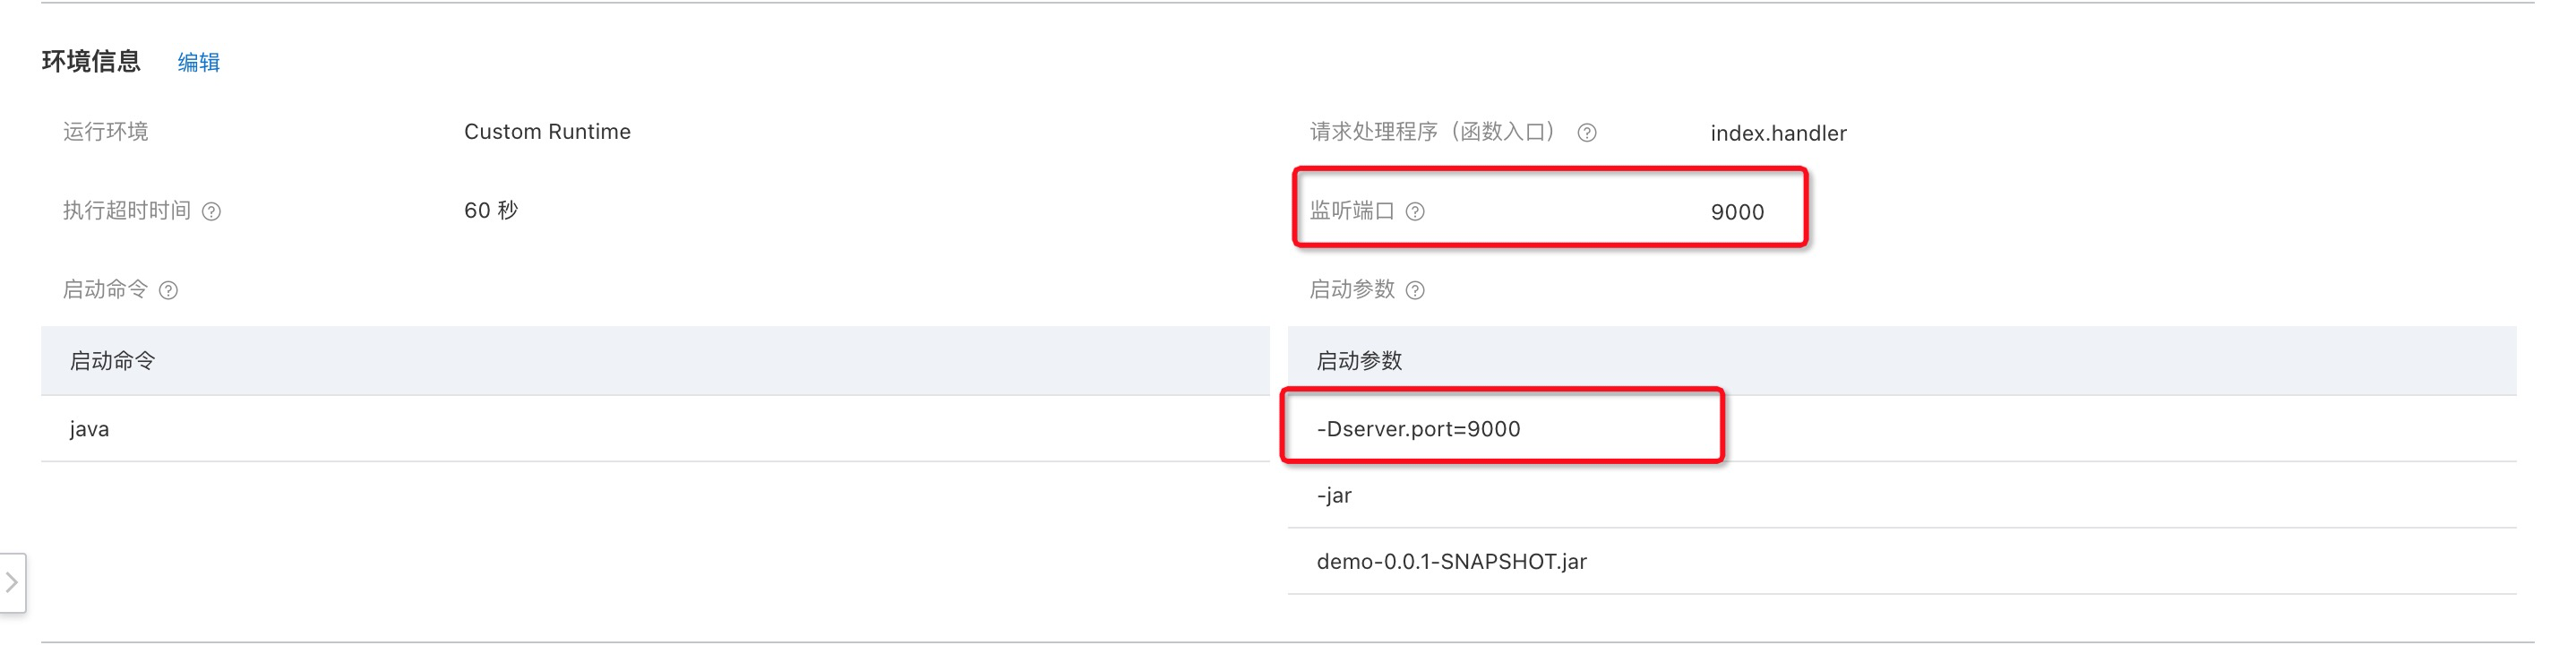
- Configure listening port
Add the listening port in the application.properties configuration file. The configuration port here needs to be consistent with the listening port configured by the function.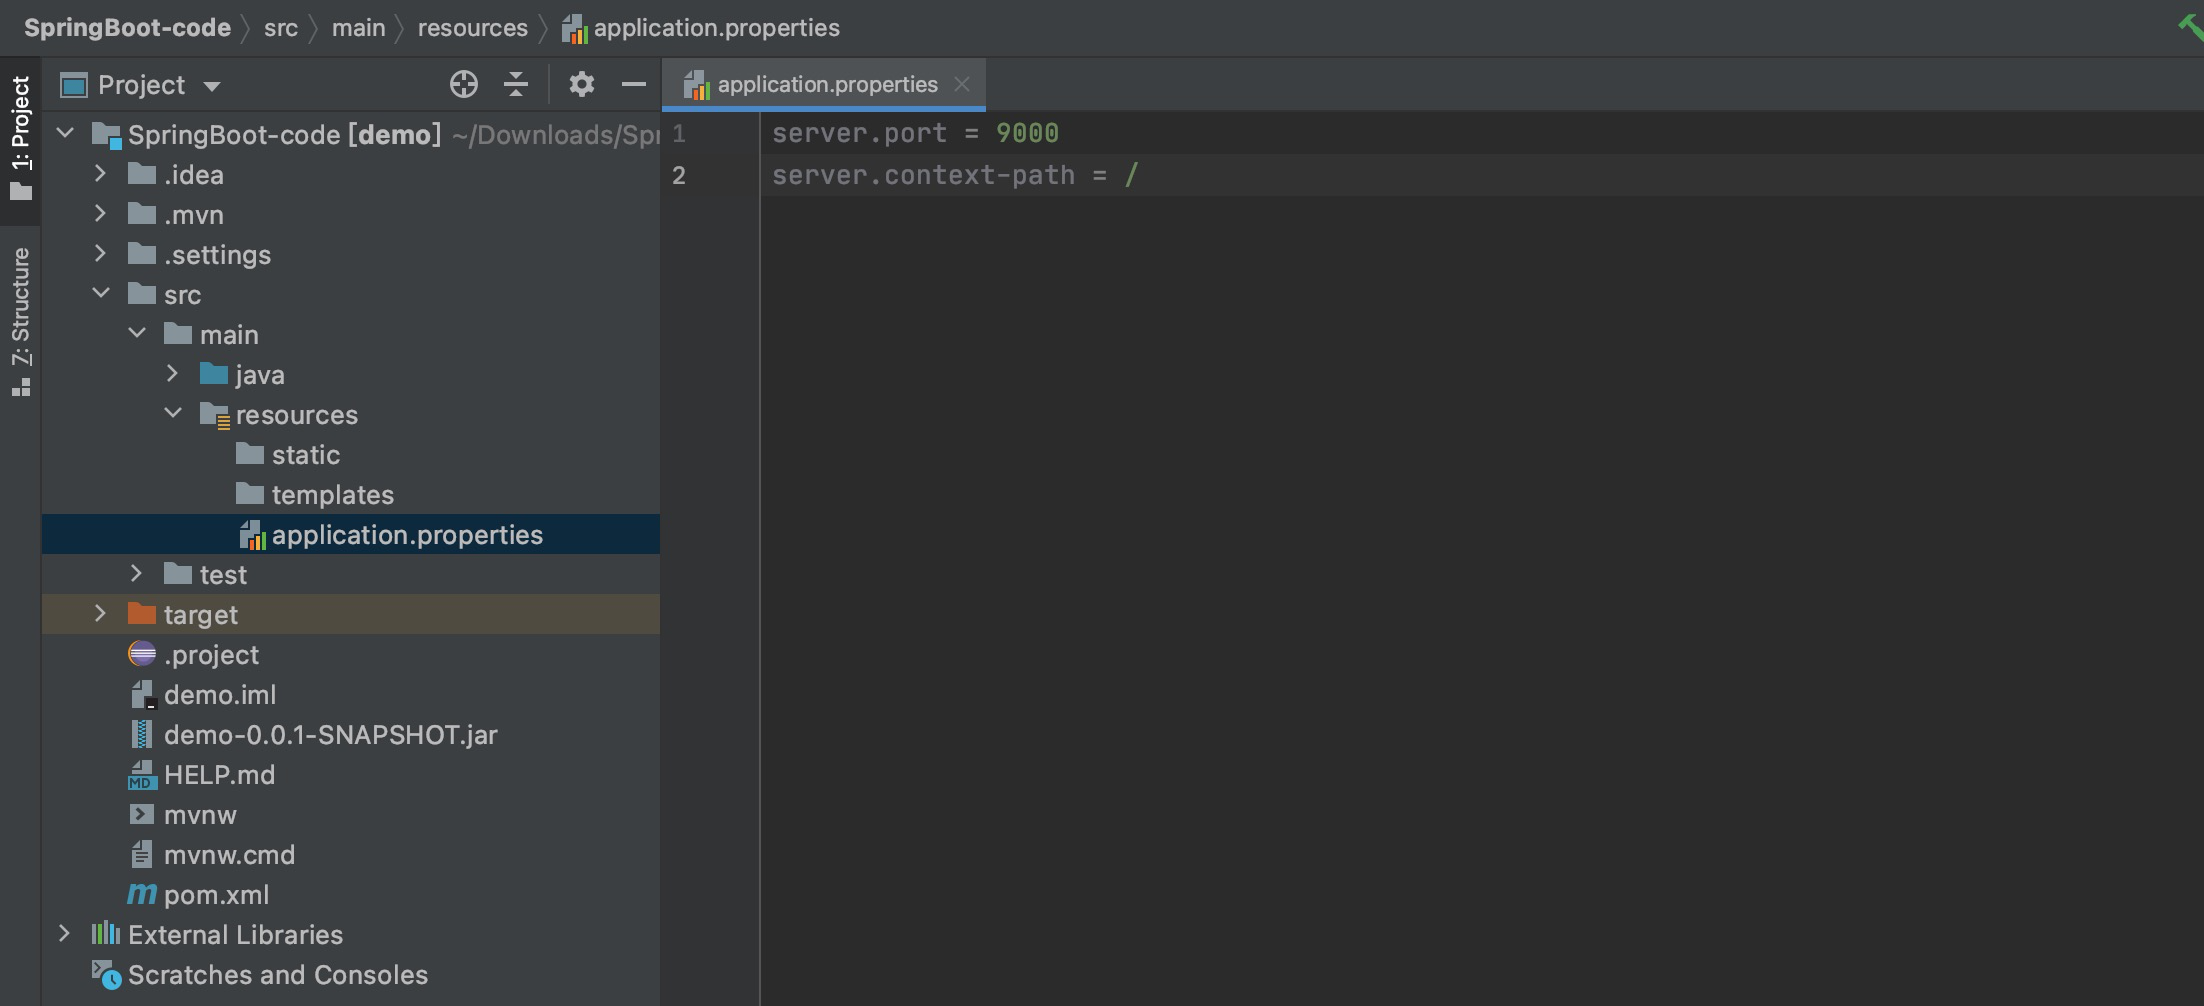
Summarize
This experience uses function computing to deploy a springboot project. Generally speaking, the process is very smooth. You can generate and deploy a project with just a few clicks in the console. It is very friendly to novices and saves a lot of traditional deployment projects. The environment construction, installation dependencies, etc., can really let us only care about the development of business logic!
For more content, pay attention to the Serverless WeChat official account (ID: serverlessdevs), which brings together the most comprehensive content of serverless technology, regularly holds serverless events, live broadcasts, and user best practices.