1. Steps to use Ali iconfont vector graphics
- The first step is to enter the homepage of Alibaba Vector Icon Library ( http://www.iconfont.cn )
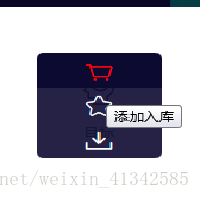
- The second step is to add the required icons into the library
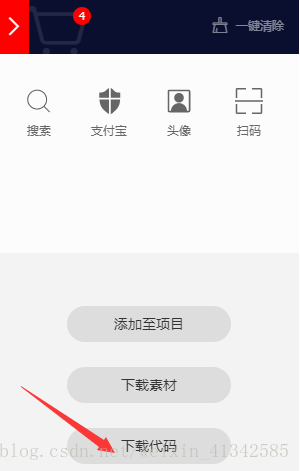
- The third step, download the code from the shopping cart
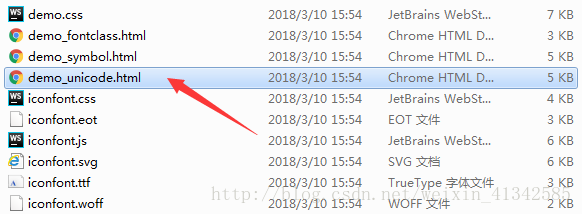
- The fourth step is to unzip the downloaded compressed package, and put the files in it into a folder in the project (when the files are placed in a folder, the url path of the code in font-face will have Some changes, assuming the font folder here), and open the demo_unicode.html file in it
- The fifth step, copy the unicode encoding of the desired icon into the label
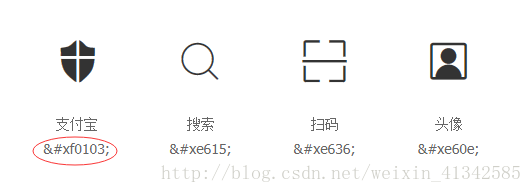
<i class="iconfont"></i>- Note: When the content attribute of the pseudo element needs to be placed in the Unicode encoding, the first three bits of the encoding need to be replaced with " \ ". Otherwise the icon will not appear
 div::before {
     content: "\e601;";
}- The sixth step, from the demo_unicode.html file, copy the font-face code into the CSS style sheet. (The font-family value can be customized). Since the file in the fourth step is placed in the font folder, the url path of the font-face needs to be added with "font/".
@font-face {
  font-family: 'diyfont';
  src: url('font/iconfont.eot');
  src: url('font/iconfont.eot?#iefix') format('embedded-opentype'),
  url('font/iconfont.woff') format('woff'),
  url('font/iconfont.ttf') format('truetype'),
  url('font/iconfont.svg#iconfont') format('svg');
}- The seventh step, define a class to set the font-famliy property to its own defined value
.my-font {
    font-famliy: "diyfont";
}- Finally, the defined class is added to the label containing Unicode encoding, and some other style settings can be performed on the label to improve the viewing effect.
<i class="my-font"></i>2. Steps to use Ali webfont vector graphics
The usage of webfont is similar to the usage of iconfont. Compared with the usage of webfont, there are fewer steps and simpler.
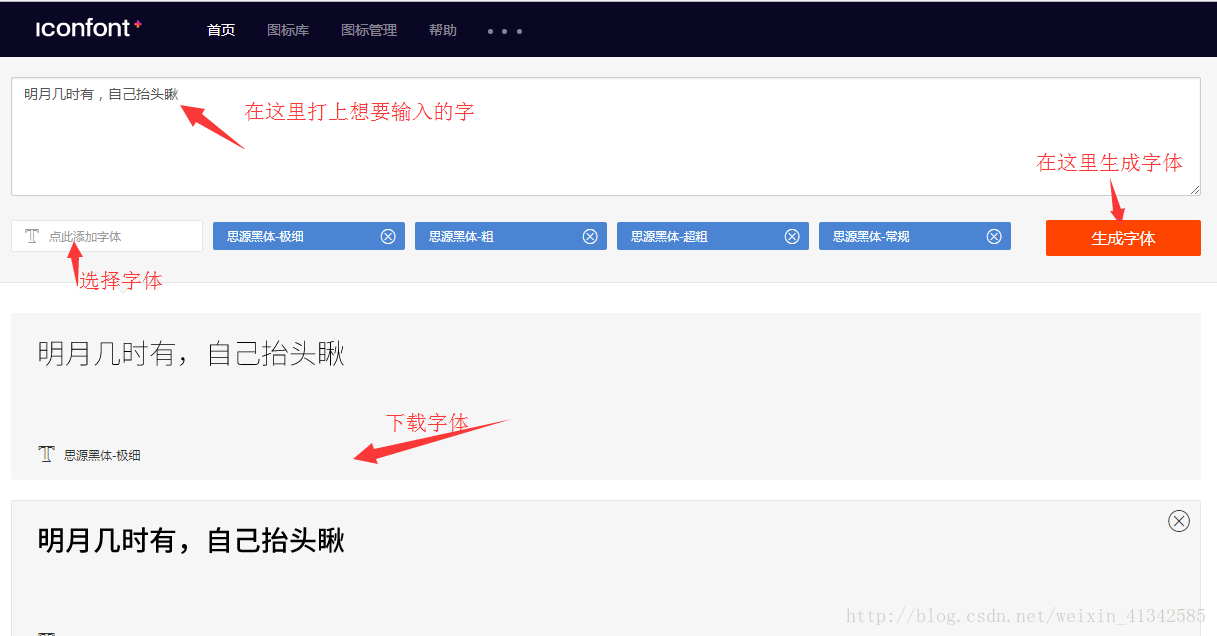
- The first step is to enter the Alimama webfont platform.
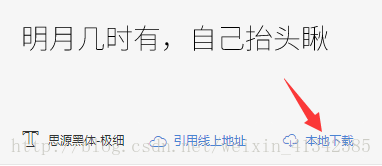
- The second step is to download the required fonts, decompress them, put the files in the project, and open the demo.html file.
- The third step, use font-face to declare the font (here the file is placed under the font folder, so the url value has changed).
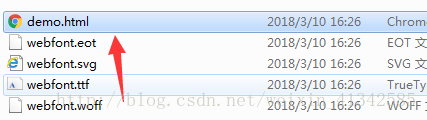
@font-face {font-family: 'webfont';
            src: url('font/webfont.eot'); /* IE9*/
            src: url('font/webfont.eot?#iefix') format('embedded-opentype'), /* IE6-IE8 */
            url('font/webfont.woff') format('woff'), /* chrome、firefox */
            url('font/webfont.ttf') format('truetype'), /* chrome、firefox、opera、Safari, Android, iOS 4.2+*/
            url('font/webfont.svg#webfont') format('svg'); /* iOS 4.1- */
}- The fourth step, define a class to specify the font-famliy property value
.web-font{
      font-family:"webfont";
}- Finally, add the class to the corresponding label, and you can set some other styles to modify.