1. Routing related objects
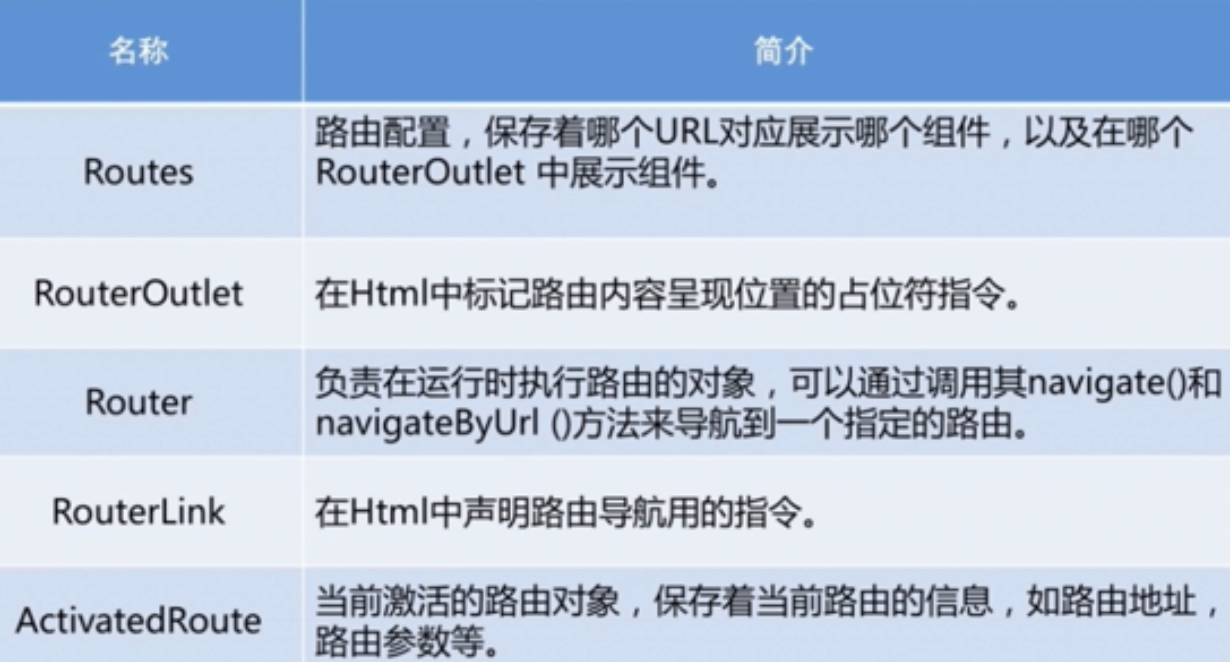
Router and RouterLink have the same function as navigation. Router is used in Controller, RouterLink is used in template.
Second, the location of the routing object
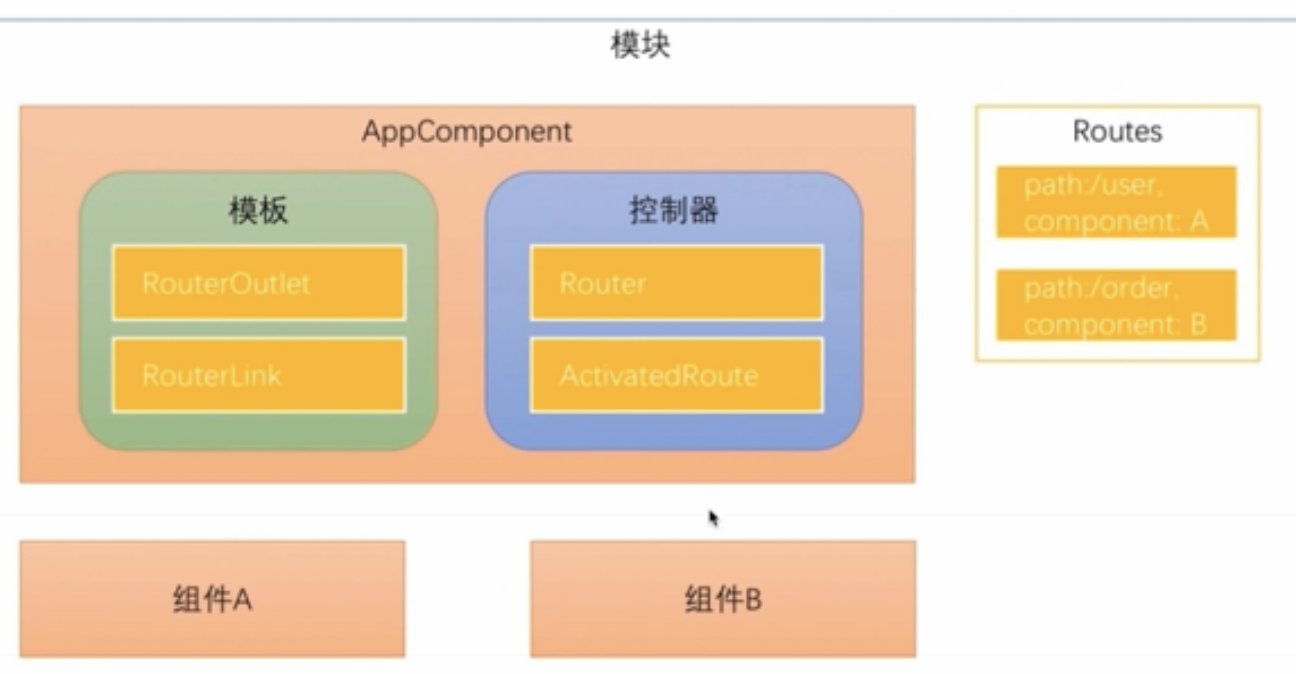
1. Routes object
configured in the module. Routes consists of a set of configuration information, each configuration information contains at least two properties, Path and Component.
2、RouterOutlet
in the template
3、RouterLink
Directive to generate links in templates to change URLs
4、Router
In the Controller, call the navigate method of the Router object to switch the route.
5、ActivatedRoute
When routing, pass data through the URL, and the data will be stored in the ActivatedRoute object.
3. Routing configuration
When using the ng new --routing parameter, an additional app-routing.module.ts file will be generated
import { NgModule } from '@angular/core';
import { Routes, RouterModule } from '@angular/router';

const routes: Routes = [];

@NgModule ({
  imports: [RouterModule.forRoot(routes)],
  exports: [RouterModule]
})
export class AppRoutingModule { }
Will automatically import to app.module.ts.
Generate two components home component and component component.
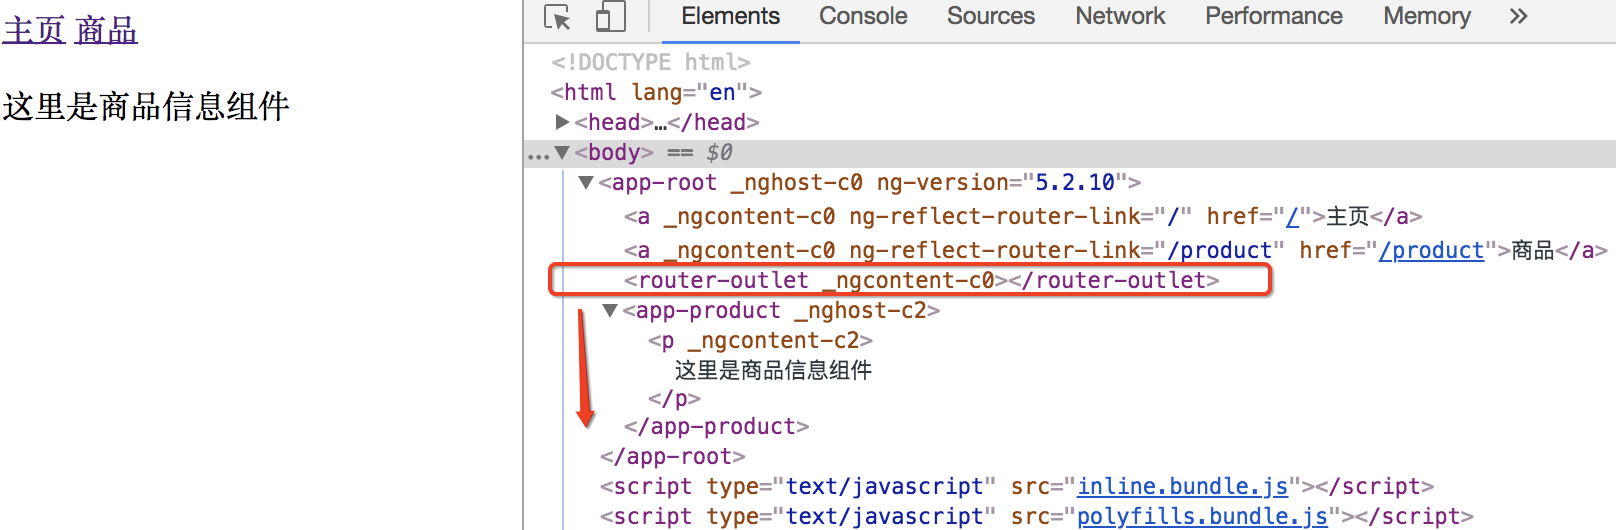
const routes: Routes = [
  {path: '', component : HomeComponent}, // path is empty
  {path: 'product' , component: ProductComponent}
];
Notice:
1. The path configuration cannot start with a slash, and cannot be configured as path:'/product'.
Because the Angular router parses and generates urls, the absence of / starts with the freedom to use relative and absolute paths when navigating between multiple views.
2. When writing the path in the template, it must start with /.
Because adding . with a slash indicates whether to navigate to the root route (/) or a sub-route (./).
/ is to navigate to the root route and find it from the layer where the root route is configured.
<a [routerLink]="['/']">主页</a>
3. Display component content under <router-outlet>
4. The routerLink parameter is an array instead of a string
Because parameters can be passed when routing.
Fourth, navigate through the Router object in the code
Add a button to the template
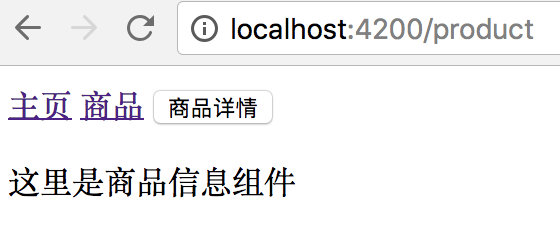
<input type="button" value="商品详情" (click)="toProductDetails()">
Use router.navigate to navigate in controller.
The navigate parameter is the same as the routerLink parameter configuration.
import { Component } from '@angular/core';
import { Router } from '@angular/router';

@Component({
  selector: 'app-root',
  templateUrl: './app.component.html',
  styleUrls: ['./app.component.css']
})
export class AppComponent {
  constructor(private router:Router){
  }
  toProductDetails(){
    this.router.navigate(['/product']);
  }
}
Clicking the button has the same effect as clicking the link.
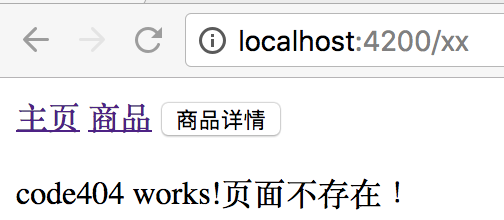
Five, configure the path that does not exist
The generated code404 component shows that the page does not exist.
Routes that match first take precedence, so **wildcard routes should be placed last.
const routes: Routes = [
  { path: '', component: HomeComponent }, // path is empty
  { path: 'product' , component: ProductComponent },
  { path: '**', component: Code404Component }
];
6. Passing data during routing
There are 3 ways
1. Pass data in query parameters

2. Pass data in the routing path
When defining a routing path, specify the parameter name and carry the parameter in the actual path.

3. Pass data in routing configuration

The author of this article starof , because the knowledge itself is changing, the author is also constantly learning and growing, and the content of the article is also updated regularly. In order to avoid misleading readers and facilitate tracing back to the source, please reprint and indicate the source: http://www.cnblogs.com/ starof/p/9000780.html If you have any questions, please discuss with me and make progress together.