Assuming that the project needs to be deployed in three environments: dev, test, and prd, for springboot projects, the following methods can be used:
1, Use springboot's own profile
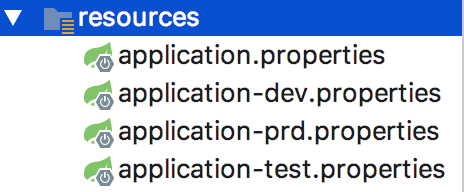
The name of the multi-environment configuration file of springboot must meet the format of application-{profile}.properties , such as:
Then you need to set the value of spring.profiles.active to activate the corresponding profile.
We can activate it in the application.properties file like:
spring.profiles.active=dev
It can also be activated when running the jar package, which will override the above, such as:
java -jar hello.jar --spring.profiles.active=test
或者
java -Dspring.profiles.active=test -jar hello.jar
Annotation @Profile introduction:
When developing java components in springboot, you can use @Profile to determine whether the class is instantiated. @Profile("dev") means that the current class will be instantiated only when spring.profiles.active = dev. It can be used in some scenarios For example: In the development and testing process, the SMS interface needs to be blocked. Please see the code:
@Service
@Profile({"dev","test"})
public class DevTestSmsServiceImpl implements SmsService {
    @Override
    public void send() {
        System.out.println("开发测试阶段不需要发短信");
    }
}

@Service
@Profile("prd")
public class PrdSmsServiceImpl implements SmsService {

    @Override
    public void send() {
        System.out.println("调用真实短信接口");
    }
}
2, use the profile of the packaging tool
For the profile of springboot, some people think that the path and naming convention of the configuration file will be inflexible, and some people think that it is a bit rude to put all the configuration files into the jar package indiscriminately regardless of the environment?
Going back to the traditional approach, we can consider using the profile of the packaging tool, and the configuration of each environment is demarcated during the packaging phase.
maven profile ( http://maven.apache.org/guides/introduction/introduction-to-profiles.html )
There are many ways to use maven profile on the official website. Here we choose the more commonly used one, configure the profile in the pom file, and then activate it when the mvn command is packaged.
pom file, such as:
<?xml version="1.0" encoding="UTF-8"?>
<project xmlns="http://maven.apache.org/POM/4.0.0"
         xmlns:xsi="http://www.w3.org/2001/XMLSchema-instance"
         xsi:schemaLocation="http://maven.apache.org/POM/4.0.0 http://maven.apache.org/xsd/maven-4.0.0.xsd">
    <modelVersion>4.0.0</modelVersion>

    <groupId>com.wx</groupId>
    <artifactId>hello</artifactId>
    <version>1.0-SNAPSHOT</version>

    <parent>
        <groupId>org.springframework.boot</groupId>
        <artifactId>spring-boot-starter-parent</artifactId>
        <version>1.5.12.RELEASE</version>
    </parent>

    <dependencies>
        <dependency>
            <groupId>org.springframework.boot</groupId>
            <artifactId>spring-boot-starter-web</artifactId>
        </dependency>
    </dependencies>

    <!--定义3个profile-->
    <profiles>
        <profile>
            <id>dev-profile</id>
            <activation>
                <property>
                    <name>maven.profile.env</name>
                    <value>dev</value>
                </property>
                <activeByDefault>true</activeByDefault>
            </activation>
            <properties>
                <env>dev</env>
            </properties>
        </profile>

        <profile>
            <id>test-profile</id>
            <activation>
                <property>
                    <name>maven.profile.env</name>
                    <value>test</value>
                </property>
            </activation>
            <properties>
                <env>test</env>
            </properties>
        </profile>


        <profile>
            <id>prd-profile</id>
            <activation>
                <property>
                    <name>maven.profile.env</name>
                    <value>prd</value>
                </property>
            </activation>
            <properties>
                <env>prd</env>
            </properties>
        </profile>

    </profiles>

    <build>

        <plugins>
            <plugin>
                <groupId>org.springframework.boot</groupId>
                <artifactId>spring-boot-maven-plugin</artifactId>
            </plugin>
        </plugins>

        <!--定制打包时的资源拷贝-->
        <resources>
            <resource>
                <directory>src/main/resources</directory>
                <targetPath>./</targetPath>
                <includes>
                    <include>application.properties</include>
                    <include>application-${env}.properties</include>
                </includes>
            </resource>
        </resources>

    </build>

</project>
Then set the value of maven.profile.env in the mvn command, such as:
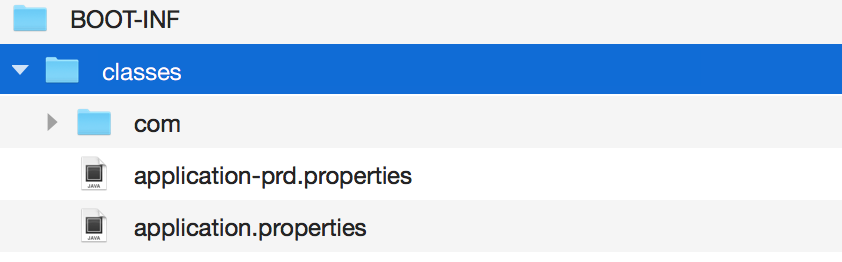
mvn clean package -Dmaven.skip.test=true -Dmaven.profile.env=prd
The final configuration file entered into the jar package is as follows: