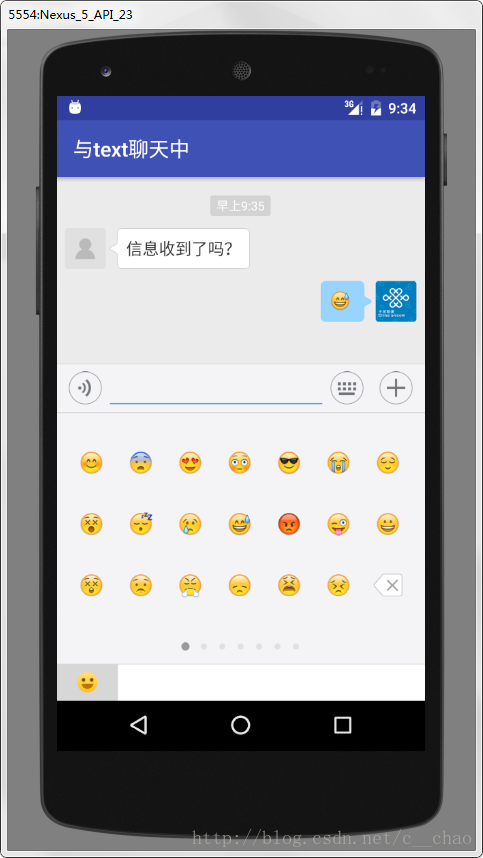
Effect picture:
Before development, we need to go to the official website to register: Rongyun official website
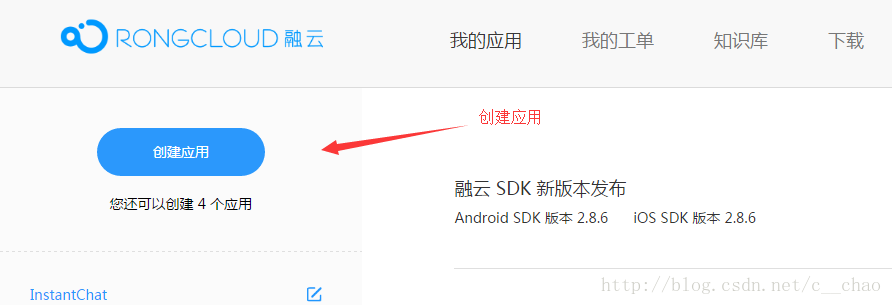
Just enter the app name and description to create it.
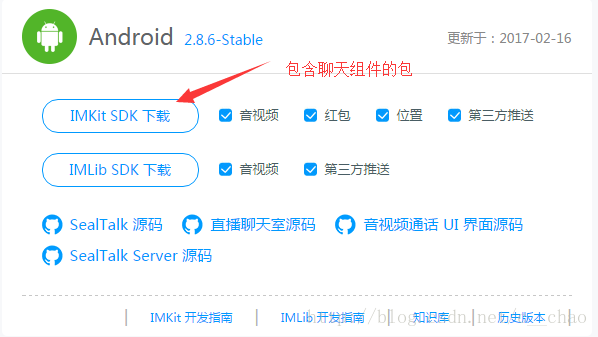
For easier integration, we download the SDK on the official website and choose the IMKit package, because this package contains the components required for chat.
After the download is successful, we introduce IMKit in the form of Module and depend on it in our project.
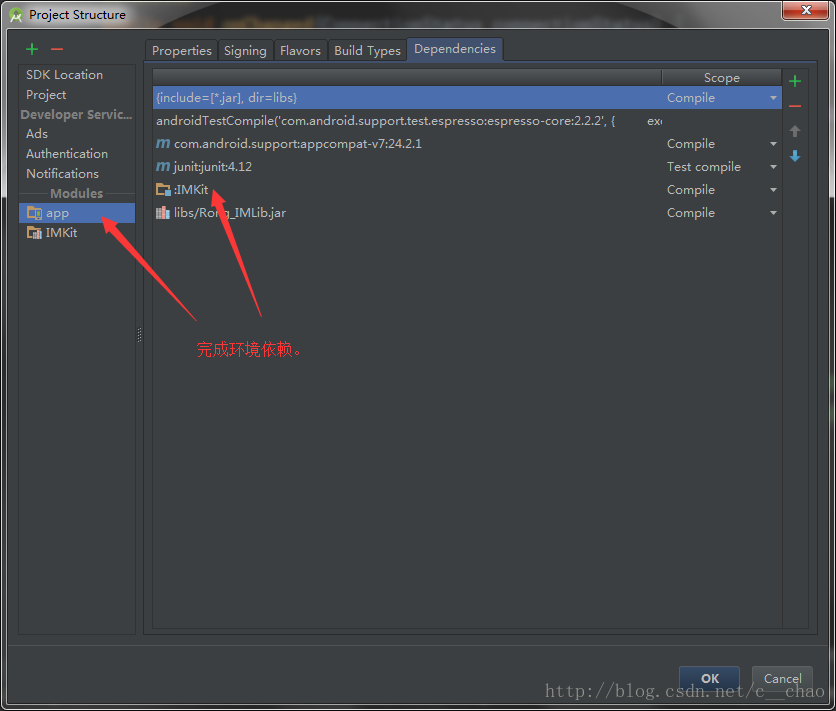
This environment has been set up, and then start our code writing:
public class App extends Application {

    @Override
    public void onCreate() {
        super.onCreate();
        RongIM.init(this);//初始化,然后记得在清单文件配置此类。
    }
}
Make the server connection in MainActivity.
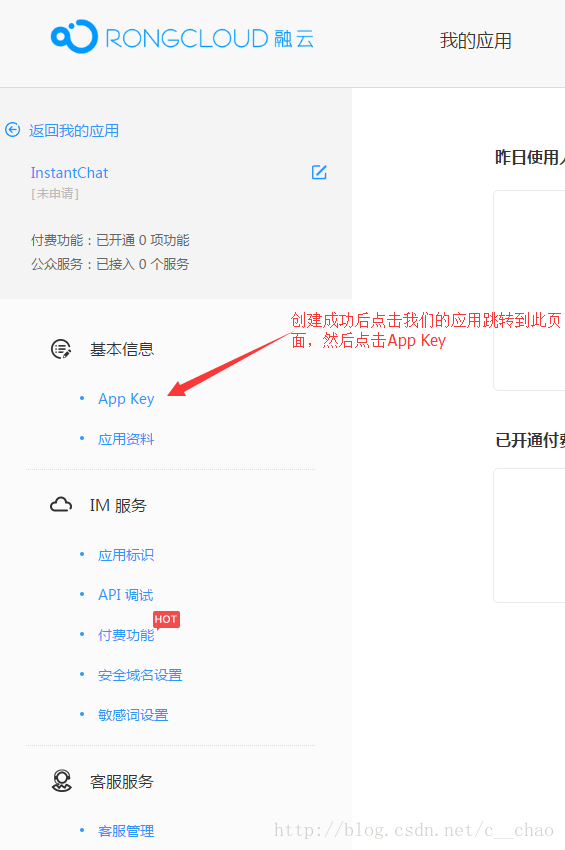
Due to the test environment, we can directly obtain the token from the official website of Rongyun. My application in the Rongyun personal center has an API debugging function on the left.
Just enter an id for testing, and then click submit.
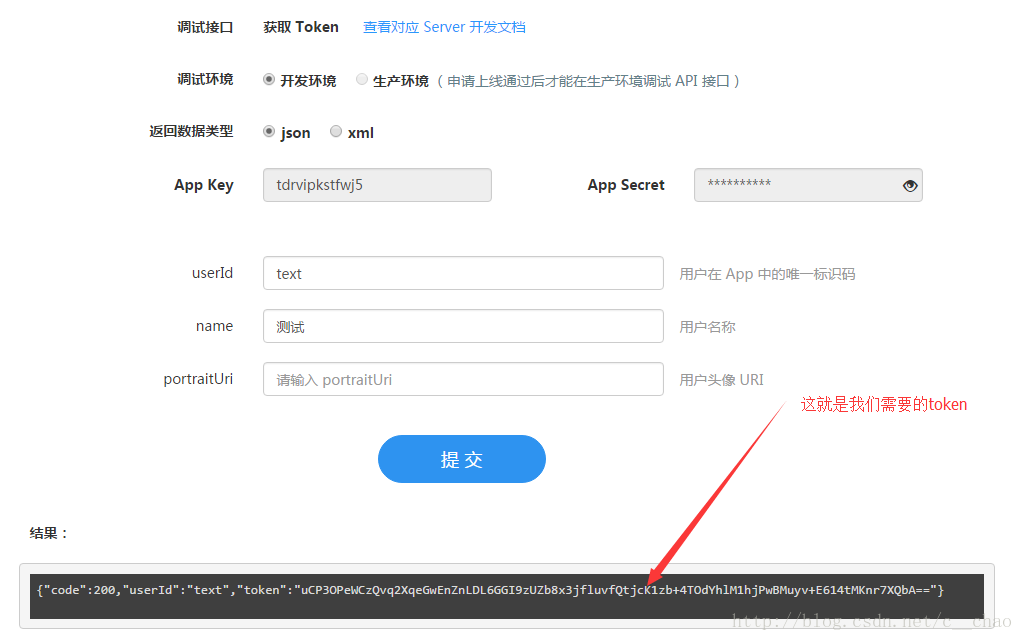
Then use this token to call the method to connect to the server:
    private void connect(String token) {
            RongIM.connect(token, new RongIMClient.ConnectCallback() {
                @Override
                public void onTokenIncorrect() {
                    Log.e("LoginActivity", "--onTokenIncorrect");
                }
                @Override
                public void onSuccess(String userid) {
                    Log.e("LoginActivity", "--onSuccess--" + userid);
                    Toast.makeText(MainActivity.this, "登录成功,用户:" + userid, Toast.LENGTH_SHORT).show();
                    //服务器连接成功,跳转消息列表
                    startActivity(new Intent(MainActivity.this, ConversationListActivity.class));
                }
                @Override
                public void onError(RongIMClient.ErrorCode errorCode) {
                    Log.e("LoginActivity", "--onError");
                }
            });
    }
public class ConversationListActivity extends AppCompatActivity {
@Override
protected void onCreate(Bundle savedInstanceState) {
super.onCreate(savedInstanceState);
//加载视图
setContentView(R.layout.subconversationlist);
ConversationListFragment listFragment = (ConversationListFragment) ConversationListFragment.instantiate(this, ConversationListFragment.class.getName());
Uri uri = Uri.parse("rong://" + getApplicationInfo().packageName).buildUpon()
.appendPath("conversationlist")
.appendQueryParameter(Conversation.ConversationType.PRIVATE.getName(), "false")
.appendQueryParameter(Conversation.ConversationType.GROUP.getName(), "false")
.appendQueryParameter(Conversation.ConversationType.DISCUSSION.getName(), "false")
.appendQueryParameter(Conversation.ConversationType.PUBLIC_SERVICE.getName(), "false")
.appendQueryParameter(Conversation.ConversationType.SYSTEM.getName(), "false")
.build();
listFragment.setUri(uri);
FragmentTransaction transaction = getSupportFragmentManager().beginTransaction();
//将融云的Fragment界面加入到我们的页面。
transaction.add(R.id.subconversationlist, listFragment);
transaction.commitAllowingStateLoss();
//为了更加直观,服务器建立连接后进入此界面,直接调用如下代码,执行单人聊天,第二个参数代表对方用户ID,第三个参数代表聊天窗口标题,为了方便测试聊天,需要两个手机测试,所以登陆第一个token的用户与第二个用户"chao"建立聊天,在运行第二个手机之前,记得改"chao"的token登录,然后聊天这里改为第一个的ID"text"。
RongIM.getInstance().startPrivateChat(this, "chao", "聊天中");
}
}The subconversationlist.xml layout contains only one FrameLayout:
    <FrameLayout
        android:id="@+id/subconversationlist"
        android:name="io.rong.imkit.fragment.SubConversationListFragment"
        android:layout_width="match_parent"
        android:layout_height="match_parent" />
At this point, the chat logic is basically processed, and then we go to the final configuration to configure the chat interface:
public class ConversationActivity extends AppCompatActivity {
    @Override
    protected void onCreate(Bundle savedInstanceState) {
        super.onCreate(savedInstanceState);
        setContentView(R.layout.conversation);
        String sName = getIntent().getData().getQueryParameter("title");//获取昵称
        setTitle("与" + sName + "聊天中");
    }
}
Add fragment to the chat layout, note that the name here is fixed:
<fragment
android:id="@+id/conversation"
android:name="io.rong.imkit.fragment.ConversationFragment"
android:layout_width="match_parent"
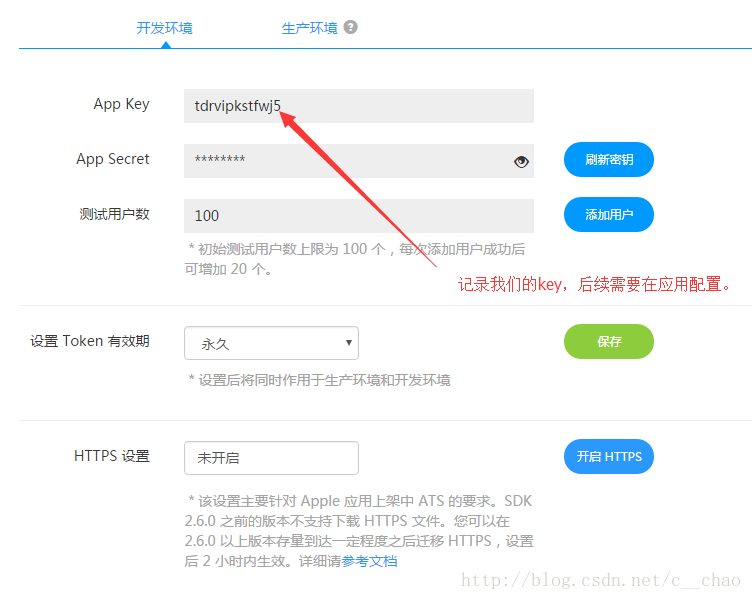
android:layout_height="match_parent" />Manifest file configuration, there are several places that need to be changed here, RONG_CLOUD_APP_KEY=your own key, android:host=”chao.example.instantchat” and the host content must be changed to the package name of your own project.
<?xml version="1.0" encoding="utf-8"?>
<manifest xmlns:android="http://schemas.android.com/apk/res/android"
    package="chao.example.instantchat">

    <uses-permission android:name="android.permission.WRITE_EXTERNAL_STORAGE" />
    <uses-permission android:name="android.permission.INTERNET" />
    <uses-permission android:name="android.permission.ACCESS_NETWORK_STATE" />
    <uses-permission android:name="android.permission.ACCESS_WIFI_STATE" />
    <uses-permission android:name="android.permission.READ_PHONE_STATE" />
    <uses-permission android:name="android.permission.RECORD_AUDIO" />
    <uses-permission android:name="android.permission.GET_TASKS" />
    <uses-permission android:name="android.permission.WAKE_LOCK" />
    <uses-permission android:name="android.permission.MODIFY_AUDIO_SETTINGS" />
    <uses-permission android:name="android.permission.VIBRATE" />
    <uses-permission android:name="android.permission.ACCESS_FINE_LOCATION" />
    <uses-permission android:name="android.permission.RECEIVE_BOOT_COMPLETED" />

    <application
        android:name=".App"
        android:allowBackup="true"
        android:icon="@mipmap/ic_launcher"
        android:label="@string/app_name"
        android:supportsRtl="true"
        android:theme="@style/AppTheme">
        <activity android:name=".MainActivity">
            <intent-filter>
                <action android:name="android.intent.action.MAIN" />

                <category android:name="android.intent.category.LAUNCHER" />
            </intent-filter>
        </activity>

        <!--会话列表-->
        <activity
            android:name=".activity.ConversationListActivity"
            android:launchMode="singleTask"
            android:screenOrientation="portrait"
            android:windowSoftInputMode="stateHidden|adjustResize">

            <intent-filter>
                <action android:name="android.intent.action.VIEW" />
                <category android:name="android.intent.category.DEFAULT" />
                <data
                    android:host="chao.example.instantchat"
                    android:path="/conversationlist"
                    android:scheme="rong" />
            </intent-filter>
        </activity>
        <activity
            android:name=".ConversationActivity"
            android:launchMode="singleTop"
            android:screenOrientation="portrait"
            android:windowSoftInputMode="stateHidden|adjustResize">

            <intent-filter>
                <action android:name="android.intent.action.VIEW" />
                <category android:name="android.intent.category.DEFAULT" />

                <data
                    android:host="chao.example.instantchat"
                    android:pathPrefix="/conversation/"
                    android:scheme="rong" />
            </intent-filter>

        </activity>

        <provider
            android:name="android.support.v4.content.FileProvider"
            android:authorities="chao.example.instantchat.FileProvider"
            android:exported="false"
            android:grantUriPermissions="true">
            <meta-data
                android:name="android.support.FILE_PROVIDER_PATHS"
                android:resource="@xml/rc_file_path" />
        </provider>

        <meta-data
            android:name="RONG_CLOUD_APP_KEY"
            android:value="tdrvipkstfwj5" />

        <service
            android:name="io.rong.imlib.ipc.RongService"
            android:exported="true"
            android:process=":ipc" />

        <service
            android:name="io.rong.imlib.ReConnectService"
            android:exported="true" />

        <receiver
            android:name="io.rong.imlib.ConnectChangeReceiver"
            android:exported="true" />

        <receiver
            android:name="io.rong.imlib.HeartbeatReceiver"
            android:process=":ipc" />
        <!-- imlib config end -->
    </application>

</manifest>
Then run the project, the two APPs use two tokens respectively, package and install them on the mobile phone, as shown in the figure: