Configuration of the Ethereum contract (take the configuration of the voting contract on the private chain as an example)
The steps for configuring an Ethereum contract are roughly as follows:
one. Install Mist Browser (Ethereum Wallet already integrated)
two. Install and configure the geth command based on the Go language
three. Build a private chain locally
Four. Complete mining work on a private chain
Fives. Configuring voting contracts on private chains using Mist
Specific steps are as follows:
one. Install Mist Browser (Ethereum Wallet already integrated)
1 Log in to https://github.com/ethereum/mist/releases/ and download the latest version of the client according to your needs:
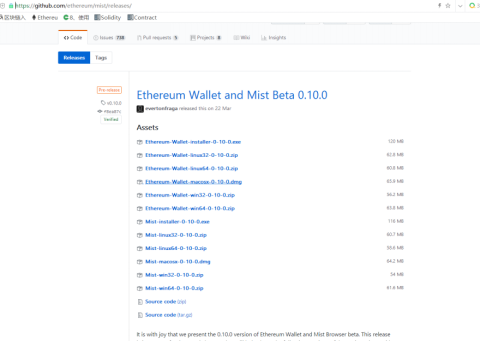
After downloading and unzipping the compressed file, find the executable file and run the installation.
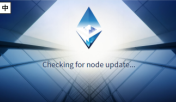
The block data needs to be synchronized during the installation process. The download process requires patience. After success, the client with the following interface will appear. Here we enter the main network of Ethereum. Of course, our subsequent experimental operations are all in the private chain built by ourselves. In the network, not here.
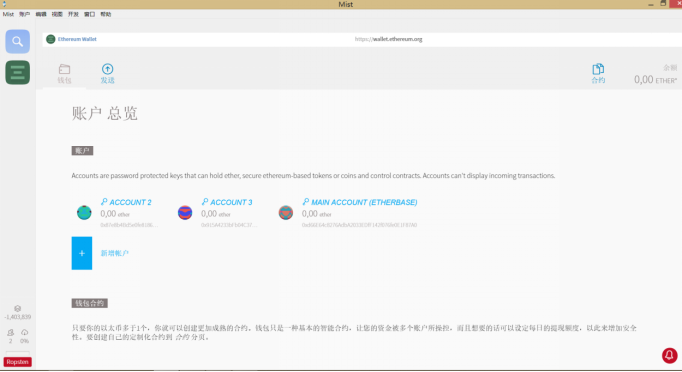
Here is the interface where three accounts have been added. If the initial installation is successful, there will be no accounts that we need to add manually. We can add them through the graphical interactive interface in Mist or through commands in the geth command line.
In the geth command line, we can pass the command (of course, this is what you can do after configuring geth )
geth accounts new to create a new account
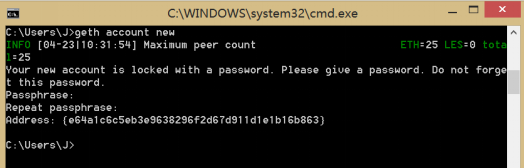
As shown in the figure, the new account is successfully established, and the new account address is
Address: {e64a1c6c5eb3e9638296f2d67d911d1e1b16b863}
When creating a new account, you need to remember the account password and back it up in time. Backup is provided in the Mist client. The Ethereum account does not have the function of retrieving the account password.
two. Install and configure the geth command based on the Go language
geth is the official client of Ethereum, it is a command line tool that provides many commands and options to run Ethereum nodes, create and manage accounts, send transactions, mine, deploy smart contracts, etc.
- The Ethereum development team provides compiled geth executable files for each system. The easiest way is to download the installation files directly. The geth installation files can go to the official download website ( https://geth.ethereum.org/downloads/ ) Download or go to the domestic mirror website ( https://ethfans.org/wikis/Ethereum-Geth-Mirror ) to download directly
Download and run the installation file
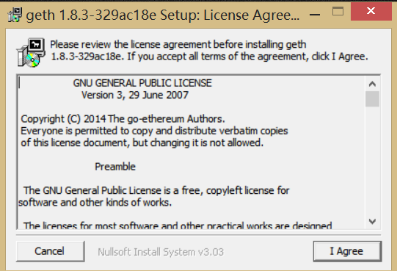
Follow the prompts to install.
After downloading and installing, you can view the help command of geth by entering:
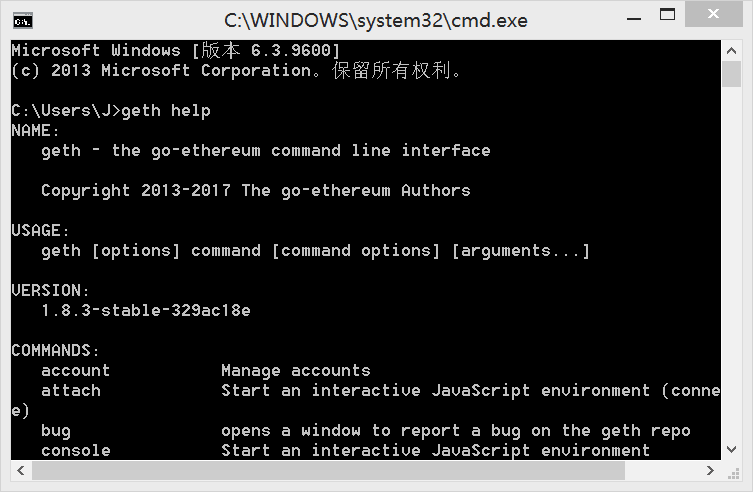
At this point , the geth installation is successful and you can proceed to the next step
three. Build a private chain locally
In order to enter the network faster and facilitate control during testing and testing, most of us choose to carry out these tasks on the private chain. Next, we will see how to build the private chain.
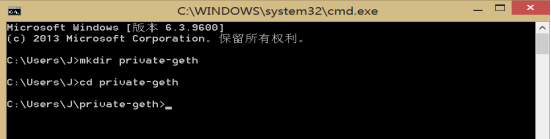
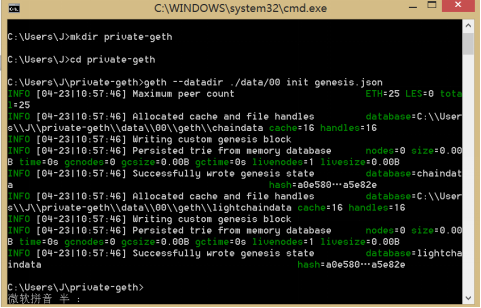
1. Enter the dos command line
Enter: mkdir private-geth
cd private-geth
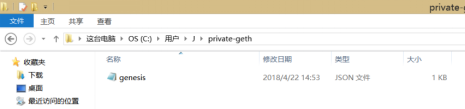
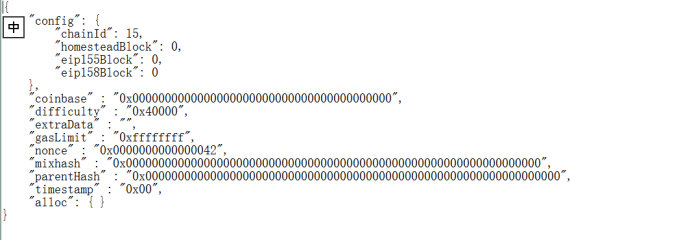
- Find the private-geth file you just created and put the .jason file of the genesis block in private-geth
The contents of the genesis file are as follows:
- Initialize the genesis node on the dos line, and set the directory:
Enter the command: geth --datadir ./data/00 init genesis.jason
4. Start the node
geth --datadir ./data/00 --networkid 15 console
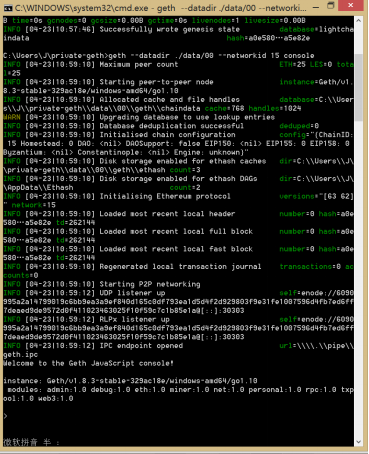
Be careful not to use networkid 1 when entering networkid, that is the id of the main network, and the networkid here must be the same as the networkid in the genesis block written by yourself! ! !
So far, the private chain has been successfully built, and you need to have an account to perform mining operations.
Four. Complete mining work on a private chain
- Create a new account on the private chain
At this point, enter the following command to view the private chain account
eth.accounts
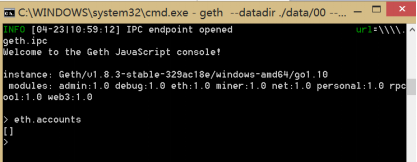
Indicates that there is no account on the private chain, we need to create it, enter the following command:
personal.newAccount("123456789")
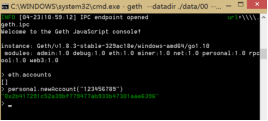
At this point, the creation is successful. The 123456789 entered in quotation marks is our account password. Of course, we can also create it through the Mist client.
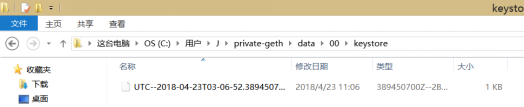
The created user account file can also be found in our local file, the path is as follows:
C:\Users\J\private-geth\data\00\keystore
At this point, opening the Mist client will automatically connect to the private chain we just created, and see the relevant information:
- Now you can start mining operations
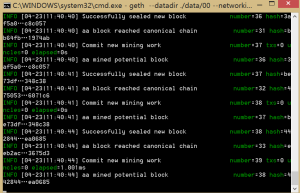
Enter miner.start() on the command line
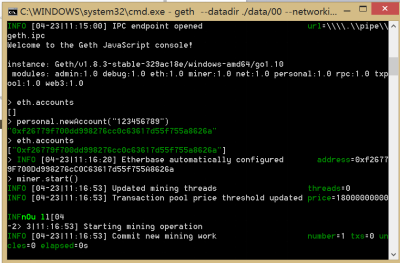
At this point, you need to wait patiently (about 5 minutes) to start mining
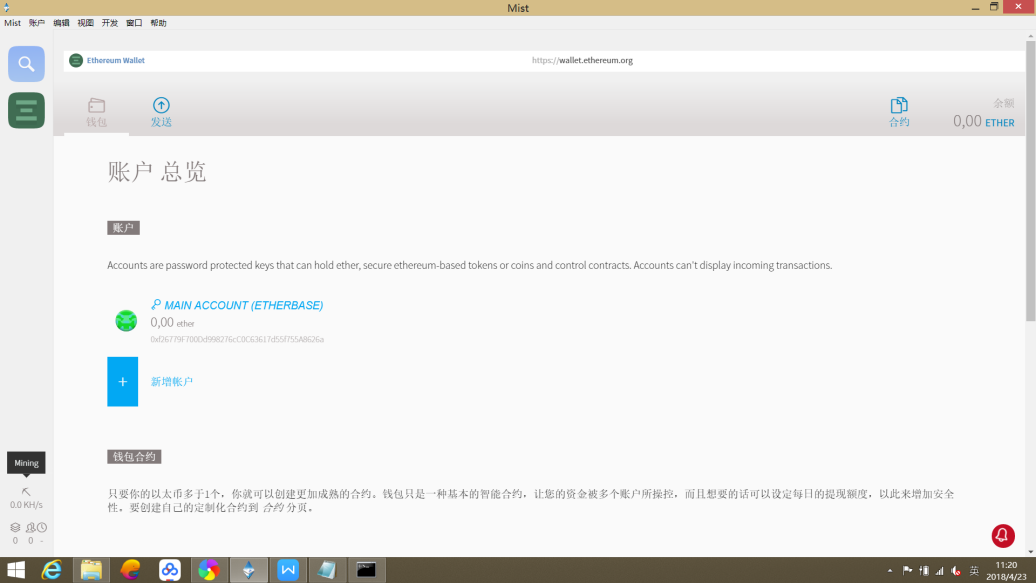
A shovel logo can also be seen in the lower left corner of the mist client, indicating that mining has started.
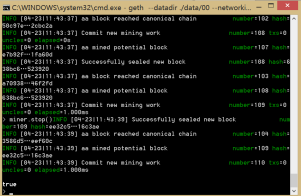
To stop mining, enter the following command:
miner.stop()
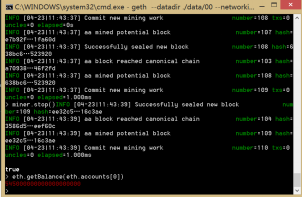
You can view the ether just mined on the geth command line. The application command is as follows:
Eth.getBalance (eth.accounts [0])
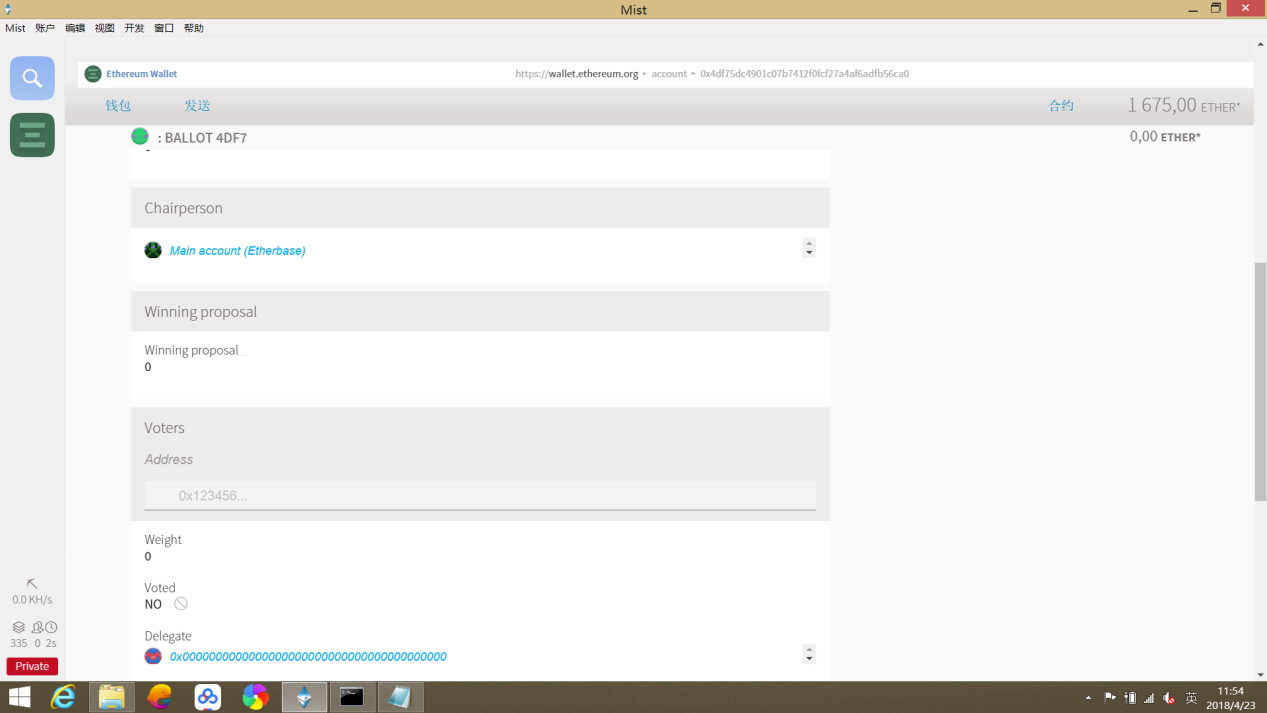
Fives. Configuring voting contracts on private chains using Mist
- Open the installed Mist browser
- Enter the contract interface
- Click to create a new contract
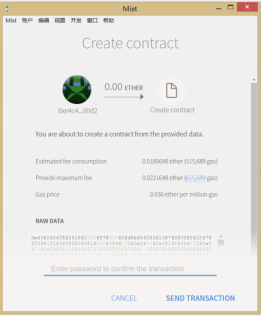
Enter the solidity contract code . Mist has its own compilation function. After the compilation is passed, you can select the contract to be deployed.
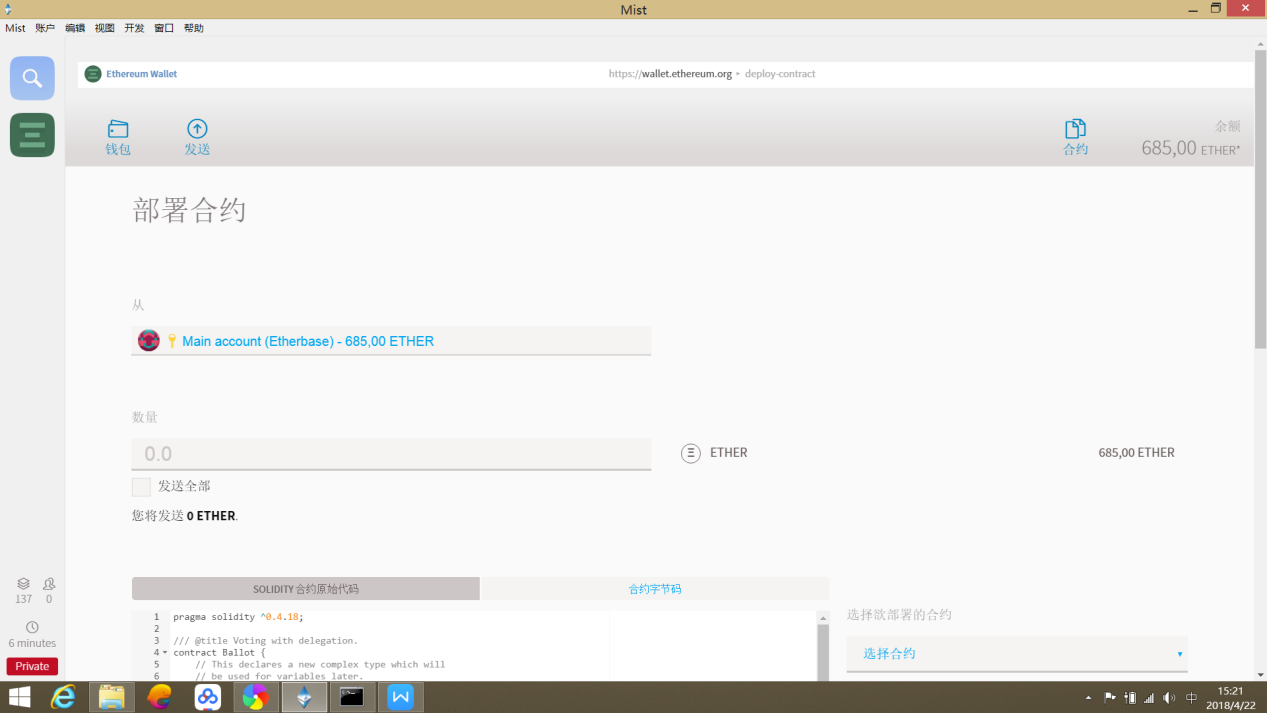
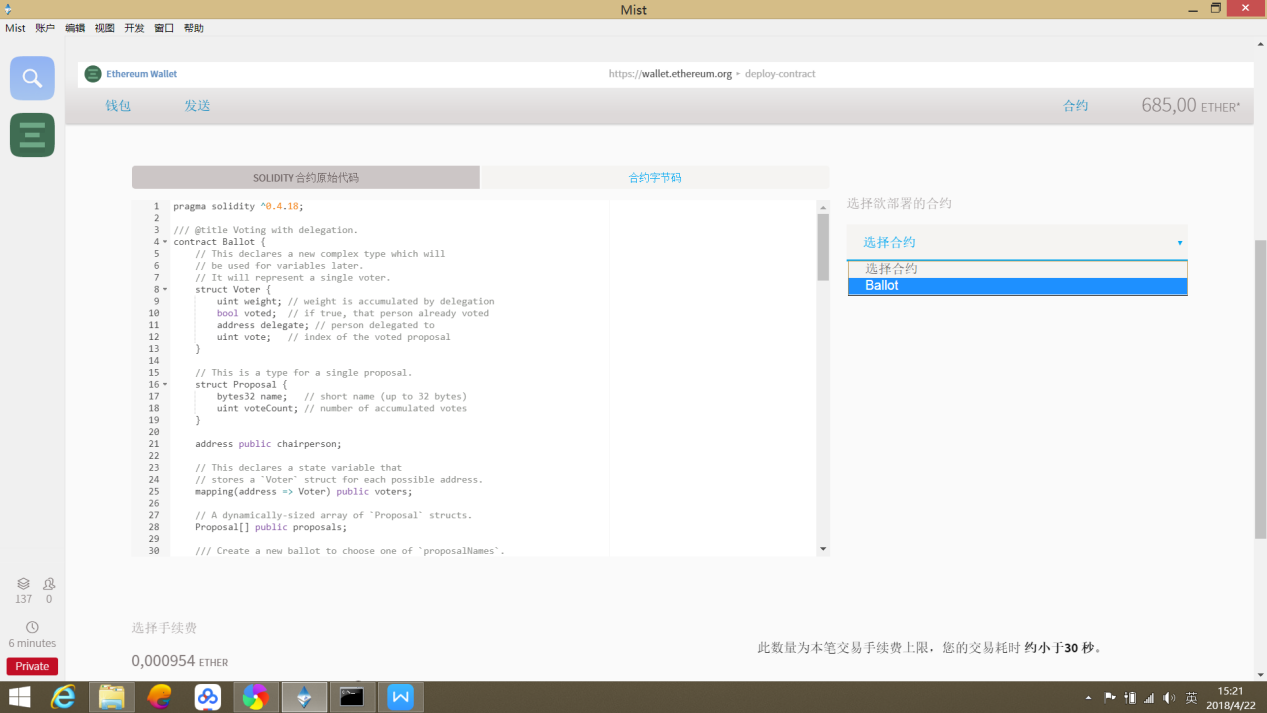
Note that the version number of the first line of the code you entered must be the same as the version number you downloaded, otherwise the compilation will fail!
Deploy after selecting the contract. After entering the password, it will be successful. Note that a large gas value is required for transactions , and the mining operation should be maintained during the process of deploying the contract!
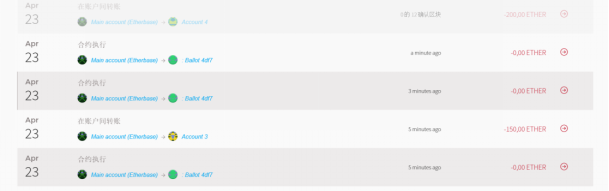
Running the contract requires other accounts. At this time, we need to create several more accounts and deposit ether from the main account.
Running the voting contract requires authorizing other accounts (for example, authorizing the second account)
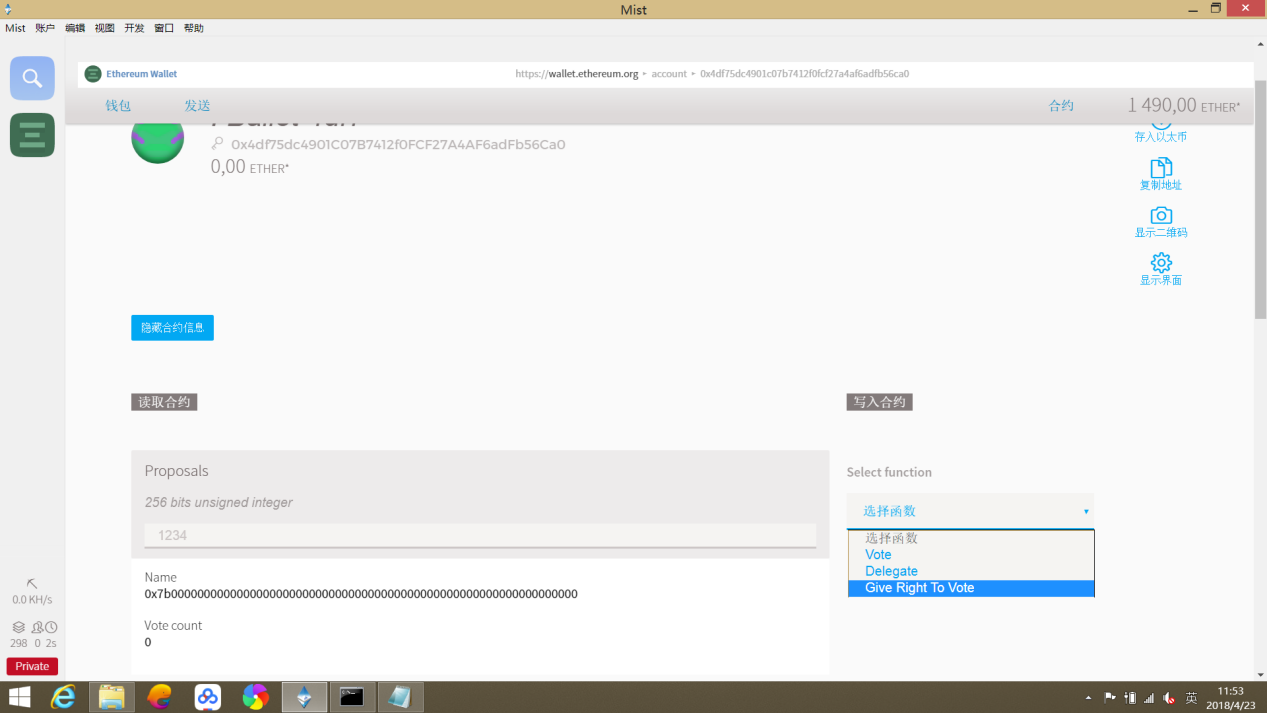
After authorization, the account can vote
---End of recovery content---