1. Background introduction
During the development process, the parameter verification in the background is essential, so you often see code like the following
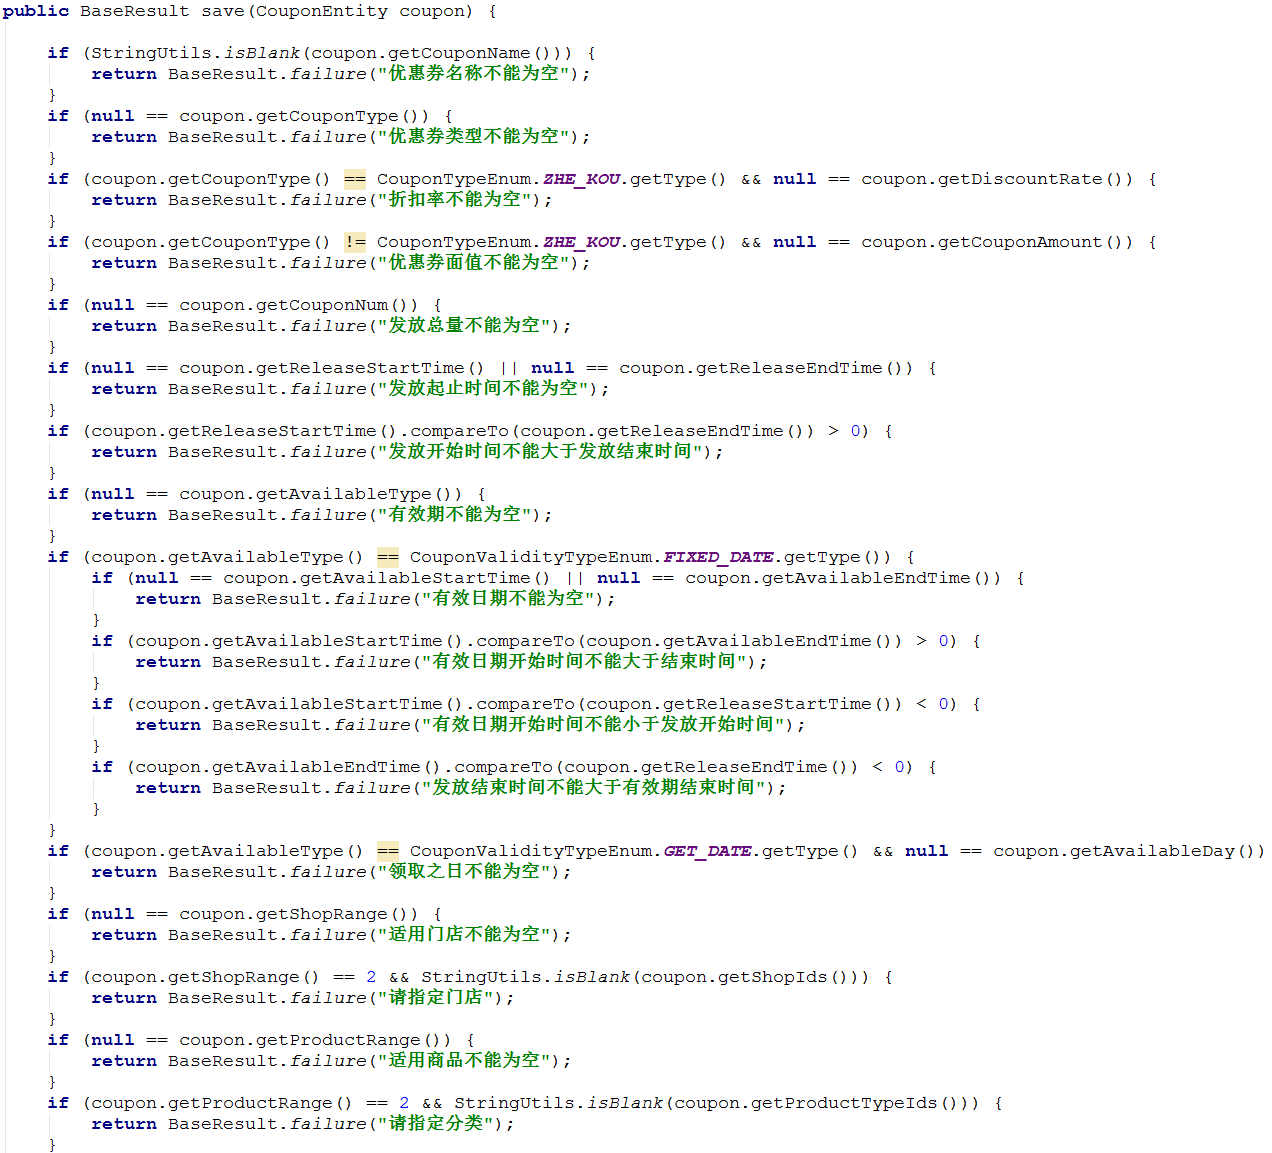
There's nothing wrong with that, it's neat, it just doesn't look very elegant.
Next, rewrite this paragraph with Validation
2. Validation in Spring Boot documentation
In the official website of Spring Boot, there is only a brief mention of Validation, as follows
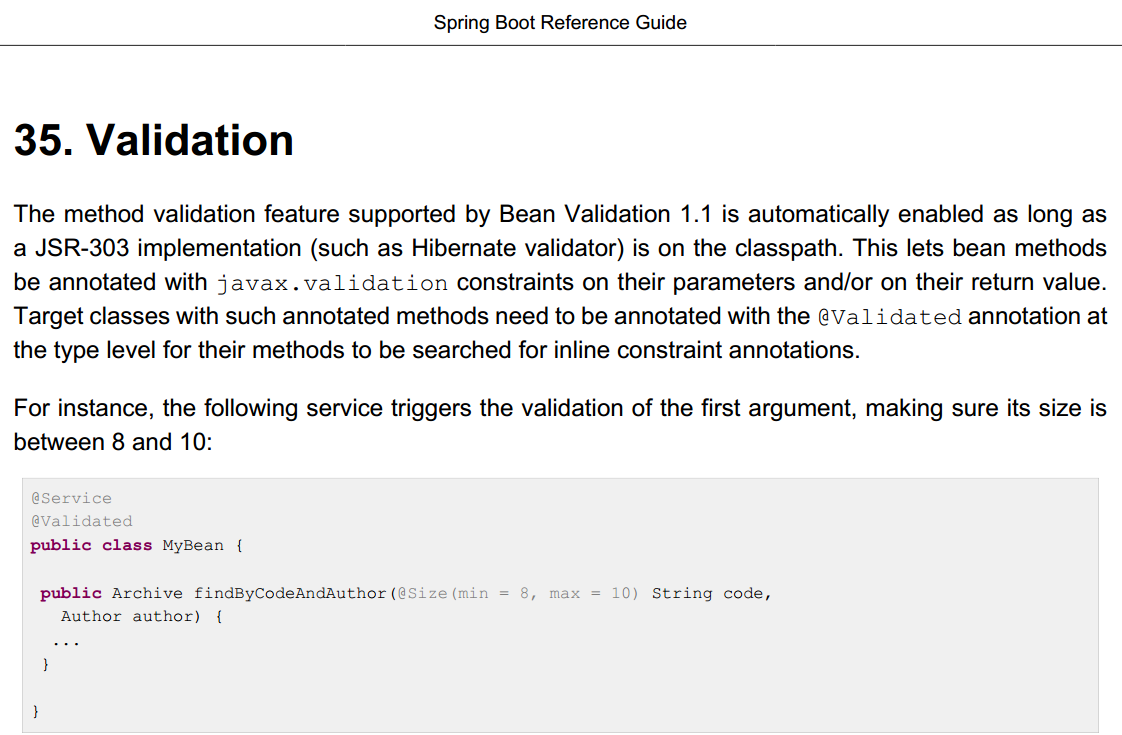
In fact, Spring Validator and Hibernate Validator are two sets of Validators, which can be mixed, here we use Hibernate Validator
3、Hibernate Validator
https://docs.jboss.org/hibernate/stable/validator/reference/en-US/html_single/#preface
4、Spring Validator
https://docs.spring.io/spring/docs/5.0.5.RELEASE/spring-framework-reference/core.html#validation
5. Examples
5.1. Introduce spring-boot-starter-validation

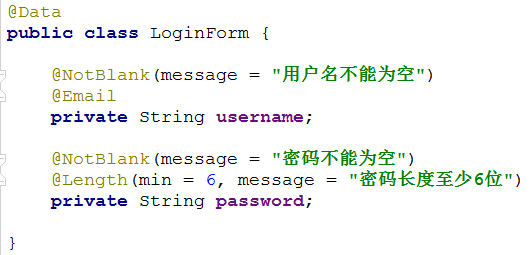
5.2, define an object
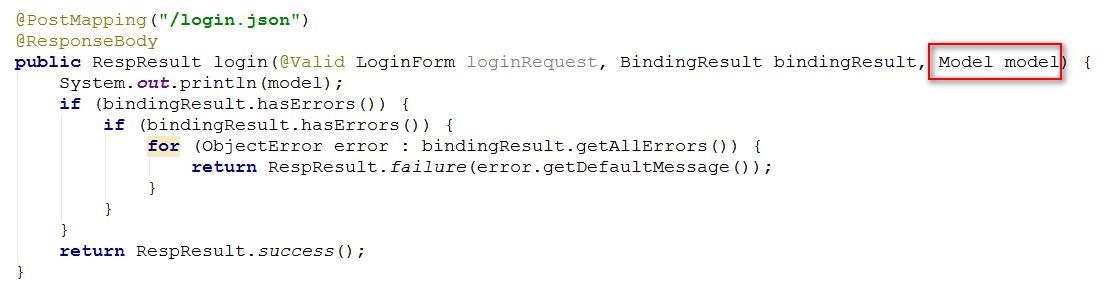
5.3. Apply @Valid verification and put the verification result in the BindingResult object
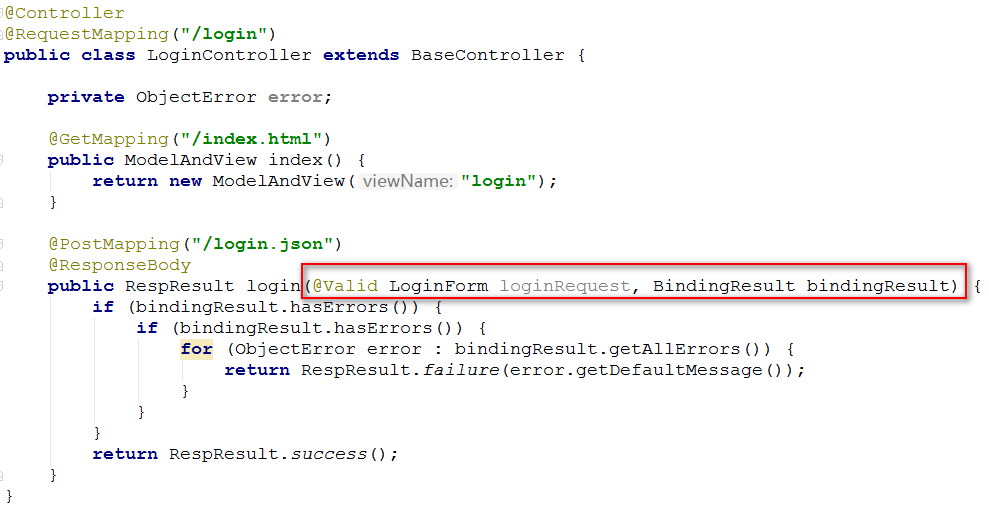
Notice:
- By default, if the validation fails, a javax.validation.ConstraintViolationException will be thrown, and these exceptions can be handled with unified exception handling.
- An Errors/BindingResult argument is expected to be declared immediately after the model attribute
5.4, see the effect


If the Model object is added after the verification object, if the ModelAndView is returned, the Model can be set to it, so that the error message can be obtained on the page.
It would be too inflexible to check only a single field. If there is an association between fields, how to check? The answer is custom
5.5. Custom verification rules
https://docs.jboss.org/hibernate/stable/validator/reference/en-US/html_single/#validator-customconstraints

Here, take coupon creation as an example to demonstrate how to customize validation rules
First, the coupon form is as follows (just for demonstration):

In addition to customizing the two validation rules, grouping is also used here.
Why is there a grouping? Because, for example, when adding, you do not need to verify the id, and when modifying, the id cannot be empty. After grouping, you can use group A for verification when adding, and group B for verification when modifying.
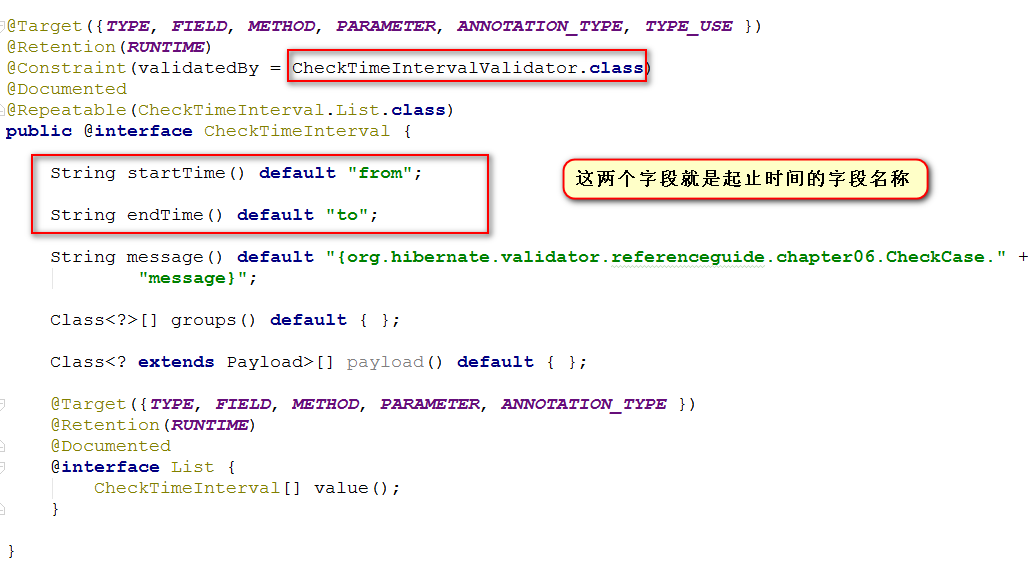
Let's focus on @CheckTimeInterval
The first step is to define an annotation called CheckTimeInterval
The second step , define a Validator to validate it
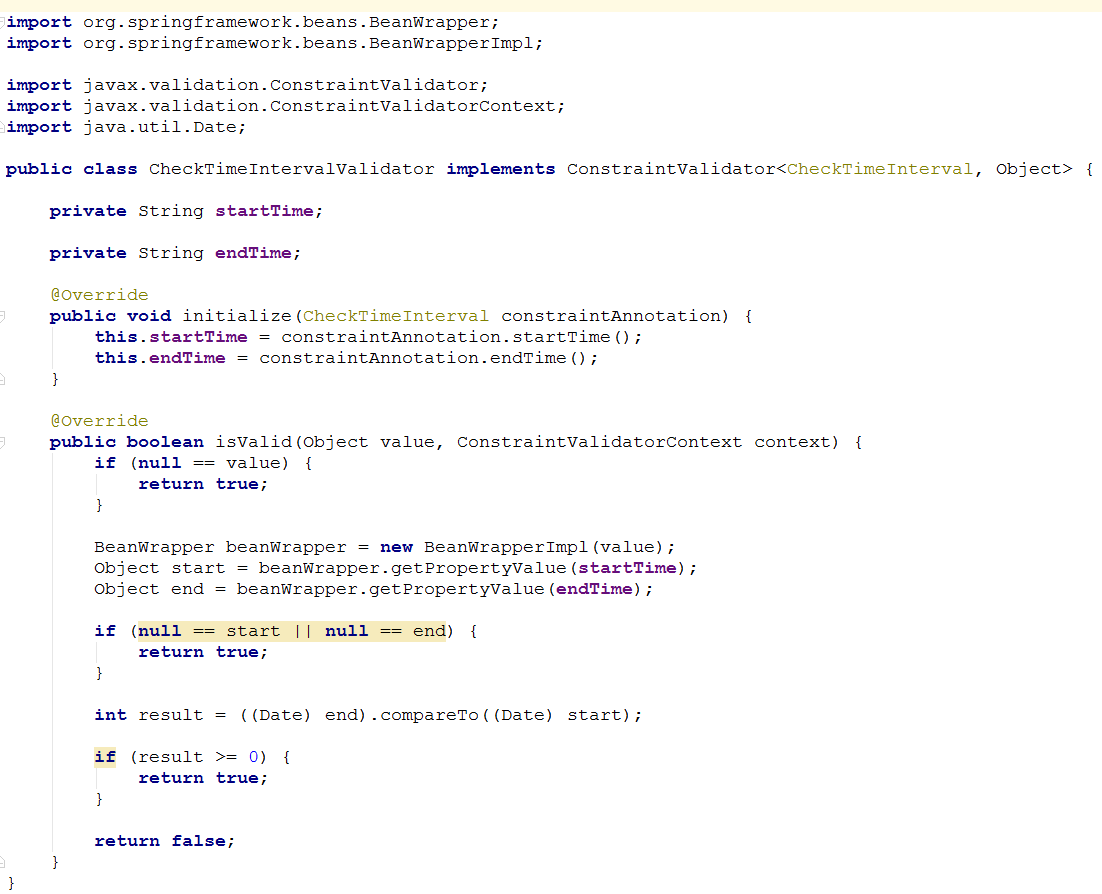
By the way, here BeanWrapper takes the attribute value of the object, let's take a look at what BeanWrapper does

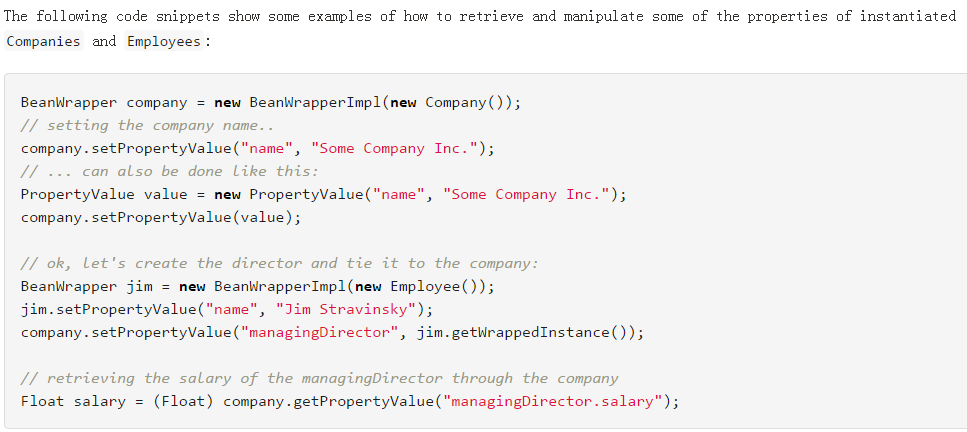
Closer to home
The third step , verification


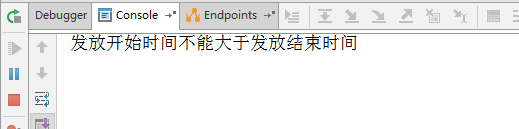
Look, the custom validation takes effect
6. Supplement
6.1, check mode
https://docs.jboss.org/hibernate/stable/validator/reference/en-US/html_single/#section-fail-fast
Let's add a little bit about the verification mode
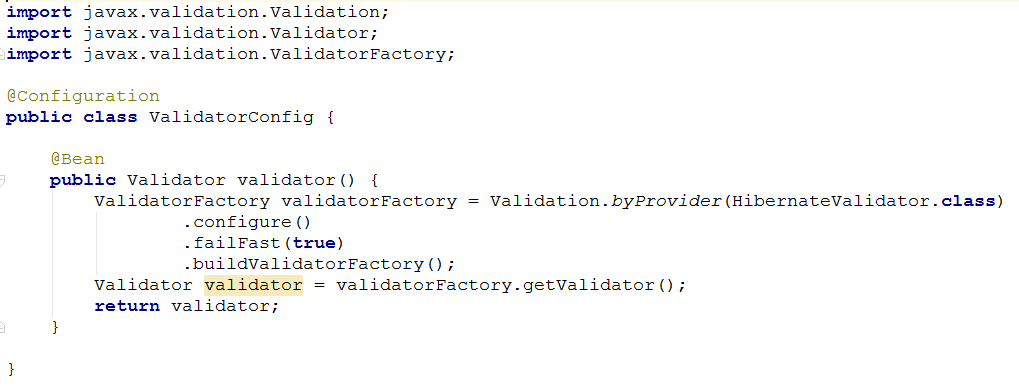
By default, all attributes will be verified, and then the error information will be returned together, but this is not necessary in many cases. If one verification fails, the others do not need to be verified.
For this, it is necessary to set
6.2. Single parameter verification


If the parameter verification fails when adjusting the page, you can leave it alone and transfer it to the error page.
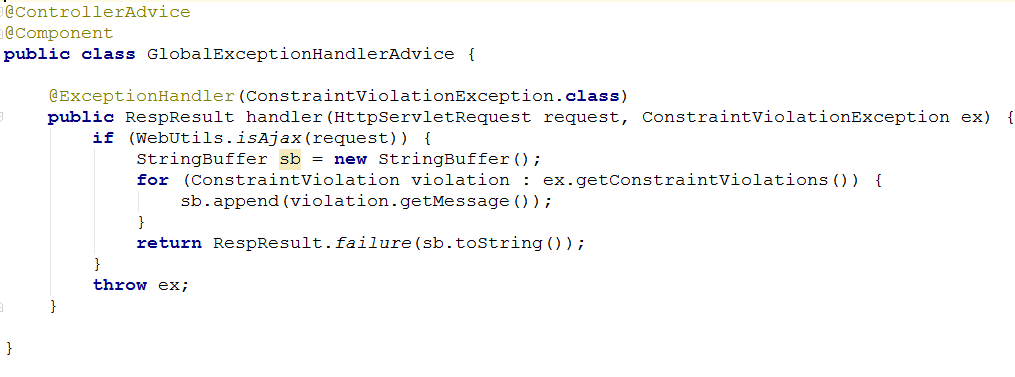
If the interface parameter verification fails, it can be processed uniformly here and returned. E.g:
6.3、错误页面


以刚才优惠券详情为例
http://localhost:8080/coupon/detail.html 400
http://localhost:8080/coupon/detail.html?id= 400
http://localhost:8080/coupon/detail.html?id=abc 400
http://localhost:8080/coupon/detail222.html?id=123 404
无权限 403
int a = 1 / 0; 500
6.4、@Valid与@Validated
https://blog.csdn.net/qq_27680317/article/details/79970590
参考
http://rensanning.iteye.com/blog/2357373
https://blog.csdn.net/kenight/article/details/77774465
https://www.cnblogs.com/mr-yang-localhost/p/7812038.html
https://www.phpsong.com/3567.html
https://www.cnblogs.com/mr-yang-localhost/p/7812038.html