Web development environment to build Eclipse-Java EE articles
[Original content, reprinted with the source of the name]
1. Download and install
1.1 Download JDK
Download the latest version of Java SE from the official Java website: http://www.oracle.com/technetwork/java/javase/downloads/index.html
Nowadays, computers are basically 64-bit, so all the resources mentioned to be downloaded later, if there are 64-bit ones, it is recommended to download the 64-bit version.

1.2 Download the latest version of Java EE:
http://www.oracle.com/technetwork/java/javaee/downloads/index.html
1.3 Install JDK:
Execute the downloaded JDK installation package to install. After the installation is complete, you can enter the following command on the command line to check the installed JDK version.
Java -version
If the installation is normal, the following results will be displayed:

Note: The new version of the JDK installer generally automatically sets the environment variables. If the above CMD fails to execute, please manually set the environment variables:
Environment variable setting method:
Open My Computer--->Properties panel, select Advanced system settings.
select environment variables,
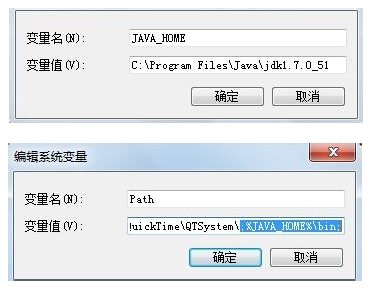
Set the system variables in this section:
New system variable:
Variable name: [JAVA_HOME]
Variable value: [C:\Program Files\Java\jdk1.7.0_51]
Special attention: my jdk is installed in this location C:\Program Files\Java\jdk1.7.0_51, so just fill in this. Where is your own jdk installed, just fill in what you want!
Find Path in the system variable and select Edit:
Add [\;%JAVA_HOME%\bin;] at the end
Special attention: add at the end, do not delete the default! If you delete it, some of your programs will not work!
1.4 Download Eclipse
Open http://www.eclipse.org/downloads/eclipse-packages/ and download Eclipse IDE for Java EE Developers (now generally download 64-bit)
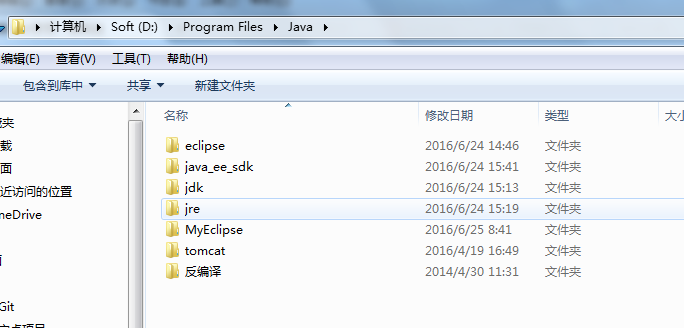
After the download is complete, unzip the Eclipse EE compressed package to any location (it is recommended to put all the things used in Java in a root directory, such as mine:)
In fact, you can also use the NetBeans IDE on the official Java website without downloading Eclipse. NetBeans provides a simplified Chinese version. ^_^
1.5 Install Java EE
Unzip the downloaded Java EE, then run \glassfish4\bin\pkg.bat , when prompted to install <y/n>, enter y and press Enter, and wait for the installation to complete.
1.6 Install Tomcat
Go to the official website ( http://tomcat.apache.org/ ) and download the latest version of Tomcat 9 directly.

After the download is complete, extract the compressed package to tomcat in the Java installation directory.
2. Configure and get started
2.1 Run Eclipse Java EE.
2.2 Setting up Tomcat
In Eclipse, click on the menu bar Window->Preferences, click on Server / Runtime Environments:
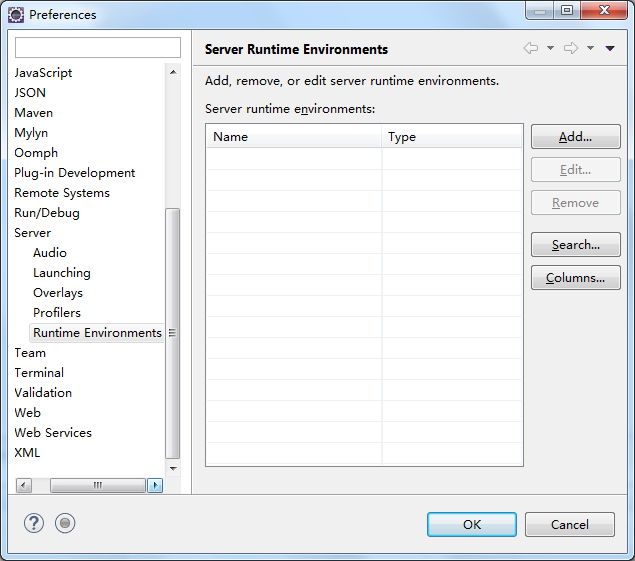
Click the "Add" button to create a new server. We previously installed Tomcat 9.0, so select it here as well.
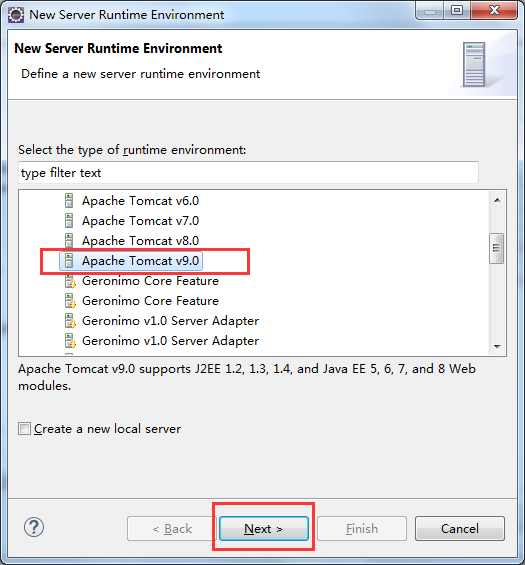
Click "Next" to go to the next step.
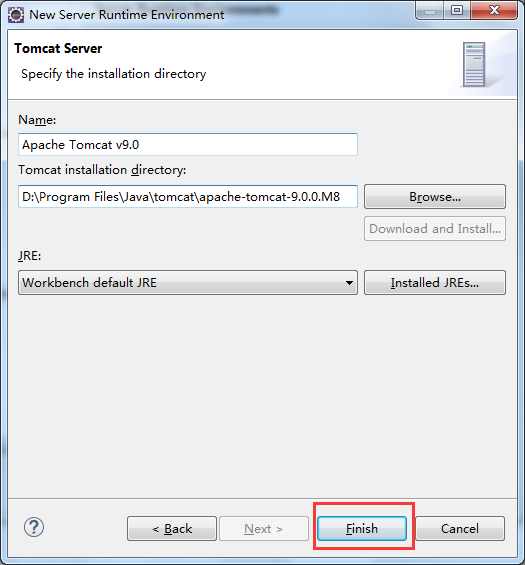
Enter the tomcat installation directory in the text box below the Tomcat installation directory, and click "finish" to complete the configuration.
2.3 Set the default character set
In eclipse, the character set of the current operating system is used by default, which is generally GBK. However, when we develop web applications, we generally use UTF-8. So you need to set the default character set.
In Eclipse, click the menu bar Window->Preferences, click General / Workspace:

Select Other : UTF-8 in the Text file encoding field. In this way, when we create a new project, UTF-8 character encoding will be used by default.
2.4 Set Build Path
When developing web applications, we need to use Tomcat, we need to add Tomcat / lib to the compilation path. Otherwise, you will get the following error when building the jsp:
The superclass "javax.servlet.http.HttpServlet" was not found on the Java Build Path

In Eclipse, click on the menu bar Window->Preferences, click Java / Build Path / Classpath Variables:

Click "New" to create a new variable named "Tomcat Server", set Path to the lib directory in the installation location of tomcat (as shown in the figure above), and click the "OK" button.
Next, add User Libraries. Click on Java / Build Path / User Libraries :

Click the "New..." button to create a new User Libraries named Tomcat Server. Then click the "Add External JARs..." button, select (Ctrl + A) all the jars under tomcal/lib we installed and use and OK. When finished, it will look like the picture above.
Click "OK" to complete the setting.
2.5 Hello World
Every time the development environment is built, a "hello world" is written and displayed successfully, and the mood will naturally become comfortable.
In Eclipse Java EE, right-click in the blank area of the Project Explorer on the left, and click "New->Dynamic Web Project":

Click "Finish" to complete.
Then right-click on WebContent, click "New->JSP File" in the right-click menu, and create a new Index.jsp page.

Double-click to open Index.jsp, prompting an error, this is the problem we mentioned earlier, and the Build Path is also configured. So now we need to use the set Build Path / User Libraries.
Right-click on the project root directory of HelloWorkd in the project manager and click "Properties". Then in the pop-up project properties dialog box, click "Java Build Path", and then switch to the Libraries tab.
Click the "Add Library..." button:
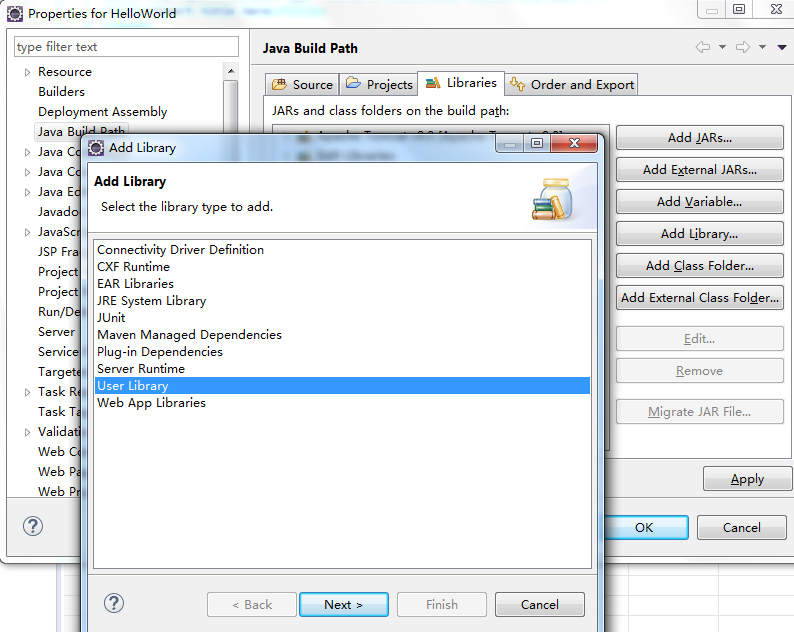
Double-click "User Library", in the pop-up Add Library dialog box, select "Tomcat Server", and click the "Finish" button.

Then switch to the Order and Export tab and select Tomcat Server. Complete the setup.

As you can see, the error in the code is gone.

At this point, our Eclipse Java EE chapter is over.