premise
Notice:
1 Take a snapshot before the operation, take a snapshot, take a snapshot, it is strongly recommended
2 Some operations can be done in the right button, I do not use commands, because I am stupid, such as renaming, deleting, creating folders, etc.
3 The directory I installed is /root/public/jdk/apache-tomcat-8.5.30
Configuration information:
Virtual machine: VMware Workstation Pro
Image: CentOS-6.6-i386-bin-DVD1.iso (32-bit)
SSH software: Bitvise SSH Client (I made an error when I installed the XShell software, so I chose this software, and I got started quickly)
Baidu network disk SSH download
Reference Information
How to build an Alibaba Cloud server
Use of Bitvise SSH Client (basic operations are in the URL below)
Renaming, deleting, and creating folders can all be done with this software, and his terminal is on Window, which can be assisted and the path can be viewed
The use of SSH, just at the beginning of the file
Build JDK
Download JDK
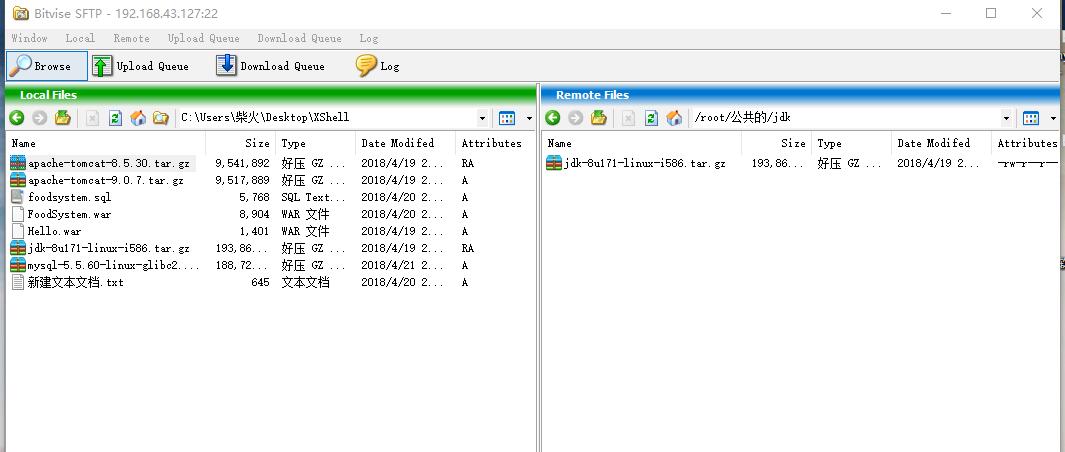
Upload the downloaded JDK to the folder on Linux through SSH software, and drag it directly from the left area to the right to realize the transfer. I created the jdk folder in (/root/public/) because I plan to install it under this file.
Go to the uploaded file directory
cd /root/public/jdkUnzip the compressed file
tar -zxvf jdk-8u171-linux-i586.tar.gz

After the decompression is completed, configure the environment variables (if you can't operate vi, you can drag it out from the Linux system through the SSH software, and edit it on the Window, and it will go)
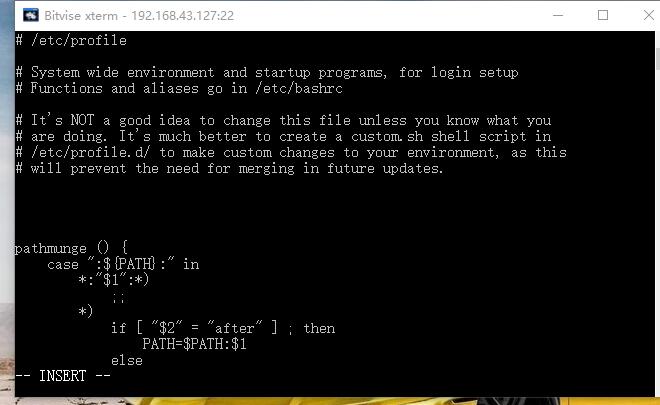
vi /etc/profile
Step 2: Press the letter "i" (otherwise it cannot be entered, there is an INSERT in the lower left corner after pressing i)
Step 3: Enter the code according to your actual situation
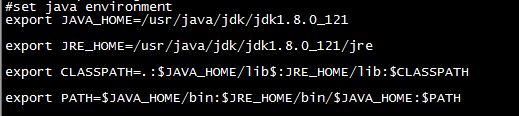
export JAVA_HOME=/root/public/jdk/jdk1.8.0_171
export JRE_HOME=/root/public/jdk/jdk1.8.0_171/jre
export CLASSPATH=.:$JAVA_HOME/lib$:JRE_HOME/lib:$CLASSPATH
export PATH=$JAVA_HOME/bin:$JRE_HOME/bin/$JAVA_HOME:$PATH
Step 4: Press "Esc" in the upper left corner, then press ":", then enter the letter "wq" and press Enter (the editing will be exited at this time)
After saving, enter the following command
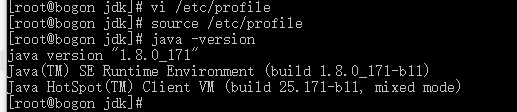
source /etc/profile
Verify that the installation was successful
java -version
Tomcat installation
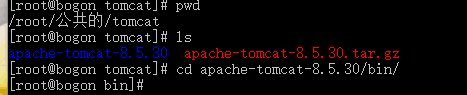
Enter the uploaded tomcat directory
cd /root/public/tomcat
Unzip the compressed package
tar -zxvf apache-tomcat-8.5.30.tar.gz
Go to bin under the unzipped folder
cd apache-tomcat-8.5.30/bin/
vi edit the setclasspath.sh script
vi setclasspath.sh
Type the letter "i" and start editing
export JAVA_HOME=/root/public/jdk/jdk1.8.0_171
export JRE_HOME=/root/public/jdk/jdk1.8.0_171/jre
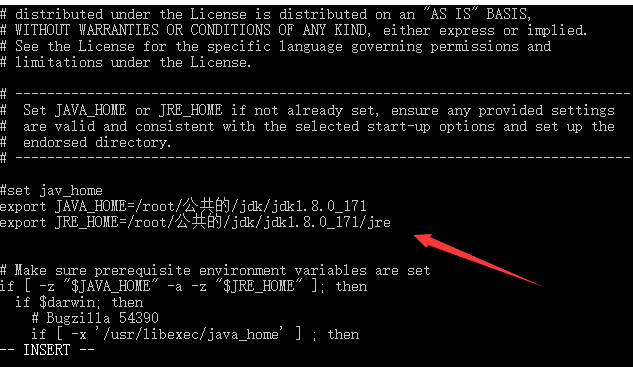
Save the edited content, press the Esc key, and enter ":wq", then press Enter to save and exit
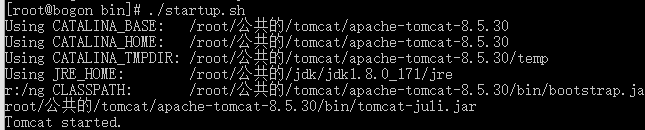
start tomcat
./startup.sh
How to deploy your own normal HelloWord_web project
Type the project into war and upload it to tomcat/webapps with SSH software

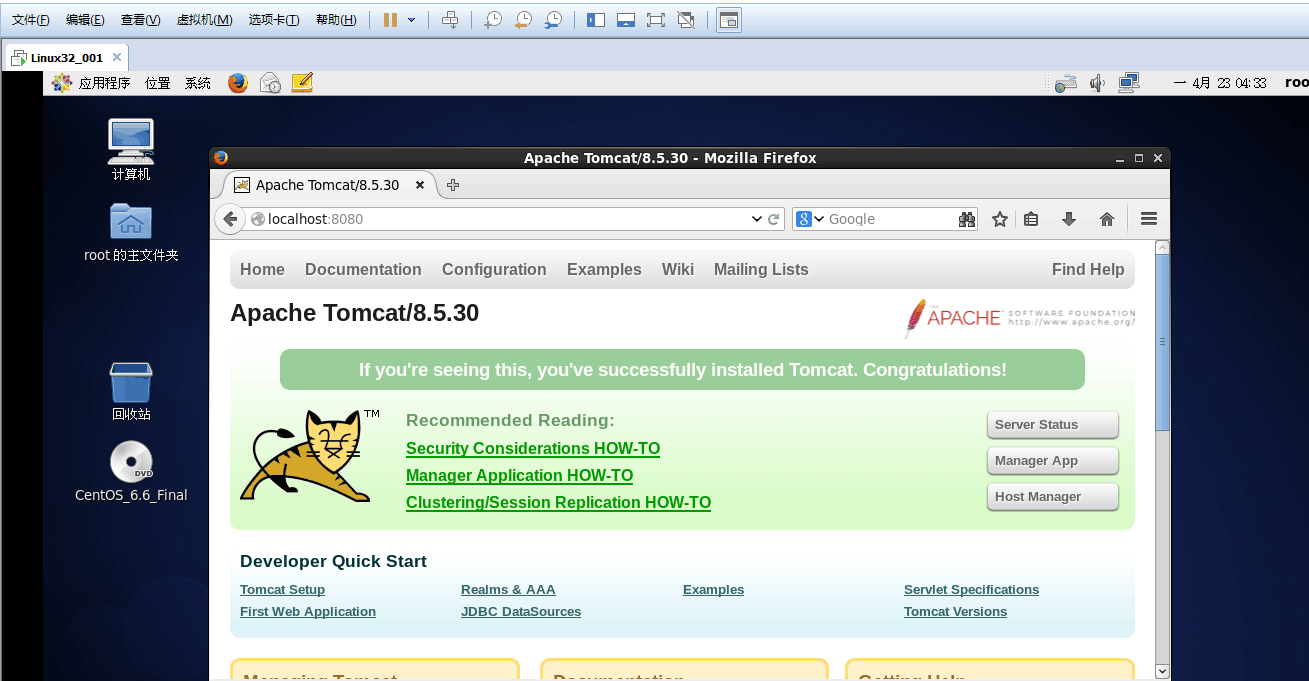
If you want to access the url under this ip on the window, you must open port 8080
Open port naming: