Not much to introduce. You can refer to the relevant introduction written in the http://blog.csdn.net/congcong68/article/details/41113239 blog.
In the future, the SpringMVC part will be supplemented and improved
 Scan WeChat to support my personal WeChat applet
Project code cloud GIT address: https://gitee.com/xshuai/dubbo/
| development tools | MyEclipse 10.7 |
| JDK | 1.7 |
| container | Tomcat 8 (running dubbo) |
| zookeeper version | zookeeper-3.4.6 |
| dubbo | dubbo-admin-2.5.3 |
dubbo-admin-2.5.3 download address: http://pan.baidu.com/s/1bozCMzP
Zookeeper download address: http://www-eu.apache.org/dist/zookeeper/zookeeper-3.4.6/
-
The download and installation configuration of Dubbo+Zookeeper starts
1. After the download of dubbo-admin-2.5.3 is complete. Put it under the webapps folder. First backup and remove the default tomcat ROOT project. Change dubbo-admin-2.5.3.war to ROOT.war for backup
2. After downloading zookeeper, decompress and install it. After the windows installation is complete, the following figure is shown
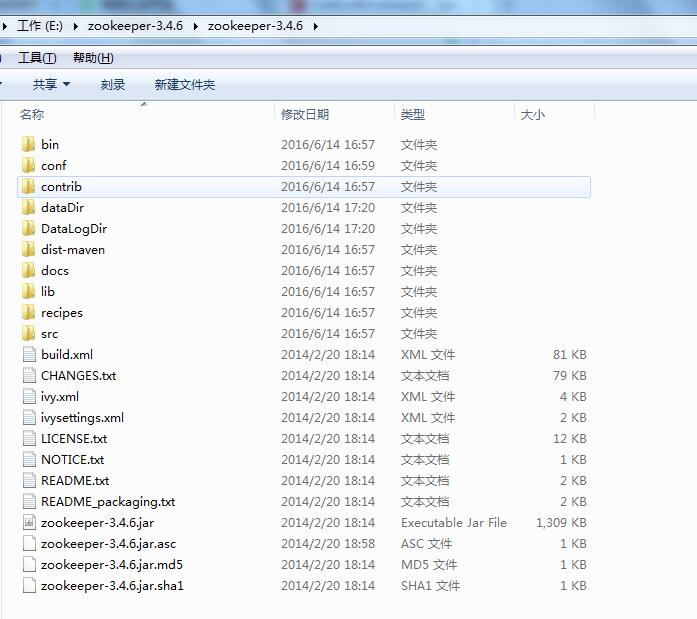
Enter into conf, you will see the zoo_sample.cfg file. Copy a modification to zoo.cfg, modify the relevant configuration content
# The number of milliseconds of each tick
tickTime=2000
# The number of ticks that the initial
# synchronization phase can take
initLimit=10
# The number of ticks that can pass between
# sending a request and getting an acknowledgement
syncLimit=5
# the directory where the snapshot is stored.
# do not use /tmp for storage, /tmp here is just
# example sakes.
dataDir=/tmp/zookeeper
# the port at which the clients will connect
#这块是设置zookeeper的端口。默认2181
clientPort=2181
# the maximum number of client connections.
# increase this if you need to handle more clients
#maxClientCnxns=60
#
# Be sure to read the maintenance section of the
# administrator guide before turning on autopurge.
#
# http://zookeeper.apache.org/doc/current/zookeeperAdmin.html#sc_maintenance
#
# The number of snapshots to retain in dataDir
#autopurge.snapRetainCount=3
# Purge task interval in hours
# Set to "0" to disable auto purge feature
#autopurge.purgeInterval=1
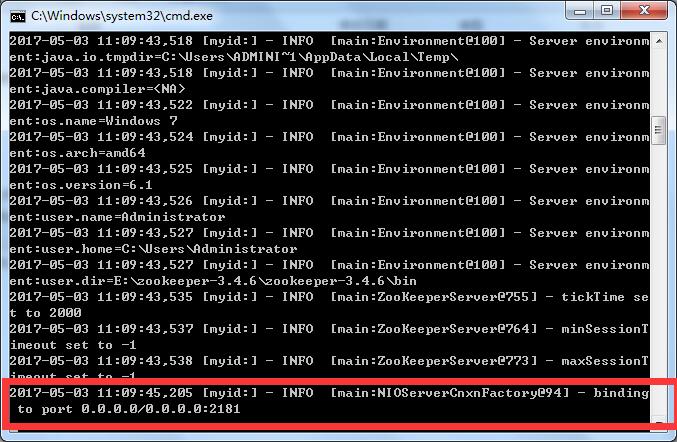
to the bin folder. Start zookeeper, click zkServer.cmd in windows, the startup is successful as shown below
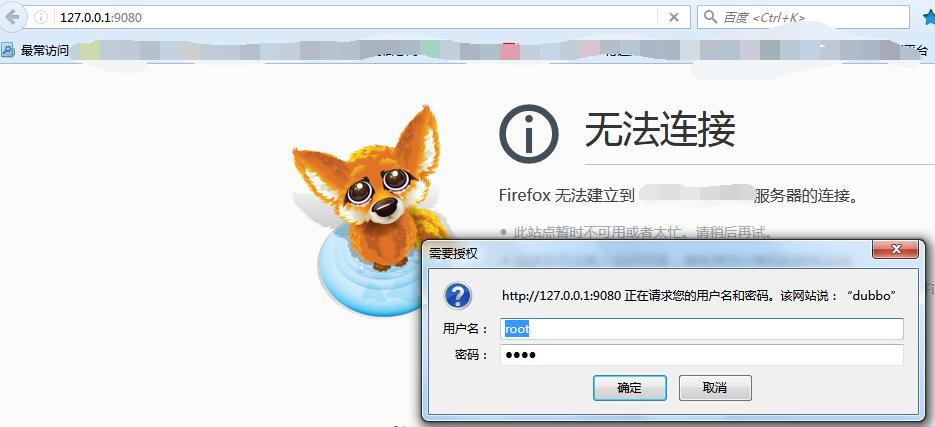
3. You can start tomcat. In this way, you can directly visit the dubbo page. Otherwise, dubbo will report an error when it starts. For the first time, it is recommended to use the default port configuration. Default user root password root
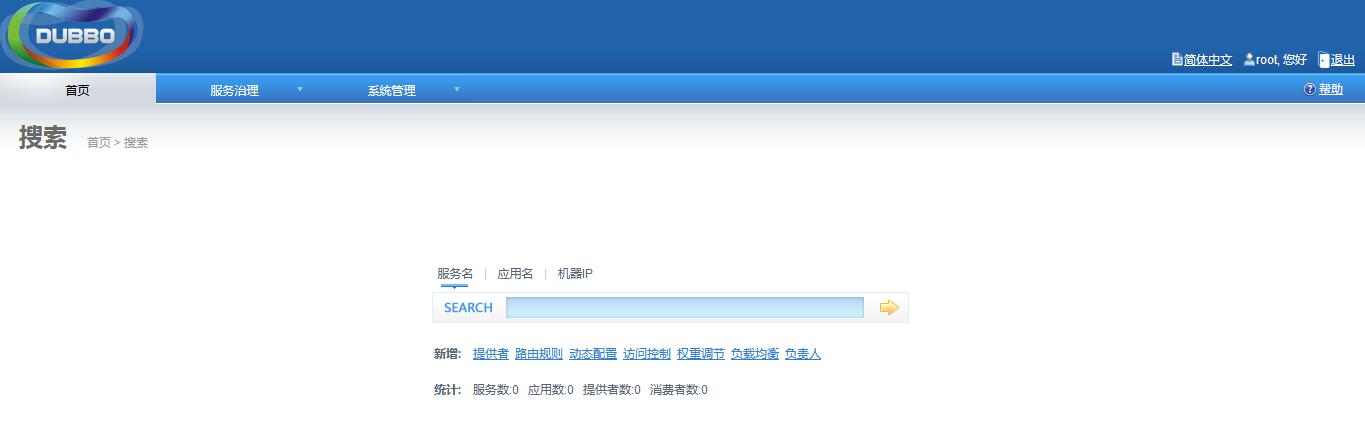
After successful login, you will see the following page
The above is the configuration and startup of dubbo+zookeeper. Let's start writing Java code
-
整合Dubbo+Zookeeper+SpringMVC
1. Create the myDubbo project as the main project. The structure diagram is as follows. MyC PS will be created later, but not at the beginning.
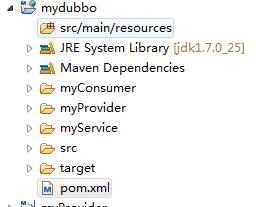
The POM.XML configuration is as follows
<project xmlns="http://maven.apache.org/POM/4.0.0" xmlns:xsi="http://www.w3.org/2001/XMLSchema-instance"
  xsi:schemaLocation="http://maven.apache.org/POM/4.0.0 http://maven.apache.org/maven-v4_0_0.xsd">
  <modelVersion>4.0.0</modelVersion>
  <groupId>com</groupId>
  <artifactId>mydubbo</artifactId>
  注意这里。打包为POM,分布式系统的第一步
  <packaging>pom</packaging>
  <version>0.0.1-SNAPSHOT</version>
  <name>mydubbo</name>
  <url>http://maven.apache.org</url>
   <properties>
        <spring.version>3.2.4.RELEASE</spring.version>
    </properties>
  <dependencies>
            <dependency>
            <groupId>com.alibaba</groupId>
            <artifactId>dubbo</artifactId>
            <version>2.5.3</version>
            <exclusions>
                <exclusion>
                    <groupId>org.springframework</groupId>
                    <artifactId>spring</artifactId>
                </exclusion>
            </exclusions>
        </dependency>
        <!--dubbo注册中心-->
        <dependency>
            <groupId>org.apache.zookeeper</groupId>
            <artifactId>zookeeper</artifactId>
            <version>3.4.6</version>
        </dependency>
        <!--zookeeper客户端-->
        <dependency>
            <groupId>com.github.sgroschupf</groupId>
            <artifactId>zkclient</artifactId>
            <version>0.1</version>
        </dependency>
        <dependency>
            <groupId>org.springframework</groupId>
            <artifactId>spring-core</artifactId>
            <version>${spring.version}</version>
        </dependency>
        <dependency>
            <groupId>org.springframework</groupId>
            <artifactId>spring-context</artifactId>
            <version>${spring.version}</version>
        </dependency>
  </dependencies>
  <build>
    <finalName>mydubbo</finalName>
  </build>
  创建子项目后自动会加载。刚开始是没有的
  <modules>
  	<module>myService</module>
  	<module>myProvider</module>
  	<module>myConsumer</module>
  </modules>
</project>
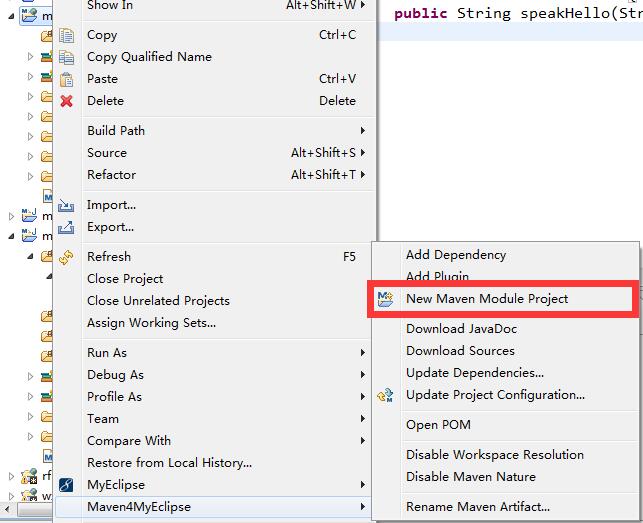
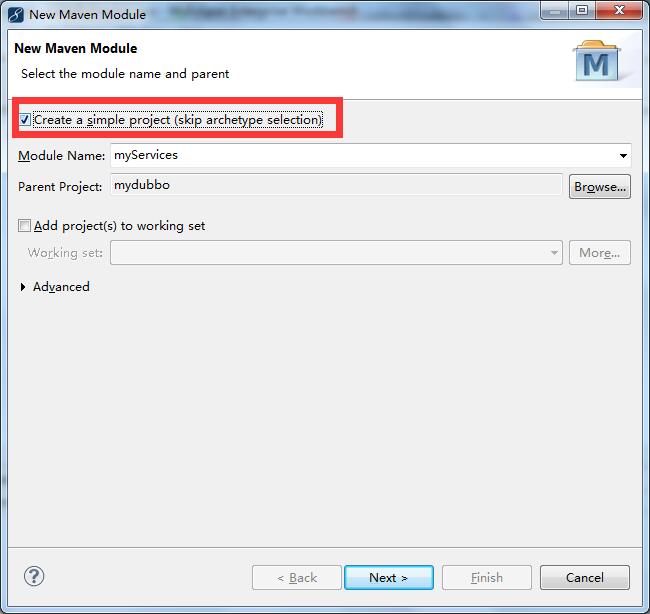
2. Create a service provider sub-project, MyEclipse operation is as shown in the figure below. Right-click on the mydubbo project or create a maven module project directly with the maven plugin, and fill in the sub-project name. Some will report an error if you do not select Create a simple project for custom creation. Choose not. Decide whether to choose according to the actual situation
3. Create 3 sub-projects as myService (service provider (interface), module provider) myProvider (supplier, register the exposed interface for dubbo zookeeper) myConsumer
-
myService project related configuration
-
pom configuration
<project xmlns="http://maven.apache.org/POM/4.0.0" xmlns:xsi="http://www.w3.org/2001/XMLSchema-instance" xsi:schemaLocation="http://maven.apache.org/POM/4.0.0 http://maven.apache.org/xsd/maven-4.0.0.xsd"> <modelVersion>4.0.0</modelVersion> <parent> <artifactId>mydubbo</artifactId> <groupId>com</groupId> <version>0.0.1-SNAPSHOT</version> </parent> <name>myService</name> <artifactId>myService</artifactId> <packaging>jar</packaging> </project> -
Create a new interface class
package com.xiaoshuai; public interface HelloService { public String speakHello(String name); } -
After the above work is completed, perform maven install
-
myProvider project related configuration
-
pom configuration
<project xmlns="http://maven.apache.org/POM/4.0.0" xmlns:xsi="http://www.w3.org/2001/XMLSchema-instance" xsi:schemaLocation="http://maven.apache.org/POM/4.0.0 http://maven.apache.org/xsd/maven-4.0.0.xsd"> <modelVersion>4.0.0</modelVersion> <parent> <artifactId>mydubbo</artifactId> <groupId>com</groupId> <version>0.0.1-SNAPSHOT</version> </parent> <artifactId>myProvider</artifactId> 引用接口服务项目 子项目maven install 为jar <dependencies> <dependency> <groupId>com</groupId> <artifactId>myService</artifactId> <version>0.0.1-SNAPSHOT</version> </dependency> </dependencies> </project> -
implement interface server
package com.xiaoshuai.impl; import com.xiaoshuai.HelloService; public class HelloServiceImpl implements HelloService{ public String speakHello(String name) { return "你好:"+name+"欢迎查阅小帅丶博客"; } } -
Expose the implementation class interface class to dubbo+zookeeper Create provider.xml in myProvider with the following content
<?xml version="1.0" encoding="UTF-8"?> <beans xmlns="http://www.springframework.org/schema/beans" xmlns:xsi="http://www.w3.org/2001/XMLSchema-instance" xmlns:dubbo="http://code.alibabatech.com/schema/dubbo" xsi:schemaLocation="http://www.springframework.org/schema/beans http://www.springframework.org/schema/beans/spring-beans.xsd http://code.alibabatech.com/schema/dubbo http://code.alibabatech.com/schema/dubbo/dubbo.xsd"> <!-- 提供方应用信息,用于计算依赖关系 --> <dubbo:application name="hello-provider" /> <!-- 使用multicast广播注册中心暴露服务地址 --> <dubbo:registry address="zookeeper://127.0.0.1:2181" /> <!-- 用dubbo协议在20880端口暴露服务 --> <dubbo:protocol name="dubbo" port="20880" /> <!-- 声明需要暴露的服务接口 --> <dubbo:service interface="com.xiaoshuai.HelloService" ref="helloService" /> <!-- 和本地bean一样实现服务 --> <bean id="helloService" class="com.xiaoshuai.impl.HelloServiceImpl" /> </beans> -
You need to create a Java class to write a method to load provider.xml and register to dubbo + zookeeper
package com.xiaoshuai.impl; import org.springframework.context.support.ClassPathXmlApplicationContext; public class ProviderServer { public static void main(String[] args){ try { ClassPathXmlApplicationContext context = new ClassPathXmlApplicationContext("provider.xml"); context.start(); System.in.read(); } catch (Exception e) { e.printStackTrace(); } } } -
can be run. Start the provider service and write the consumer.
-
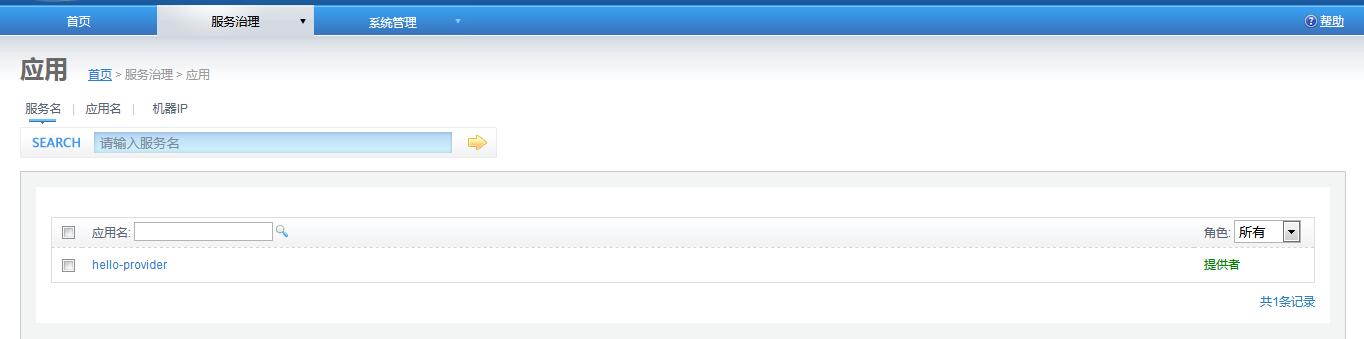
You can see that the dubbo provider service has been registered
-
myConsumer project related configuration
-
pom configuration
<project xmlns="http://maven.apache.org/POM/4.0.0" xmlns:xsi="http://www.w3.org/2001/XMLSchema-instance" xsi:schemaLocation="http://maven.apache.org/POM/4.0.0 http://maven.apache.org/xsd/maven-4.0.0.xsd"> <modelVersion>4.0.0</modelVersion> <parent> <artifactId>mydubbo</artifactId> <groupId>com</groupId> <version>0.0.1-SNAPSHOT</version> </parent> <artifactId>myConsumer</artifactId> <dependencies> <dependency> <groupId>com</groupId> <artifactId>myService</artifactId> <version>0.0.1-SNAPSHOT</version> </dependency> </dependencies> </project> -
Consumers subscribe to provider services, that is, they need to go to zookeeper to read and load services, then they need to create a consumer.xml to load zookeeper
<?xml version="1.0" encoding="UTF-8"?> <beans xmlns="http://www.springframework.org/schema/beans" xmlns:xsi="http://www.w3.org/2001/XMLSchema-instance" xmlns:dubbo="http://code.alibabatech.com/schema/dubbo" xsi:schemaLocation="http://www.springframework.org/schema/beans http://www.springframework.org/schema/beans/spring-beans.xsd http://code.alibabatech.com/schema/dubbo http://code.alibabatech.com/schema/dubbo/dubbo.xsd"> <!-- 消费方应用名,用于计算依赖关系,不是匹配条件,不要与提供方一样 --> <dubbo:application name="hello-consumer" /> <!-- 使用multicast广播注册中心暴露发现服务地址 --> <dubbo:registry address="zookeeper://127.0.0.1:2181" /> <!-- 生成远程服务代理,可以和本地bean一样使用demoService --> <dubbo:reference id="helloService" interface="com.xiaoshuai.HelloService" /> </beans> -
Create a consumer method that calls ConsumerClient
package com.xiaoshuai; import org.springframework.context.support.ClassPathXmlApplicationContext; public class ConsumerClient { public static void main(String[] args) { ClassPathXmlApplicationContext context = new ClassPathXmlApplicationContext("consumer.xml"); HelloService helloService = (HelloService) context.getBean("helloService"); String result = helloService.speakHello("xiaoshuai"); System.out.println(result); } } -
Run this method to output the content

-
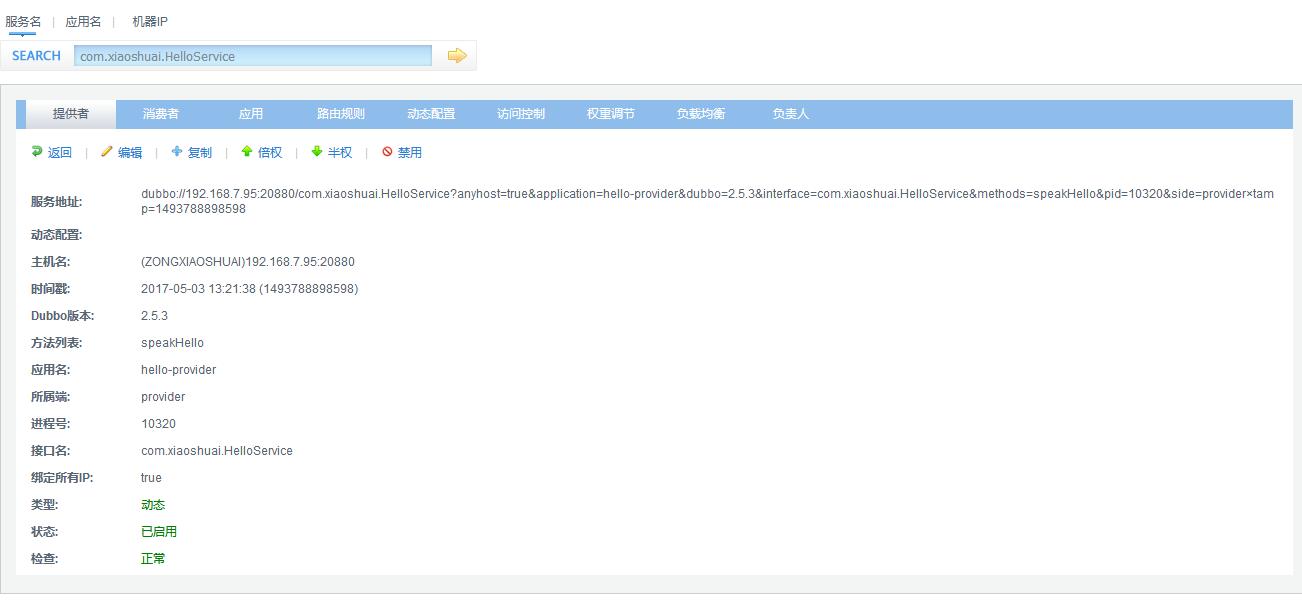
Next, let's see what's in the dubbo center.
-
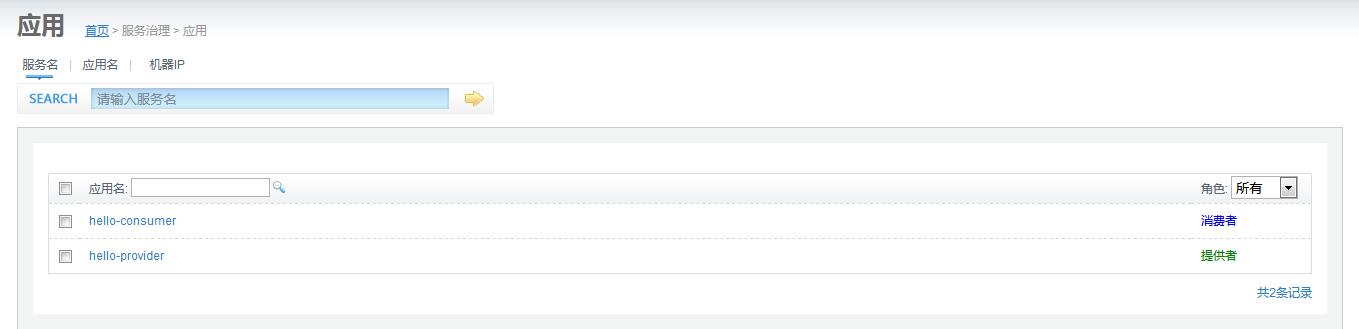
See what's displayed in consumers
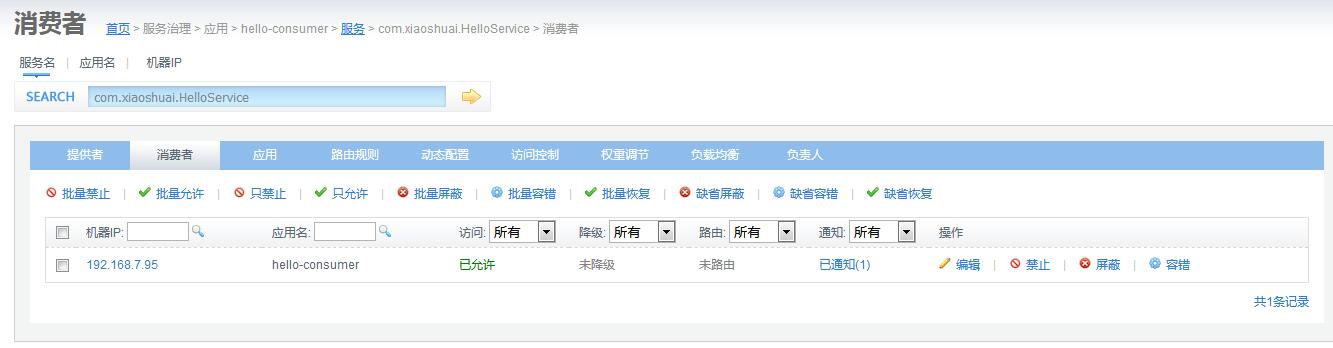
-
Detailed consumer information is shown in the figure
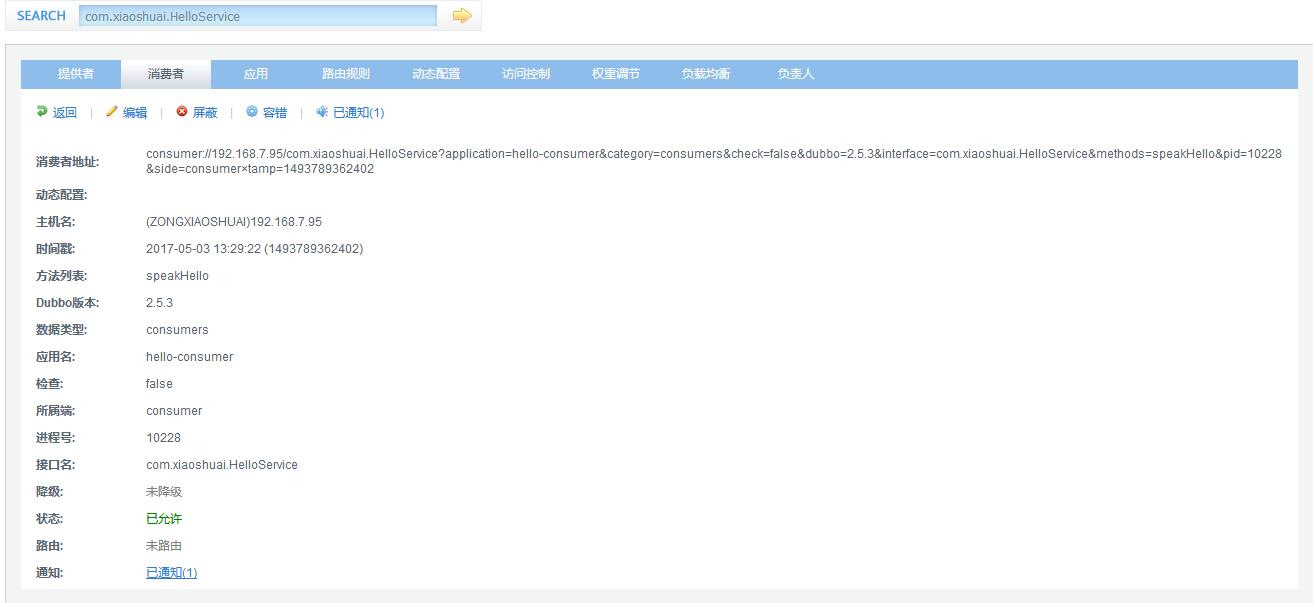
-
The above simple distributed Demo has been completed
-
Beginner's guide. If there is any problem, we can communicate with you.