1. Introduction to SourceTree
SourceTree is a free Git and Hg client for Windows and Mac OS X. It has a visual interface and is easy to use. It is also a version control system tool for Mercurial and Subversion. Supports operations such as create, submit, clone, push, pull and merge.
Second, download and install SourceTree steps
1. Download address: https://www.sourcetreeapp.com/ , this version is in Chinese
and can be installed after the download is complete.
2. Install SourceTree
installation first interface
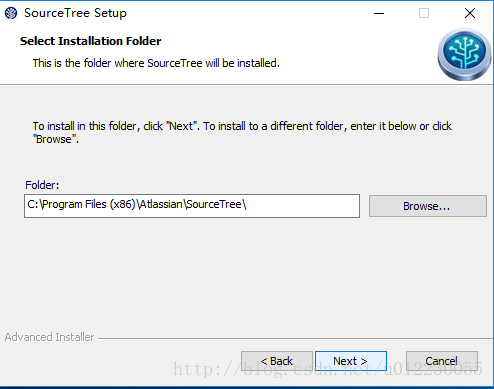
Click, Next
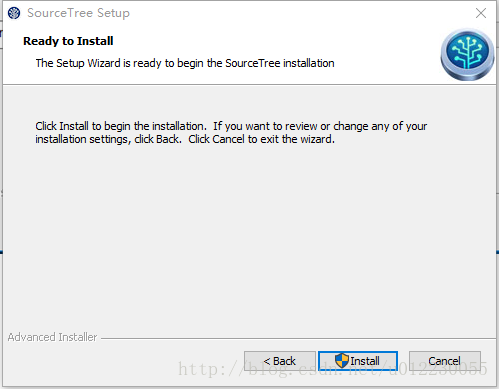
Click "install", after the installation is complete, open sourcetree, click "user an existing account", as shown in the figure
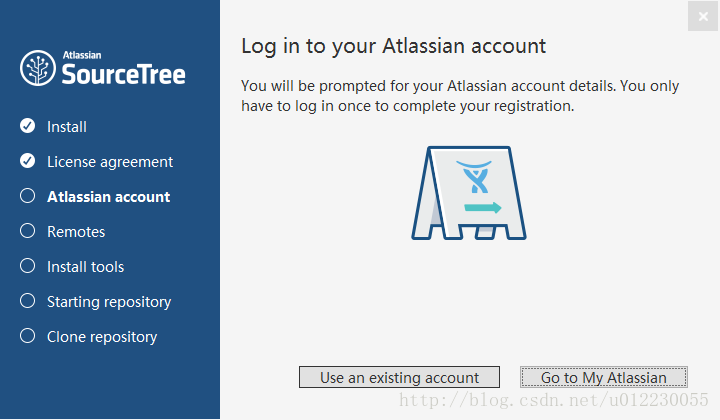
Note: 1. You can log in with a Google account, provided that you must be able to access Google.
After the GOOGLE account login is completed, as shown in the figure:
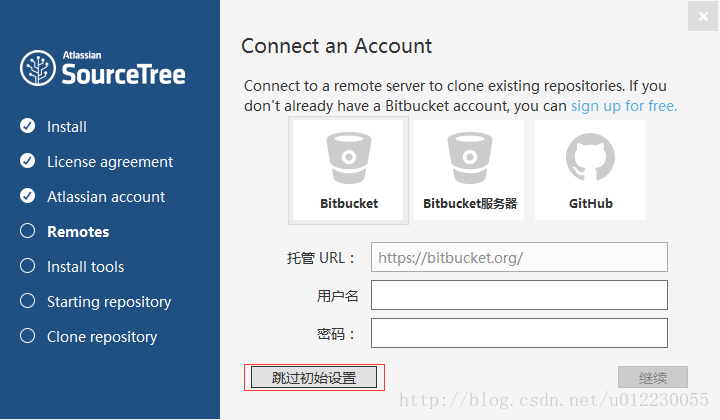
No settings are required here, just click "Skip Initial Settings".
After successful login and registration, the interface for setting puttykey will pop up, click "Cancel".
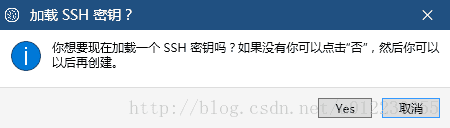
Click the "Cancel" button, and the following prompt box will pop up:
At this point, you enter the main interface of sourcetree, and you can use sourcetree now.
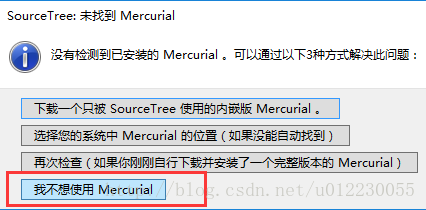
3. Integrated file comparison plugin
Install the comparison plugin
Sourcetree integrates Beyond Compare 4, which can resolve conflicts well when files conflict. The installation process is very simple and will not be described in detail here.
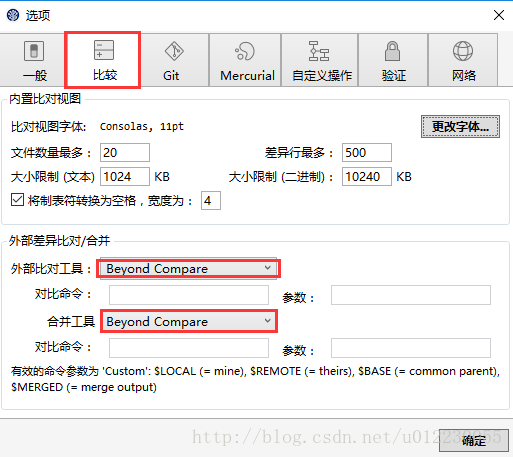
Configure Beyond Compare 4 in Sourcetree
Menu bar, "Tools" - "Options", as shown in the figure:

Select the "Compare" tab, and then modify the contents of the red box as shown:
Fourth, the basic use of SourceTree
(1) Clone
Click the clone button to clone the project:
it can be either a local existing git project or a project in a remote directory,
For a git project that exists locally,
get the project clone address and click the clone button, as shown in the figure:
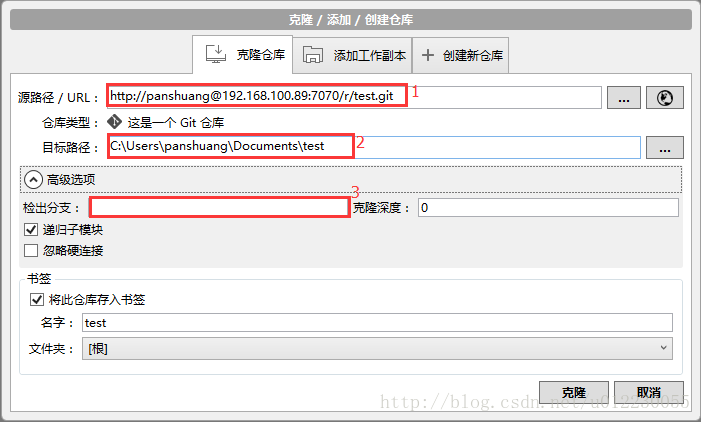
1. The path
of the cloned project 2. The location where the cloned project is stored
3. If you want to download a specific branch, you can download it by branch
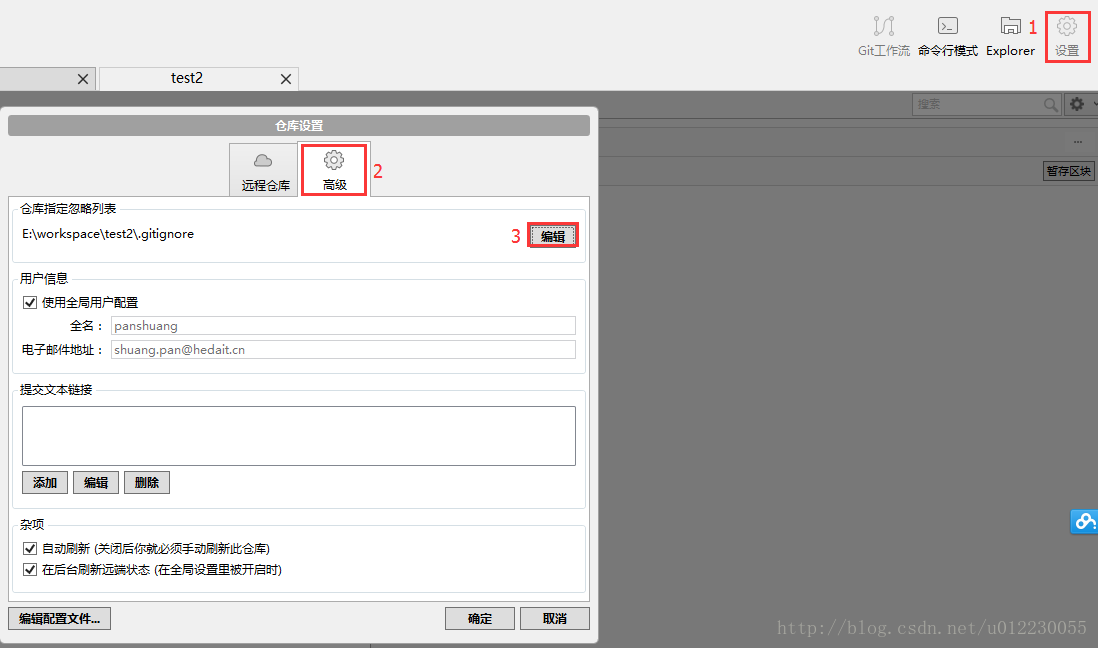
(2) Configure ignore files
Use .gitignore to filter files, such as intermediate files in the compilation process, etc. These files do not need to be tracked and managed.
The .gitignore file only works for files that have not yet been added to version management. If these files have been included in the repository with git before, it will not work.
Use sourcetree to add ignore files:
under normal circumstances, after the administrator creates the project The ignore file needs to be created directly. The creation method is shown in the figure:
Follow the steps above to edit the conflict file.
Conflict file rules:
Ignore folders (such as bin, obj): All .txt files in a directory of
obj/
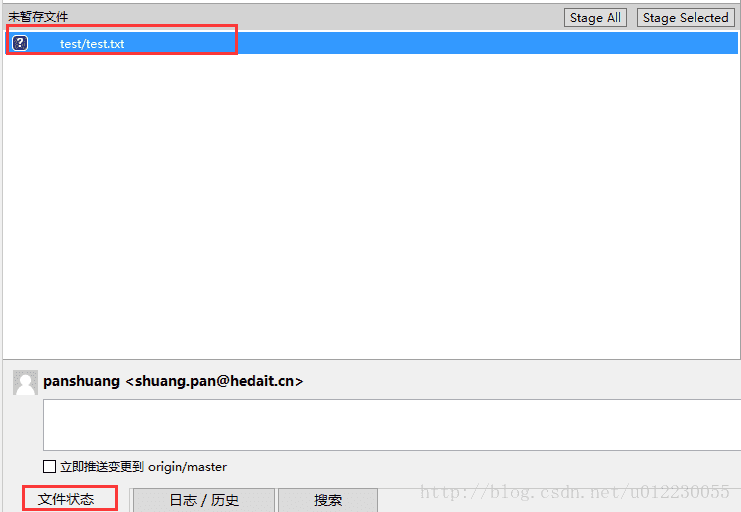
bin/ , some files that are not added in the ignored files may be encountered during the development of obj/*.txt. The developer needs to add ignore files by themselves. The method of adding is as follows: The files that are not under version control or are under version control have been introduced before, and look for them in the "File Status" tab of sourcetree, as shown in the figure:
Right-click the file to be ignored, click "Ignore", and select the ignore mode to ignore the file, as shown in the figure:

(3) How to use tags
The purpose of tagging is to have a mark at the main node of the code, so that the next time you modify the code, you can accurately find the code you want to find. Instead of looking at the log file to recall the code location you are looking for one by one.
(4) Branch management and use
使用sourcetree创建和使用分支是很方便的,不像之前使用的TortoiseGit只能在当前代码处创建分支,使用sourcetree的方便之处:
1、可以选择特定的某版本创建分支
2、代码检出时可以按照分支进行检出
3、分支的添加很简单
分支添加:
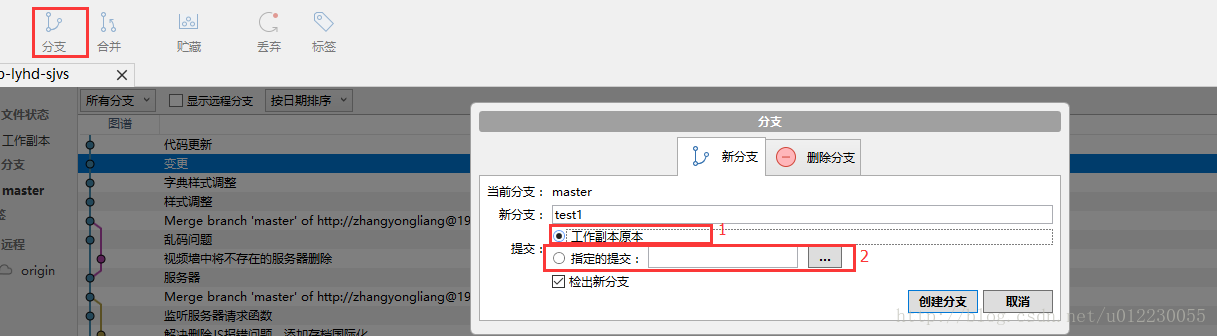
1、可以在当前的版本下创建分支
2、选择指定的提交创建分支
3、点击“创建分支”
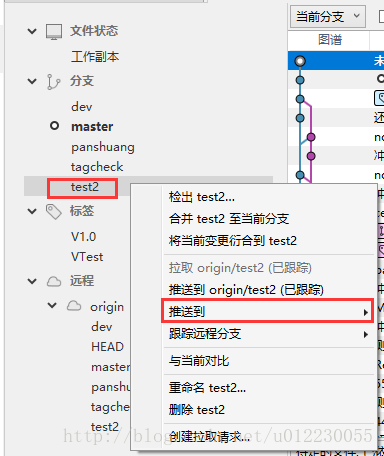
分支提交到服务器:
在sourcetree右侧内容中的分支列表中,选中创建的分支,右键提交,如图所示:
分支合并:
1、分支合并功能和分支添加功能类似,这里不再详述,需要注意的是首先要切换到被合并的分支上,再进行合并操作。
2、分支合并时,可以选择具体的某提交进行合并,同时主分支可以合并到子分支;子分支可以合并到主分支;子分支之间也可以进行合并。
(5)GIT与SVN同步
git svn工具集在当前不得不使用 Subversion 服务器或者开发环境要求使用 Subversion 服务器的时候格外有用。不妨把它看成一个跛脚的 Git,在实际使用中不推荐这样使用GIT。
(6)基本步骤
提交、拉取和推送
提交:
项目提交是为了维护本地版本库,如果本地有未提交的内容,则不允许拉取和推送;如图所示区域有内容时,则代表本地未提交的内容:

点击Stage All,填写提交信息既可以将本地内容(暂存区)提交到本地版本库,如图所示:
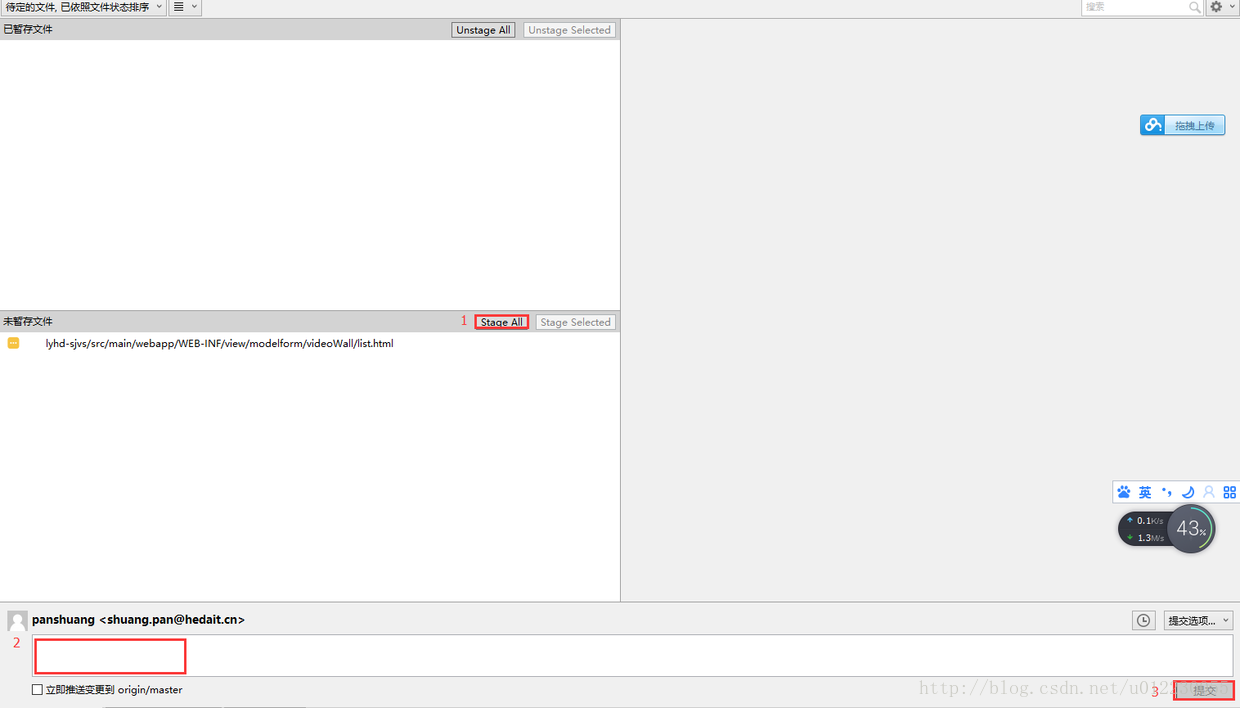
1、将未暂存的文件进行暂存,如果有些文件不需要暂存,则可以进行删除,选中文件,右键“移除”即可。
拉取:从远程将代码进行更新,相当于SVN的“更新”
推送:将代码提交到远程。
(7)解决冲突
简单介绍
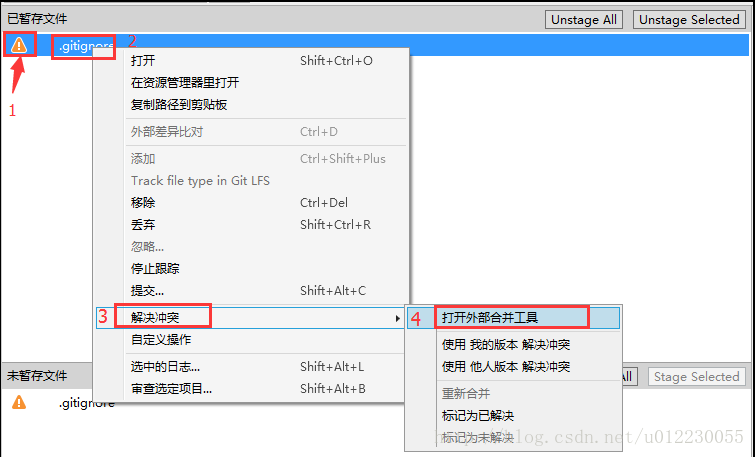
1、冲突文件的符号为“感叹号”
2、选中“冲突文件”,右键——点击”解决冲突“——点击”打开外部合并工具“(备注:才操作时已经安装外部合并工具,同时在sourcetree中已经进行配置,详见”集成文件对比插件“)
冲突界面
冲突解决界面如下:可以根据需要选择内容显示类型,只”显示更改“,”显示冲突“或者”全部“
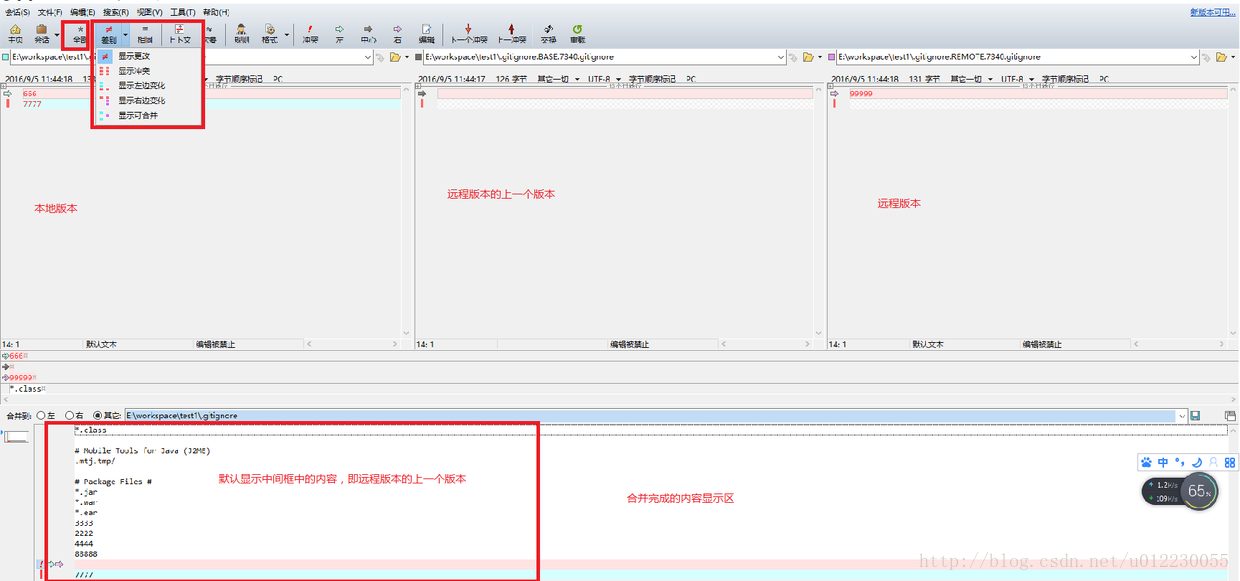
解决冲突
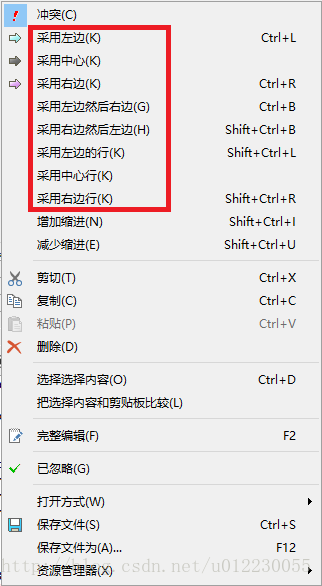
方法一:在相关的版本处,选中”冲突行”,合并区默认处于合并位置,鼠标右键,选择最终冲突地方留下的内容,如图:
解决冲突之后效果图:
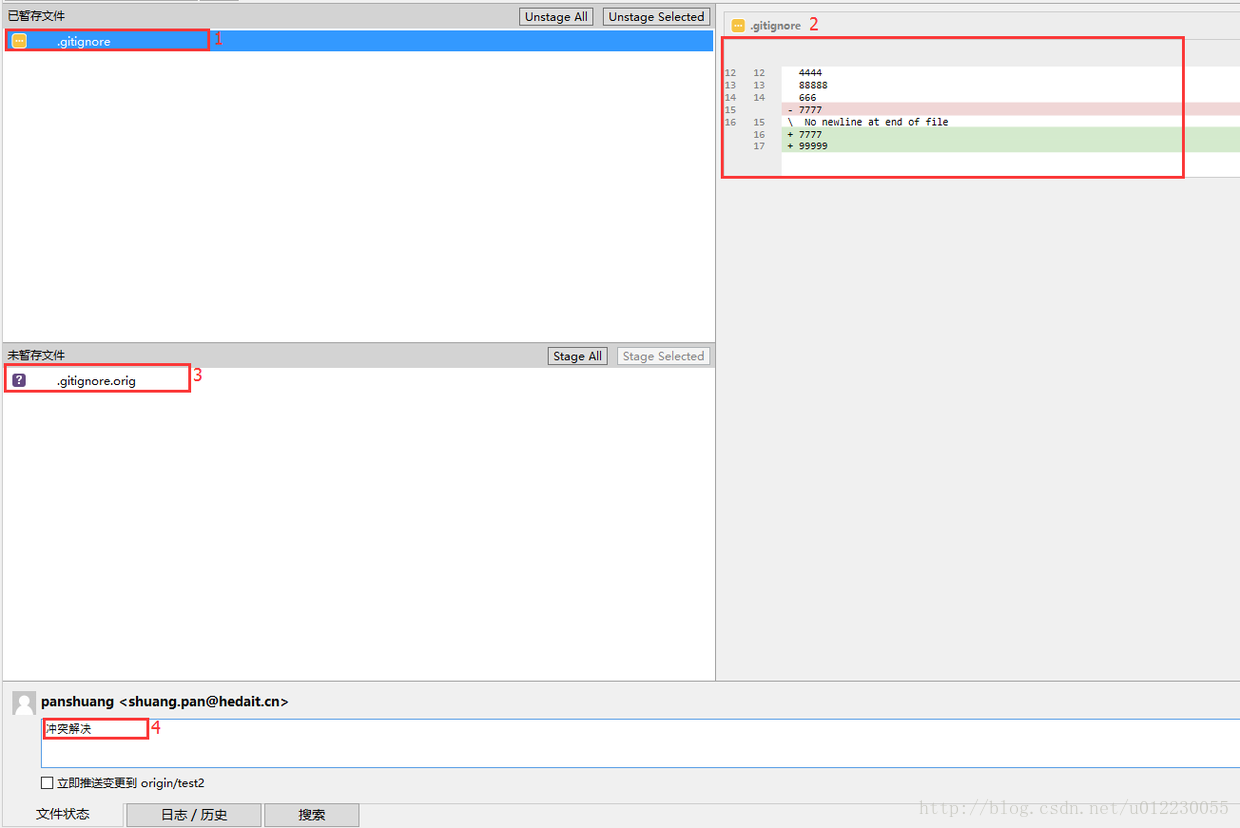
1、冲突图标由”感叹号”——“省略号”。
2、右侧显示修改后的代码进行查看。
3、同时修改的冲突文件有相应的备份,大家可以下载到本地,方便冲突有问题再次修改文件。
备注:该文件下载之后请将版本库中的该文件删除,不要上传到版本库中。
4、修改完冲突之后,需要再次提交,推送。大家养成提交时,提交有效的日志信息,不要将比如:123之类的信息推送到服务器中。
方法二:如果冲突非常少,可以直接在右侧栏中解决冲突,如图所示:
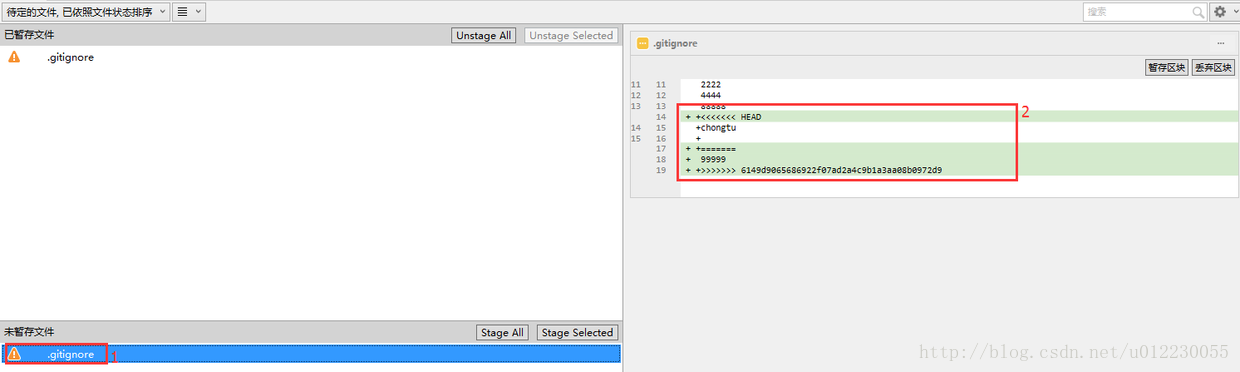
1、点击未暂存区域的冲突文件。
2、右侧列表中出现冲突的内容。
3、选择冲突内容,解决冲突,如图所示:
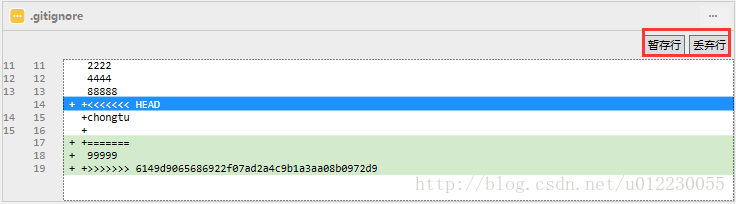
暂存行:表示保留该内容
丢弃行:表示删除该内容
备注:区分于第一种方式,使用第一种方法解决时,不要点击”未暂存文件”,否则可能无法打开冲突文件
(8)版本回退
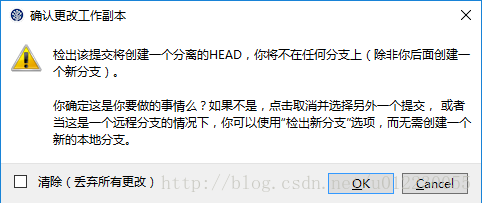
原则上,代码推送之前要保证本地的代码可运行,不要将不可运行或者有问题的代码推送到服务器上,如果由于误操作,将代码推送到了远程,想重新修改上传代码,此时,需要将版本进行回退,回退方法如图:
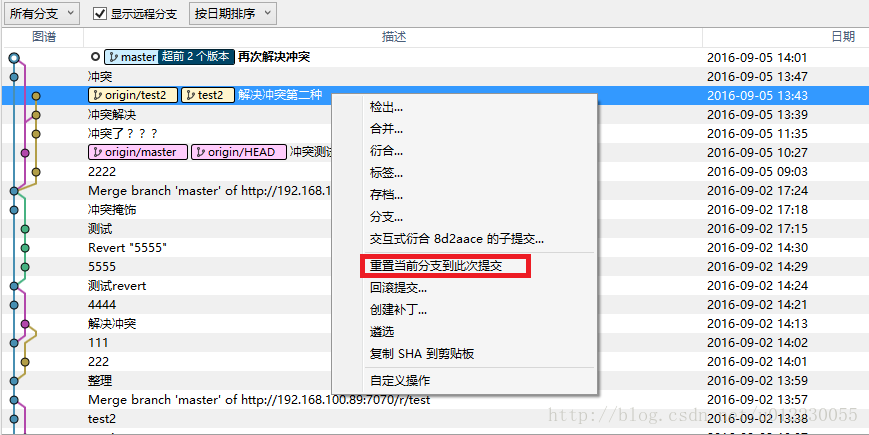
1、切换到日志/历史标签
2、选择要恢复到的版本,如图蓝色位置
3、鼠标右键,选择“重置当前分支到此次提交”
4、选择”重置模式”,如图所示
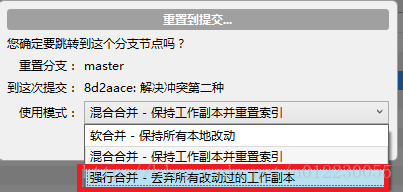
5、弹出框中选择”Yes”

(9)相关提示信息含义
冲突信息
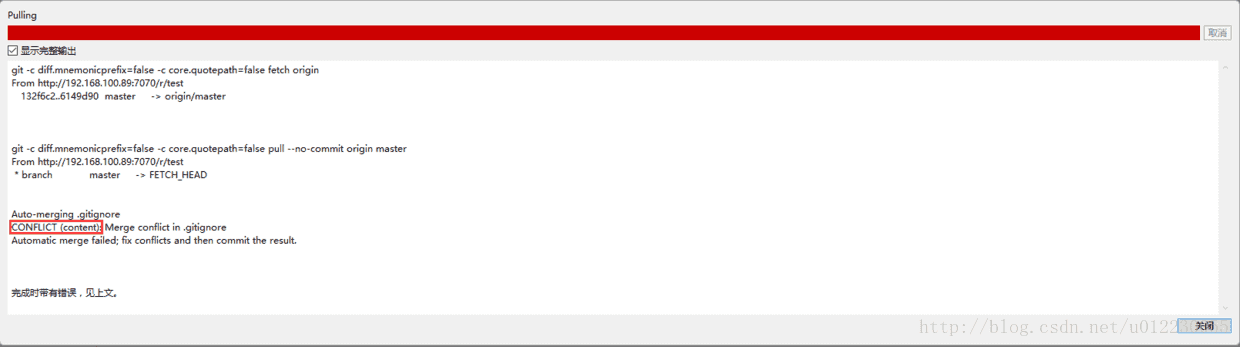
先更新信息 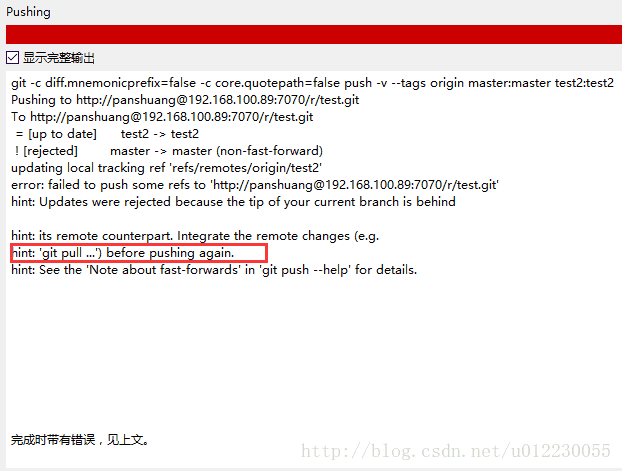
小窍门: 
如果推送时,拉取右上方显示数字,则需要先拉取再推送。
五、SourceTree&Git部分名词解释
克隆(clone):从远程仓库URL加载创建一个与远程仓库一样的本地仓库
提交(commit):将暂存文件上传到本地仓库(我们在Finder中对本地仓库做修改后一般都得先提交一次,再推送)
检出(checkout):切换不同分支
添加(add):添加文件到缓存区
移除(remove):移除文件至缓存区
暂存(git stash):保存工作现场
重置(reset):回到最近添加(add)/提交(commit)状态
合并(merge):将多个同名文件合并为一个文件,该文件包含多个同名文件的所有内容,相同内容抵消
抓取(fetch):从远程仓库获取信息并同步至本地仓库
拉取(pull):从远程仓库获取信息并同步至本地仓库,并且自动执行合并(merge)操作,即 pull=fetch+merge
推送(push):将本地仓库同步至远程仓库,一般推送(push)前先拉取(pull)一次,确保一致
分支(branch):创建/修改/删除分枝
标签(tag):给项目增添标签
工作流(Git Flow):团队工作时,每个人创建属于自己的分枝(branch),确定无误后提交到master分枝
Terminal (terminal) : You can enter the git command line
[Original link]: How to use SourceTree