0 Preface
This issue mainly explains how to use docker to quickly install rabbitmq and configure the delay queue plugin
1. docker installation
1.1 Install rabbitmq
1. Download the mirror
docker pull rabbitmq
2. Install the mirror
docker run -d --hostname my-rabbit --name rabbit -p 15672:15672 -p 5672:5672 rabbitmq
3. Enable remote management, otherwise you cannot log in to the management page through 15672.
Enter into the docker container and execute:
# 查看容器id
docker ps -a
# 进入容器
docker exec -it 容器id /bin/bssh
# 容器内执行
rabbitmq-plugins enable rabbitmq_management
4. Access ip:15672. If it is installed in a virtual machine, remember to open ports 15672 and 5672
1.2 Install the delayed queue plugin delayed_message_exchange
1. Download the delay queue plugin. Because my rabbitmq version here is 3.9.11. So we need to download the corresponding version of the plugin
Find the rabbitmq plugin download addressrabbitmq_delayed_message_exchange , click releasesto enter the github address , and download the corresponding version.
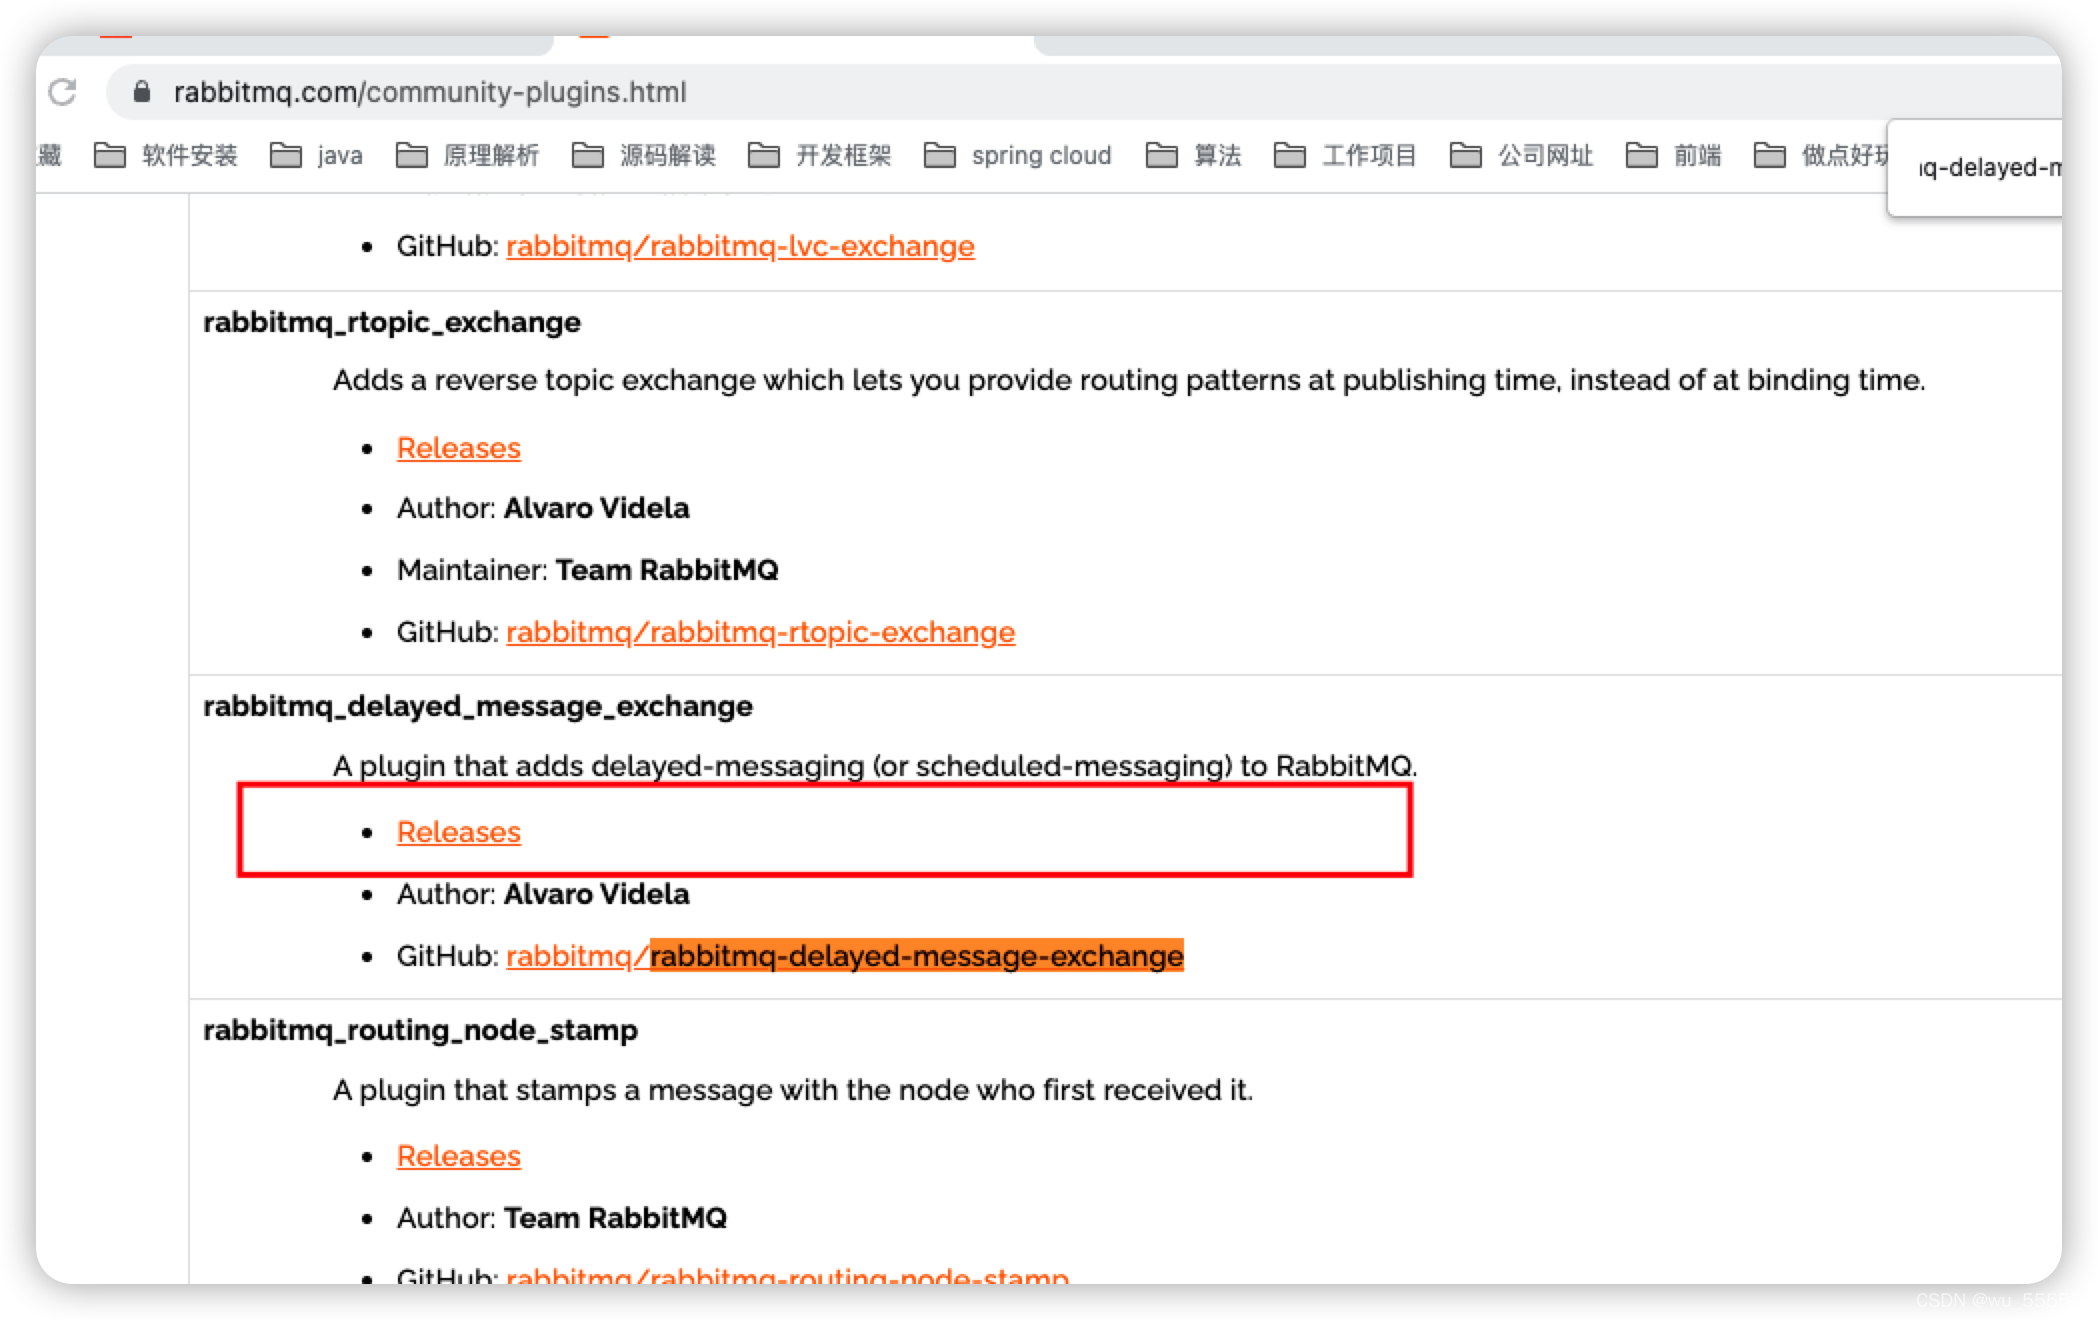
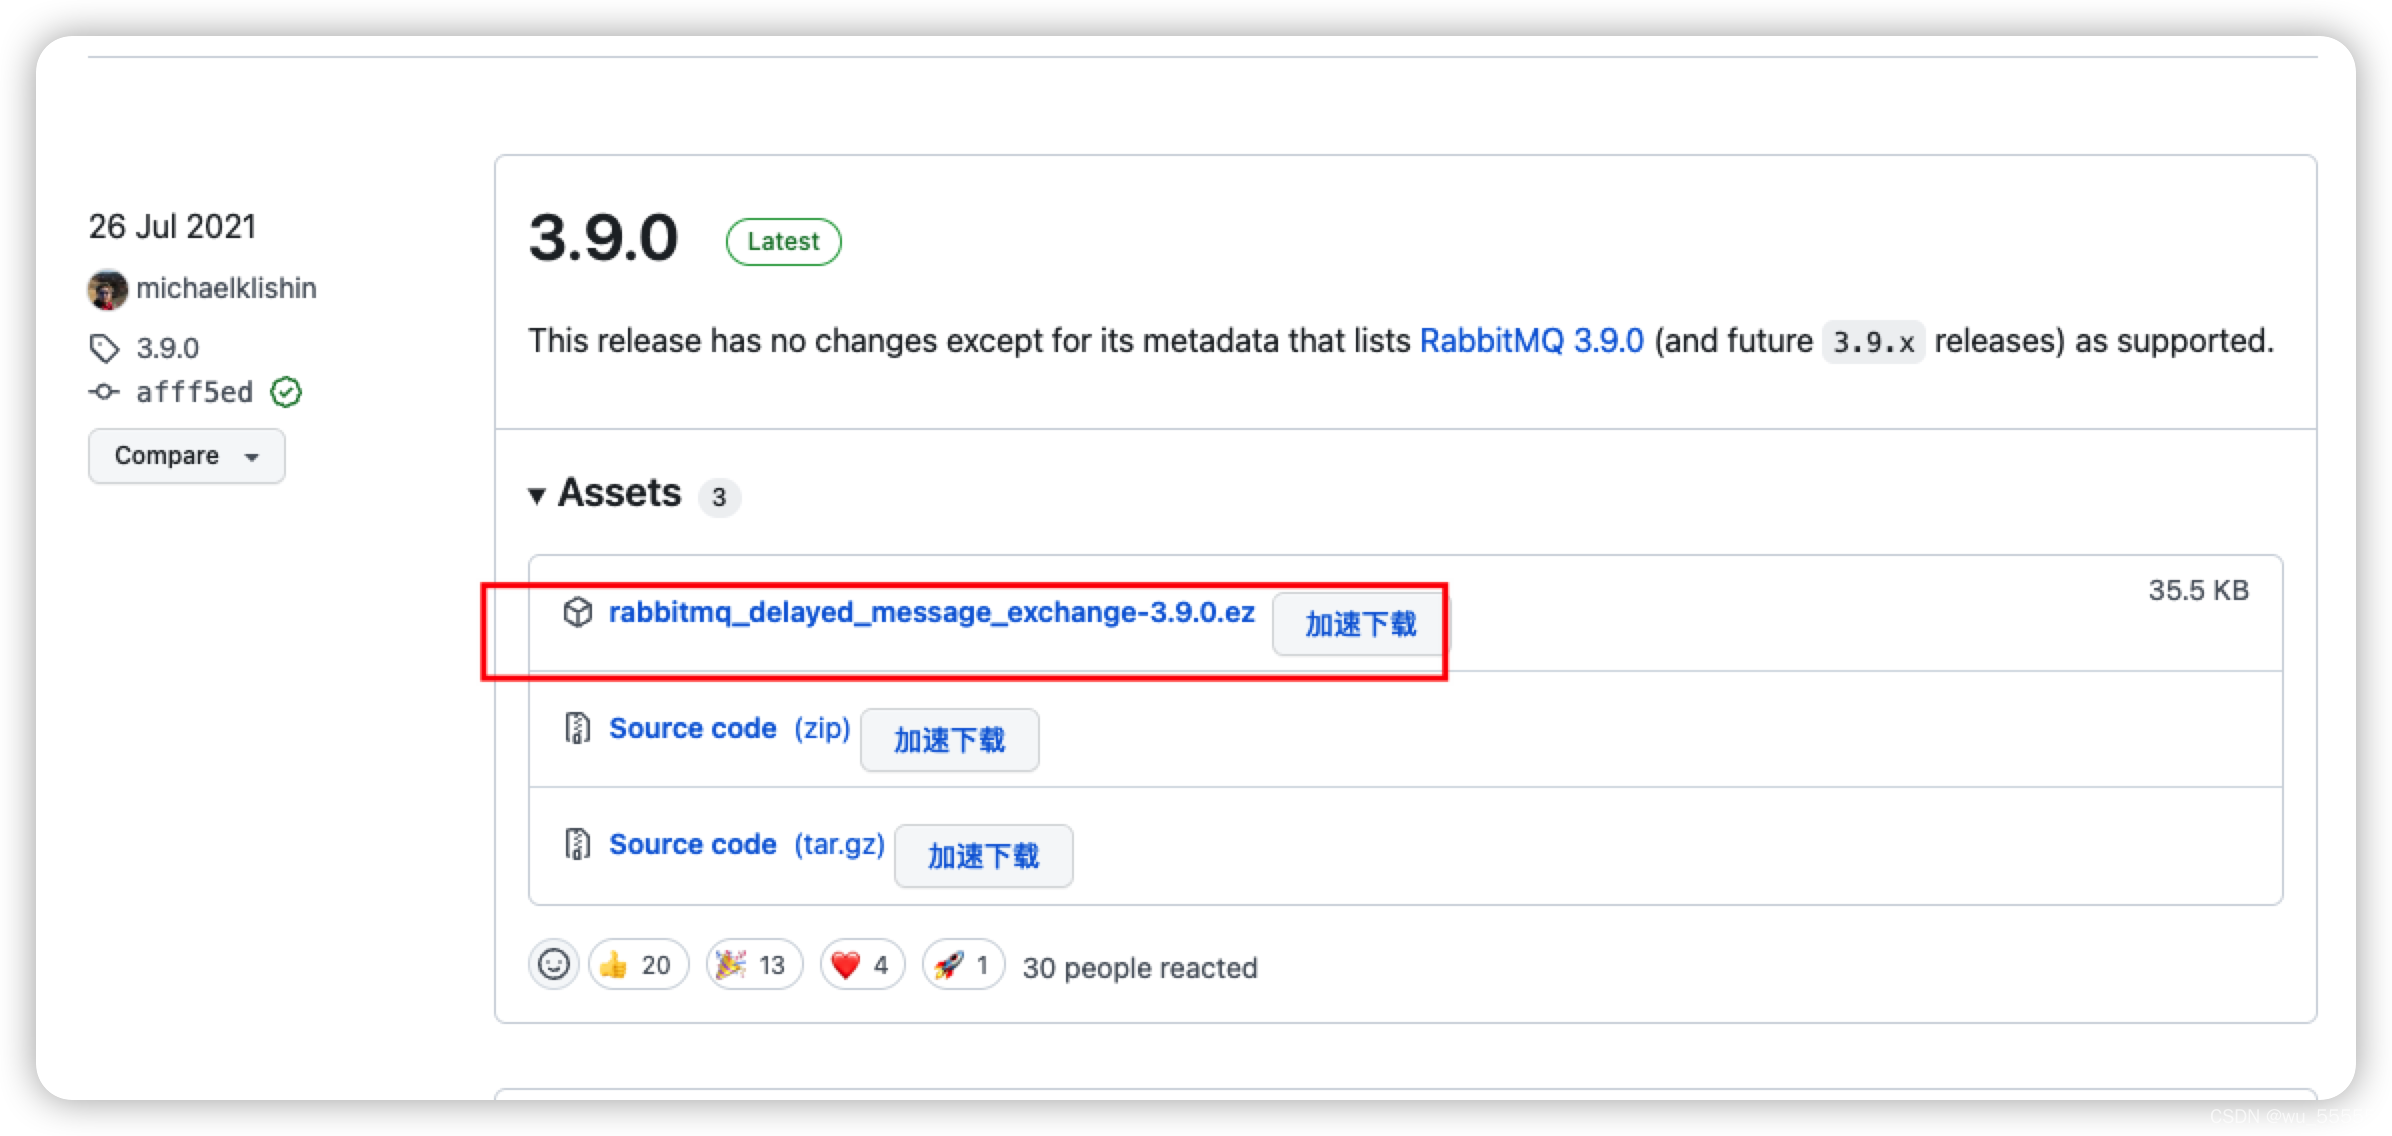
Because the current highest version is 3.9.0, we directly download this version
2. Copy the plugin to the rabbitMQ plugin directory of the docker container
# 查看容器ID
docker ps -a
#  将本地文件复制到docker容器中
docker cp /Users/wuhanxue/Downloads/rabbitmq_delayed_message_exchange-3.9.0.ez 1faca6a70742:/opt/rabbitmq/plugins

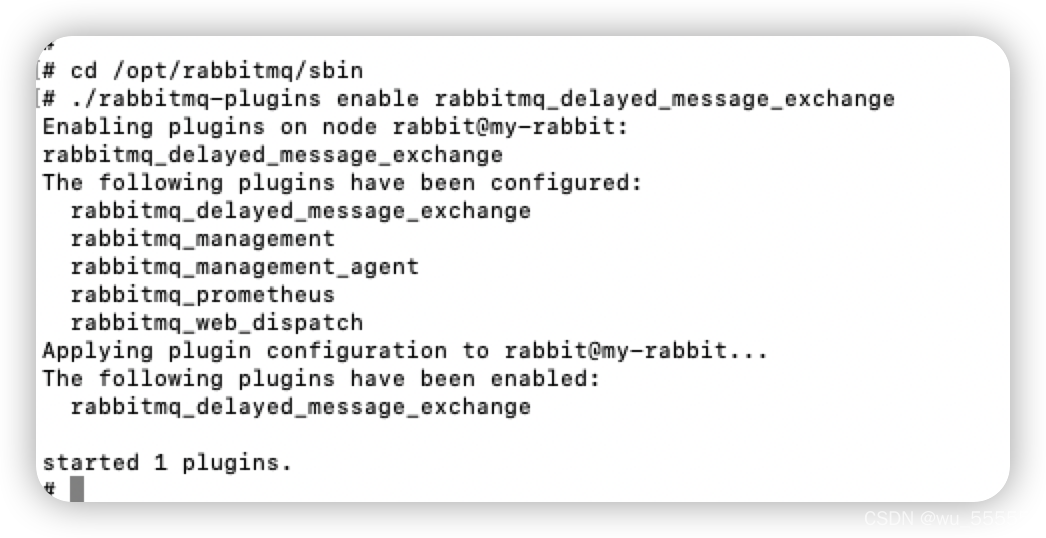
3. Enter the container content and enable the delay switch plugin
docker exec -it 1faca6a70742 /bin/bash
cd /opt/rabbitmq/sbin
./rabbitmq-plugins enable rabbitmq_delayed_message_exchange
4. Restart the rabbitmq container
docker restart 1faca6a70742
2. docker package and install rabbitmq + delay queue plugin
Above we have demonstrated the installation of rabbitmq first, and then the delay plug-in. In addition, we also provide a one-step installation of rabbitmq that includes the delay plug-in, which is to install through the bladex source
1. Download the bladex/rabbitmq image
docker pull bladex/rabbitmq:3.8.9-management-delayed-message
2. Create a container
docker run --name rabbitmq -d -p 15672:15672 -p 5672:5672 bladex/rabbitmq:3.8.9-management-delayed-message
3. No need to open remote management, log in directly to ip:15672 to access the management page