First, the server page as shown in the figure appears to prove that kubesphere is installed successfully.
When we install our system, the admin account and password will appear when the installation is successful. We use the initialized account and password to log in to the system. When logging in for the first time, we need to change the default password to ensure the security of the system.
After logging in to the system, we can see the page as shown in the figure. At the beginning, it is an admin user. You can use the admin user to deploy multiple factories and other administrator users. However, in order to learn the deployment of mysql in a targeted manner, we use admin user to deploy.

First of all, we need to enter the access control to deploy the corresponding factory. After the factory is deployed, we can enter the corresponding factory to create the project. Since the above steps are too basic, we will no longer demonstrate and directly deploy the service for the project.
First of all, we configure the most basic configmap in config, which is the most basic configuration file we configure for mysql. The content of the configuration file is the /etc/mysql/my.cnf configuration file of mysql that we usually use.
The content of the configuration file we give here is:
[client]
default-character-set=utf8mb4

[mysql]
default-character-set=utf8mb4

[mysqld]
init_connect='SET collation_connection = utf8mb4_unicode_ci'
init_connect='SET NAMES utf8mb4'
character-set-server=utf8mb4
collation-server=utf8mb4_unicode_ci
skip-character-set-client-handshake
Next, we configure the most basic configuration file. Through the entry of configmaps under configuration, click create on the right, select basic information, enter the name and remarks of the configuration file, and click the Next button. 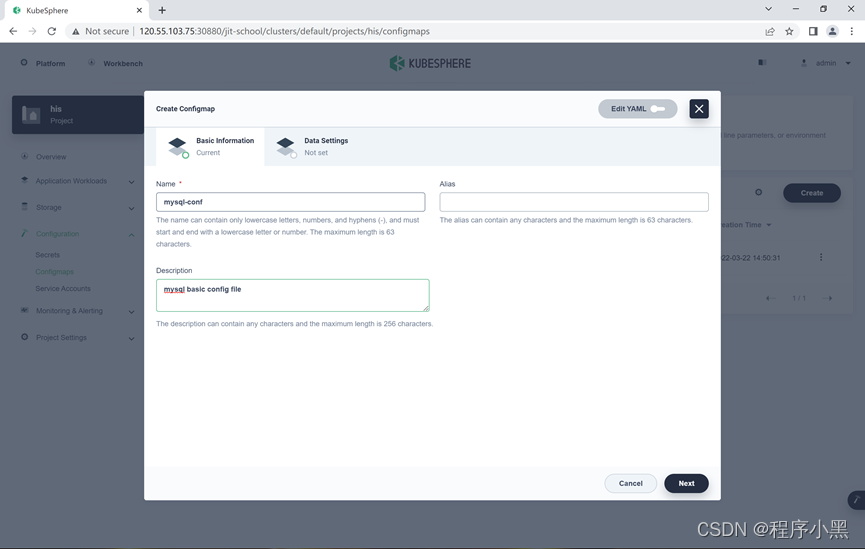
Then we set the Data Value.

Among them, the value of key represents the name of the configuration file we need to create, and the value of value represents the content of our configuration file.
After entering the content, we press the black tick below, and then click Create.

Then we can see that a basic mysql-conf configuration file is created.
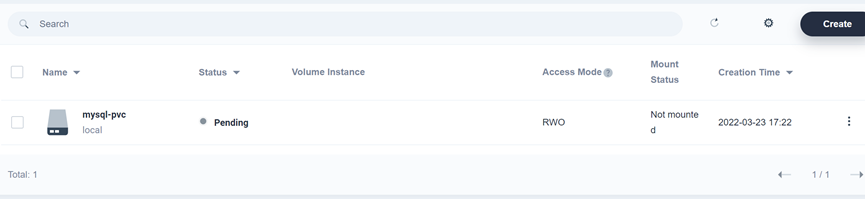
Next, we need to create a pvc for this configuration file. In multi-node mode, we need to apply for pv through network sharing NFS, but in a single-node host, we only need to apply for resources in the local hard disk.
We select Storage-volumes, create a PV storage file,

and set the basic PV name and storage capacity size, 10G.
After creating the basic pv, we can move on to creating our workload.
Select application workland, select workloads, since we need to deploy mysql, we need to deploy a stateful replica set instead of a daemon set, we select statefulsets on the right,

Enter a basic workload name and remarks.
Then select the most basic docker image file, configure the most basic environment variables according to the content displayed in the docker hub, and configure the time zone of the synchronization host.

After pressing the tick in the lower right corner, we click Next to configure the basic storage space.
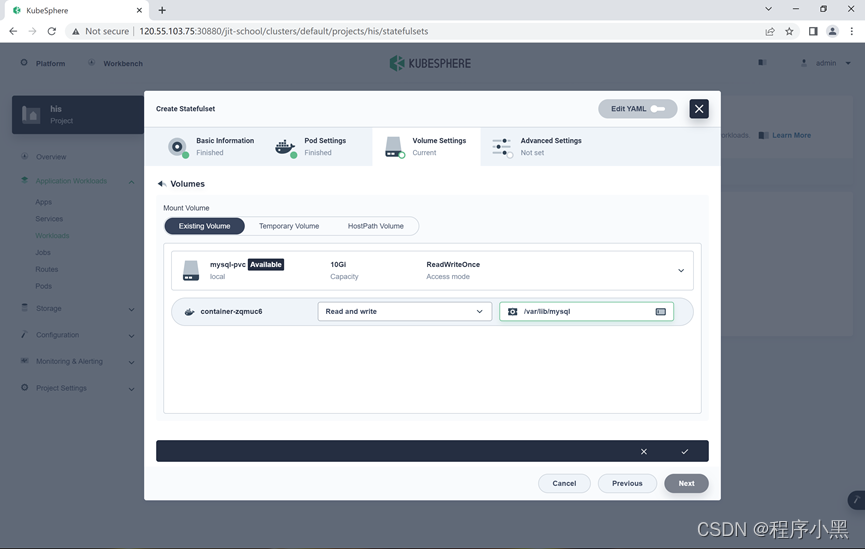
We need to map our /var/lib/mysql working directory to the corresponding pv of our k8s. To correspond to the services we deploy later, to provide storage functions.

Also configure our corresponding configuration file information.
The effect diagram after configuring the storage file settings is as follows:

After we click Next, we can directly create the workload.

When our Status shows Running, it means that our mysql workload has been configured successfully.

We can directly find the pod container corresponding to this workload, and directly click the pod container to enter the corresponding container viewing interface.
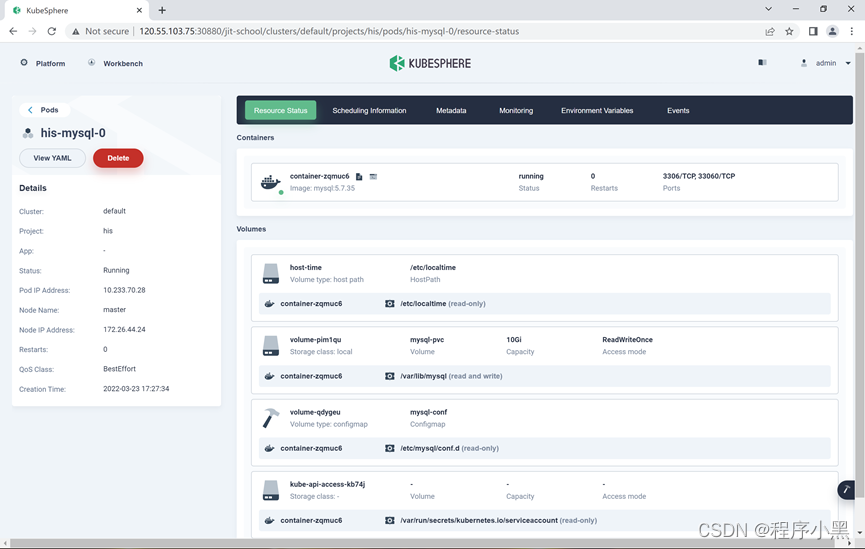
Click the terminal icon above to enter the terminal.

It can be seen that we can successfully enter our mysql service through the pod container.
Continue to view our mysql configuration file
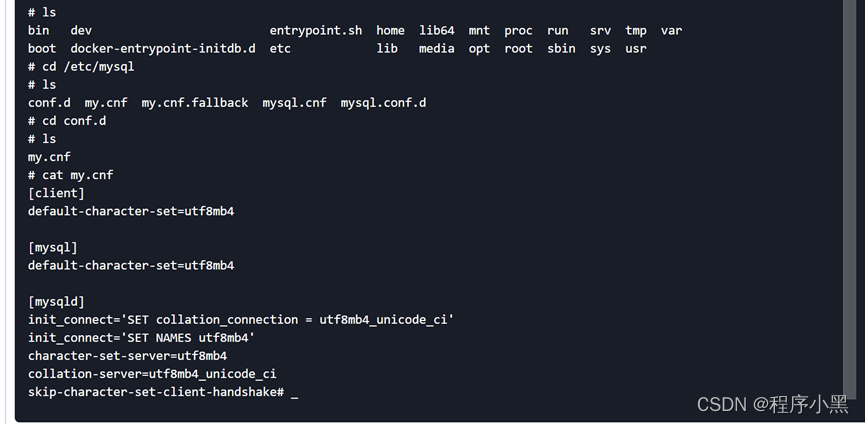
It can be seen that under the storage volume of /etc/mysql/conf.d, the key is my.cnf, and the value is the content of our file. We can view it through the cat command in the directory of /etc/mysql/conf.d The content we set for this file is the value of the value we set in the configmap.