foreword
Before reading this article, you need to purchase Tencent server in advance and connect to Xshell . Other cloud servers are also available, and the operations are basically similar.
Because this is the first time for the author to deploy a full-stack project on the server, I encountered many pits, and it took almost a day to solve it.
The purpose of creating this article is to sort out the process of launching the project for the next use, and at the same time help friends to quickly deploy the project and eliminate a lot of pits! ! !
operate
Install the pagoda panel
宝塔It is a safe and efficient server operation and maintenance panel, which is very friendly to small partners who are not familiar with Linux operation. First of all, we need to connect our server in Xshell, and choose to execute the following command according to the type of server
- Centos install script
yum install -y wget && wget -O install.sh http://download.bt.cn/install/install_6.0.sh && sh install.sh
- Ubuntu/Deepin installation script
wget -O install.sh http://download.bt.cn/install/install-ubuntu_6.0.sh && sudo bash install.sh
- Debian installation script
wget -O install.sh http://download.bt.cn/install/install-ubuntu_6.0.sh && bash install.sh
- Fedora Install Script
wget -O install.sh http://download.bt.cn/install/install_6.0.sh && bash install.sh
For example, I am a virtual machine of ubuntu, I will execute the following command after connecting to the server in Xshell: If there is a choice

during the installation process, select y, and then press Enter all the way . If the installation is successful, the following interface will be displayed (xxx.xxx.xxx.xx refers to your server address, username and password are the name of your login pagoda, to save!!!).
Bt-Panel:http//xxx.xxx.xxx.xx:8888
username:xxxx
password:xxx
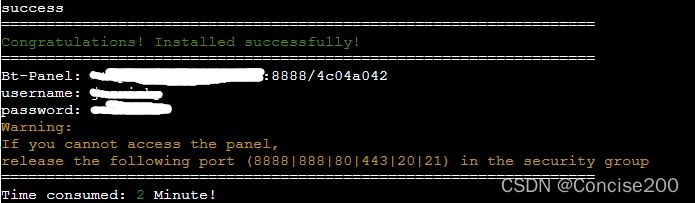
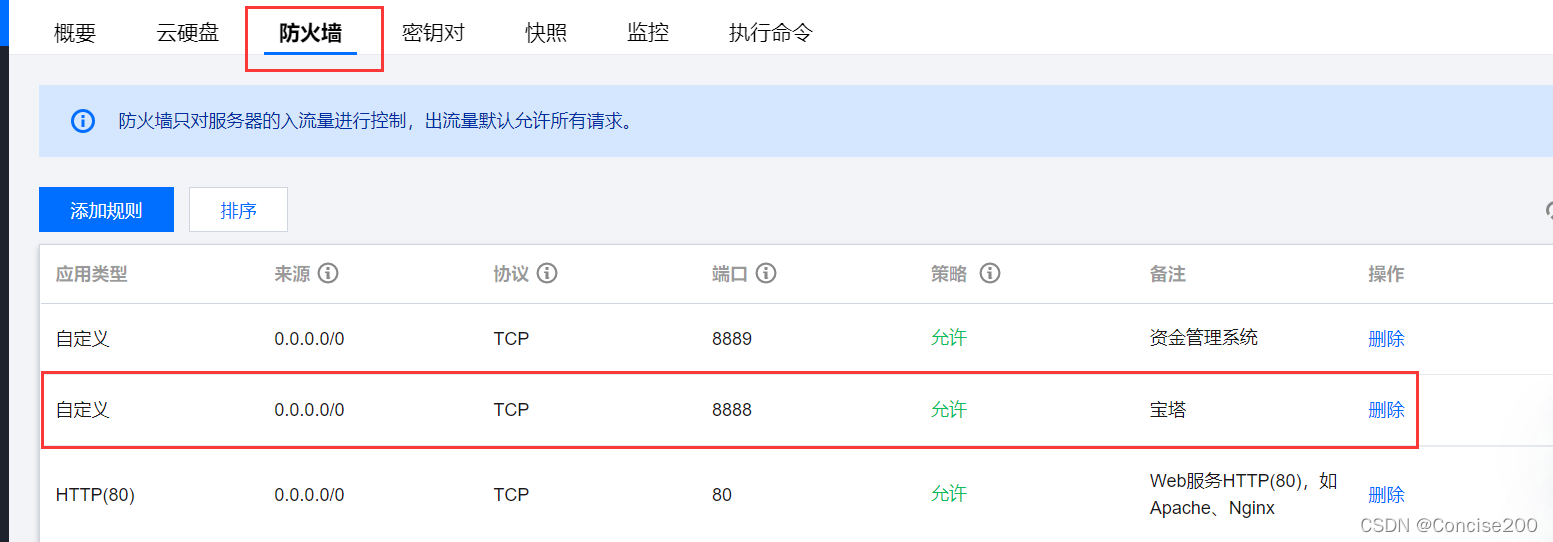
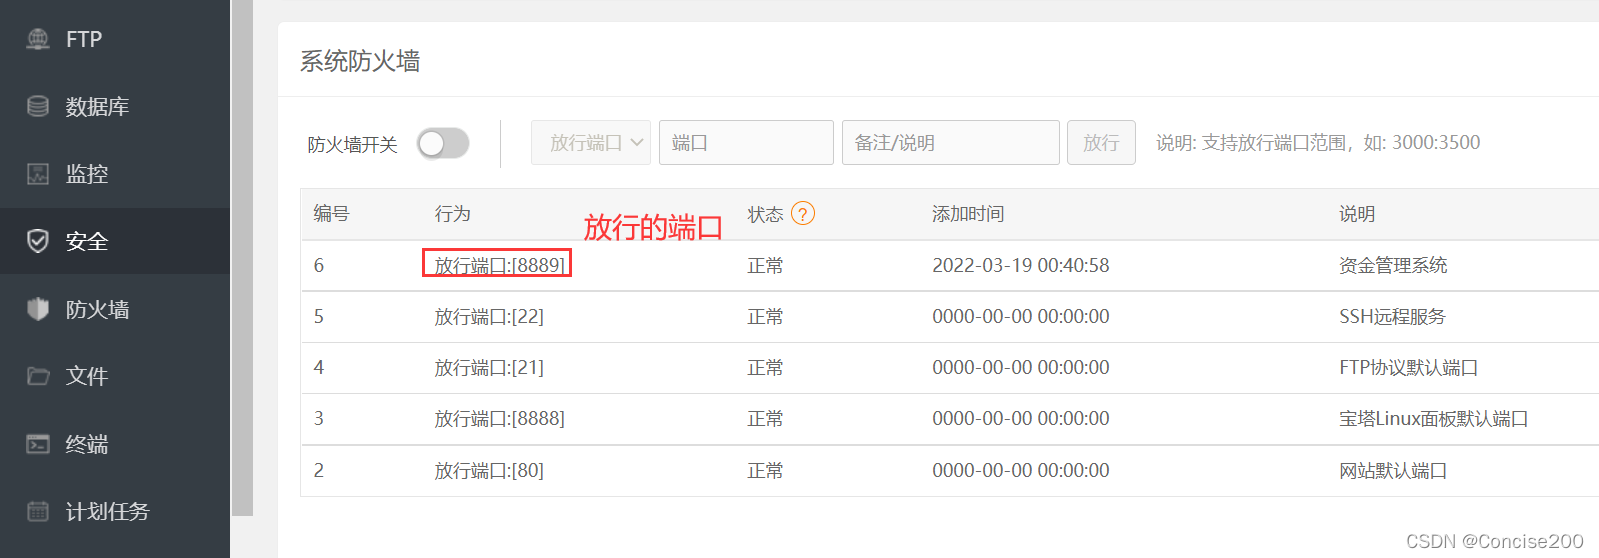
At this time, you need to go to the server to open port 8888
and then open http//xxx.xxx.xxx.xx:8888it, enter your username and password to log in. 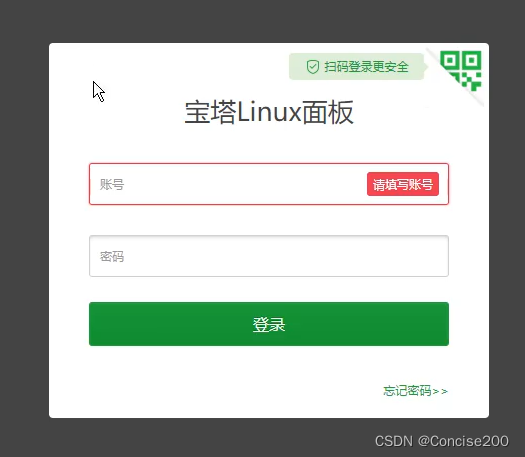
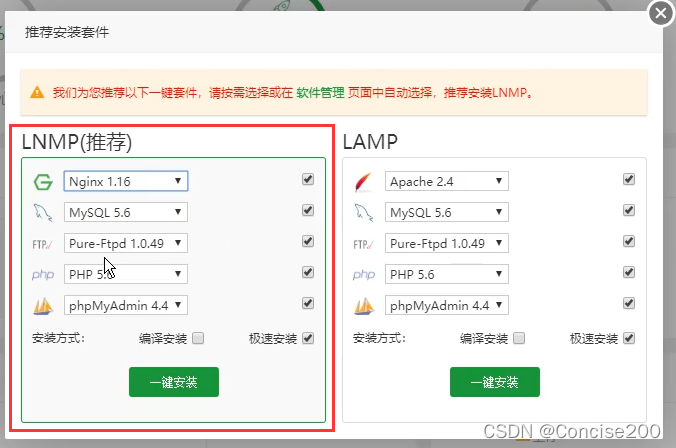
After the login is successful, the recommended installation software will pop up, and you can install it with one click LNMP(推荐).
Create database and import data
We select the database on the left, then click Add Database, fill in the database name, user name, database password, select the database type (Mysql I use), and then submit.

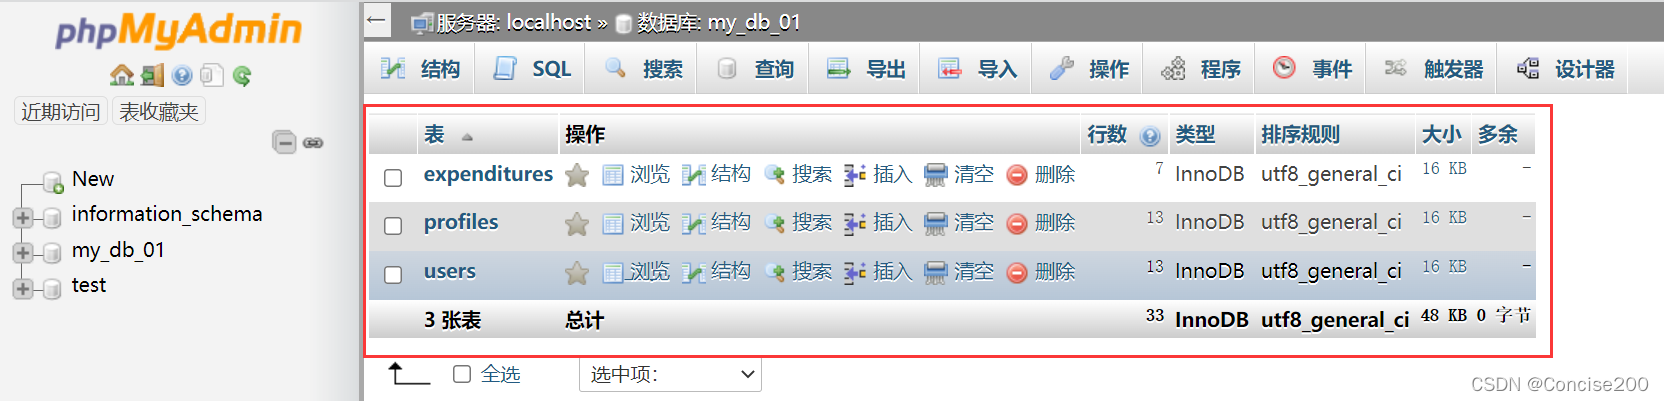
Import the base table. Click Import to directly import the local sql file, and then click Manage to view

If the table already exists, the import is successful. If it doesn't work, look down
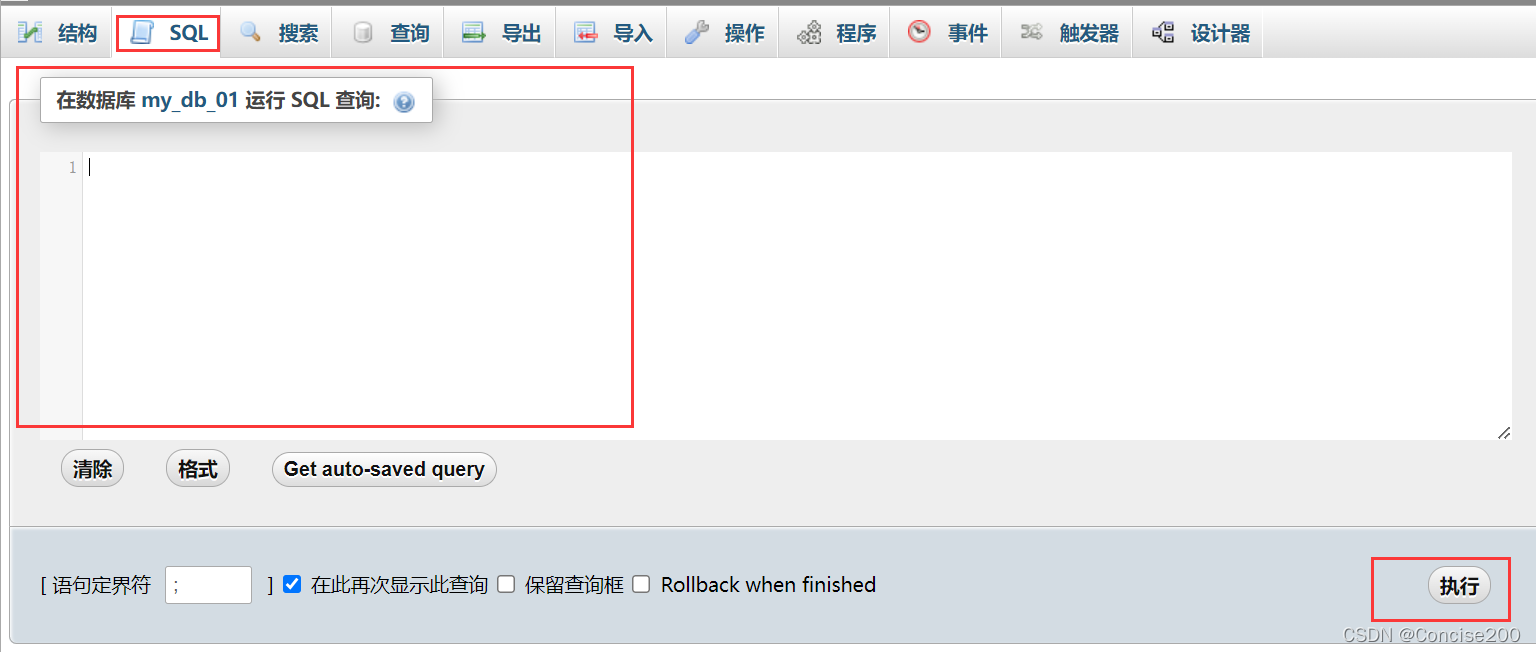
because the .sql file I exported with Navicat only has an insert statement (that is, no table is created), so I will not succeed if I click on the import directly. You need to use SQL statements to create tables first. If you are not familiar with it, you can check the definition, deletion and modification of basic SQL tables inCREATE TABLE this article .
After writing the SQL statement, click Execute, so there will be an empty table, and then importing the data will succeed .
Backend deployment
First of all, we need to release the back-end interface in the safe place on the pagoda. I have released 8889 here. You can decide which port to release.
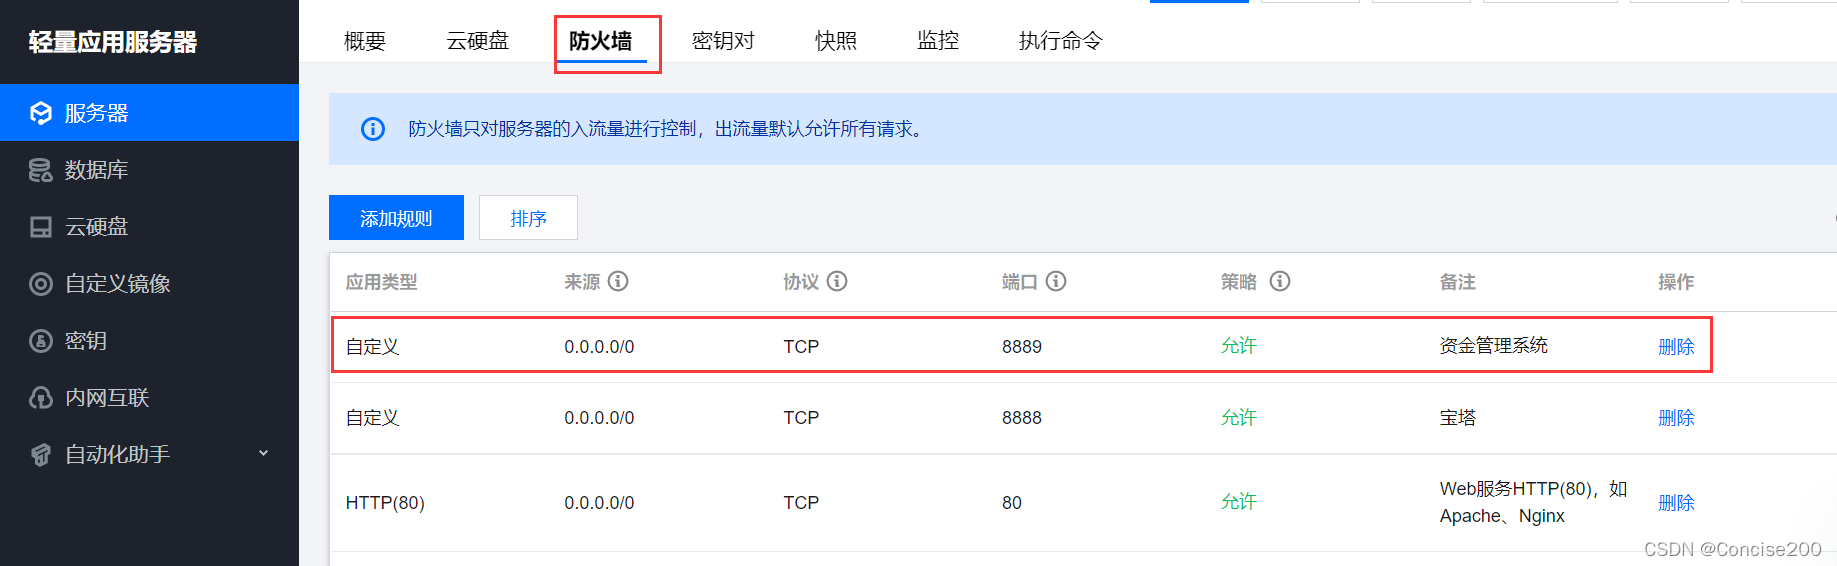
On Tencent Cloud, you also need to release the corresponding port and
replace the back-end project database connection with the information of the database you just created.
注意: Don't host: '127.0.0.1'change it to your server ip, because here 127.0.0.1refers to your server's loopback address.
// 2. 建立与 MySQL 数据库的连接关系
const db = mysql.createPool({


    host: '127.0.0.1', // 数据库的 IP 地址
    user: 'xxx', // 登录数据库的账号
    password: 'xxxx', // 刚所建数据库的密码
    database: 'my_db_01' // 指定要操作哪个数据库
})
At the same time, change the port that the server is listening on to the port you developed, here is 8889.
// 创建端口号
const port= 8889;

// 调用app.listen(端口号,启动成功后的回调函数) , 启动 web 服务器
app.listen(port, () => {


    console.log(`express server running on port ${

      port}`);
})
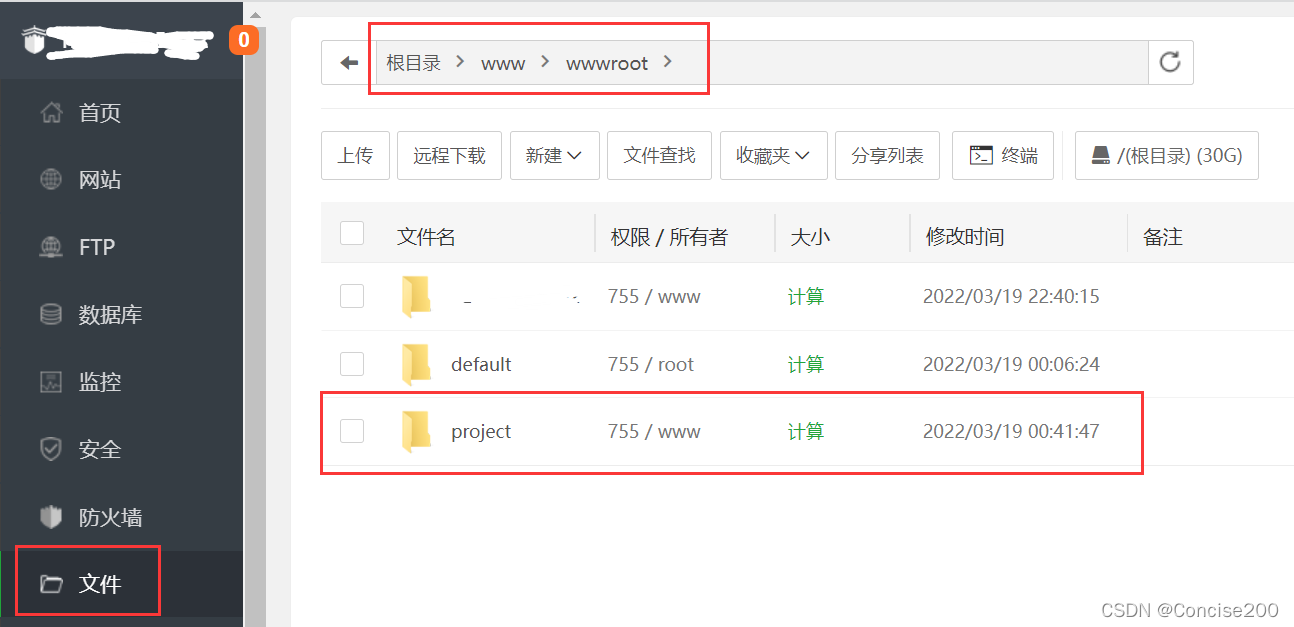
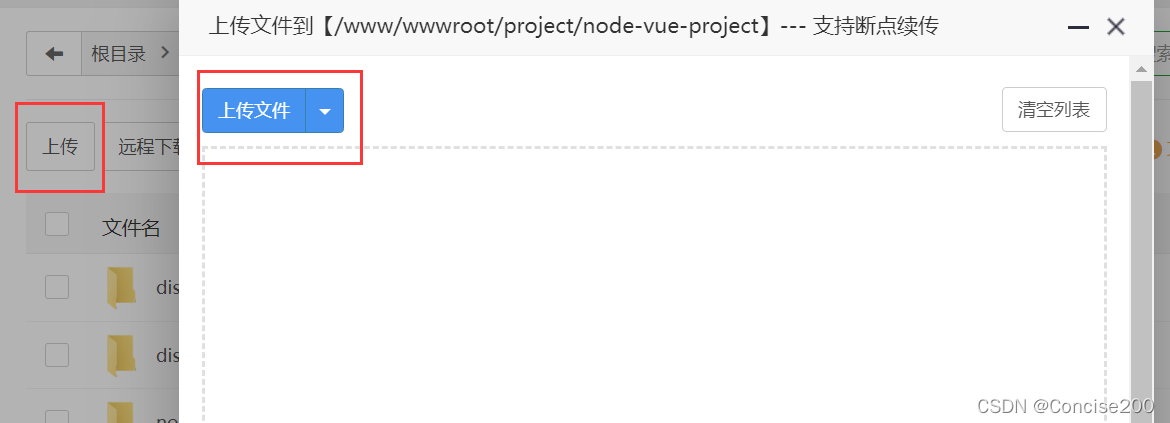
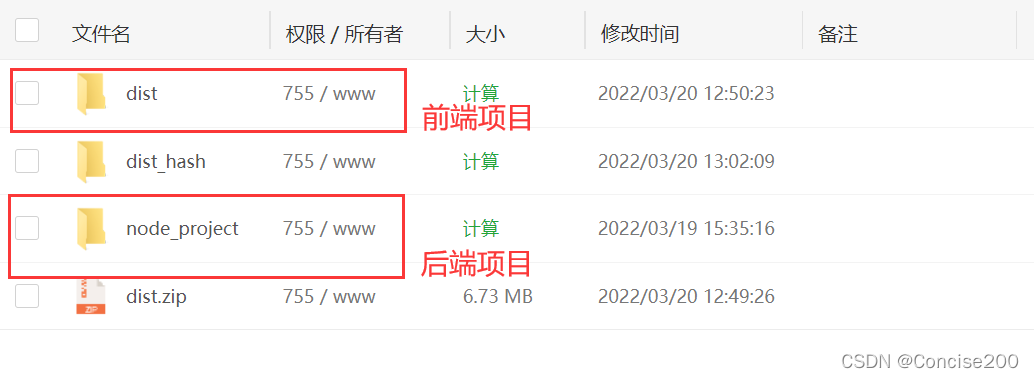
After all are saved and compressed, www/wwwroot/create your folder in the directory, and then upload your back-end project compressed package under this folder .
After the upload is successful, extract it to the current directory.
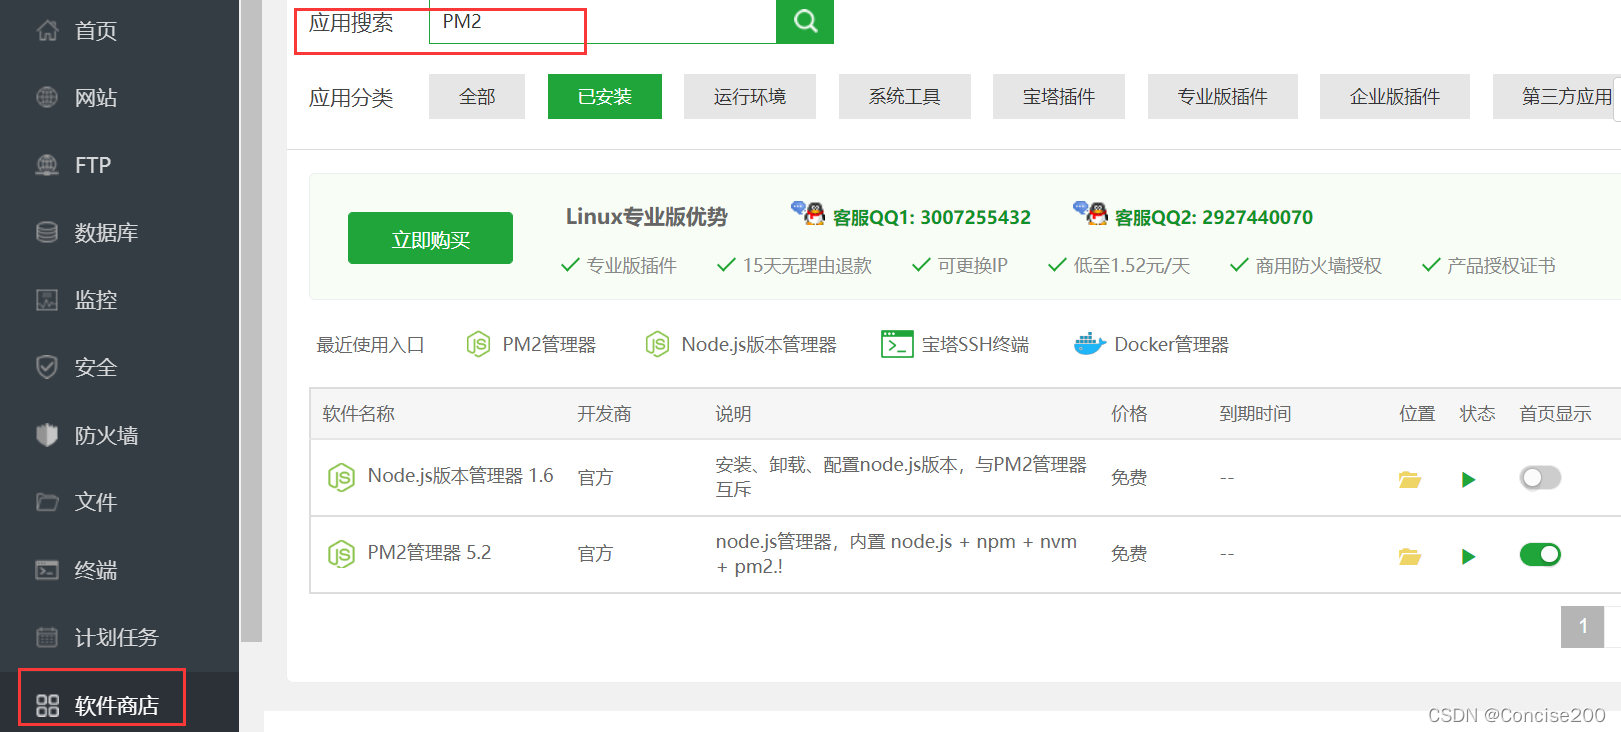
Search for PM2 Manager in the software mall and download it. (I have already downloaded this~)
Open the PM2 manager, then add the project ,
- The startup file is yours
app.jsorserver.js - The run directory is the directory of the backend project you uploaded
- The project name can be filled in according to the actual situation
Save at last!!

At this point, the project is in the process of starting, you can click on the error to view the error log, and if there are errors, solve them one by one. If there are no errors, it means the operation is normal.

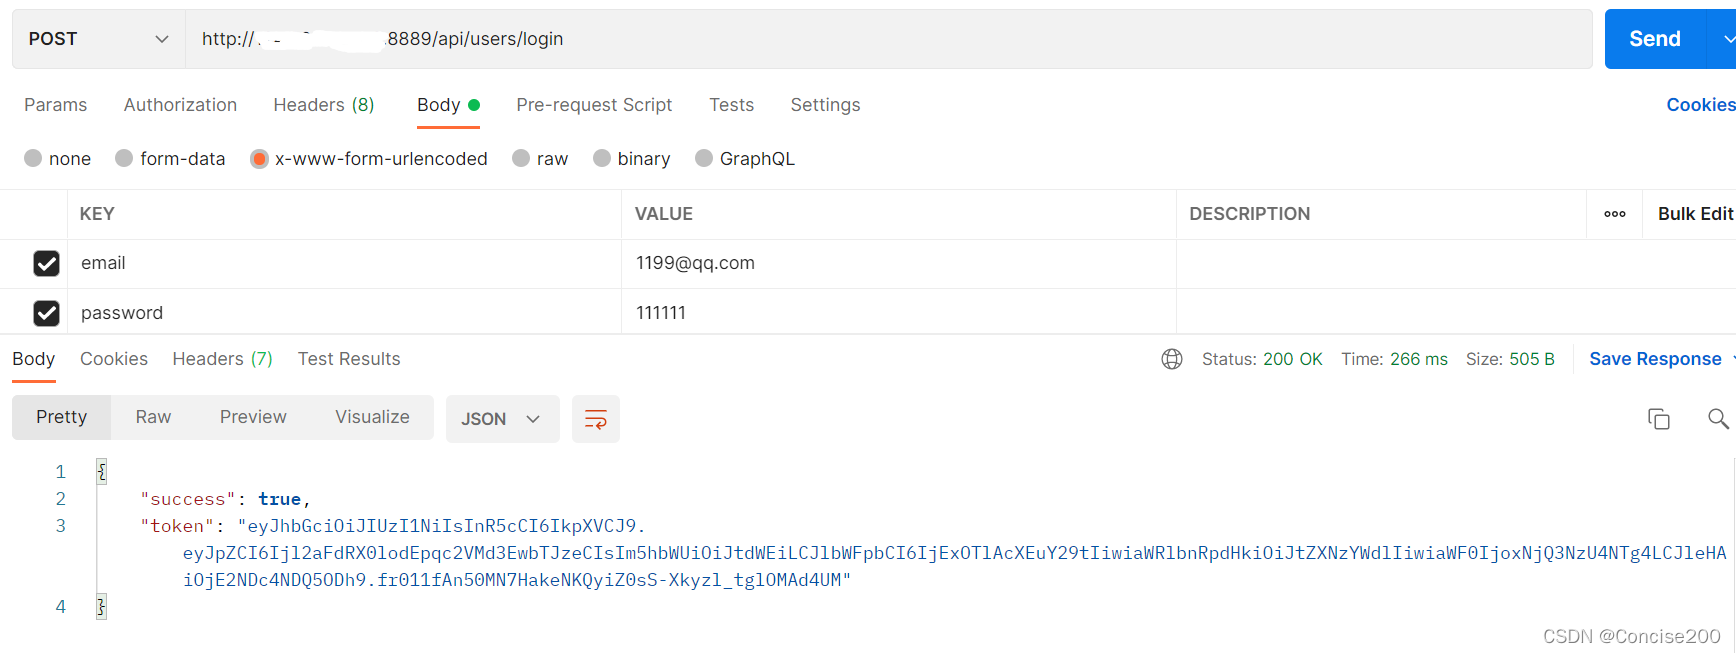
You can go to Postman to test the interface to ensure that the interface can be accessed correctly, and then deploy the front end ! ! !
Front-end deployment
vue.config.jsThe configuration in the front-end project can be devServerdeleted, because we will use nginxthe reverse proxy later
devServer: {


    proxy: {

     // 配置跨域
        '/api': {


            target: 'http://xxx.xxx.xxx.xxx:8889/api/',
            changOrigin: true,
            pathRewrite: {


                '^/api': ''
            }
        }
    },
  }
If the working mode of the route is history, it needs to be changed to hash. Otherwise, there will be a 404 problem when the page is refreshed! ! !
const router = new VueRouter({


   mode:'hash',
   ...
Execute npm run buildto generate dist file

Similarly, compress the dist file, upload it to the same level directory of the backend file, and then decompress it.
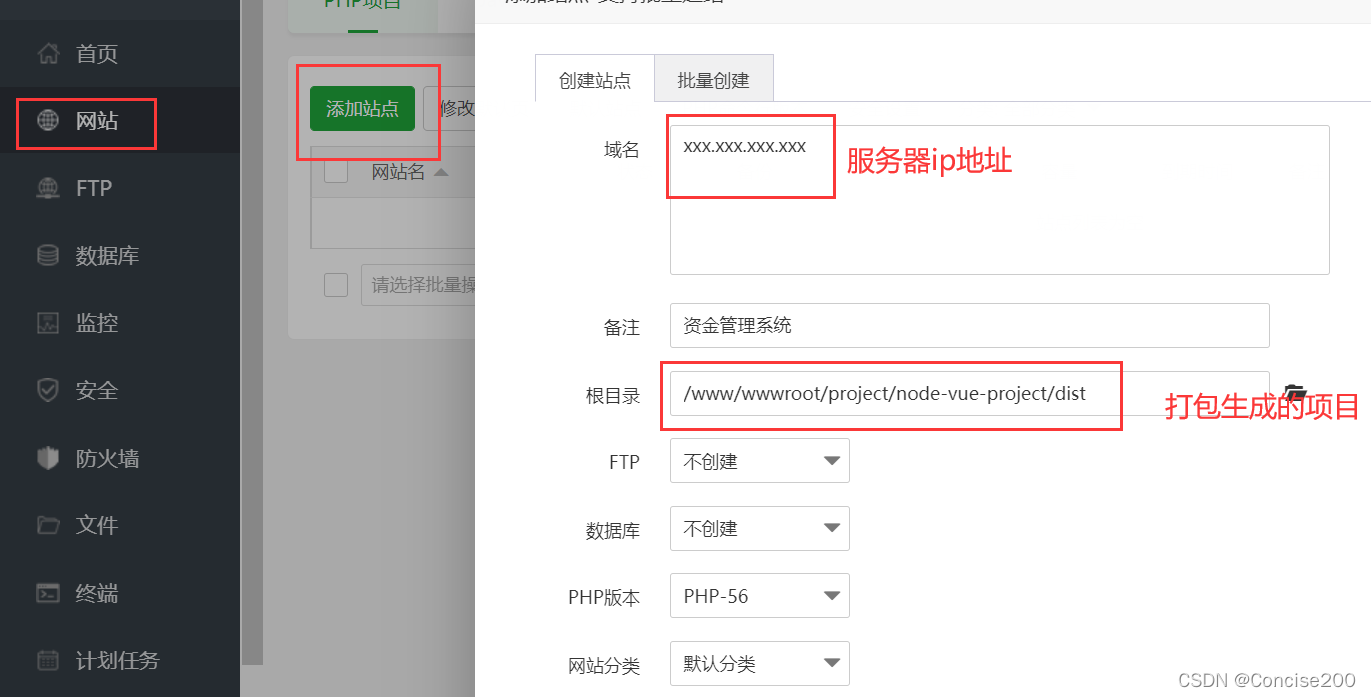
Click the website on the pagoda, add a site, and then fill in the following information according to your own ip address and file address.
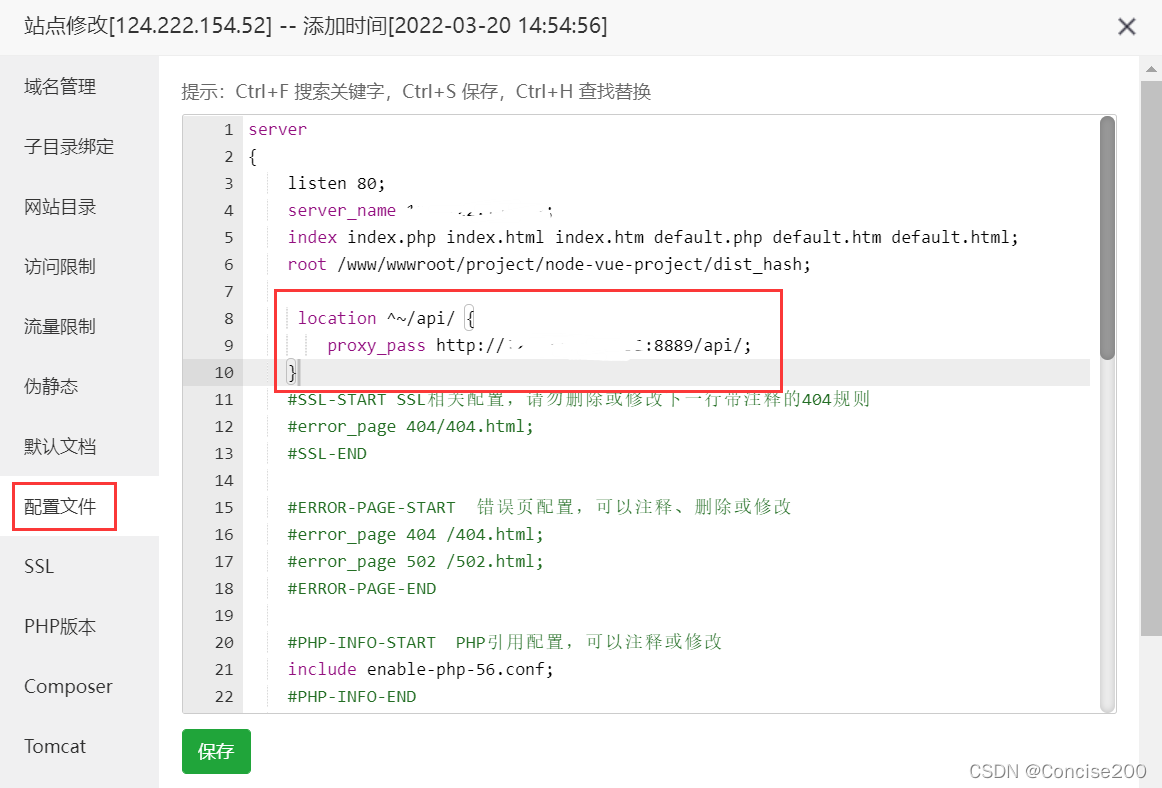
Finally, click Settings.

Configure the nginx proxy, and the address inside writes the address of your front-end proxy server (very, very important, otherwise an error will be reported!!!)
 location ^~/api/ {


        proxy_pass http://xxx.xxx.xxx.xxx:8889/api/;
    }
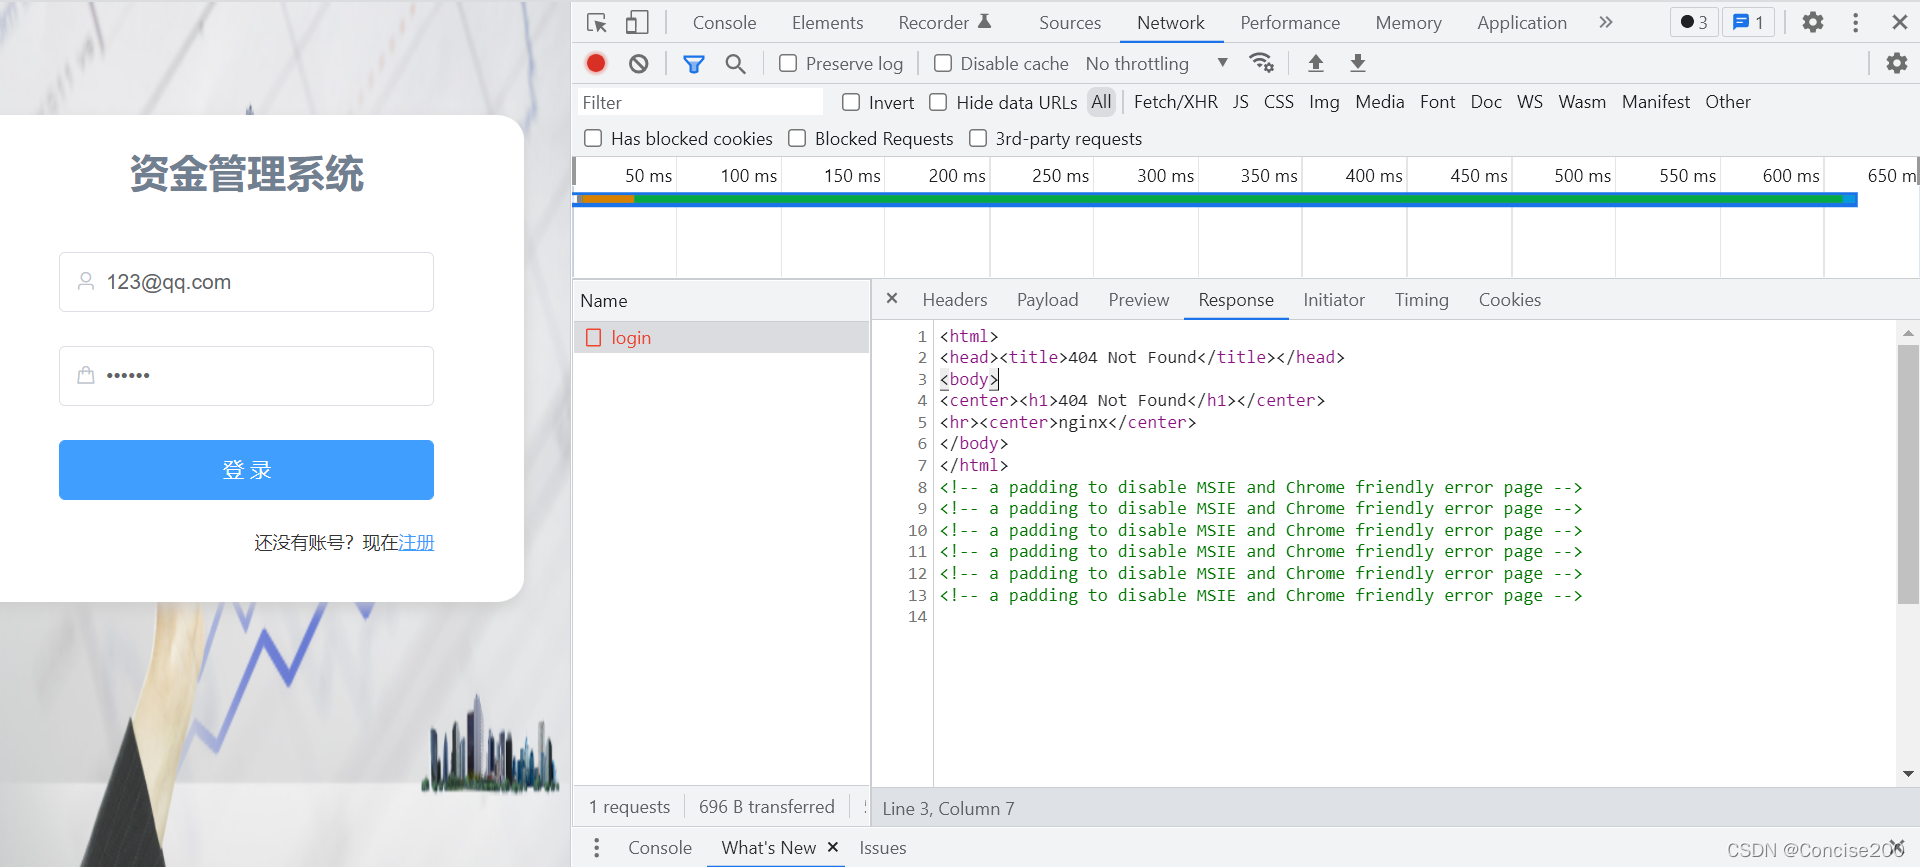
As shown in the figure, if the proxy is not configured, a 404 error occurs.
So far, the front and back ends have been deployed and successfully accessed! !

If you think this article is useful to you, remember to bookmark and like it! !