SpringBoot integrates Xxl-job to realize scheduled tasks
Contents of this article
XXL-JOB is a distributed task scheduling platform whose core design goals are rapid development, easy learning, light weight, and easy expansion. Now open source and connected to the online product lines of many companies, out of the box.
If it is a single machine and there are not many timed tasks, you can choose Timerannotations @Scheduledor Cron工具类other methods to achieve it, but this has a disadvantage, that is, the timed tasks will be written in the code, and once started, they cannot be paused or modified. If it is modified, the entire project needs to be recompiled, which is really very troublesome.
This article will introduce how to implement task scheduling through xxl-job
1. Deployment dispatch center
1. Project download
The following is the gitee address of the dispatch center code, which can be colonized locally
http://gitee.com/xuxueli0323/xxl-job
2. Initialize data
doc/dbThere is a file in the directory of the downloaded project. tables_xxl_job.sqlFirst put it into your own database for execution. In fact, it is to initialize the table structure and data required by the scheduling center.
3. Modify the properties configuration file
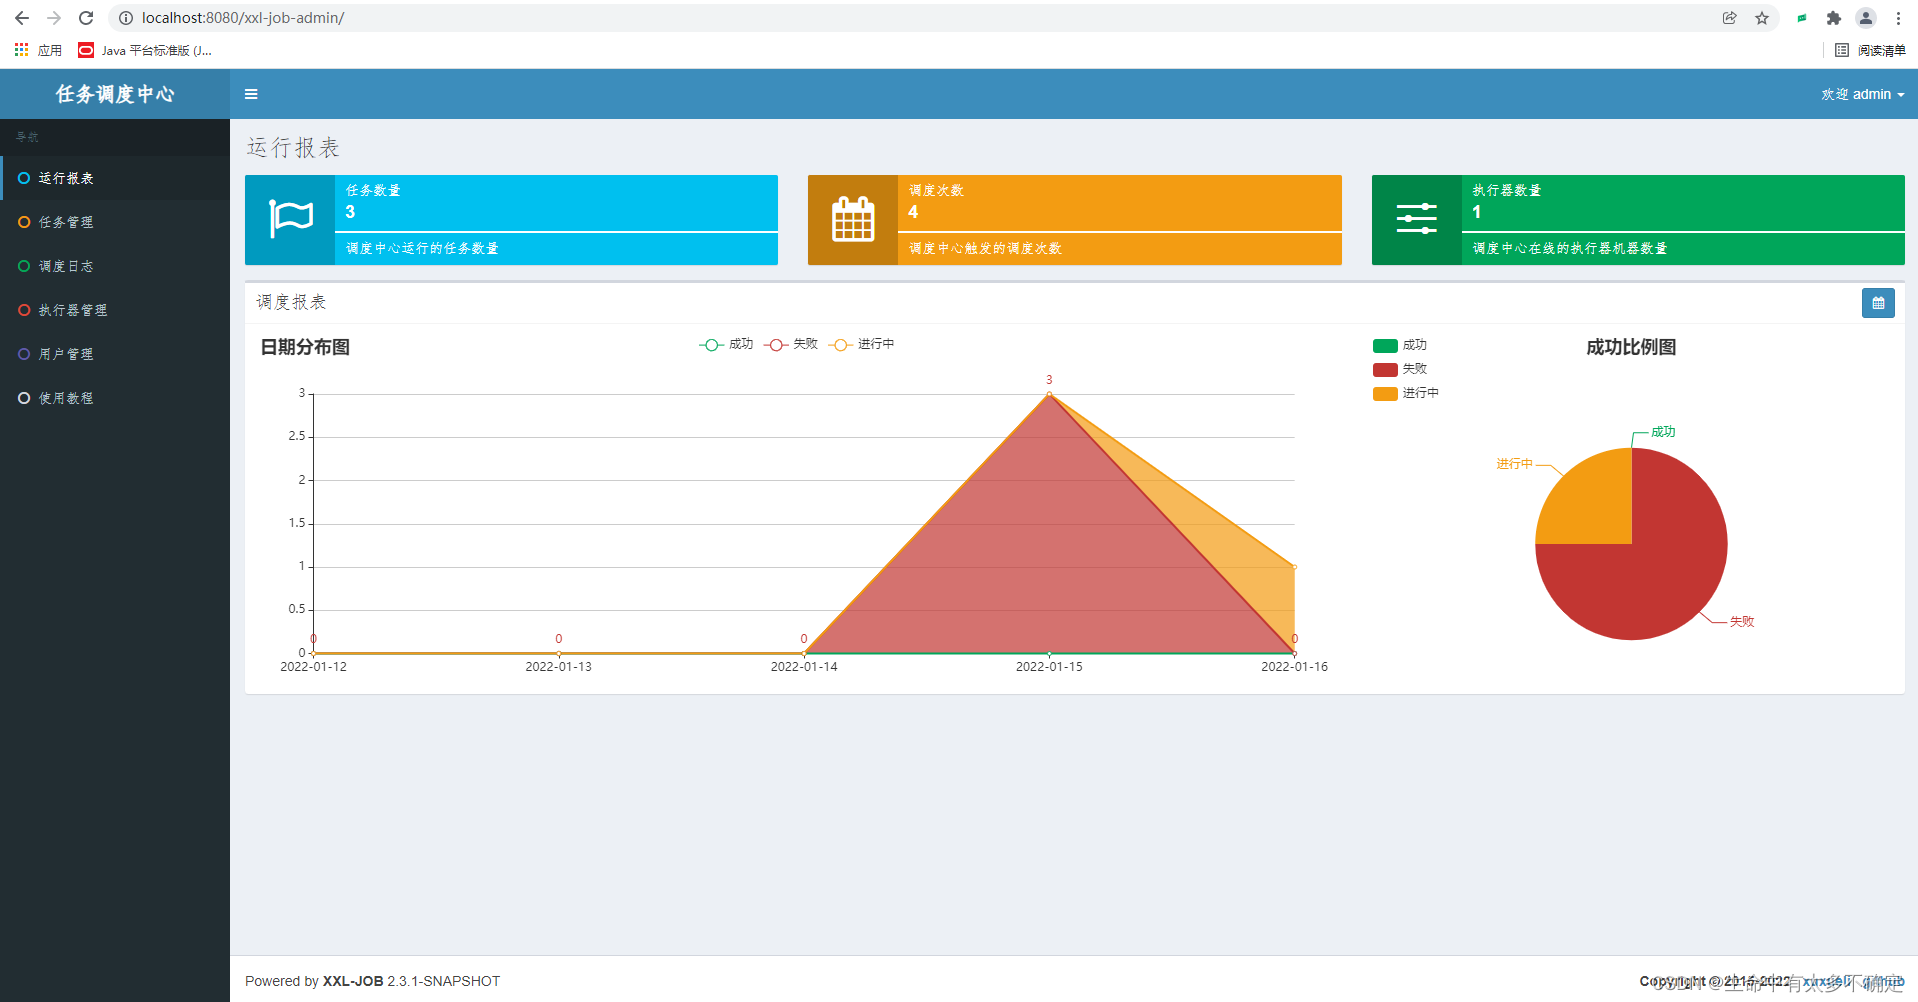
Open the cloned project with IDE, and then modify xxl-job-adminthe properties configuration file under the module. You only need to modify the url, username, and password of the connection database to your own. After the modification, you can start the xxl-job-admindispatch center. Then open http://localhost:8080/xxl-job-admin/ to see the control panel:
Second, deploy the SpringBoot project
1. Introduce dependencies
<dependency>
	<groupId>com.xuxueli</groupId>
    <artifactId>xxl-job-core</artifactId>
    <version>2.2.0</version>
</dependency>
2. Create a configuration class
@Configuration
public class XxlJobConfig {


    private Logger logger = LoggerFactory.getLogger(XxlJobConfig.class);

    @Value("${xxl.job.admin.addresses}")
    private String adminAddresses;

    @Value("${xxl.job.executor.appname}")
    private String appName;

    @Value("${xxl.job.executor.ip}")
    private String ip;

    @Value("${xxl.job.executor.port}")
    private int port;

    @Value("${xxl.job.accessToken}")
    private String accessToken;

    @Value("${xxl.job.executor.logpath}")
    private String logPath;

    @Value("${xxl.job.executor.logretentiondays}")
    private int logRetentionDays;


    @Bean
    public XxlJobSpringExecutor xxlJobExecutor() {


        logger.info(">>>>>>>>>>> xxl-job config init.");
        XxlJobSpringExecutor xxlJobSpringExecutor = new XxlJobSpringExecutor();
        xxlJobSpringExecutor.setAdminAddresses(adminAddresses);
        xxlJobSpringExecutor.setAppname(appName);
        xxlJobSpringExecutor.setIp(ip);
        xxlJobSpringExecutor.setPort(port);
        xxlJobSpringExecutor.setAccessToken(accessToken);
        xxlJobSpringExecutor.setLogPath(logPath);
        xxlJobSpringExecutor.setLogRetentionDays(logRetentionDays);

        return xxlJobSpringExecutor;
    }
}
3. Modify the configuration file
xxl:
  job:
    admin:
      addresses: http://127.0.0.1:8080/xxl-job-admin #部署的调度中心的url
    executor:
      appname: xxl-job-volunteer-executor #执行器的名字
      ip:
      port: 9999 #调度中心调用执行器时使用的端口
      logpath: /data/apploggs/xxl-job/jobhandler #日志路径
      logretentiondays: 30 #日志保留天数
    accessToken:
4. Create the executor
@Component
public class XxlJobSample {


    // myDemoJob是任务的名字,也是Spring中bean的名字
    @XxlJob("myDemoJob")
    public ReturnT<String> myDemoJob(String value) {


        System.out.println("myDemoJob:定时任务触发:" + value);
        return ReturnT.SUCCESS;
    }

}
5. Start the SpringBoot project
After the startup is successful, you will see the following two lines of log information. You can see that you have successfully connected to the scheduling center and registered the tasks to be scheduled.
 >>>>>>>>>>> xxl-job register jobhandler success, name:myDemoJob, jobHandler:com.xxl.job.core.handler.impl.MethodJobHandler@1f94dd63[class com.volunteer.component.XxlJobSample#myDemoJob]

 >>>>>>>>>>> xxl-job remoting server start success, nettype = class com.xxl.job.core.server.EmbedServer, port = 9999
3. Task scheduling through the scheduling center
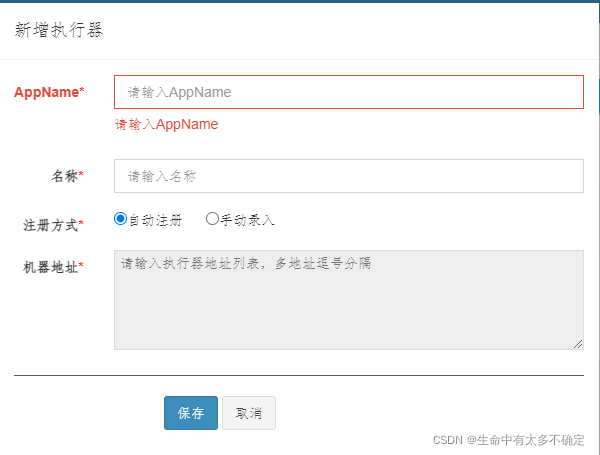
1. Add the executor
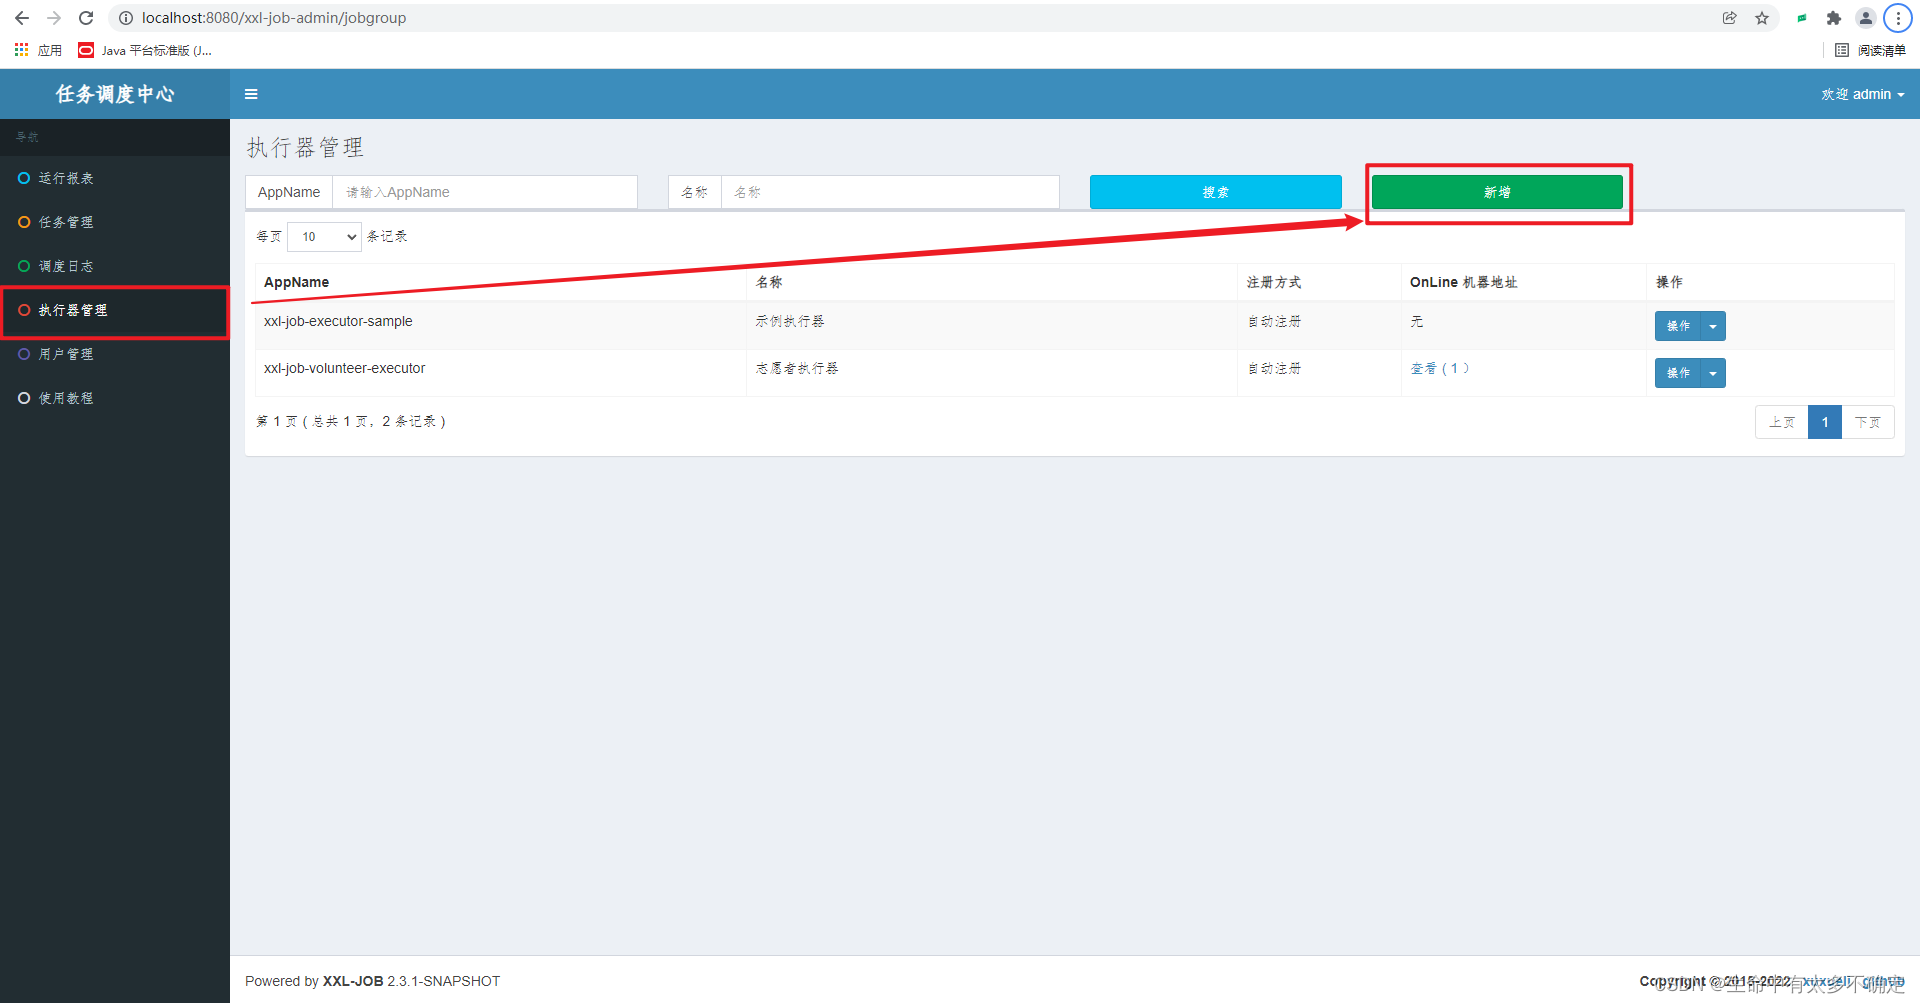
Enter the appName configured in the configuration file, the name can be arbitrary
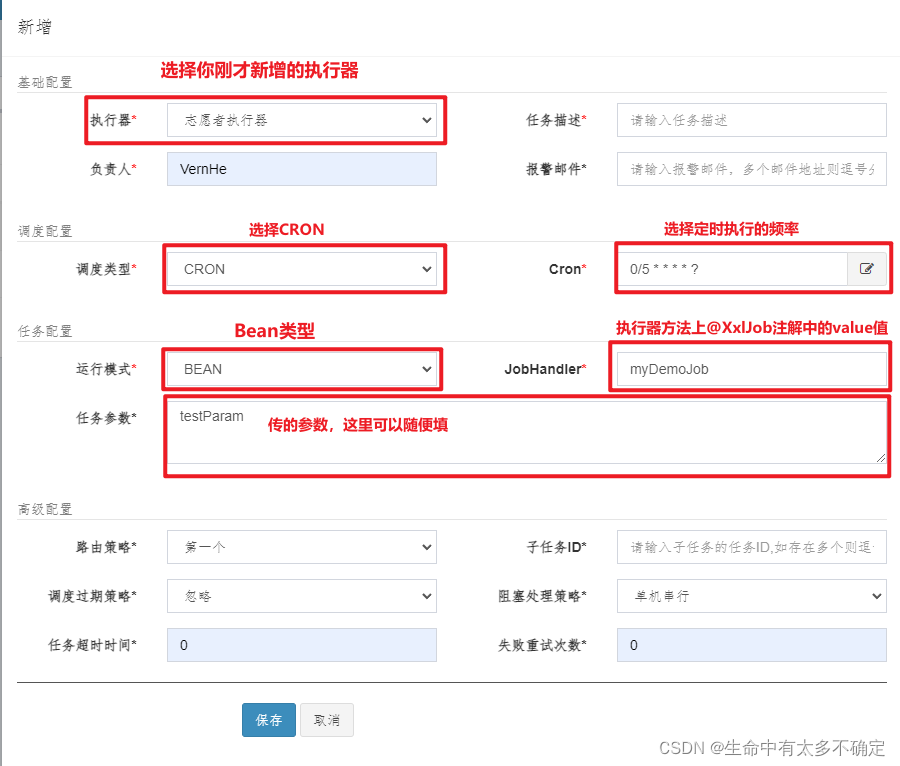
2. Add tasks
Add scheduling task
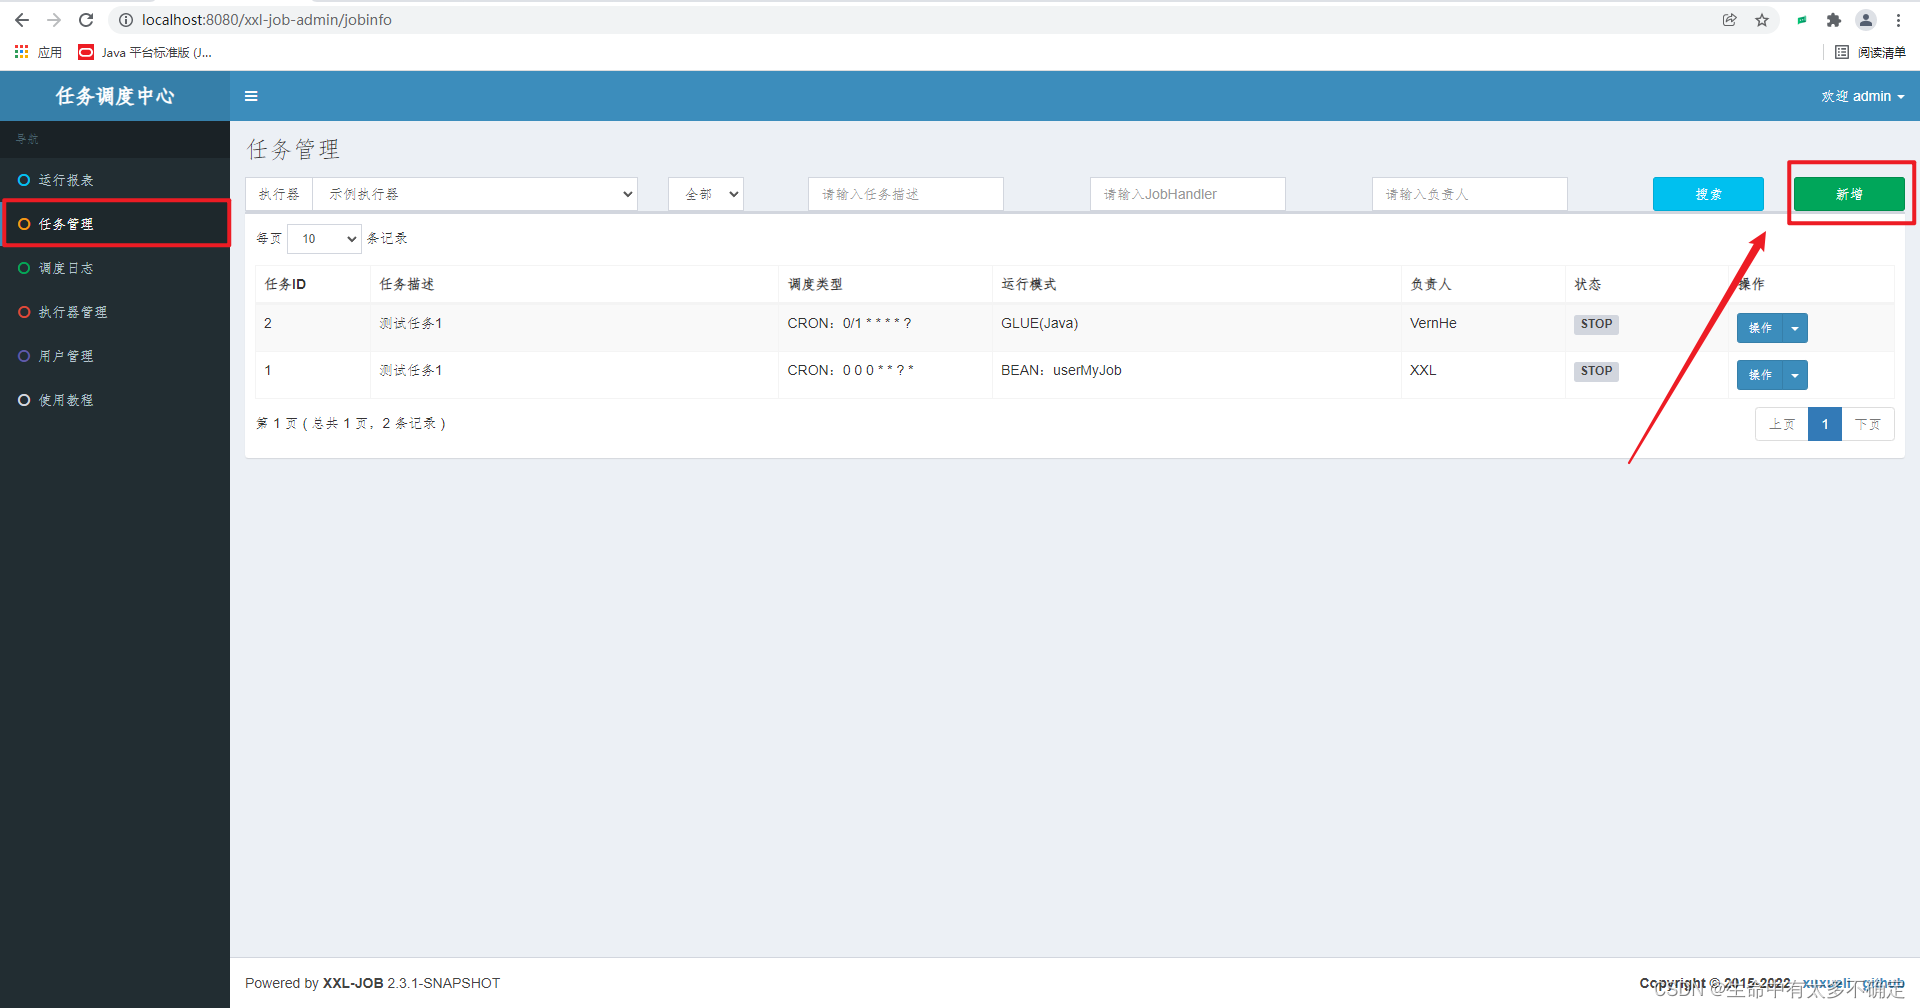
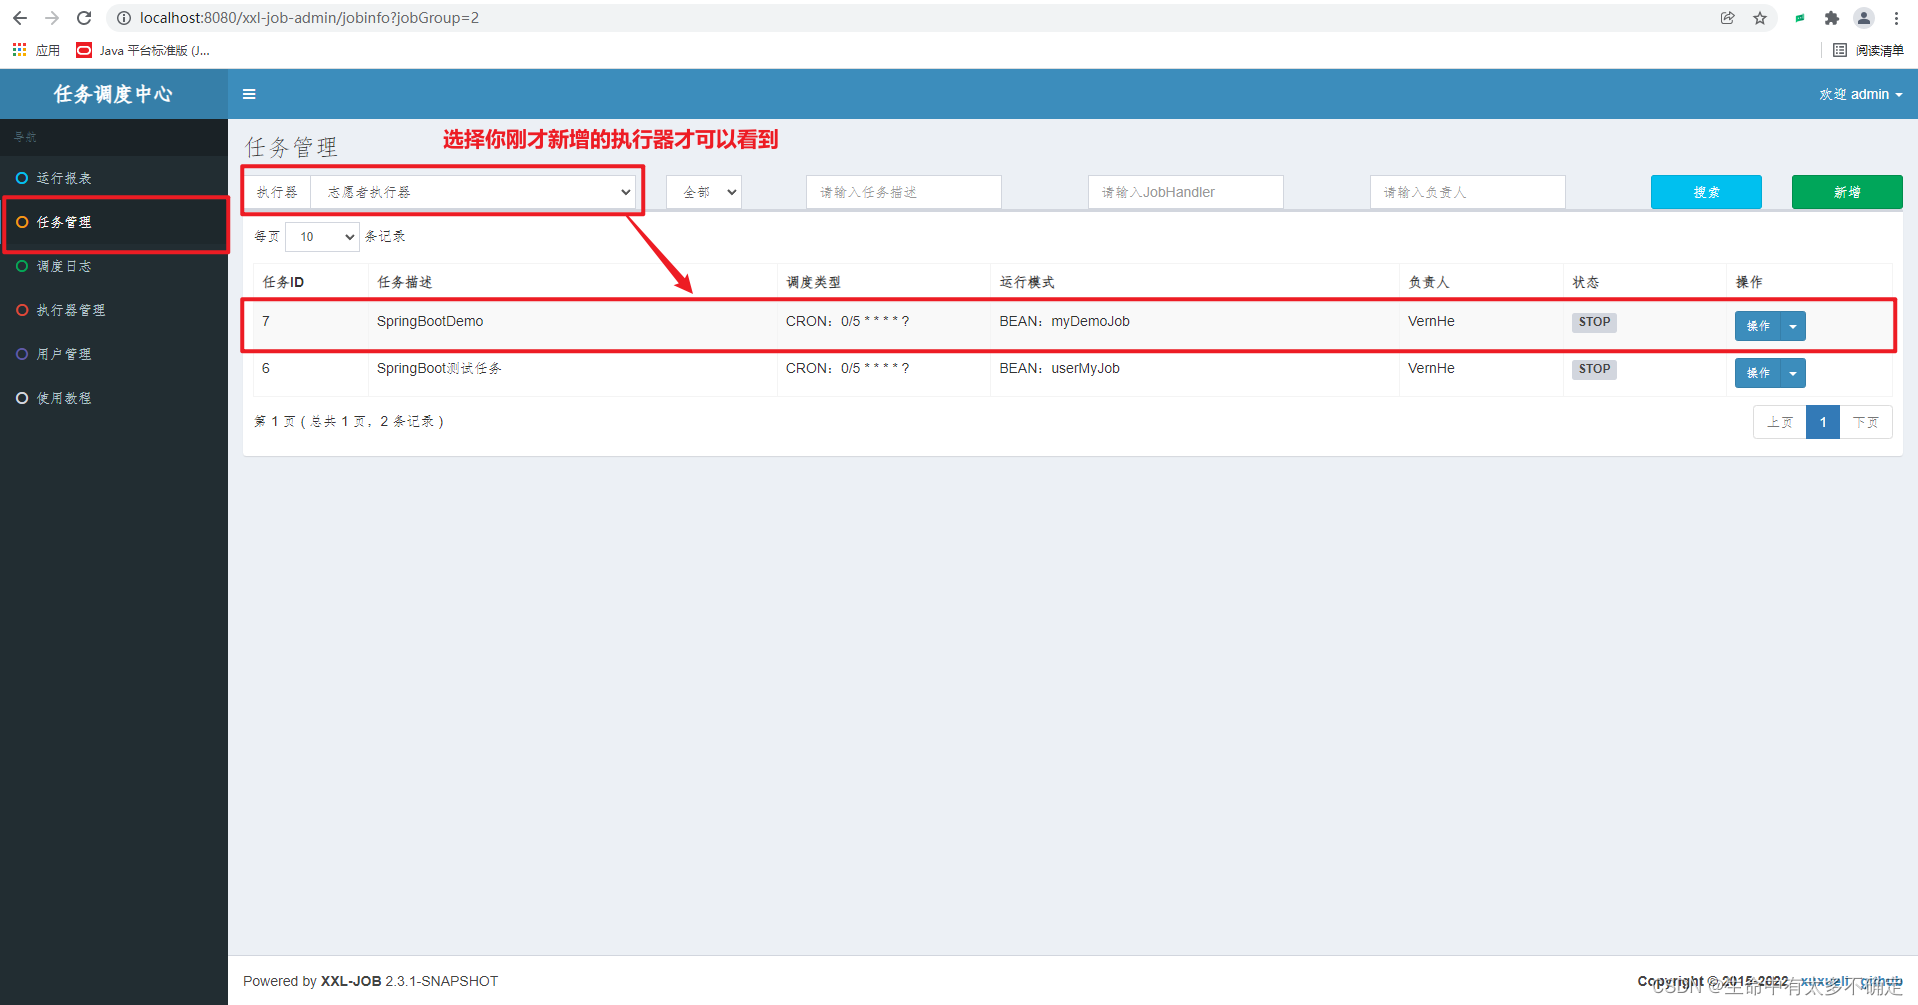
View scheduled tasks
3. The task scheduling center initiates task scheduling
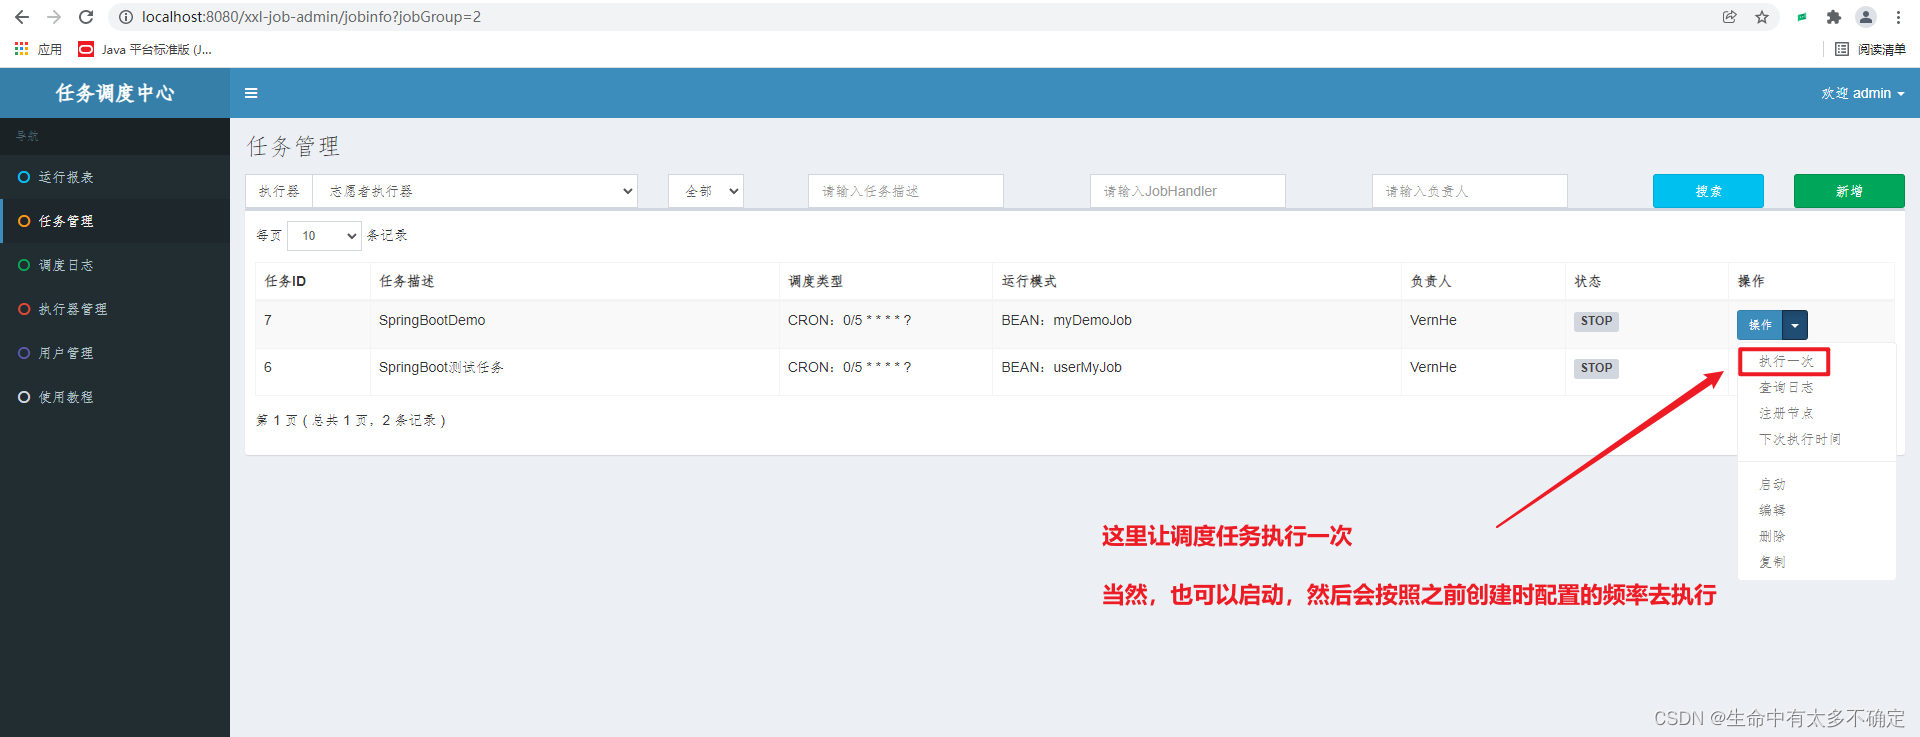
In the SpringBoot project, you can see the console output the following information:
2022-01-16 11:54:05.039  INFO 7836 --- [Pool-1148366645] c.xxl.job.core.executor.XxlJobExecutor   : >>>>>>>>>>> xxl-job regist JobThread success, jobId:7, handler:com.xxl.job.core.handler.impl.MethodJobHandler@1f94dd63[class com.volunteer.component.XxlJobSample#myDemoJob]
myDemoJob:定时任务触发:testParam
2022-01-16 11:55:38.059  INFO 7836 --- [      Thread-22] com.xxl.job.core.thread.JobThread        : >>>>>>>>>>> xxl-job JobThread stoped, hashCode:Thread[Thread-22,10,main]
4. Summary
So far, SpringBoot's integration of Xxl-job is complete. The sample code just now is actually quite intrusive to the original project. The above only demonstrates the BEANrunning mode. To put it bluntly, it calls the added @XxlJobmethod. In fact, you can also try to use this operation mode when creating tasks GLUE(Java). This method is actually to execute the Java code you enter. This method does not need to add dependencies or configurations on the original project. For scheduled tasks, you only need to Write an interface for triggering, and then GLUE(Java)the task periodically requests the exposed interface
Here is the code snippet:
public class DemoGlueJobHandler extends IJobHandler {


	@Override
	public void execute() throws Exception {


		XxlJobHelper.log("定时任务执行了一次");
        HttpRequest.post("http://localhost:8088/oos/test")
                  .header(Header.USER_AGENT, "xxl-job")//头信息,多个头信息多次调用此方法即可
                  .timeout(20000)//超时,毫秒
                  .execute();
	}

}
The above code will actually be executed in the executor, you can run it in the Test, and then paste it if there is no problem (also pay attention to copying the import and other information)
The above is the whole content of today. If you want to know more, you can read the official documentation