Article Directory
One, build nfs server
1. Create an nfs shared directory and give the directory 777 permissions
mkdir /nfsdata      %这里选择将物理机作为nfs服务器
chmod 777 /nfsdata/
2. Write a sharing strategy
vim /etc/exports:
/nfsdata       *(rw,no_root_squash)   %所有人可读写,没有root用户限制]
showmount -e   %显示指定NFS服务器输出目录列表(也称为共享目录列表)


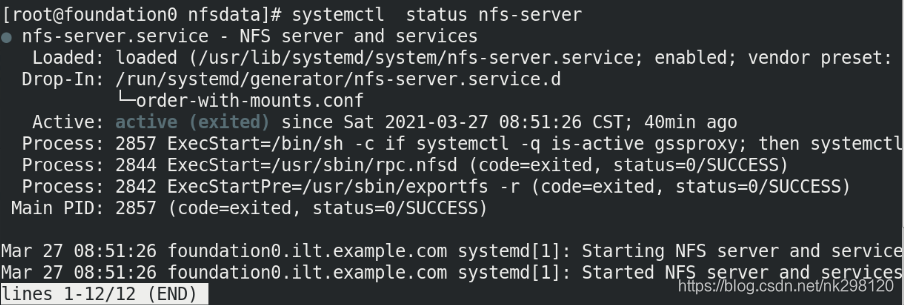
3. Start the nfs-server service
systemctl start nfs-server.service
4. Test
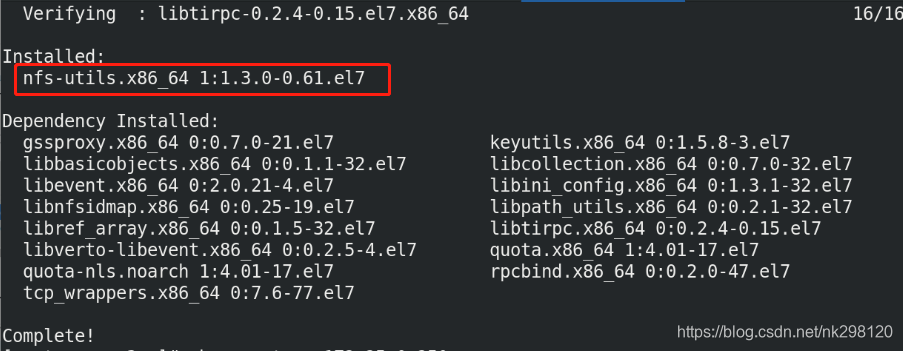
yum install -y nfs-utils %服务端和客户端必须软件nfs-utils,否则无法挂载nfs服务器共享目录,这里我们在所有节点均安装这个软件
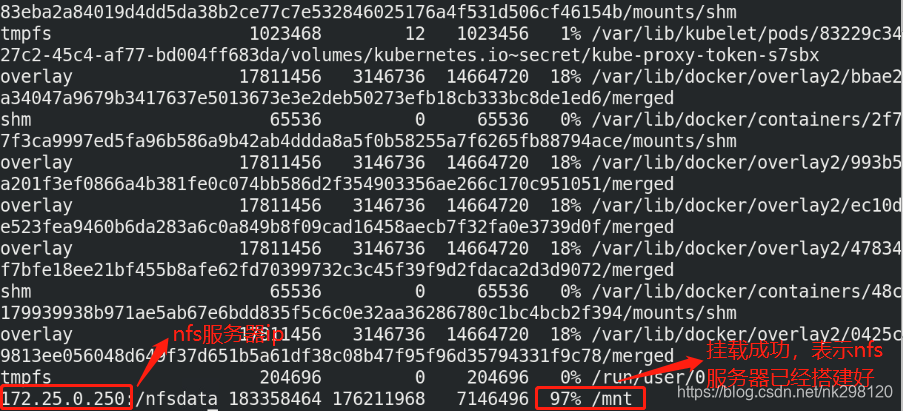
Mount the /nfsdata directory of the nfs server on the client to see if it can be mounted successfully:
Second, the overall deployment of helm
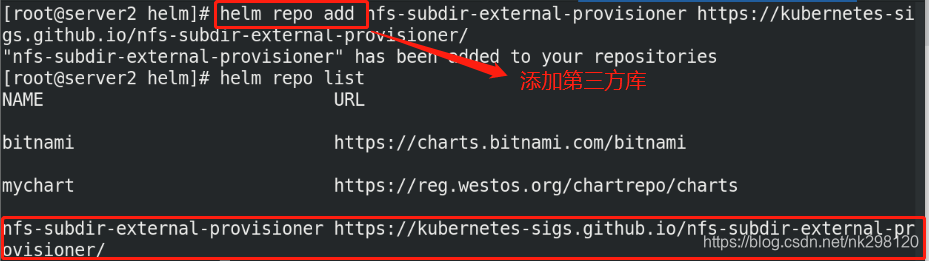
1. Heml adds third-party libraries and pulls packages
helm pull nfs-subdir-external-provisioner/nfs-subdir-external-provisioner %拉取包

2. Download the required image and upload it to the harbor warehouse
docker load -i nfs-client-provisioner-v4.0.0.tar   %这里镜像已经提前下载好,直接load -i就可以
docker push reg.westos.org/library/nfs-subdir-external-provisioner   %上传到harbor仓库
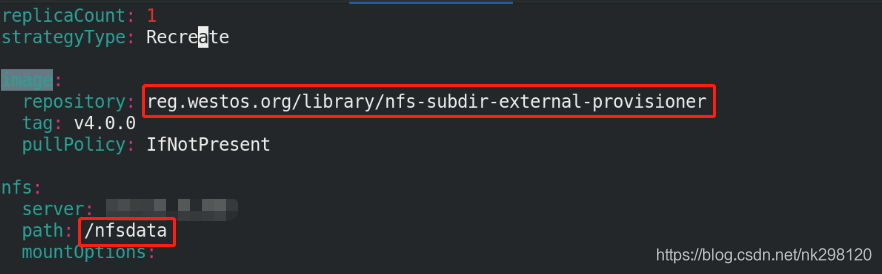
3. Unzip the downloaded package and edit the values.yaml file
tar zxf nfs-subdir-external-provisioner-4.0.5.tgz
cd nfs-subdir-external-provisioner/
vim values.yaml
image:
repository: reg.westos.org/library/nfs-subdir-external-provisioner %由于文件中没有设置全局,因此需要写镜像在harbor仓库中完整的路径
tag: v4.0.0
pullPolicy: IfNotPresent
nfs:
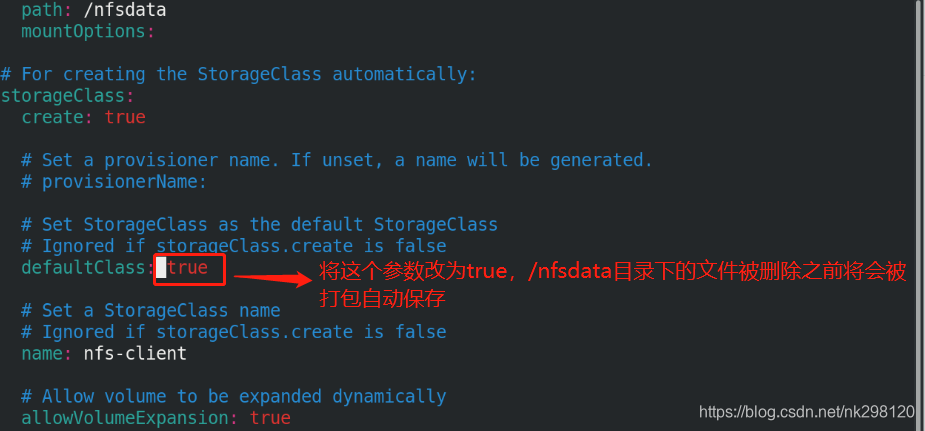
server: 172.25.1.250 %指定nfs服务器ip
path: /nfsdata %指定nfs目录
mountOptions:
4. Create a namespace
kubectl create namespace nfs-provisioner %为了更好的做环境隔离,创建专属的namespace:nfs-provisioner

5. Install under the specified namespace
helm install nfs-subdir-external-provisioner . -n nfs-provisioner


Three, test
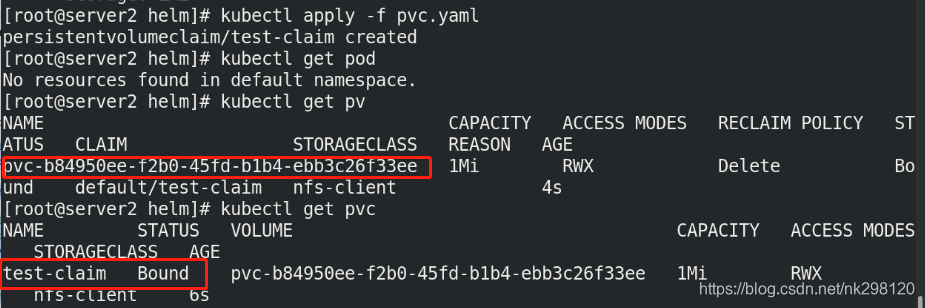
1. Edit the pvc.yaml file and apply
cat pvc.yaml:
kind: PersistentVolumeClaim
apiVersion: v1
metadata:
  name: test-claim
spec:
  #storageClassName: managed-nfs-storage
  accessModes:
    - ReadWriteMany
  resources:
    requests:
      storage: 1Mi
kubectl apply -f pvc.yaml
2. Check whether to create pv and pvc
kubectl get pv
kubectl get pvc
3. Check if there are any files generated in the /nfsdata directory on the nfs server
After pv and pvc are created, corresponding directories will be generated in the shared directory of the nfs server. When pv and pvc are deleted, the files in the /nfsdata directory will also be deleted. If you specify parameters in the configuration file, the files will be It is packaged and saved. Whether it needs to be saved depends on the specific situation: