Contents of this article
One, data paging
It is very simple to complete paging in laravel. The previous framework has a different idea. The previous framework used the paging class to complete the paging. Laravel directly calls the paging method of the model to return the corresponding data and the paging string. .
The position of the pagination class in the frame:
vendor/laravel/framework/src/Illuminate/Pagination
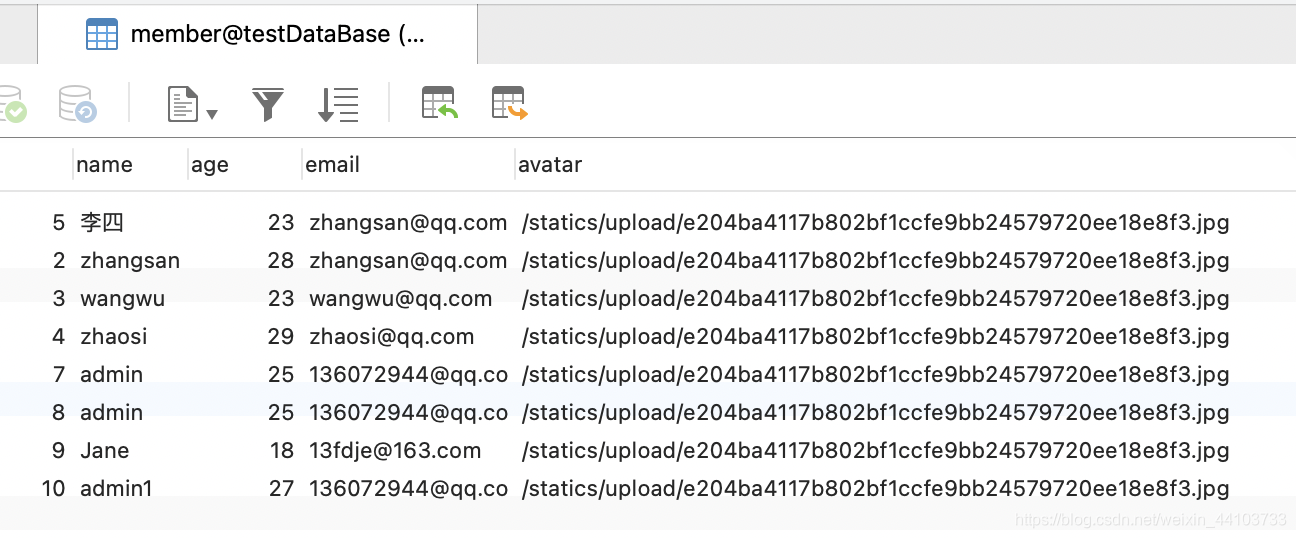
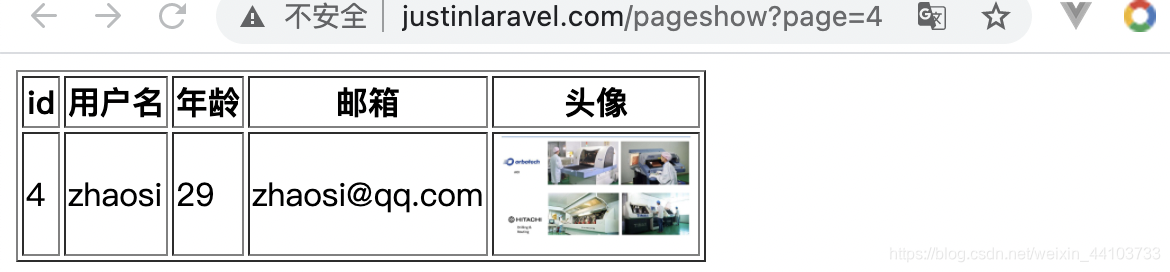
Case: Use the paging function to realize the paging effect of the current member data table, and display one piece of data on each page.
Important steps to achieve the paging effect
1. Query the total number of records that meet the paging conditions
2. Calculate the total number of pages (total number of records/number of records per page, and round up)
3. Piece together paging links
4. Use limit grammar to Limit the number of pagination records
5. Display the page number and data of the pagination
6. If possible, it is recommended to consider the style display of the next page
The steps in laravel are divided into:
1, pagination
2, display
3, processing style
Create a route and display a simple list page.
Route: /pageshow

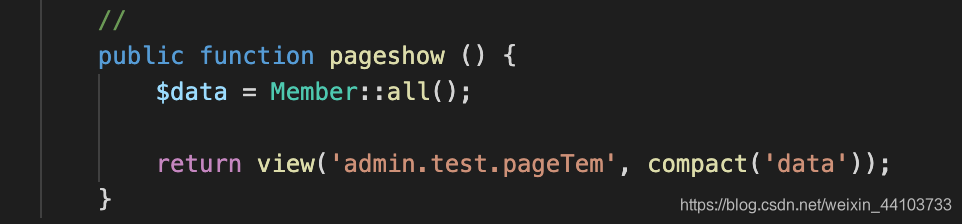
controller:
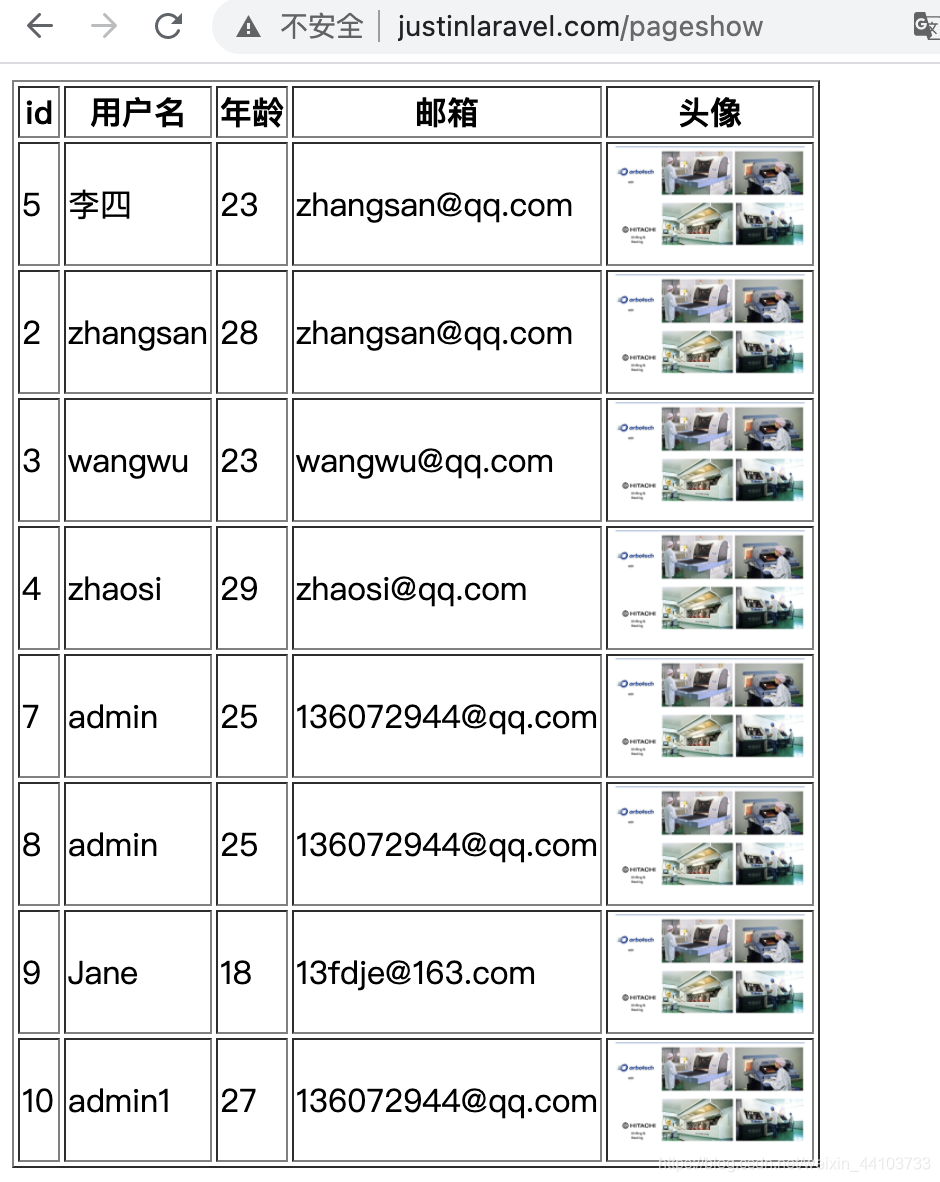
no paging view:
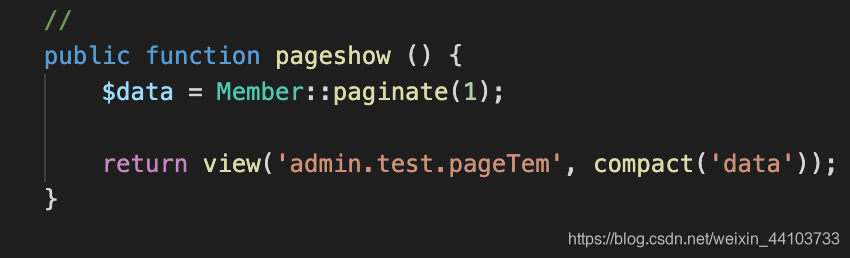
use paging display:
display one piece of data per page
There are 2 providers for paging in laravel, the DB query builder, and the model can be used to implement it. The usage is basically the same.
The most basic syntax for pagination:
Model::paginate (the number of records displayed on each page) Similarly, paginate, like get, supports auxiliary query methods such as where and orderBy.
Display pagination results
When calling the paginate method, you will get theIlluminate\Pagination\LengthAwarePaginatorinstance, and when calling the method, yousimplePaginatewill get theIlluminate\Pagination\Paginatorinstance. These objects provide related methods and these result sets. In addition to these auxiliary functions, the paginator instance itself is an iterator. It can be called cyclically like an array. Therefore, after obtaining the results, you can use Blade to display the results and render the page link as follows:
<div class="container">
	@foreach($data as $user)
	{

    {

    $user -> name}}
	@endforeach
</div>
{

    {

    $data -> links()}} // 通过数据对象调用links方法显示分页码
Two, verification code
Verification code: captcha, a fully automatic Turing test that distinguishes between humans and computers.
Review: The verification code generation needs to go through: drawing steps, generating interference lines, generating noise, generating verification codes, generating verification codes and storing them in the session, and outputting pictures.
Common types of verification codes: character verification codes, SMS verification codes, phone verification codes, 12306 type verification codes, drag-and-drop verification codes, etc.
2.1 Verification code depends on installation
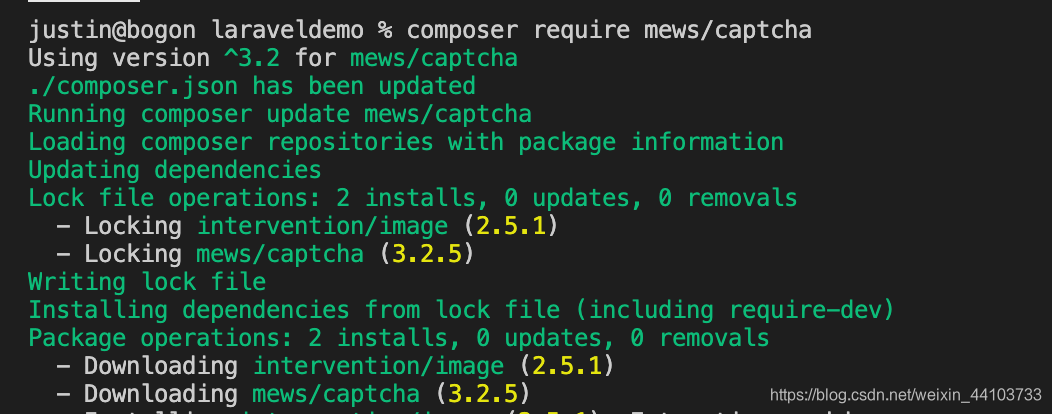
The code dependency of the packagist website search verification code: Keyword: captcha

Enter the installation command in the directory terminal:
composer require mews/captcha
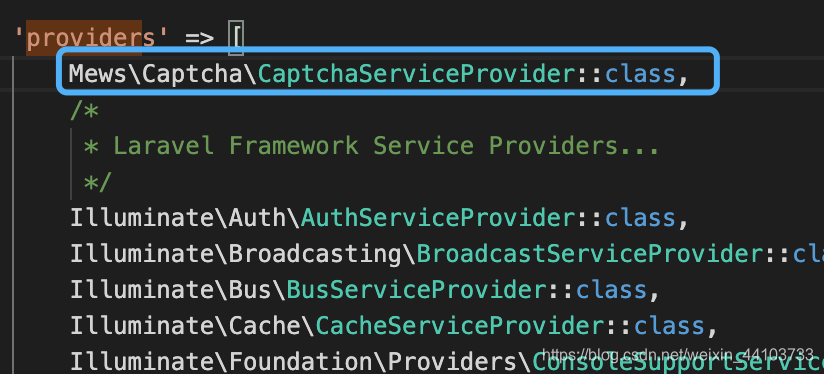
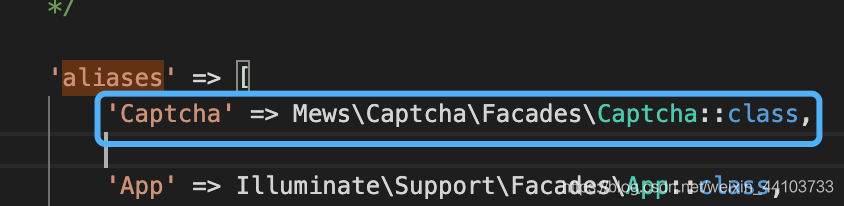
Configure in config/app.php:
If you need customized settings, add a configuration file:
first execute after the file terminal command:
php artisan vendor:publish
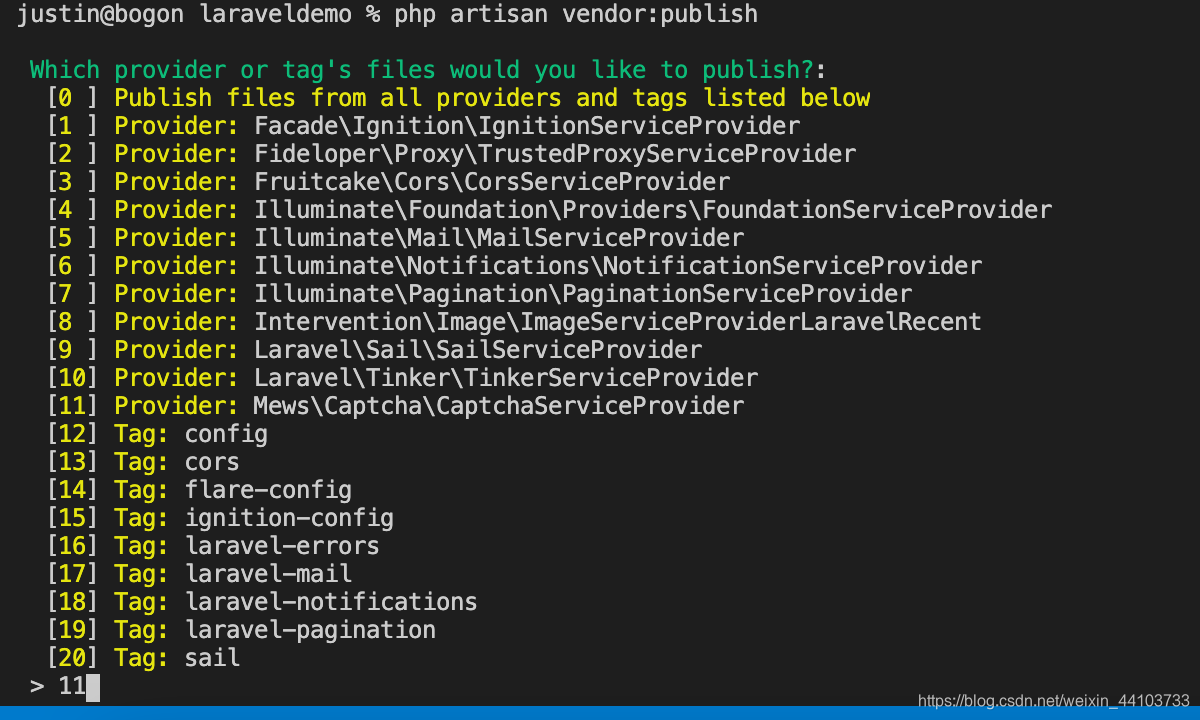
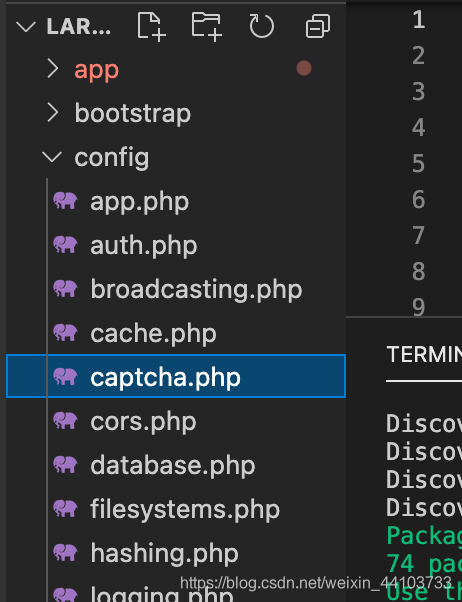
Here we choose 11 and press Enter. At this time captcha.php:
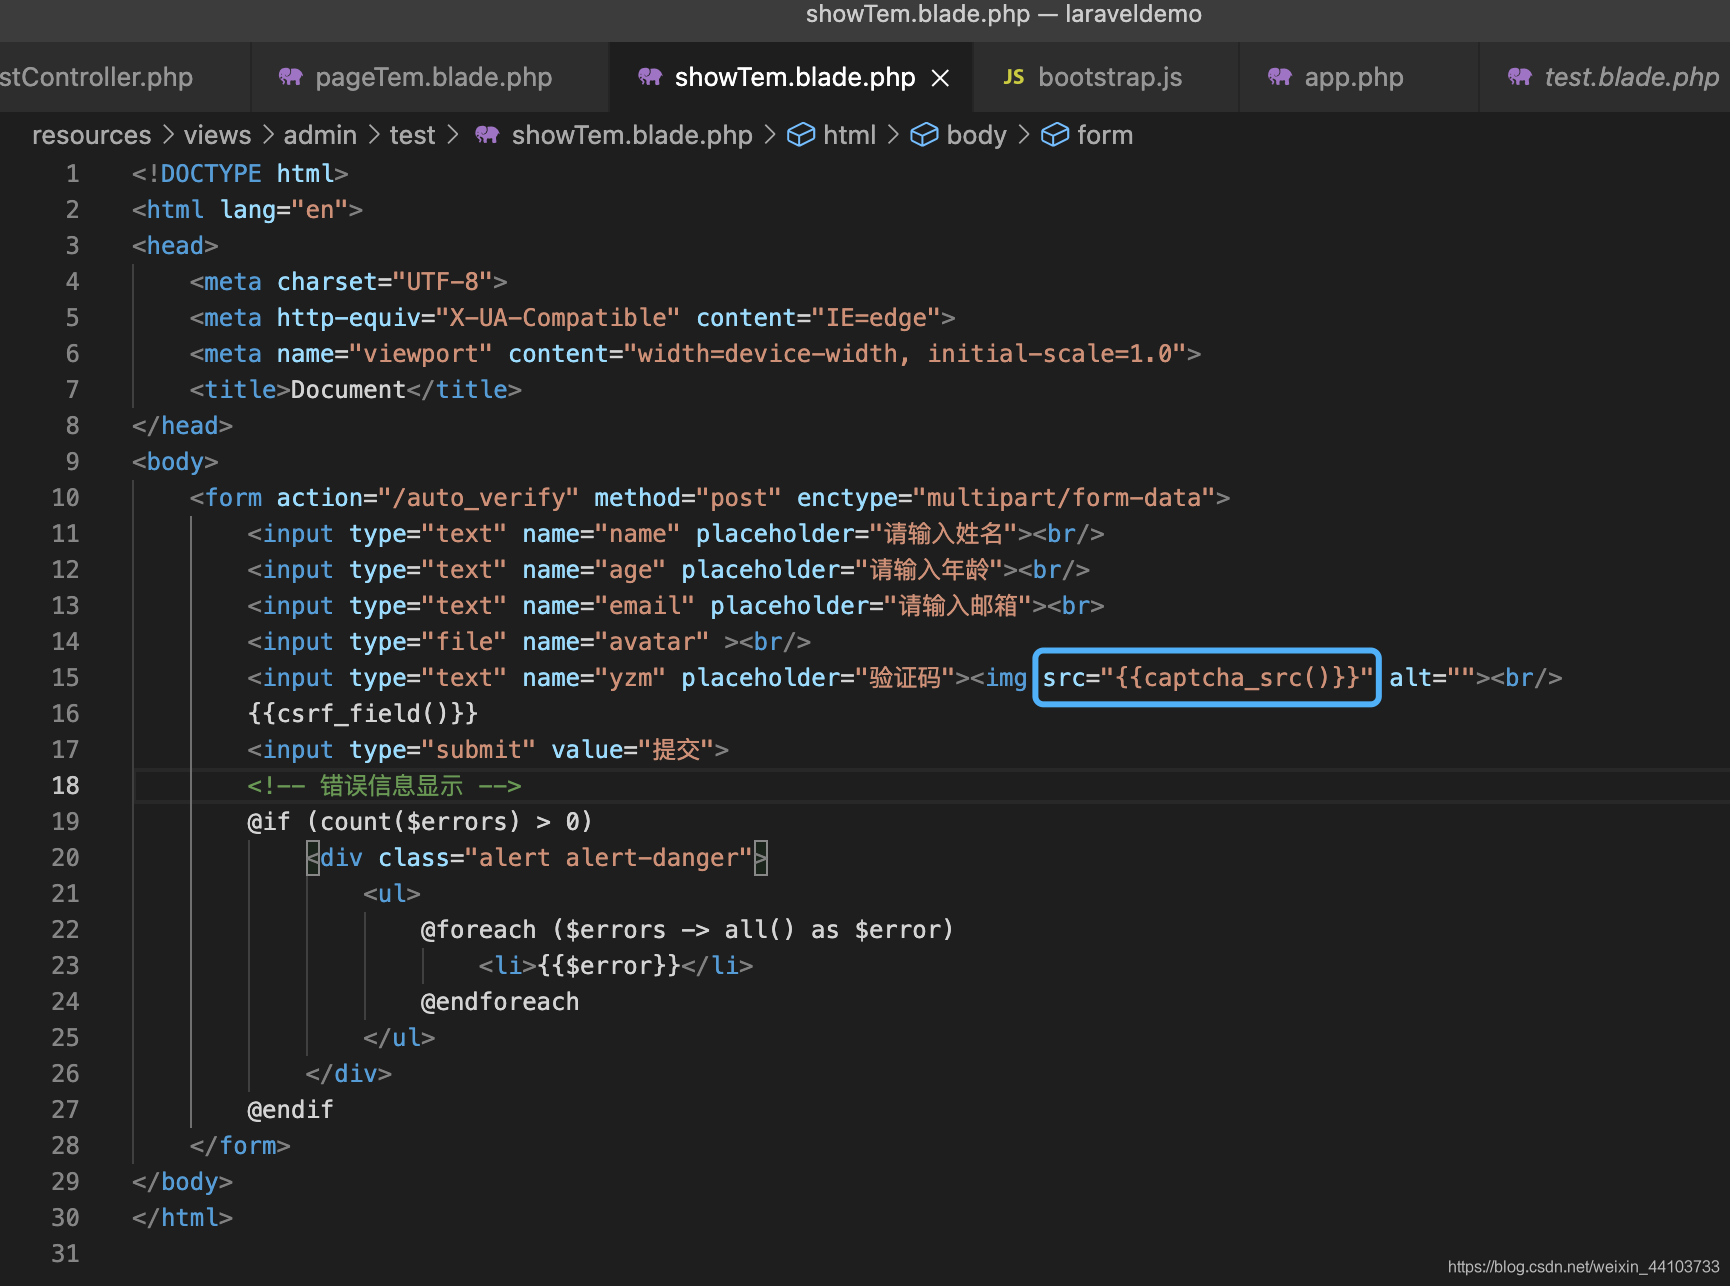
Write the following in the blade of the form:
<!DOCTYPE html>
<html lang="en">
<head>
    <meta charset="UTF-8">
    <meta http-equiv="X-UA-Compatible" content="IE=edge">
    <meta name="viewport" content="width=device-width, initial-scale=1.0">
    <title>Document</title>
</head>
<body>
    <form action="/auto_verify" method="post" enctype="multipart/form-data">
        <input type="text" name="name" placeholder="请输入姓名"><br/>
        <input type="text" name="age" placeholder="请输入年龄"><br/>
        <input type="text" name="email" placeholder="请输入邮箱"><br>
        <input type="file" name="avatar" ><br/>
        <input type="text" name="yzm" placeholder="验证码"><img src="{

    {captcha_src()}}" alt=""><br/>
        {

    {

    csrf_field()}}
        <input type="submit" value="提交">
        <!-- 错误信息显示 -->
        @if (count($errors) > 0)
            <div class="alert alert-danger">
                <ul>
                    @foreach ($errors -> all() as $error)
                        <li>{

    {

    $error}}</li>
                    @endforeach
                </ul>
            </div>
        @endif
    </form>
</body>
</html>
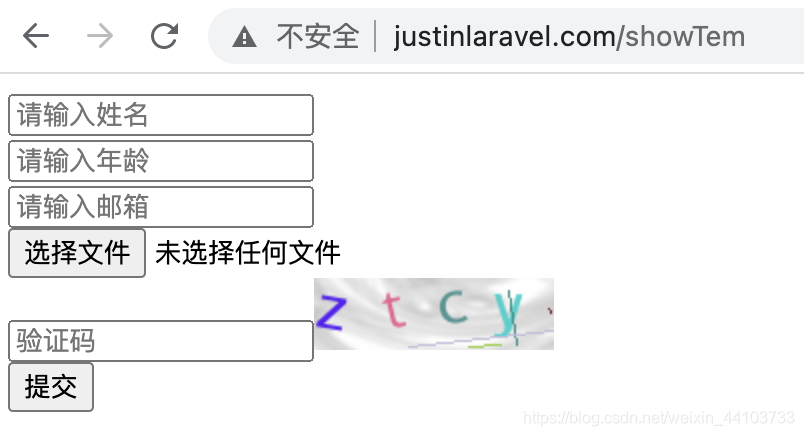
Browser enters the route of the display form:
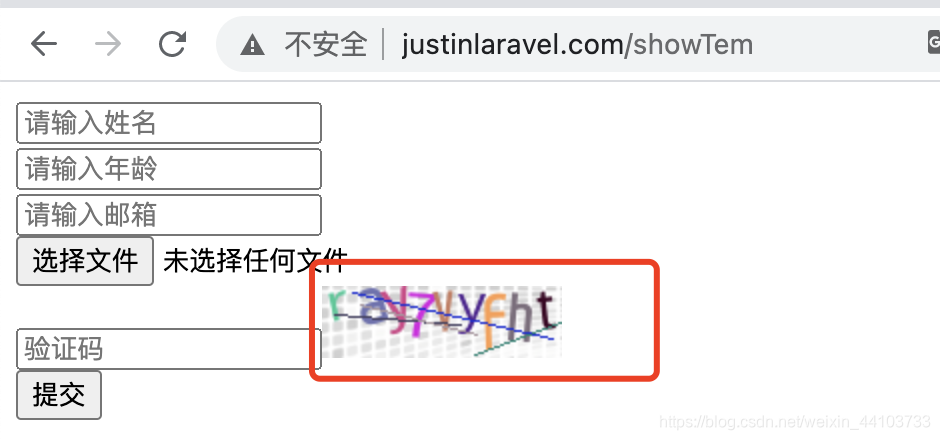
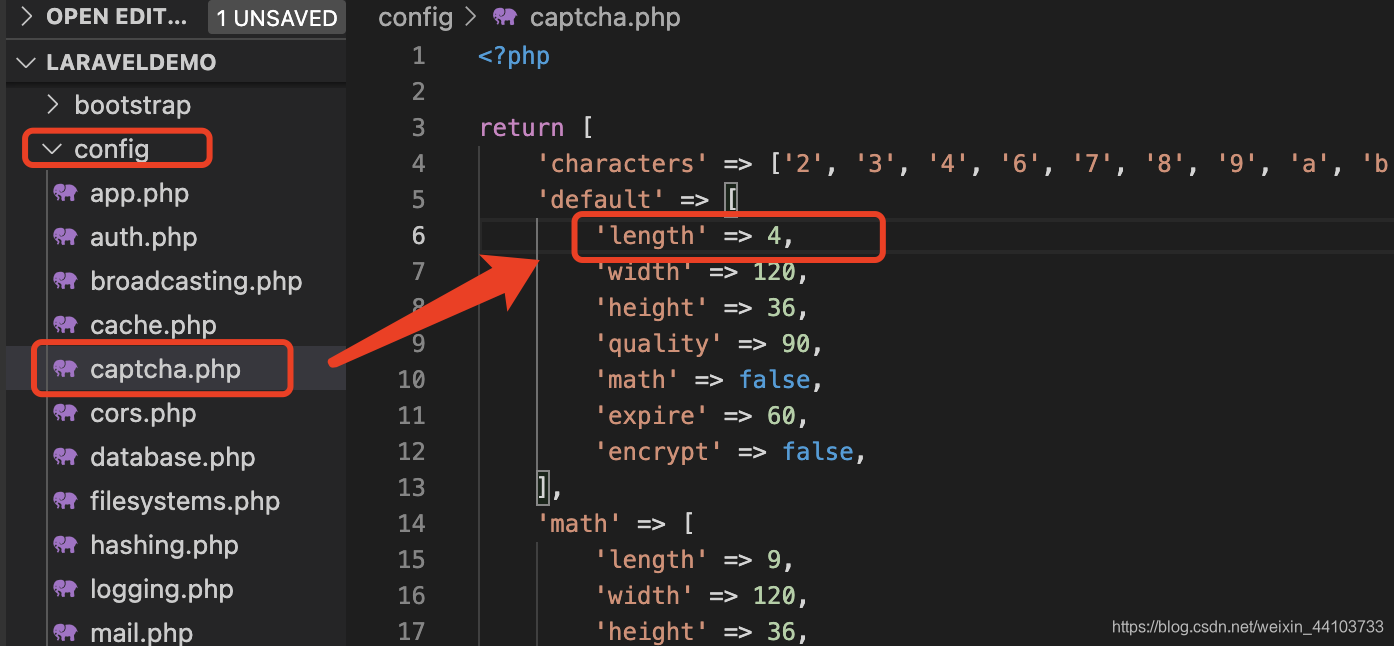
you can see that the verification code comes out, normally there are 4, we go to the configuration file to modify: the
effect is as shown:
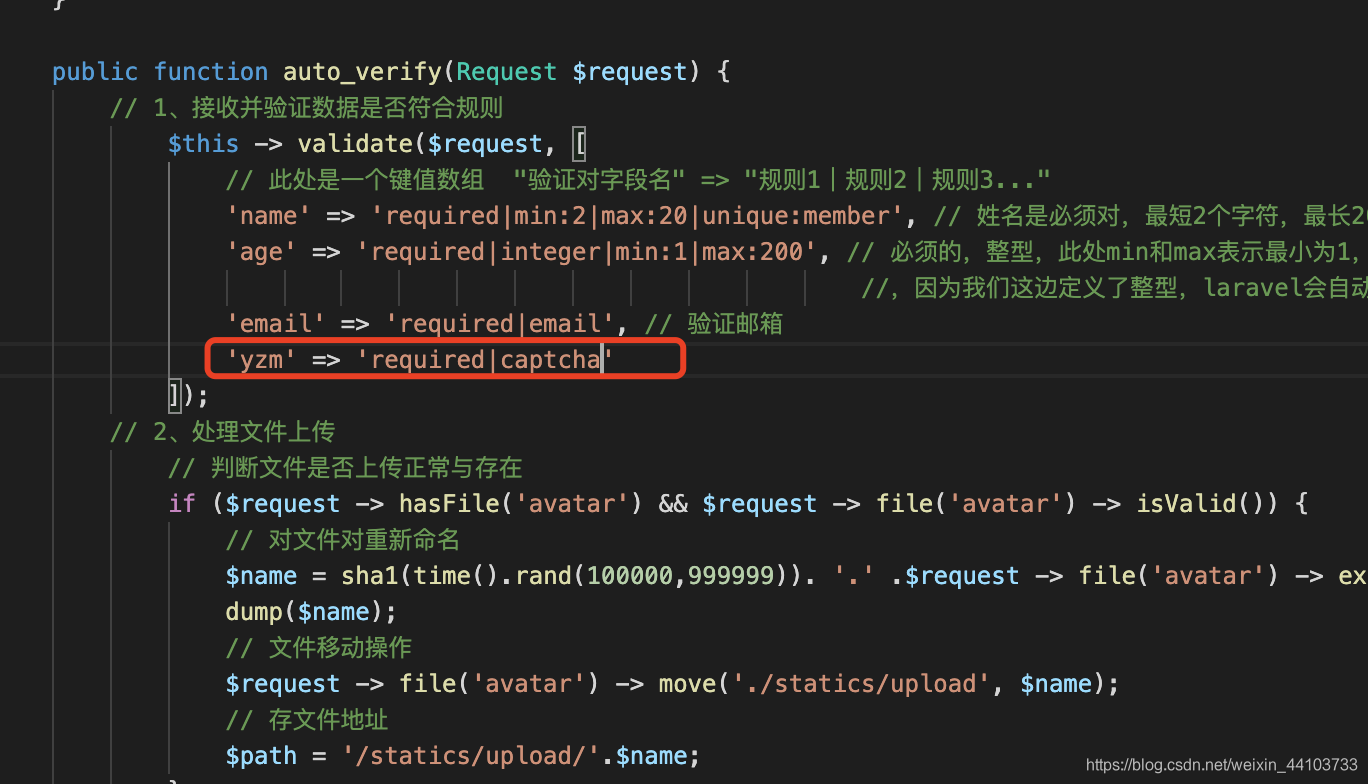
then add the verification code verification rule:
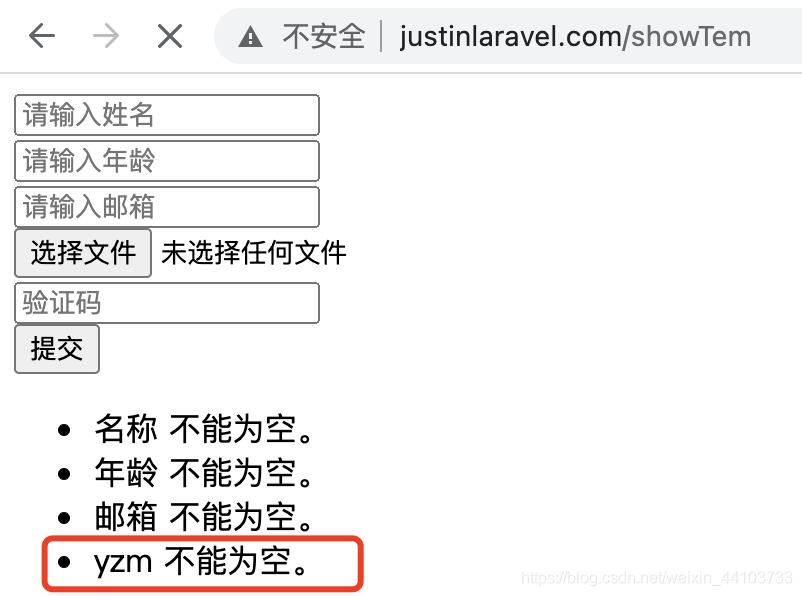
effect:
you can see that yzm appears here , This time we go to change the language pack:
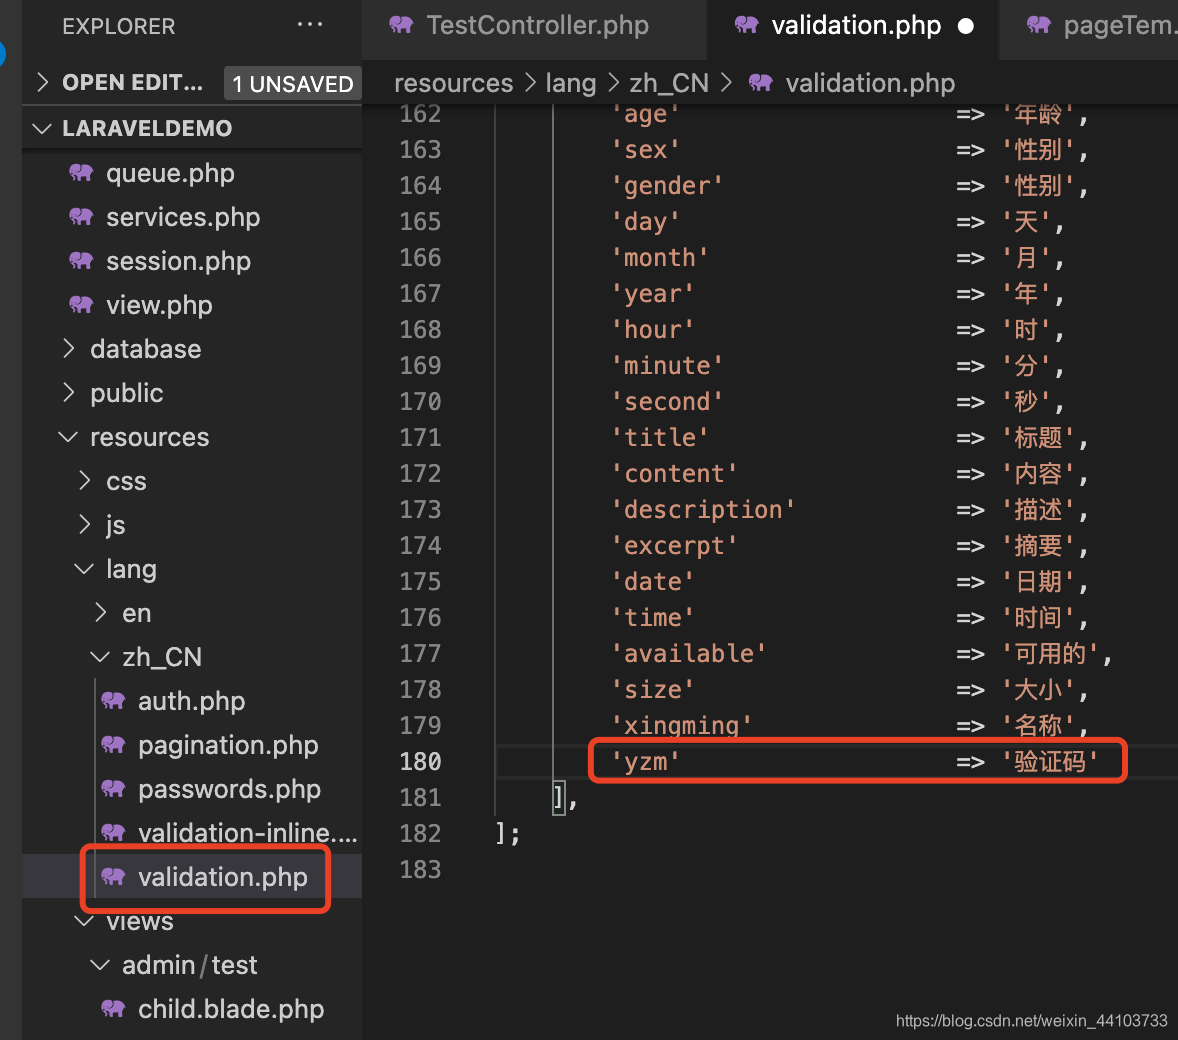
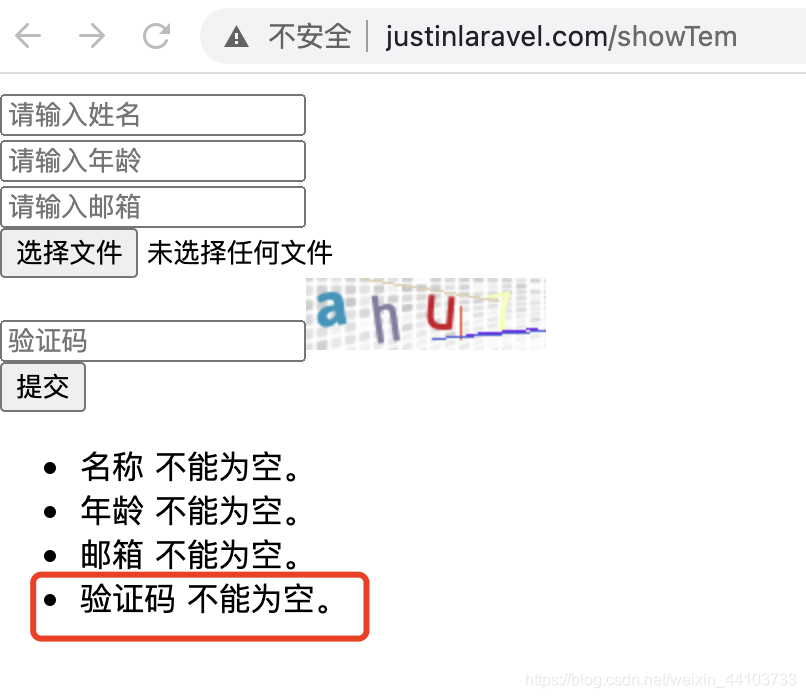
effect:
then enter a different verification code:

add translation:
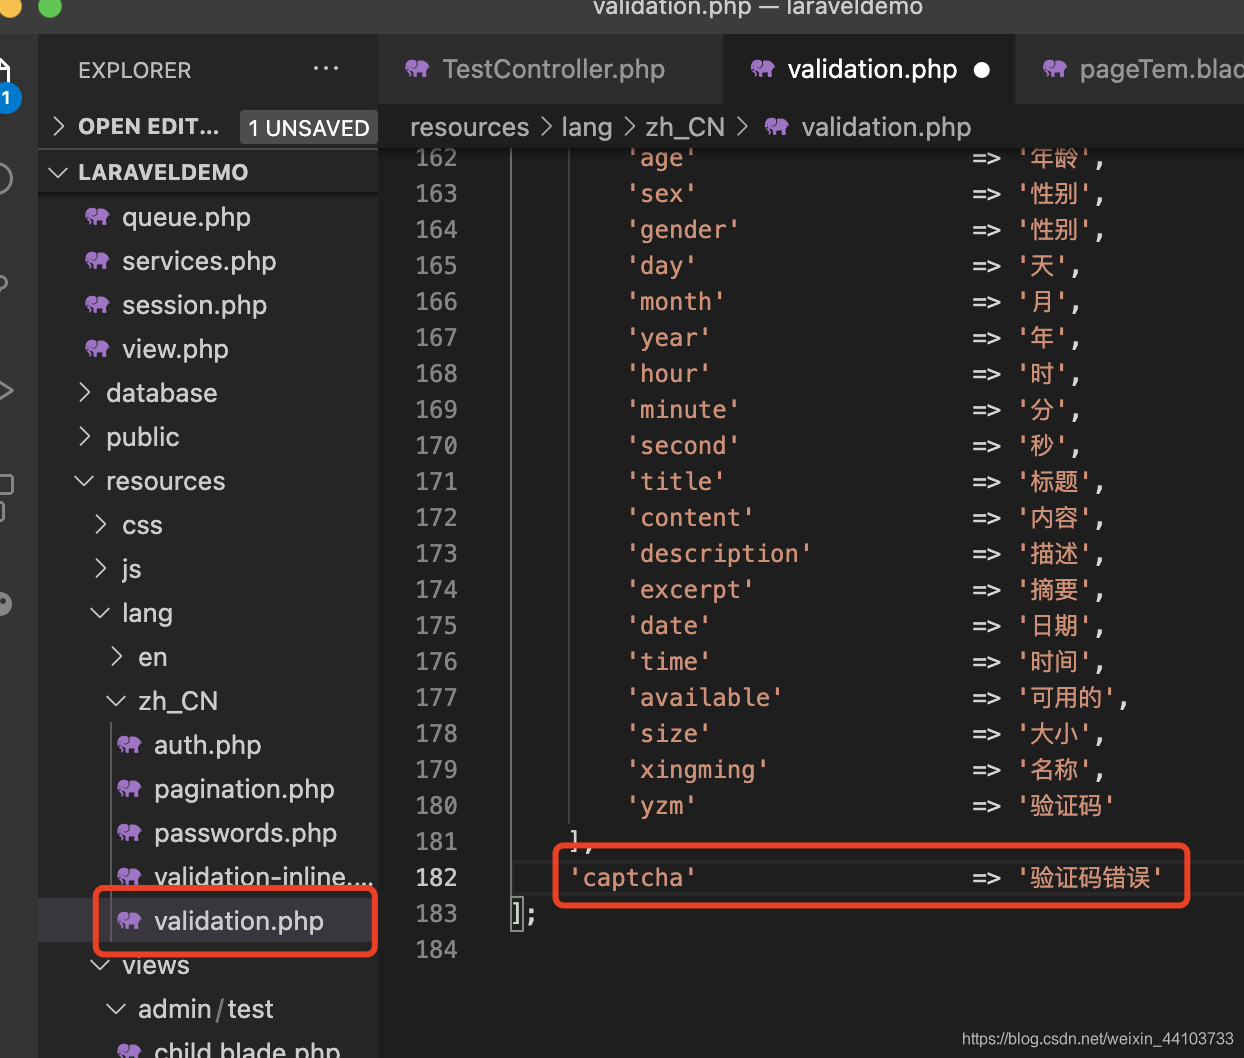
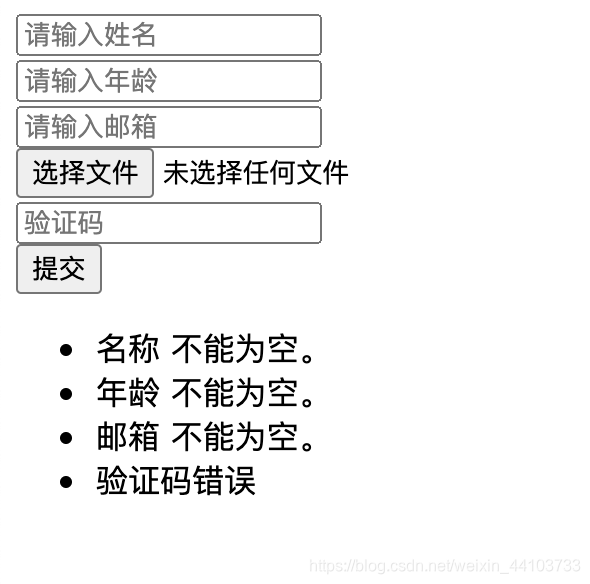
effect:
click here for more configuration syntax
On the way of learning php, if you think this article is helpful to you, then please pay attention to like and comment Sanlian, thank you, you must be another support for my blog.