
Author | Li Qiujian
Editor in charge | Kou Xueqin
Produced | AI Technology Base Camp (ID: rgznai100)
introduction:
Anyone who knows about our previous articles knows that we have done a smart table pet project. But it is clear that the program is too stuck. Therefore, this time we will re-create a smart table pet project, which is different from the previous project in that a large number of jpg images were used before, which caused the phenomenon of lag. And this time we will not use this method, see the code below for details. The source code is attached at the end of the article.
Effect picture

System Overview
First of all, the purpose of our only table pet is to facilitate the operation of the computer, so this version will include building a python-free environment to run the program. That is, you can run the table pet program on a computer that does not have python installed, but the process is a bit complicated, and only the free installation program is given at the end of the article.

Code flow explanation
2.1 Import library:
Here we have used the problem of setting up the program QT environment with os. The setting of the environment can be achieved by using the following code, which is used here to avoid the construction of the environment program. If we don't use it, we can remove this code:
1os.environ['QT_QPA_PLATFORM_PLUGIN_PATH'] = "Lib\site-packages\PyQt5\Qt\plugins"
Then import other libraries used:
 1import os
 2os.environ['QT_QPA_PLATFORM_PLUGIN_PATH'] = "Lib\site-packages\PyQt5\Qt\plugins"
 3import sys
 4from PyQt5.QtGui import *
 5from PyQt5.QtCore import *
 6from PyQt5.QtWidgets import *
 7from PyQt5 import QtWidgets, QtGui
 8# 导入QT,其中包含一些常量,例如颜色等
 9from PyQt5.QtCore import Qt
10# 导入常用组件
11from PyQt5.QtWidgets import QApplication, QMainWindow
12from PyQt5.QtWidgets import QLabel
13from threading import Thread
14# 使用调色板等
15from PyQt5.QtGui import QIcon, QMovie
16import time
17import os
18import random
2.2 The overall initialization of the setup program:
The initialization of the program interface includes the following:
(1) The establishment of irregular windows; the easiest way to implement irregular windows is to use the image material not only as a mask layer, but also as a background image. The window background is drawn by overloading the paintEvent() function; using the function setMask(self,QBitmap) setMask(self,QRegion). The function of setMask() is to add a mask to the control that calls it, covering the part outside the selected area, making it appear transparent. Its parameter can be a QBitmap or QRegion object. Here, the mask of QPixmap is called ( ) The function obtains the mask of the picture itself, which is a QBitmap object. In the example, the picture in PNG format is used, and its transparent part is a mask
1super(DemoWin, self).__init__()
2self.initUI()
3# 初始化,不规则窗口
4self.setWindowFlags(Qt.FramelessWindowHint | Qt.WindowStaysOnTopHint | Qt.SubWindow)
5self.setAutoFillBackground(False)
6self.setAttribute(Qt.WA_TranslucentBackground, True)
7self.repaint()
(2) Mouse initialization. The purpose of setting the mouse here is to achieve the effect of dragging the table pet with the mouse.
1# 是否跟随鼠标
2self.is_follow_mouse = False
3self.move(1650,20)
(3) Initialization of the corpus, where the corpus is set in data.txt. The content of the txt searched by the pop-up dialogue of the table pet can also be modified according to your own needs.
1with open("data.txt", "r") as f:
2    text = f.read()
3    self.sentence = text.split("\n")
(4) Set the tray icon. Because table pets are easy to manage when they are not needed, setting the tray icon can hide and display table pets at any time:
1# 设置托盘选项
2iconpath="1.jpg"
(5) Set the initialization of the right-click menu function:
 1#右键菜单
 2quit_action = QAction(u'退出', self, triggered=self.quit)
 3quit_action.setIcon(QIcon(iconpath))
 4showwin = QAction(u'显示', self, triggered=self.showwin)
 5self.tray_icon_menu = QMenu(self)
 6self.tray_icon_menu.addAction(showwin)
 7self.tray_icon_menu.addAction(quit_action)
 8self.tray_icon = QSystemTrayIcon(self)
 9self.tray_icon.setIcon(QIcon(iconpath))
10self.tray_icon.setContextMenu(self.tray_icon_menu)
11self.tray_icon.show()
(6) Transparent window:
1#窗口透明程度
2self.setWindowOpacity(1)
(7) The setting dialog box is a dialog box where the mouse stays for a long time:
 1# 对话框
 2QToolTip.setFont(QFont('楷体', 14))
 3y = ['不要随便摸人家啦', '每次见到主人都很开心呀', '话说最近主人都没理我诶', '再摸我的话小心我生气了', '恭喜发财大吉大利']
 4self.setToolTip(random.choice(y))
 5# 每隔一段时间做个动作
 6self.timer = QTimer()
 7self.timer.timeout.connect(self.randomAct)
 8self.timer.start(7000)
 9self.condition = 0
10self.talk_condition=0
(8) Random actions for setting table pets:
1# 每隔一段时间做个动作
2self.timer1 = QTimer()
3self.timer1.timeout.connect(self.talk)
4self.timer1.start(5000)
5self.pet1 = []
6for i in os.listdir("biu"):
7    self.pet1.append("biu/" + i)
2.3 Set the initialization of the GUI interface:
The content includes the definition of window size, position, title, etc. For details, see the following code, all with comments:
 1def initUI(self):
 2    # 将窗口设置为动图大小
 3    self.resize(400, 400)
 4    self.label1 = QLabel("", self)
 5    self.label1.setStyleSheet("font:15pt '楷体';border-width: 1px;color:blue;")  # 设置边框
 6    # 使用label来显示动画
 7    self.label = QLabel("", self)
 8    # label大小设置为动画大小
 9    self.label.setFixedSize(200, 200)
10    # 设置动画路径
11    self.movie = QMovie("./biu/biu12.gif")
12    #宠物大小
13    self.movie.setScaledSize(QSize(200, 200))
14    # 将动画添加到label中
15    self.label.setMovie(self.movie)
16    # 开始播放动画
17    self.movie.start()
18    #透明窗口
19    #self.setWindowOpacity(1)
20    # 添加窗口标题
21    self.setWindowTitle("GIFDemo")
2.4 Set the mouse drag function:
The mouse drag function is actually the binding and moving unbinding of the mouse and the window. That is, when the left mouse button is pressed, the pet will be bound to the mouse position; then when the mouse is moved, the pet will also move; then when the mouse is released, the pet will be unbound. code show as below:
 1'''鼠标左键按下时, 宠物将和鼠标位置绑定'''
 2def mousePressEvent(self, event):
 3    if event.button() == Qt.LeftButton:
 4        self.is_follow_mouse = True
 5        self.mouse_drag_pos = event.globalPos() - self.pos()
 6        event.accept()
 7        self.setCursor(QCursor(Qt.OpenHandCursor))
 8        self.movie = QMovie("./biu/biu10.gif")
 9        # 宠物大小
10        self.movie.setScaledSize(QSize(200, 200))
11        # 将动画添加到label中
12        self.label.setMovie(self.movie)
13        # 开始播放动画
14        self.movie.start()
15'''鼠标移动, 则宠物也移动'''
16def mouseMoveEvent(self, event):
17    if Qt.LeftButton and self.is_follow_mouse:
18        self.move(event.globalPos() - self.mouse_drag_pos)
19        event.accept()
20'''鼠标释放时, 取消绑定'''
21def mouseReleaseEvent(self, event):
22    self.is_follow_mouse = False
23    self.setCursor(QCursor(Qt.ArrowCursor))
2.5 Set the transformation when the mouse moves in:
Set the mouse to become a small hand when it touches the table pet, so that it is more cartoonish and closer:
 1def enterEvent(self, event):  # 鼠标移进时调用
 2    #print('鼠标移入')
 3    self.setCursor(Qt.ClosedHandCursor)  # 设置鼠标形状。需要from PyQt5.QtGui import QCursor,from PyQt5.QtCore import Qt
 4    '''
 5    Qt.PointingHandCursor   指向手            Qt.WaitCursor  旋转的圆圈
 6    ArrowCursor   正常箭头                 Qt.ForbiddenCursor 红色禁止圈
 7    Qt.BusyCursor      箭头+旋转的圈      Qt.WhatsThisCursor   箭头+问号
 8    Qt.CrossCursor      十字              Qt.SizeAllCursor    箭头十字
 9    Qt.UpArrowCursor 向上的箭头            Qt.SizeBDiagCursor  斜向上双箭头
10    Qt.IBeamCursor   I形状                 Qt.SizeFDiagCursor  斜向下双箭头
11    Qt.SizeHorCursor  水平双向箭头          Qt.SizeVerCursor  竖直双向箭头
12    Qt.SplitHCursor                        Qt.SplitVCursor
13    Qt.ClosedHandCursor   非指向手          Qt.OpenHandCursor  展开手
14    '''
15    # self.unsetCursor()   #取消设置的鼠标形状
2.6 Set the right mouse button menu:
Some functions of the right-click menu set here need to be modified according to your own computer path, etc.:
 1# 当按右键的时候,这个event会被触发
 2def contextMenuEvent(self, event):
 3    menu = QMenu(self)
 4    code = menu.addAction("代码")
 5    py = menu.addAction("python—test")
 6    hide = menu.addAction("隐藏")
 7    quitAction = menu.addAction("退出")
 8    action = menu.exec_(self.mapToGlobal(event.pos()))
 9    if action == quitAction:
10        qApp.quit()
11    if action == hide:
12        self.setWindowOpacity(0)
13    if action == py:
14        os.startfile("python练习.bat")
15    if action == code:
16        os.startfile("代码.bat")
17'''退出程序'''
18def quit(self):
19    self.close()
20    sys.exit()
21'''显示'''
22def showwin(self):
23    self.setWindowOpacity(1)
2.7 Set pet status changes:
We need that when we click on the table pet, the table pet will smile at us. Only in this way has human-computer interaction performance. At the same time, the interactive and random states cannot conflict. details as follows:
 1'''随机做一个动作'''
 2def randomAct(self):
 3    if not self.condition:
 4        print("状态变更")
 5        print(random.choice(self.pet1))
 6        self.movie = QMovie(random.choice(self.pet1))
 7        # 宠物大小
 8        self.movie.setScaledSize(QSize(200, 200))
 9        # 将动画添加到label中
10        self.label.setMovie(self.movie)
11        # 开始播放动画
12        self.movie.start()
13        self.condition=1
14    else:
15        print("状态还原")
16        # 设置动画路径
17        self.movie = QMovie("./biu/biu12.gif")
18        # 宠物大小
19        self.movie.setScaledSize(QSize(200, 200))
20        # 将动画添加到label中
21        self.label.setMovie(self.movie)
22        # 开始播放动画
23        self.movie.start()
24        self.condition=0
2.8 Set the pet dialog window:
Just set the label as a dialog window:
 1def talk(self):
 2    if not self.talk_condition:
 3        self.label1.setText(random.choice(self.sentence))
 4        self.label1.setStyleSheet("font: bold;font:15pt '楷体';color:yellow;background-color: black")  # 设置边框
 5        self.label1.adjustSize()
 6        self.talk_condition=1
 7    else:
 8        self.label1.setText("")
 9        self.label1.adjustSize()
10        self.talk_condition = 0

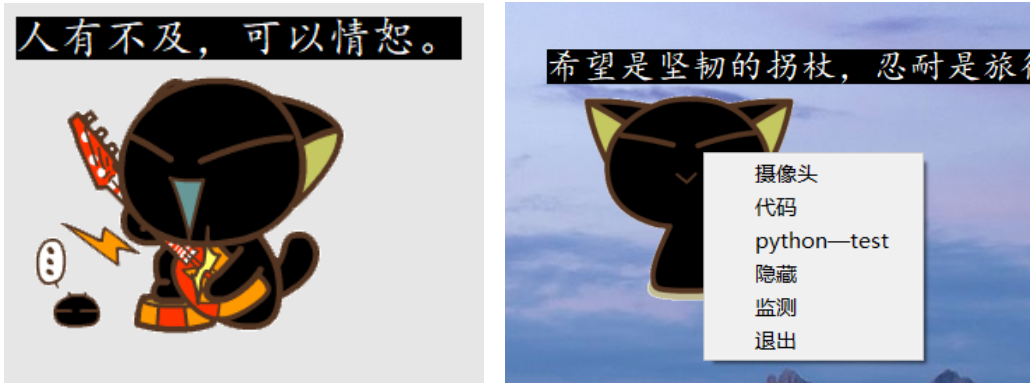
Figure 2 gif rendering

Source code
The complete code download link refers to the CODE CHINA address:
https://codechina.csdn.net/qq_42279468/python_pet2_liqiujian
Copyright statement: This article is the original article of the CSDN blogger "jia666666". It follows the CC 4.0 BY-SA copyright agreement. Please attach the original source link and this statement for reprinting.
Original link:
https://blog.csdn.net/jia666666/article/details/81874586
Author brief introduction: Li Qiujian, CSDN blog expert, CSDN master class author. Master's degree in China University of Mining and Technology, tappap competition awards in development and so on.


Address of the live broadcast room:
https://live.csdn.net/room/csdnnews/B3423dYF
更多精彩推荐
☞315 曝光人脸识别摄像头,进店瞬间偷走你的“脸”,自动分析心情☞玩转3D全息图像!AI即刻生成☞用 Python 动态可视化,看看比特币这几年☞Python 搭建车道智能检测系统
点分享点收藏点点赞点在看