Android custom TextView control is used to form a table to facilitate data display.
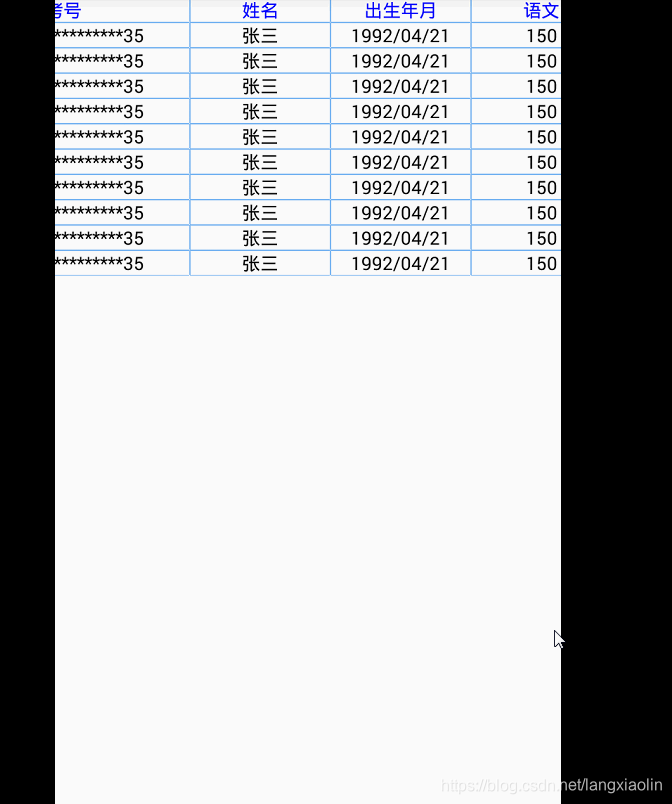
First look at the effect: the
implementation steps are:
(1) The custom control MyTableTextView inherits TextView and overrides the onDraw method. Add the operation of the words frame inside.
package lyf.com.mytableview;

import android.content.Context;
import android.graphics.Canvas;
import android.graphics.Color;
import android.graphics.Paint;
import android.util.AttributeSet;
import android.widget.TextView;

/**
 * 自定义TextView
 */
public class MyTableTextView extends TextView {


    Paint paint = new Paint();

    public MyTableTextView(Context context, AttributeSet attrs) {


        super(context, attrs);
        int color = Color.parseColor("#80b9f2");
        // 为边框设置颜色
        paint.setColor(color);
    }

    @Override
    protected void onDraw(Canvas canvas) {


        super.onDraw(canvas);
        // 画TextView的4个边
        canvas.drawLine(0, 0, this.getWidth() - 1, 0, paint);
        canvas.drawLine(0, 0, 0, this.getHeight() - 1, paint);
        canvas.drawLine(this.getWidth() - 1, 0, this.getWidth() - 1, this.getHeight() - 1, paint);
        canvas.drawLine(0, this.getHeight() - 1, this.getWidth() - 1, this.getHeight() - 1, paint);
    }
}
(2) The main layout, no need to write anything. Just put a LinearLayout directly. But because the width and height of the table often exceed the width and height of the screen, we need to add ScrollView and HorizontalScrollView. In order for the HorizontalScrollView to fill the entire ScrollView, you need to set the attribute android:fillViewport="true" in the ScrollView.
<?xml version="1.0" encoding="utf-8"?>
<LinearLayout
    xmlns:android="http://schemas.android.com/apk/res/android"
    android:layout_width="fill_parent"
    android:layout_height="match_parent"
    android:orientation="vertical">

    <ScrollView
        android:layout_width="match_parent"
        android:layout_height="match_parent"
        android:fillViewport="true"
        android:scrollbars="none"
        >

        <HorizontalScrollView
            android:id="@+id/scroll_view"
            android:layout_width="match_parent"
            android:layout_height="match_parent"
            android:scrollbarAlwaysDrawHorizontalTrack="false"
            android:scrollbars="none">

            <LinearLayout
                android:id="@+id/MyTable"
                android:layout_width="fill_parent"
                android:layout_height="wrap_content"
                android:layout_marginBottom="9dp"
                android:orientation="vertical"
                >
            </LinearLayout>

        </HorizontalScrollView>
    </ScrollView>
</LinearLayout>
(3) Next, write the style file table.xml for table display. The layout file is used to display the style of each row of the table.
<RelativeLayout xmlns:android="http://schemas.android.com/apk/res/android"
    android:layout_width="fill_parent"
    android:layout_height="match_parent">

    <lyf.com.mytableview.MyTableTextView
        android:id="@+id/list_1_1"
        android:layout_width="50dp"
        android:layout_height="wrap_content"
        android:layout_alignBottom="@+id/list_1_2"
        android:layout_alignTop="@+id/list_1_2"
        android:gravity="center"
        android:textColor="#000"
        android:textSize="13sp" />

    <lyf.com.mytableview.MyTableTextView
        android:id="@+id/list_1_2"
        android:layout_width="180dp"
        android:layout_height="wrap_content"
        android:layout_toRightOf="@+id/list_1_1"
        android:gravity="center"
        android:textColor="#000"
        android:textSize="13sp" />

    <lyf.com.mytableview.MyTableTextView
        android:id="@+id/list_1_3"
        android:layout_width="100dp"
        android:layout_height="wrap_content"
        android:layout_alignBottom="@+id/list_1_2"
        android:layout_alignTop="@+id/list_1_2"
        android:layout_toRightOf="@+id/list_1_2"
        android:gravity="center"
        android:textColor="#000"
        android:textSize="13sp" />

    <lyf.com.mytableview.MyTableTextView
        android:id="@+id/list_1_4"
        android:layout_width="100dp"
        android:layout_height="wrap_content"
        android:layout_alignBottom="@+id/list_1_3"
        android:layout_alignTop="@+id/list_1_3"
        android:layout_toRightOf="@+id/list_1_3"
        android:gravity="center"
        android:textColor="#000"
        android:textSize="13sp" />

    <lyf.com.mytableview.MyTableTextView
        android:id="@+id/list_1_5"
        android:layout_width="100dp"
        android:layout_height="wrap_content"
        android:layout_alignBottom="@+id/list_1_4"
        android:layout_alignTop="@+id/list_1_4"
        android:layout_toRightOf="@+id/list_1_4"
        android:gravity="center"
        android:textColor="#000"
        android:textSize="13sp" />

    <lyf.com.mytableview.MyTableTextView
        android:id="@+id/list_1_6"
        android:layout_width="100dp"
        android:layout_height="wrap_content"
        android:layout_alignBottom="@+id/list_1_5"
        android:layout_alignTop="@+id/list_1_5"
        android:layout_toRightOf="@+id/list_1_5"
        android:gravity="center"
        android:textColor="#000"
        android:textSize="13sp" />


    <lyf.com.mytableview.MyTableTextView
        android:id="@+id/list_1_7"
        android:layout_width="100dp"
        android:layout_height="wrap_content"
        android:layout_alignBottom="@+id/list_1_6"
        android:layout_alignTop="@+id/list_1_6"
        android:layout_toRightOf="@+id/list_1_6"
        android:gravity="center"
        android:textColor="#000"
        android:textSize="13sp" />
</RelativeLayout>
(4) Finally, put the data in our table.xml file and display it in our main layout file.
package lyf.com.mytableview;

import android.app.Activity;
import android.graphics.Color;
import android.os.Bundle;
import android.view.LayoutInflater;
import android.widget.LinearLayout;
import android.widget.RelativeLayout;

/**
 * 自定义表格显示
 */

public class MainActivity extends Activity {


    private LinearLayout mainLinerLayout;
    private RelativeLayout relativeLayout;
    private String[] name={

    "序号","考号","姓名","出生年月","语文","数学","英语"};

    @Override
    protected void onCreate(Bundle savedInstanceState) {


        super.onCreate(savedInstanceState);
        setContentView(R.layout.activity_main);
        mainLinerLayout = (LinearLayout) this.findViewById(R.id.MyTable);
        initData();
    }

    //绑定数据
    private void initData() {


        //初始化标题
        relativeLayout = (RelativeLayout) LayoutInflater.from(this).inflate(R.layout.table, null);
        MyTableTextView title = (MyTableTextView) relativeLayout.findViewById(R.id.list_1_1);
        title.setText(name[0]);
        title.setTextColor(Color.BLUE);

        title = (MyTableTextView) relativeLayout.findViewById(R.id.list_1_2);
        title.setText(name[1]);
        title.setTextColor(Color.BLUE);
        title = (MyTableTextView) relativeLayout.findViewById(R.id.list_1_3);
        title.setText(name[2]);
        title.setTextColor(Color.BLUE);
        title = (MyTableTextView) relativeLayout.findViewById(R.id.list_1_4);
        title.setText(name[3]);
        title.setTextColor(Color.BLUE);
        title = (MyTableTextView) relativeLayout.findViewById(R.id.list_1_5);
        title.setText(name[4]);
        title.setTextColor(Color.BLUE);
        title = (MyTableTextView) relativeLayout.findViewById(R.id.list_1_6);
        title.setText(name[5]);
        title.setTextColor(Color.BLUE);
        title = (MyTableTextView) relativeLayout.findViewById(R.id.list_1_7);
        title.setText(name[6]);
        title.setTextColor(Color.BLUE);
        mainLinerLayout.addView(relativeLayout);

        //初始化内容
        int number = 1;
        for (int i=0;i<10;i++) {


            relativeLayout = (RelativeLayout) LayoutInflater.from(this).inflate(R.layout.table, null);
            MyTableTextView txt = (MyTableTextView) relativeLayout.findViewById(R.id.list_1_1);
            txt.setText(String.valueOf(number));

            txt = (MyTableTextView) relativeLayout.findViewById(R.id.list_1_2);
            txt.setText("320321**********35");
            txt = (MyTableTextView) relativeLayout.findViewById(R.id.list_1_3);
            txt.setText("张三");
            txt = (MyTableTextView) relativeLayout.findViewById(R.id.list_1_4);
            txt.setText("1992/04/21");
            txt = (MyTableTextView) relativeLayout.findViewById(R.id.list_1_5);
            txt.setText("150");
            txt = (MyTableTextView) relativeLayout.findViewById(R.id.list_1_6);
            txt.setText("200");
            txt = (MyTableTextView) relativeLayout.findViewById(R.id.list_1_7);
            txt.setText("120");
            mainLinerLayout.addView(relativeLayout);
            number++;
        }
    }
}
Summary: The
overall idea is to store data in a custom table style, fill it with line unit data during the display process, and finally integrate it into a data table.
Reference materials:
https://www.cnblogs.com/Jett/p/5620236.html Android custom table display data