HTML5
Form details
table details
1. HTML document header related tags
- The <title> tag is used to define the title of the HTML page. An HTML document can only contain one pair
<title>网页标题名称</title>
- The <meta /> tag is used to define the meta information of the page and can be repeated in the header tag.
| <meta name=“keywords” content=“JAVA、php" /> | Set web keywords |
|---|---|
| <meta name="description" content="IT training and education"/> | Set page description |
| <meta name="author" content="Chuanzhi Podcast" /> | Set page author |
| < meta http-equiv=“Content-Type” content=“text/html; charset=utf-8” /> | Set character set |
| < meta http-equiv=“refresh” content=“10;url=http://www.itcast.cn” /> | Set the page to automatically refresh and jump |
- <link>, use tags in to refer to external files (used for linking css)
| Property name plus introduction | Common attribute values |
|---|---|
| href----Specify the address of the referenced external document | URL |
| rel----Specify the relationship between the current document and the referenced external document, which means to define an external style sheet | stylesheet |
| type----The type of the referenced external document is a CSS style sheet | text/css |
| type----The type of the referenced external document is a javascript script | text/javascript |
- <style> is used to define styles for HTML documents, located in the head (indicating the use of embedded CSS styles)
<style 属性=”属性值”>样式内容</style>
-
What are the elements in the line? What are the block-level elements? What are the empty elements?
Answer:
Block-level elements: div, p, h1-h6, ol, ul, table, form In-
line elements: span, a, input, select, small
Line block elements: img
Empty elements: elements without content, br, hr
( Line-level elements can only nest row-level elements, and block-level elements can nest any element. But there is one exception, P tags cannot nest block-level elements, and a tags cannot be nested inside a tag) -
Usually the class name defined in the entire page
2.
1. Title and paragraph mark
- left: Set the left alignment of the title text (default value)
- center: set the title text to be aligned in the center
- right: Set the right alignment of the title text
The code is used as follows:
<p align="对齐方式">段落文本</p>
- <hr /> is the mark that creates the horizontal line.
Use as follows:
<hr 属性="属性值" />
- <br />Some text fragments are forced to wrap
- Text style mark (font)
<font 属性="属性值">文本内容< /font>
2. Common attributes of text style tags
| Attribute name | meaning |
|---|---|
| face | Set the font of the text, such as Microsoft Yahei, HeiTi, Song Ti, etc. |
| size | Set the size of the text, you can take an integer value between 1 and 7 |
| color | Set the color of the text |
3. Text formatting mark
Set bold, italic or underline effect for text
| mark | display effect |
|---|---|
| < b>< /b>和< strong>< /strong> | The text is displayed in bold (XHTML recommends using strong) |
| < i>< /i>和< em>< /em> | The text is displayed in italics (XHTML recommends em) |
| < s>< /s>和< del>< /del> | The text is displayed with strikethrough (XHTML recommends using del) |
| < u>< /u>和< ins>< /ins> | The text is displayed underlined (XHTML deprecated the use of u) |
- Image tag <img>
<img src="图像URL" />
- alt----Alternative text attribute of the image, which tells the user the content of the image when the image cannot be displayed.
- width-height----used to define the width and height of the picture
- border----Add a border to the image and set the width of the border.
- vspace--hspace----You can adjust the vertical and horizontal margins of the image separately
- align----The alignment attribute align of the image. Used to adjust the position of the image
- Use the title attribute to set the prompt text----The attribute title in the image tag <img/> can be used to set the prompt text of the image when the mouse is hovered.

- A element hyperlink
Hyperlink can realize the jump in the page, such as:
<a href="jump target" target="the way of pop-up of the target window">text or image< /a>
- The value of target in the a element:
_self: open in the current page window, default value
_blank: open in a new window - Create an image hyperlink
In some browsers, the image will automatically add a border effect. At this time, in order not to affect the beauty of the page, it is usually necessary to clear the border of the hyperlink image to make the image display normally.
The specific code is as follows:
<a href="#"><img src="images/logo.gif" border="0" /></a>
- Anchor link
Use the following code to create the link text.
< a href="#id名">链接文本</ a>
Use the corresponding id name to mark the location of the jump target.
- Link pseudo-classes control hyperlinks
In CSS, different link states can be realized through link pseudo-classes, so that the styles of hyperlinks are different before, after, and when the mouse is hovered.
| Pseudo-class of hyperlink tag <a> | meaning |
|---|---|
| a:link{ CSS style rules;} | The state of the hyperlink when not visited |
| a:visited{ CSS style rules;} | The status of the hyperlink after the visit |
| a:hover{ CSS style rules;} | The state of the hyperlink when the mouse passes over and when hovering |
| a: active{ CSS style rules;} | The state of the hyperlink when the mouse is still clicked |
Go to the underscore of the a tag
text-decoration: none;
When using the four pseudo-classes of links at the same time, they are usually written in the order of a:link, a:visited, a:hover and a:active, otherwise the defined style may not work.
In addition to text styles, link pseudo-classes are often used to control the background, border and other styles of hyperlinks.
h1 element: first-level heading such as <h1 tetle="handsome or handsome"> first code</h1>
p element: paragraph such as <p>this is a paragraph</p>
span element [no semantics] no semantics, Only used to style
pre element (that is, not affected by blank folding)
pre-formatted text element blank folding: continuous blank characters (spaces, line breaks, tabs) in the source code will be folded into a space when the page is displayed
Exception: the content in the pre element will not appear blank folds,
The content that appears inside the pre element will be displayed on the page in accordance with the source code format.
This element is usually used to display some code in a web page.
The essence of the pre element function: it has a default css attribute
When the code is displayed, the code element is usually enclosed, and code represents the code area.
Entity (special characters cannot be displayed, you have to use codes to display) & add words;
- Less than sign: <2. Greater than sign:> 3. Space sign: &nbst; 4. & sign: &
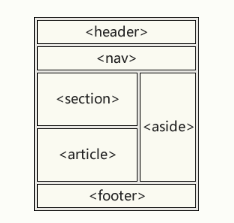
<figure> tag is used to combine elements, put related elements in it for binding
<figcaption> tag definition figure The caption of the element. - Element type conversion:
Element type conversion:
(1) Block element to inline element: display: inline;
(2) Inline element to block element: display: block;
(3) Hide the entire block element: display: none;
(4) Set the element as an inline block element: display: inline-block;
(that is, it has the characteristics of inline element and block element at the same time, such as img, input)
Frequently used labels
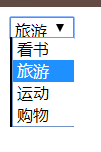
- select tag
	<select>
        <option value="看书">看书</option>
        <option value="旅游" selected="selected">旅游</option>
        <option value="运动">运动</option>
        <option value="购物">购物</option>
    </select>
Effect picture
- input
type table
| Attribute value | description |
|---|---|
| text | Single line text input box |
| password | Password input box |
| radio | Single box |
| Checkbox | Checkbox |
| button | Normal button |
| submit | Submit button |
| reset | Reset button |
| image | Submit button in image form |
| file | File domain |
If you want to set the text, you can add **value="content"** to set the content inside
- table: table
	<table style="border:3px solid yellowgreen">
        <tr>
            <th>标题一</td>
                <th>标题二</th>
                <th>标题三</th>
                <th>标题四</th>
        </tr>
        <tr>
            <td>内容一</td>
            <!--rowspan 纵向合并-->
            <td rowspan="2">内容二</td>
            <td>内容三</td>
            <td>内容四</td>
        </tr>
        <tr>
            <td>内容一</td>

            <td>内容三</td>
            <td>内容四</td>
        </tr>

    </table>

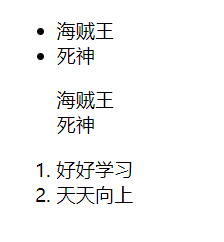
- li: list
	<ul>
        <li>海贼王</li>
        <li>死神</li>
    </ul>
    <!--style="list-style-type: none"消除格式-->
    <ul style="list-style-type: none">
        <li>海贼王</li>
        <li>死神</li>
    </ul>
    <ol>
        <li>好好学习</li>
        <li>天天向上</li>
    </ol>
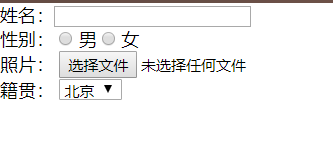
- form: The
<form> tag is used to create an HTML form for user input.
The <form> element contains one or more of the following form elements:
<input>,<textarea>,<button>,<select>,<option>,<optgroup>,<lable>, etc.
The label label in the form
does not present any special effects to the user. Its function is to improve the usability for mouse users.
If you click on the text inside the label, this control will be triggered.
In other words, when the user clicks to select the label, the browser will automatically turn the focus to the form control related to the label (the form control related to the label is automatically selected)
Note: The value of the for attribute of the label should be the same as the value of the id attribute of the related control. (as follows)
 <form>
        <p>
            <label for="male">姓名:</label><input id="male" />
        </p>
        <p>
            <label for="two">性别:</label>
            <input type="radio" value="0" id="two"/> 男
            <input type="radio" value="1" id="two"/> 女
        </p>

        <p>
            <label for="three">照片:</label>
            <input type="file" id="three">
        </p>
        <p>
            <label for="four">籍贯:</label>
            <select name="site">
            <option value="0" id="four">北京</option>
            <option value="1" id="four">上海</option>
            <option value="2" id="four">广州</option>
            <option value="3" id="four">深圳</option>
        </select>
        </p>

    </form>
Effect picture