First of all, I suggest that you next myEclipse10 (a colleague has a lot of problems with version 9, so...), myEclipse10 needs us to download a registered cracking software to crack it before it can be used.
Let me say a little bit more here: We found that when starting myEclipse10, the building workSpace is always displayed. Solution: Click on the menu project, select properties and then select buildings, as shown in the figure, cancel the verification inside. Verifying javascript is very time-consuming and unnecessary. The most important thing is Good to cancel, and then restart.
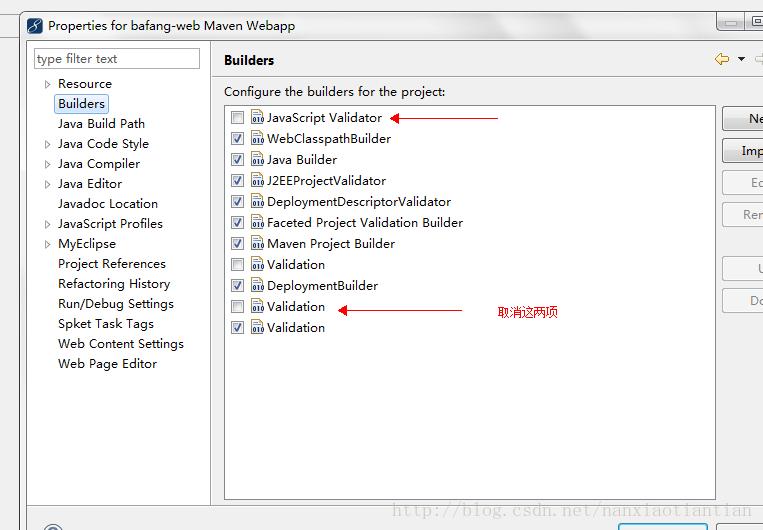
How is it, or not? Take your time, don’t worry: right click on your project, select properties, cancel the two verifications in the buildings as in the above steps, now it’s OK; if the startup is still slow, it is recommended to delete the js file of the project (this is how I did it) ), when you start eclipse and put it in the project, it must be fine!
Pull away, come back!
Now let's talk about the configuration of maven+sonar specifically:
1. Create a database user:
Log in to your oracle as a super administrator, and then create a user named sonar, the password is also sonar ( here it is fixed, do not change ), when creating this user should be granted the corresponding system permissions, these permissions are: create any sequence, create any table, create any type, unlimited tablespace, there are two role permissions to be granted: connect, resource. These operations are shown in the figure:

Here is the username and password
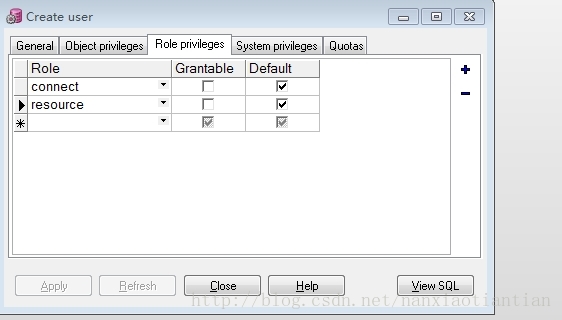
Give users two role permissions
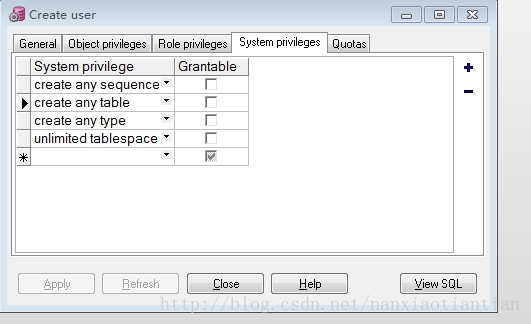
Here is to grant system permissions
Click Apply after completion, so that the user sonar is created successfully.
Then open our sonar-3.3.2 folder, find the sonar.properties file under conf, and open it. There are a few things that need to be modified: about 38-39 lines
sonar.jdbc.username:                       sonar
sonar.jdbc.password:                       sonar
Change it to this, about 74-75 lines are also changed to the same as above, and about 70 lines are changed to the following:
sonar.jdbc.url: jdbc:oracle:thin:@AUNEY-PC:1521:orclWhere @AUNEY-PC is your computer name, save it after over.
2. Modify the sonar configuration file:
Find the windows-x86-64 folder under the bin under sonar-3.3.2 (if the computer is 32-bit, select windows-x86-32), open it, and double-click StartSonar to activate the sonar service, as shown in the figure:
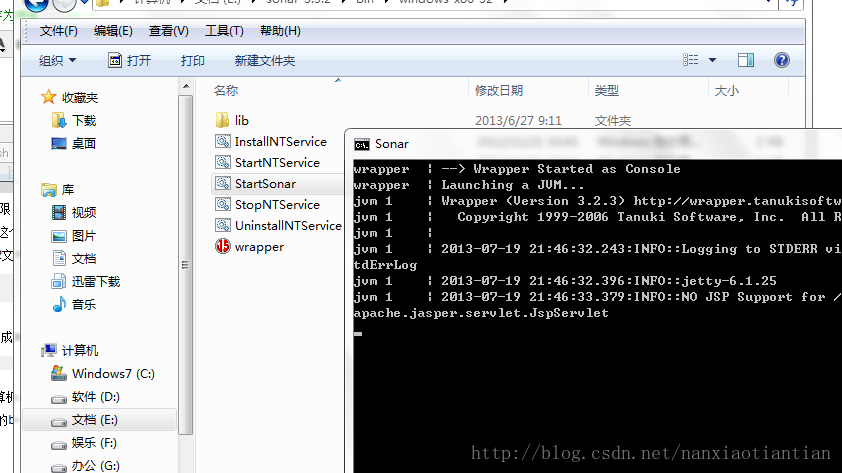
This is a bit slow, because the table is being created to the oracle sonar user. After the end, the port ID of 9000 will be displayed. Do not close it, open your browser, and enter: http://localhost:9000/ in the address bar, if As shown in the figure, congratulations on the successful configuration of sonar!

Three, configure maven:
You must have the maven setting file in your hand, open it. About the fifth line, modify your local warehouse, mine such as:
<localRepository>/G:/java/workspace/mavenrepo</localRepository>Next, about the 26th line is modified as follows:
<url>http://。。。。。。。/nexus/content/groups/public</url> Probably modify lines 59-61 as follows:
<sonar.jdbc.url>
            jdbc:oracle:thin:@AUNEY-PC:1521:ORCL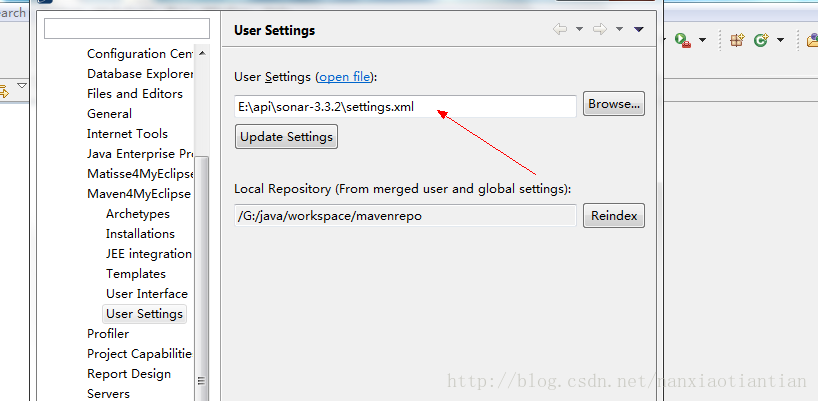
</sonar.jdbc.url>Open your eclipse, windows-preferences-maven4MyEclipse-user Settings, select the setting file you just modified, as shown in the figure:
Click OK, and now create a new maven project: file-new-Other-maven Project, click next directly after entering, and then choose here as shown:
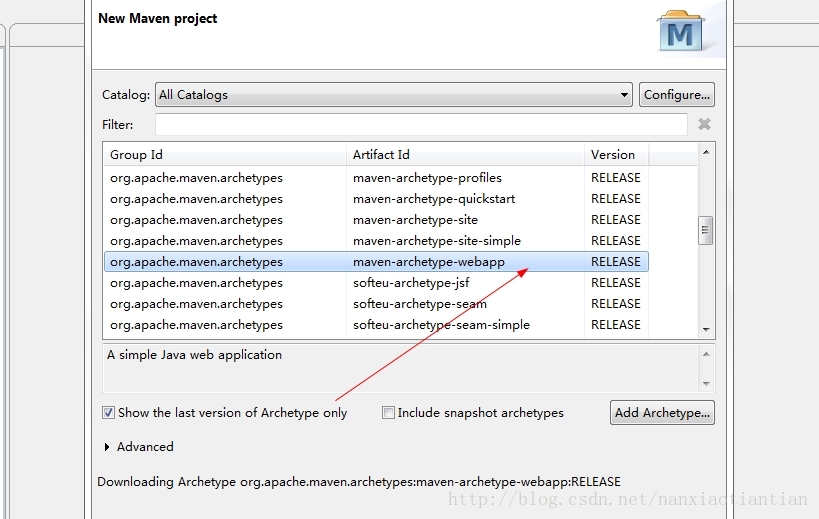
After clicking the selection, click next, then fill in the groupid and artifaceid, with any name, click finish after completion, and now the maven project is established. . . . I feel so tired to write here, so who, do you have a watermelon? ? ? ?
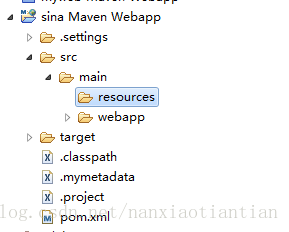
Now open the maven project just created, as shown in the figure:
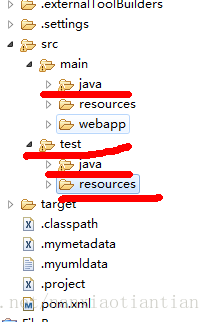
Now you can write your own code under the java folder. If you have already written it, just paste it in. The test source file is for the test code. The java below is the test code we wrote, the resources file Below the folder is our configuration file (yes, here is the same configuration file as the resources in main).
Now, do you see that there are a lot of red crosses in the code you posted directly? This is because you have not "quoted the jar package" yet, OK, open the pom.xml file of the project, and you can see the contents inside are as follows:
<project xmlns="http://maven.apache.org/POM/4.0.0" xmlns:xsi="http://www.w3.org/2001/XMLSchema-instance"
  xsi:schemaLocation="http://maven.apache.org/POM/4.0.0 http://maven.apache.org/maven-v4_0_0.xsd">
  <modelVersion>4.0.0</modelVersion>
  <groupId>sina</groupId>
  <artifactId>sina</artifactId>
  <packaging>war</packaging>
  <version>0.0.1-SNAPSHOT</version>
  <name>sina Maven Webapp</name>
  <url>http://maven.apache.org</url>
  <dependencies>
    <dependency>
      <groupId>junit</groupId>
      <artifactId>junit</artifactId>
      <version>3.8.1</version>
      <scope>test</scope>
    </dependency>
  </dependencies>
  <build>
    <finalName>sina</finalName>
  </build>
</project>
Observe whether there is something we are familiar with: junit:
<dependency>
      <groupId>junit</groupId>
      <artifactId>junit</artifactId>
      <version>3.8.1</version>
      <scope>test</scope>
    </dependency>
The meaning of this code is that we have introduced the Junit jar package in the project. If the project wants to use the spring jar package, we should introduce it as follows:
(1) Open your local warehouse: G:\java\workspace\mavenrepo, you will find whether there are a lot of files in it, find the spring you want, open it, find the spring-3.0.pom file and open it, is there any Such a piece of code:
 <groupId>spring</groupId>
  <artifactId>spring</artifactId>
  <version>3.0</version>
OK, what we want is him, copy and put it in the POM file of your project, then this jar package is imported. Other jar packages can be made in the same way.
You can now run the project.
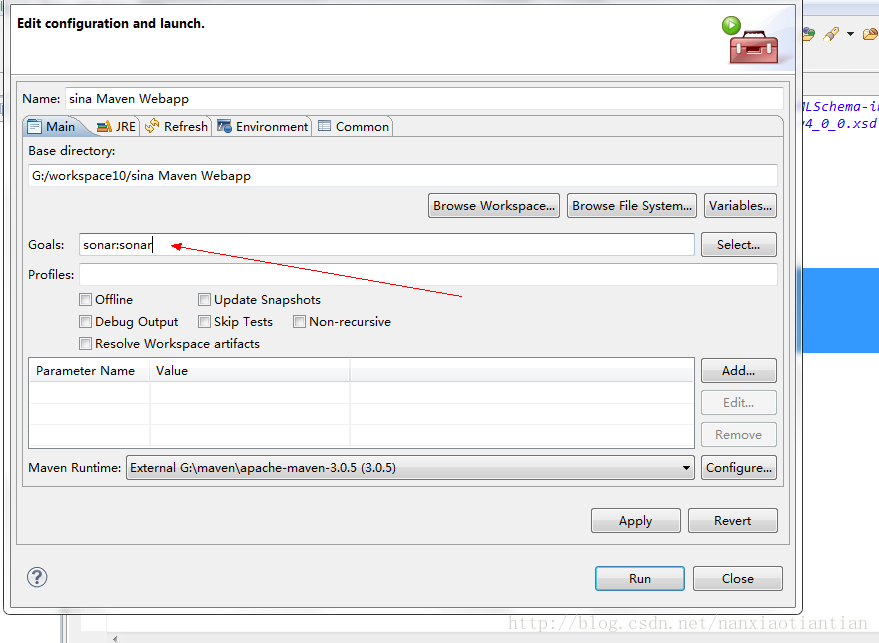
4. Sonar manages the maven project:
Right-click the maven project, select run as, and then see that there are two maven builds, select the second one, and fill in as shown in the figure. After completion, click run, and your project will be deployed to sonar:
Open the browser and enter localhost:9000. Now if there is one more project you built, click on the project to view the indicators.
I wish you all success! ! I have to say that blogging is really tiring! ! ! ! ! ! !