Create Maven project
Before creating a Maven project, you need to have your own local Maven warehouse. If not, please read this article to configure https://blog.csdn.net/ITMuscle/article/details/111932649
-
First create a new Maven project. Here you can choose to use the Maven template to create a Web project. Note that when selecting the template, you must select the webapp under maven.
ps: Here we don't use Maven template to create, so we create the cleanest project without checking the option Create from archetype.

-
Click Next to jump to the following interface:

-
Click Finish to successfully create the Maven project, as follows:

-
Create a directory, where the directory can not be created at will, said before the agreement is greater than the configuration .
Create a Java directory and a resources directory under the main directory
Create a Java directory under the test directory
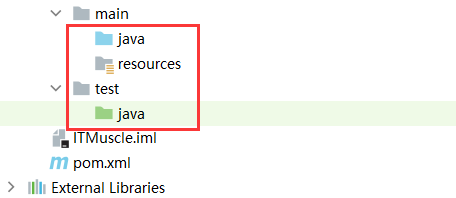
-
Set mark
You can see that the color of each file directory above has changed, at this time we need to set it
Right-click the directory> Mark Directory as> select the corresponding color to set, as shown in the figure above
The blue java directory is used to store Java source code
The resources directory is used to store resources
The green java directory is used to store the test code

-
Create a web directory, because the Maven tool is used to develop web projects, so you need to create a web directory here
File > Project Structure > Modules > + 选择 Web

-
Then select Artfacts> +

-
Click Finish to complete the creation

At this point, a Web project with Maven is created.
Configure Maven repository
-
Open Settings> Build> Build Tools> Maven
ps: If you are using the Maven template to create, the following configuration will be edited when creating.

- Then select Importing under Maven to set the automatic import source code, you need to pay attention to the JDK version number to be consistent with your own.

At this point, Maven has been successfully integrated into IDEA.